
Related Manuals for fantastic furniture Cabin


Summary of Contents for fantastic furniture Cabin
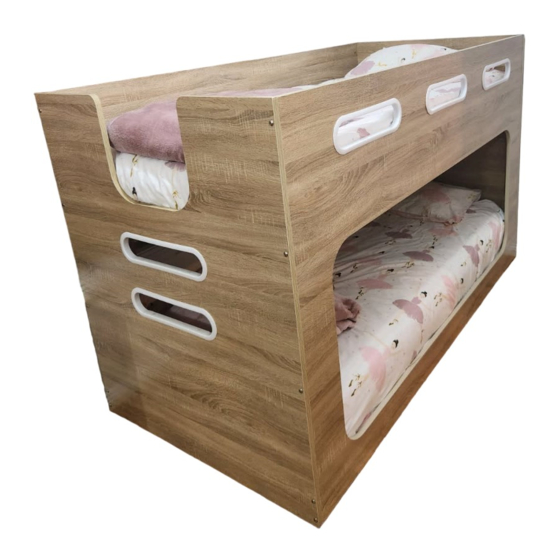
- Page 1 I ,� � Fantastic Furniture Version 1.2 Two People Note: Assembly has two options: A or B Cabin Bunk Twin Light Oak www.fantasticfurniture.com.au Required...
- Page 2 Fantastic Furniture Love it? Share it! Fantastic buy! Share how it looks at home on Instagram for your chance to win a $250 Fantastic Furniture Gift Card! @fantasticfurniture Fantastic Furniture www.fantasticfurniture.com.au Page 2...
-
Page 3: Assembly Checklist
Assembly checklist Read through the instructions carefully Make sure you have all the required tools. before you begin. Never use power tools unless instructed. Identify and lay out all of the components Unless instructed, do not fully tighten screws before you begin assembly. until the item is fully assembled. - Page 4 What you need mble t�e prod� � DONOTUSE'' Other tools you need: Flat head screwdriver, Phillips head screwdriver, Mallet (soft headed); Parts list Box 1: 1 x Headboard (P4); 1 x Footboard (P5); Box 2: 1 x Front Board (P6); Box 3: 1 x Back Lower Side Rail (P1);...
- Page 5 Step1 You will need · , 20 x Dowels (H5) Flat head screwdriver � H ammer Insert 20 x Dowels (H5) into Panels (P1),(P2),(P3),(P6). Step2 Raw edge (Face down) You will need · , 32 x Bolts (H3) Phillips head screwdriver Raw edge (Face upward)
- Page 6 Raw edge facing Step3 upwards You will need · , 12 x Bolts (H3) Phillips head screwdriver Attach 4 x Short Support Panels (P7) to Headboard (P4) and Footboard (P5) by using 12 x Bolts (H3). fa c i n g i n c o m i n g Ensure the slot on nut is b o �...
- Page 7 Step5 Ensure the slot on nut is facing incoming bolt (H1) You will need - - - �L _ _ _ - - - - � - - - .. - - .. - - - - - -==I:'··-- - - - - - - - 5 x Nuts 5 x Bolts (H6)
- Page 8 Step6 You will need � 4 x Nuts 4 x Bolts (H6) (H2) 1 x Allen Wrench (H1) (H6) \ Insert 4 x Nuts into Panels (P1). (H6) Attach panel (P1) to panels (P4) & (P5) -- - - --- - - - - Ensure the slot on nut i�...
- Page 9 Step7 Option A ·p 2 Attach panel (P2) to panel (P1). ·P2 Option B Fantastic Furniture www.fantasticfurniture.com.au Page9...
- Page 10 Step8 You will need Allen Wrench (H1) Bolts (H2) � Nuts (H6) Ensure the slot on nut Insert 6 x Nuts (H6) into Panels (P2) & (P3). is-facingJ_ � coming bolt Attach panel (P3) & (P2) to panels (P4) & (P5) using 6 x bolts (H2). Option B Two People Fantastic...
- Page 11 Step9 Option A Make sure the inner space is square. Then attach 4 x Middle Base Panels (P10) and 4 x Left & Right Base Panels (P9) to the bunk by using 40 x screws, tightening with a phillips head screwdriver. Option B Fantastic Furniture...
-
Page 12: Job Complete
Step 10 Option A Option B Job Complete! In the interest of our environment please dispose of all packaging thoughtfully Fantastic Furniture www.fantasticfurniture.com.au Page12...
Need help?
Do you have a question about the Cabin and is the answer not in the manual?
Questions and answers