Advertisement
Quick Links
Advertisement

Subscribe to Our Youtube Channel
Related Manuals for fantastic furniture Coda


Summary of Contents for fantastic furniture Coda
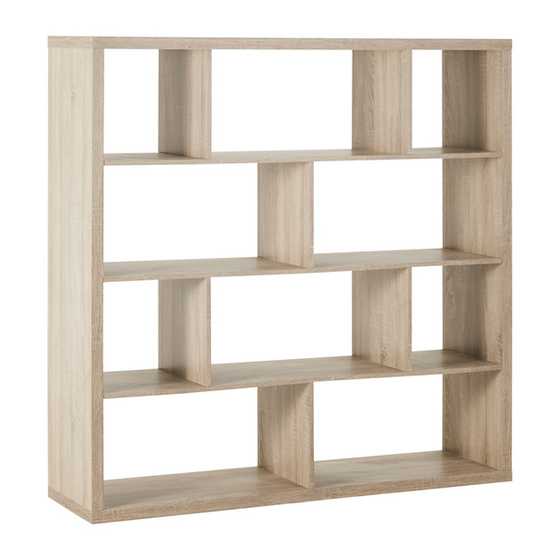
- Page 1 Version 1.0 Coda Bookcase 10 Shelf fantasticfurniture.com.au...
- Page 2 Secure it! Reduce the risk of furniture tip-over accidents Please seek professional advice if you are in doubt of what fixing device to use. Recommended Weight Capacity :10kg/shelf • • • Do not • • Wall attachment guide (with available wood stud) (with available wood stud) crew Screw...
- Page 3 We’re thrilled you’ve chosen Fantastic Furniture to help create a home you’ll love! Love it? Share it! Fantastic buy! Share how it looks at home on Instagram for your chance to win a $250 Fantastic Furniture Gift Card! @fantasticfurniture Page 3 fantasticfurniture.com.au...
-
Page 4: Assembly Checklist
Assembly Checklist Read through the instructions carefully Make sure you have all the required tools. before you begin. Never use power tools unless instructed. Unless instructed, do not fully tighten Identify and lay out all of the screws until the item is fully assembled. components before you begin assembly. -
Page 5: What You Need
What you need Side Panel Top Panel (P2) to assemble the product (P1) Shelf Panel DO NOT USE (P3) Divider Other tools you need: (P5) Phillips Head Screwdriver; Hammer Divider (P5) Shelf Panel (P4) Divider (P5) Shelf Panel Side Panel Divider (P3) (P2) - Page 6 Step 1 You will need 12 x Cam Bolts Phillips Head (H3) Screwdriver (P2) x 2 Attach 6 x Cam Bolts (H3) into each Side Panel (P2) as shown. Step 2 You will need 8 x Cam Bolts Phillips Head (H3) Screwdriver (P3) x 2...
- Page 7 Step 4 You will need (P3) (P5) 4 x Small 4 x Long Dowels (H2) Screws (H5) Phillips Head Screwdriver Insert 2 x Small Dowels (H2) into the holes of Divider (P5) as shown. Attach Shelf Panel (P3) to Divider (P5) with 2 x Long Screws (H5). Tighten the screws with a Phillips Head Screwdriver.
- Page 8 (P3) Step 6 You will need (P5) (P4) 10 x Small 10 x Cam Nuts (P5) Dowels (H2) (H4) (P3) (P5) Phillips Head 10 x Covers Screwdriver (H8) This is how a cam nut works..(P6) The head of the cam bolt goes into the open mouth of the Two People...
- Page 9 Step 8 You will need 6 x Small 6 x Cam Nuts (P2) Dowels (H2) (H4) (P3) Phillips Head Screwdriver (P4) (P3) Insert 6 x Small Dowels (H2) into the holes of Shelf Panels (P3, P4). Insert 6 x Cam Nuts (H4) into the holes of Shelf Panels (P3, P4). Rotate the Cam Nuts so the arrows point towards the incoming Cam Bolts.
- Page 10 Step 10 You will need (P1) (P2) (P5) 4 x Dowels 2 x Small (H1) Dowels (H2) 2 x Cam Nuts 2 x Covers (H4) (H8) (P2) Phillips Head Screwdriver Insert 4 x Dowels (H1) into the holes of Side Panels (P2). Insert 2 x Small Dowels (H2) into the holes of Divider (P5).
- Page 11 Step 12 (P2) You will need 4 x Dowels 4 x Small (H1) Dowels (H2) (P6) (P6) 8 x Inside 1 x Allen Key Hexagonal Bolts (H7) (H6) (P2) (P7) Insert 4 x Dowels (H1) into the holes of Side Panels (P2). Insert 4 x Small Dowels (H2) into the holes of Dividers (P6).
- Page 12 Step 14 We strongly advise that you use Seek advice from a qualified the wall safety strap provided to trades person on how to prevent the unit toppling attach this safety strap to You will need your specific wall. 2 x Restraint 2 x Screws Straps (H10) (H11)
-
Page 13: Job Complete
Job Complete! In the interest of our environment please dispose of all packaging thoughtfully. fantasticfurniture.com.au Page 13...
Need help?
Do you have a question about the Coda and is the answer not in the manual?
Questions and answers