Extron electronics SB 33 A Series User Manual
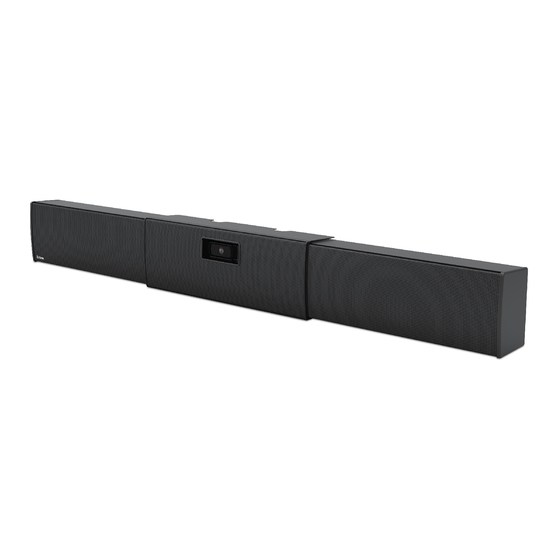
Adjustable width sound bar
Hide thumbs
Also See for SB 33 A Series:
- User manual (44 pages) ,
- Setup manual (20 pages) ,
- Setup manual (15 pages)

Related Manuals for Extron electronics SB 33 A Series


Summary of Contents for Extron electronics SB 33 A Series
- Page 1 User Guide Speakers SB 33 A Series Adjustable Width Sound Bar 68-3103-01 Rev. D 11 22...
- Page 2 Safety Instructions Safety Instructions • English Instructions de sécurité • Français AVERTISSEMENT : Ce pictogramme, , lorsqu’il est utilisé sur le WARNING: This symbol, , when used on the product, is intended to produit, signale à l’utilisateur la présence à l’intérieur du boîtier du alert the user of the presence of uninsulated dangerous voltage within produit d’une tension électrique dangereuse susceptible de provoquer the product’s enclosure that may present a risk of electric shock.
- Page 3 安全说明 • 简体中文 警告: 产品上的这个标志意在警告用户, 该产品机壳内有暴露的危险 电压, 有触电危险。 注意: 产品上的这个标志意在提示用户, 设备随附的用户手册中有重 要的操作和维护(维修)说明。 关于我们产品的安全指南、遵循的规范、EMI/EMF 的兼容性、无障碍使 用的特性等相关内容, 敬请访问 Extron 网站 , www.extron.com,参见 Extron 安全规范指南,产品编号 (www.extron.com) 。 68-290-01 安全記事 • 繁體中文 안전 지침 • 한국어 경고: 이 기호 가 제품에 사용될 경우, 제품의 인클로저 내에 있는 警告: 若產品上使用此符號,...
- Page 4 FCC Class B Notice NOTE: This device complies with part 15 of the FCC rules. Operation is subject to the following two conditions: (1) This device may not cause harmful interference, and (2) This device must accept any interference received, including interference that may cause undesired operation.
- Page 5 Conventions Used in this Guide In this user guide, the following are used: Notifications WARNING: Potential risk of severe injury or death. AVERTISSEMENT : Risque potentiel de blessure grave ou de mort. CAUTION: Risk of minor personal injury. ATTENTION : Risque de blessure mineure. ATTENTION: Risk of property damage.
-
Page 7: Table Of Contents
Attaching the Center Section Cover ....19 Attaching the Optional Blank Grille ....20 VESA Mounting Kits ...........21 SMK V SB 33 Plus VESA Mounting Kit ...21 SMK V SB 33 82-100 VESA Mounting Kit ..27 SB 33 A Series • Contents... - Page 8 SB 33 A Series • Contents viii...
-
Page 9: Introduction
Introduction This section gives an overview of the Extron SB 33 A Series Sound Bar Speaker. Topics include: About this Guide Product Description Features Application Example About this Guide This guide describes the installation and set up of the SB 33 A Series Speaker. -
Page 10: Features
SB 33 A 82-90 80"- 89" SB 33 A 90-100 SB 33 A Series Model Options Figure 2. The SB 33 A supports mounting directly to the wall under the display using the included wall plate. It can also be attached to an articulating display mount using the optional VESA mounting kit. -
Page 11: Application Example
ADA compliant when used with the included wall bracket — Protrudes less than 4 inches (102 mm) from the wall. Application Example The following diagram shows a typical SB 33 A Series installation. 55'' Display Extron SB 33 A 55-65... -
Page 12: Installation
L’installation et la maintenance du système doivent être exclusivement effectuées par le personnel autorisé. NOTE: Observe all applicable building codes and local ordinances when installing the SB 33 A speaker. SB 33 A Series • Installation... -
Page 13: Wall Plate
The center of the wall plate does not need to be precisely aligned with the • center of the display above it because the speaker module on either end of the wall plate can be adjusted on the wall plate. SB 33 A Series • Installation... - Page 14 (17.5 mm) between the highest part of the top rail of the wall plate and the top of the speaker, as shown below. The display screen should not encroach into this area above the top rail. SB 33 A Series • Installation...
- Page 15 The center section cover from the center bracket standoffs by removing the two screws. The web camera mount from the center bracket (if necessary) by removing the two screws and lock washers that attach it to the center bracket. SB 33 A Series • Installation...
- Page 16 Use wood or metal screws depending on whether the studs are wood or metal. Wall Stud Wall Plate 1/4" SAE Washer (x4) #14 x 1 3/4" Self-tapping Metal/Wood Screws (x4) Figure 8. Attach the Wall Plate to Studs SB 33 A Series • Installation...
-
Page 17: Installing The Wall Plate On A Masonry Wall
Insert each screw and washer through the wall plate and into the pilot hole. Wall Plate 1/4" SAE Washer (x4) 1/4" x 1 3/4" Masonry Screws (x4) Figure 10. Attaching the Wall Plate to Masonry Securely tighten the four screws to the wall plate. SB 33 A Series • Installation... -
Page 18: Attaching The Sb 33 A To The Wall Plate
Wall Wall 2 2 2 Right Speaker Screws (2) 3 3 3 Wall Plate Wall Plate Right Speaker Side View Front View Side View Figure 12. Attaching the Right Speaker to the Wall Plate SB 33 A Series • Installation... - Page 19 S’ils sont trop courts, ils peuvent être tirés facilement, même s’ils sont correctement serrés par les borniers à vis. NOTE: Do not tin the wires. Tinned wire does not hold its shape and can become loose over time. SB 33 A Series • Installation...
- Page 20 ) on the bottom of the center bracket to the bottom rail of the wall plate. If a camera is to be mounted to the center bracket, see Mounting a NOTE: Camera on the following page before proceeding to the next step. SB 33 A Series • Installation...
-
Page 21: Mounting A Camera
) to secure the webcam. Webcam 2 2 2 Screw Figure 17. Securing the Webcam to Shelf Attaching Power and Audio Sources to the SB 33 A on page 16 to continue the installation. SB 33 A Series • Installation... - Page 22 There are two pairs of available holes in the bracket. The shelf height can be adjusted by positioning the screws in the shelf slots. Center Bracket Screws (2) PTZ Camera Shelf Lock Washers (2) Figure 19. Attaching the PTZ Camera Shelf SB 33 A Series • Installation...
- Page 23 Two grille hooks are included to facilitate grille removal while avoiding damage to the grille. It is best to insert the hook along the top or bottom outer edge of the grille, as shown in figure 21, above. SB 33 A Series • Installation...
-
Page 24: Attaching Power And Audio Sources To The Sb 33 A
) and a DC power output connector ( ) that routes power to the amplifier. Left Speaker/Power Supply (Side View) B B B A A A Figure 23. AC Input and DC Output Power Connectors SB 33 A Series • Installation... - Page 25 RCA unbalanced stereo input Left speaker output receptacle (to left connectors speaker) For a detailed description of the above connectors see SB 33 A Internal Amplifier Front Panel on page 33. SB 33 A Series • Installation...
- Page 26 26. Display Speaker Cable Power Cable Audio Cable Right Speaker Amplifier Side View Amplifier INPUTS Audio Input Front View Connectors Speaker Cable 1 1 1 Figure 28. Routing Speaker Cables from the Display SB 33 A Series • Installation...
-
Page 27: Attaching The Center Section Cover
Attach grille to the center section cover (see figure 30). NOTE: Two grille hooks are included to facilitate grill removal while avoiding damage to the grille. It is best to insert the hook along the outer edge of the grille. SB 33 A Series • Installation... -
Page 28: Attaching The Optional Blank Grille
Webcam Doors and Door Rails Center Section Cover Grille Screws (4) Figure 31. Attaching the Blank Grille Remove the center section webcam doors and door rails (not shown). Attach the blank grille to the center section cover. SB 33 A Series • Installation... -
Page 29: Vesa Mounting Kits
SMK V SB 33 Plus VESA Mounting Kit The SMK V SB 33 Plus VESA Mounting Kit is used to attach the SB 33 A Series of soundbar speakers (models SB 33 A 46-55, SB 33 A 55-65, SB 33 A 65-70, and SB 33 A 75-80) to the same VESA display mount supporting the display device. - Page 30 Insert the bolts through the VESA display mounts, the long L-brackets, and the display. Be sure to align the bolt holes of the VESA display mounting holes and insert the bolts. Hand tighten all 4 bolts. Spacers are provided if needed (see figure 32). SB 33 A Series • Installation...
- Page 31 The short L-bracket may be reversed if the soundbar needs to be positioned further forward, relative to the display (see figure 34). Wingnut Lock Washer Long L-bracket Short Short L-bracket L-bracket (Reversed) Bolt Alternative Installation of Short L-bracket Figure 34. Installing Short L-brackets Long L-brackets SB 33 A Series • Installation...
- Page 32 To adjust the SB 33 speaker vertically: Loosen, but do not remove, the bolts that attach the long L-brackets to the display. VESA Display Mount Long L-bracket Washer Bolt Vertical Adjustment Figure 36. Loosening Long L-brackets Bolts SB 33 A Series • Installation...
- Page 33 SB 33 speaker height by adjusting the wall bracket position on the short L-bracket. Install the SB 33 A speaker to the wall plate as shown in figure 37. SB 33 A Series • Installation...
- Page 34 Loosen, but do not remove, the two wingnuts attaching the long L-brackets to the short L-brackets. Adjust the soundbar speaker to either the front or the rear of the display and then tighten the wingnuts. Long L-bracket Short L-bracket Depth Adjustment Figure 38. Adjusting Depth SB 33 A Series • Installation...
-
Page 35: Smk V Sb 33 82-100 Vesa Mounting Kit
SMK V SB 33 82-100 VESA Mounting Kit The SMK V SB 33 82-100 VESA Mounting Kit is used to attach the SB 33 A Series of soundbar speakers (models SB 33 A 82-90 and SB 33 A 90-100) to the same VESA display mount supporting the display device. - Page 36 Insert bolts through the VESA display mounts, the long L-brackets, and the display, making sure to the align the bolt holes of the VESA display mounts with the bolt holes of the display (see figure 40). Tighten all four bolts. Spacers are provided if needed. SB 33 A Series • Installation...
- Page 37 Install the SB 33 speaker wall plate to the short L-bracket using two bolts, two lock figure 43 washers, and two wingnuts, as shown in on the next page. Repeat this procedure for the other short L-bracket on the other side. SB 33 A Series • Installation...
- Page 38 Long VESA Display L-bracket Mount Washer Bolt Vertical Adjustment Figure 44. Adjusting the SB 33 Speaker Wall Plate Adjust the SB 33 to the desired distance from the display, then tighten the bolts. SB 33 A Series • Installation...
- Page 39 SB 33 speaker needs to be adjusted, see Aligning the SB 33 Speaker to the Display on page 32. Long L-bracket Display Wall Plate Short L-bracket SB 33 A Speaker Figure 45. Installing the SB 33 Speaker Wall Plate SB 33 A Series • Installation...
- Page 40 Loosen, but do not remove, the two wingnuts that attach the long L-brackets to the short L-brackets. Long L-bracket Short L-bracket Depth Adjustment Figure 46. Adjusting Depth Adjust the SB 33 either to the front or to the rear of the display and then tighten the wingnuts. SB 33 A Series • Installation...
-
Page 41: Operation
Left speaker output receptacle connectors Power LED — The LED lights green when the amplifier is receiving power and active. It lights amber when the unit is powered down (after 25 minutes of inactivity). SB 33 A Series • Operation... - Page 42 RCA connector plugged into the left receptacle. Tip (+) Sleeve ( ) RCA Connector Figure 50. RCA Connector If unused, the receptacles automatically terminate to lower the noise floor. SB 33 A Series • Operation...
- Page 43 Left Speaker output receptacle (to the left speaker) — This 2-pole, 5 mm screw lock captive screw receptacle is used to connect the amplifier to the left speaker. CLASS 2 WIRING L SPEAKER Figure 53. The amplifier produces up to 15 watts per channel. SB 33 A Series • Operation...
-
Page 44: Wiring For Remote Control
Mute: it can be used for remote control muting. Sound is muted while this pin is • shorted to ground. Pin 3 is for the ground connection. • All nominal levels are at ±10%. NOTE: SB 33 A Series • Operation... -
Page 45: Audio Output
Slowly increase the amplifier level by rotating the Level potentiometer clockwise until sound distortion starts. Lower the level slightly until the distortion disappears. At this setting, whatever the volume setting of the audio source, no clipping should occur. SB 33 A Series • Operation... -
Page 46: Setting Bass And Treble
10 kHz and above. Turning the Bass or Treble potentiometers counterclockwise decreases the NOTE: output at the specified frequencies. Turning the potentiometers clockwise increases the output. When the potentiometer is in the center, flat response is achieved. SB 33 A Series • Operation... -
Page 47: Reference Information
Be certain that you need to defeat the auto power-down timer before continuing. La procédure qui suit est irréversible et doit être effectuée en dernier recours. • Veuillez désactiver le temporisateur de mise hors tension automatique avant de continuer. SB 33 A Series • Reference Information... - Page 48 Removing the Top Cover of the Amplifier ATTENTION: Exercise caution when removing the screws to avoid stripping the screw • heads. Soyez prudent en retirant les vis afin d’éviter d’abîmer les têtes de vis. • SB 33 A Series • Reference Information...
- Page 49 Re-attach all power, VCM, and audio cables that were removed from the amplifier. Re-attach the center section cover and center section grille that were removed in step SB 33 A Series • Reference Information...
-
Page 50: Troubleshooting
Amplifier Enters Standby Mode Too Early Power LED Color Problem Description Problem Solution Green or Amber Enters standby mode early. The input signal may be too weak. Raise the level of the source signal. SB 33 A Series • Reference Information... - Page 51 Extron Electronics makes no further warranties either expressed or implied with respect to the product and its quality, performance, merchantability, or fitness for any particular use. In no event will Extron Electronics be liable for direct, indirect, or consequential damages resulting from any defect in this product even if Extron Electronics has been advised of such damage.
Need help?
Do you have a question about the SB 33 A Series and is the answer not in the manual?
Questions and answers