Table of Contents
Advertisement
Available languages
Available languages
Quick Links
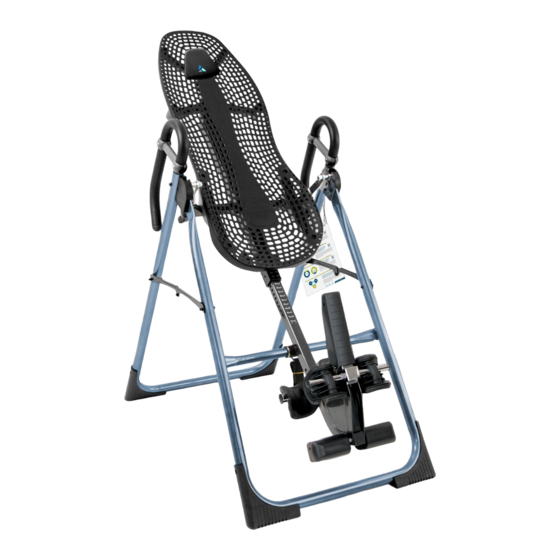
800ia
Inversion Table
Assembly Instructions
To download and print Teeter's 800ia instructions, visit the product support page at teeter.com.
Para descargar e imprimir las instrucciones de montaje de 800ia en español, visite teeter.com
FULL
5
YEAR
NEW!
Follow along with
your smartphone
to make assembly
even easier!
* Specifications may vary from this image and
are subject to change without notice.
EN
Advertisement
Chapters
Table of Contents

Related Manuals for Teeter 800ia


Summary of Contents for Teeter 800ia
- Page 1 * Specifications may vary from this image and are subject to change without notice. To download and print Teeter’s 800ia instructions, visit the product support page at teeter.com. Para descargar e imprimir las instrucciones de montaje de 800ia en español, visite teeter.com...
-
Page 2: Table Of Contents
Assembly Steps........6 – 11 Get the Most out of Your Teeter ..... 6 Misassembly Check. -
Page 3: Important Safety Instructions
• DO NOT store the inversion table upright if children are present. Fold and lay the table on the floor. DO NOT store outdoors. • DO NOT use aggressive movements, or use weights, elastic bands, any other exercise or stretching device or non-Teeter attachments ®... -
Page 4: Items For Assembly
Items for Assembly Items not shown to scale. Hardware drawings located on the insert inside each Hardware Kit. ITEM NO. ITEM NAME ITEM NO. ITEM NAME A-Frame Base Assembly Main Shaft Assembly NX2200 A-Frame NX1690 with EZ-Reach™ Ankle Lock System F51007 Angle Tether pre-assembled to A-Frame... -
Page 5: Understanding Your Inversion Table
Understanding Your Inversion Table Before reading further, study the drawing below to familiarize yourself with the important components of your Teeter Inversion Table. Located on back of table bed. Identifying Parts and Components Head Pillow 3-Hole Roller Hinges A-Frame Support Arms Traction Support™... -
Page 6: Safety Warning Labels & Product Specifications
This drawing indicates the locations of the warning labels found on your product. If a label is missing, illegible or is removed, contact Teeter Customer Service to request a complimentary replacement label. Note: Image and labels below not shown at actual size. -
Page 7: Before Beginning Assembly
• Use Instructions - Learn how to test your balance and rotation control, and how to properly invert and return upright. • Advanced Stretching & Exercises - Use your Teeter for rotational stretches, sit ups, squats and more! • BONUS Healthy Back Routines* Dr. - Page 8 STEP 1 Assemble A-Frame Base & Traction Support Handles • On a level surface, position the A-Frame so that it is standing upright FIGURE 1 LOCKED and the Stability Feet are on the ground. RIGHT LEFT • Gently push down on the Spreader Arms to ensure they are fully open and in the “locked”...
- Page 9 STEP 2 Assemble Table Bed Support Arms • Locate the Table Bed Assembly Hardware Kit (HK1010). FIGURE 4 • Place the Table Bed face down on the floor and push down on the Support Beam, so the two holes align evenly with the holes at the base of the Upper Support Arms (Figure 4).
- Page 10 STEP 3 Assemble Roller Hinges to Table Bed • Familiarize yourself with the 3-Hole Roller Hinge and Cam Lock FIGURE 6 terms (Figure 6). UNLOCKED LOCKED WARNING NEVER disassemble the Roller Hinge Pivot Pin. Pivot Pin Bracket Pin Bracket Cam Lock •...
- Page 11 STEP 4 Assemble Table Bed to A-Frame • Face the front of the A-Frame where the Crossbar is located (Figure 9). FIGURE 9 • Grasp both Roller Hinges, right above the Cam Lock, and lift the Table Bed. Allow the top of the Table Bed to rotate toward the floor, so that the back of the Table Bed is now facing you and the top of the Table Bed is in front of the Crossbar (Figure 10).
- Page 12 REV.DATE APP.DATE APPROVED REV. DESCRIPTION STEP 5 Assemble Main Shaft to Table Bed • Loosen the De-Rattler Knob on the Main Shaft Housing. FIGURE 13 • Facing the front of the A-Frame, hold the Main Shaft in your left hand with the height markings facing up.
- Page 13 STEP 6 Attach Angle Tether & Head Pillow Attach Angle Tether FIGURE 20 • The tether will come pre-assembled to the A-Frame. • Unfold the adjustable tether and clip it to the U-Bar on the underside of the Table Bed (Figure 20). •...
-
Page 14: Misassembly Check
Misassembly Check WARNING If your Teeter Inversion Table looks like either of these images, your inversion table has been misassembled and is unfit for use. Improper assembly could result in serious injury or death! Image B Image A Go back to Step 4 for instruction. -
Page 15: Before Inverting
Ensure Owner’s Manual is Attached FIGURE 24 The Owner’s Manual contains important information on how to use your Teeter Inversion Table, including how to personalize the user settings, properly secure and release the Ankle Lock System, and test and adjust the rotation control. - Page 17 Under no circumstances shall Teeter, or any other party involved in the sale of this product, have any liability for incidental or consequential damage arising from breach of an express or implied warranty on any Teeter product.
- Page 18 Any modification to this device will void the UL Listing. 30175 Hannover Germany Tel. +49 511 62628630 U.S. and Foreign Patents Apply. Teeter and Teeter logo are registered trademarks of Teeter. Specifications subject to change without notice. © COPYRIGHT 2015 Teeter. International Law Prohibits Any Copying. LI8001 0415-0...
- Page 19 800ia Tabla de Inversión Instrucciones de montaje COMPLETA AÑO * Las especificaciones pueden variar de esta imagen y están sujetas a cambios sin previo aviso. Para descargar e imprimir las instrucciones de montaje de 800ia en español, visite teeter.com...
- Page 20 ¡Felicitaciones por la compra de una Tabla de Inversión 800ia de Teeter! Este producto ha sido cuidadosamente diseñado para proporcionarle un control de rotación de precisión y seguridad para garantizarle la experiencia de inversión más cómoda y eficaz. A fin de utilizar este producto en toda su plenitud, es fundamental que siga las instrucciones de montaje, lea y entienda completamente el Manual del usuario que se adjunta con el equipo y revise el DVD introductorio antes de usar la nueva Tabla de Inversión Teeter.
-
Page 21: Instrucciones Importantes De Seguridad
• NO realice movimientos agresivos ni utilice pesas, bandas elásticas ni ningún otro dispositivo de estiramiento o de ejercicio, ni accesorios que no sean de la marca Teeter® mientras se encuentre en la tabla de inversión. Utilice esta tabla de inversión solo para los fines descritos en este manual. -
Page 22: Artículos Para El Montaje
Artículos para el montaje Los elementos no se muestran a escala. Los dibujos de tornillería están ubicados en el inserto dentro de cada kit de tornillería. N.° DE ARTÍCULO NOMBRE DE ARTÍCULO N.° DE ARTÍCULO. INOMBRE DE ARTÍCULO Montaje de la base de la estructura en A Montaje de eje principal NX2200 Estructura en A... -
Page 23: Comprensión De La Tabla De Inversión
Comprensión de la tabla de inversión Antes de continuar con la lectura, estudie el siguiente dibujo para familiarizarse con los componentes importantes de su nueva tabla de inversión de Teeter. Situado en la parte posterior del respaldo. Identificación de las partes y componentes... -
Page 24: Etiquetas De Advertencias De Seguridad Y Especificaciones De Productos
59.3 in (150.5 cm) 60.0 in (152.4 cm) 28.8 in (73.2 cm) Aquí se muestra la 800ia. Su modelo real puede variar. Dimensiones de montaje sin uso: 60.0 in (L) x 28.8 in (W) x 59.3 in (H) (152.4 x 73.2 x 150.5 cm) Dimensiones máximas en uso:... -
Page 25: Antes De Comenzar El Montaje
• Instrucciones de uso - Aprenda a probar su control de equilibrio y rotación, y cómo invertirse adecuadamente y volver a la posición vertical. • Estiramiento y ejercicios avanzados - ¡Use su Teeter para estiramientos de rotación, abdominales, sentadillas y mucho más! • Rutinas ADICIONALES para una espalda sana* El doctor Shawn lo guía a través de 5 originales “Rutinas para una espalda sana”, incluida una diseñada específicamente... - Page 26 PASO 1 Monte la base de la estructura en A y las empuñaduras de apoyo con tracción • Sobre una superficie nivelada, coloque la estructura en A de modo FIGURA 1 BLOQUEADO que quede en posición vertical y que las patas estabilizadoras se apoyen firmemente en el suelo.
- Page 27 PASO 2 Montaje de los brazos de apoyo del respaldo • Ubique el kit de tornillería para el montaje del respaldo (HK1010). FIGURA 4 • Coloque el respaldo boca abajo en el suelo y ejerza presión sobre la barra de apoyo de modo tal que los dos orificios se alineen de manera pareja con los de la base de los brazos superiores de apoyo (Figura 4).
- Page 28 PASO 3 Montaje de las bisagras deslizantes en el respaldo • Familiarícese con los términos de la bisagra deslizante de 3 orificios y la FIGURA 6 leva de bloqueo (Figura 6). BLOQUEADO DESBLOQUEADO ADVERTENCIA NUNCA desmonte el pasador de pivote de la bisagra deslizante. Pasador de Soporte Leva de...
- Page 29 PASO 4 Montaje del respaldo en la estructura en A • Colóquese en la parte frontal de la estructura en A, donde se encuentra FIGURA 9 la barra cruzada (Figura 9). • Sujete ambas bisagras deslizantes, justo sobre las leva de bloqueo, y levante el respaldo.
- Page 30 REV.DATE APP.DATE APPROVED REV. DESCRIPTION PASO 5 Ensamble el eje principal al respaldo • Afloje la perilla de sujeción que se encuentra en la base del alojamiento FIGURA 13 del eje principal. •De frente a la estructura en A, sostenga el eje principal con la mano izquierda con las marcas de altura hacia arriba.
- Page 31 PASO 6 Sujete la correa de sujeción y la almohada para la cabeza Sujete la correa de sujeción FIGURA 20 • La correa de sujeción viene montada en la estructura en A. • Despliegue la correa de sujeción ajustable y sujétela a la barra en U en la parte inferior del respaldo (Figura 20).
-
Page 32: Control De Un Mal Montaje
ADVERTENCIA Si su tabla de inversión Teeter se ve como alguna de estas imágenes, ha montado su tabla de inversión de manera incorrecta y no es apta para su uso. ¡Montarla incorrectamente podría provocar lesiones graves o incluso la muerte! -
Page 33: Manual Del Usuario
El Manual del Usuario contiene información importante respecto de cómo utilizar la tabla de inversión Teeter, incluido cómo personalizar los ajustes del usuario, sujeción y liberación apropiada del mecanismo de seguridad para tobillos, y prueba y ajuste del control de rotación. - Page 35 GARANTÍA COMPLETA DE 5 AÑOS La garantía Teeter establecida a continuación y en el sitio web de Teeter se aplica sólo a los clientes de los EE. UU. y Canadá. Para los clientes internacionales, consulte a su distribuidor local para obtener información sobre la garantía que variará...
- Page 36 Tel. +49 511 62628630 Se aplican patentes de los EE. UU. y el extranjero. Teeter y el logo de Teeter son marcas registradas de Teeter. Las especificaciones están sujetas a cambios sin previo aviso. © COPYRIGHT 2015 Teeter. La ley internacional prohíbe cualquier tipo de reproducción. LI8001S 0615-0...
Need help?
Do you have a question about the 800ia and is the answer not in the manual?
Questions and answers