
Related Manuals for MUTOH ViperTX Extreme


Summary of Contents for MUTOH ViperTX Extreme
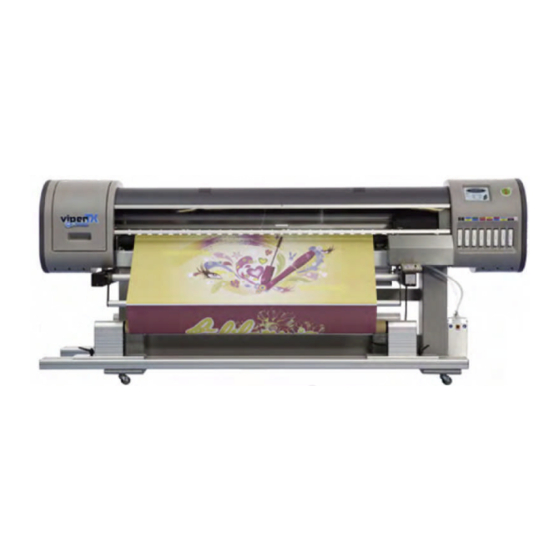
- Page 1 User’s Guide ViperTX Extreme For Maintenance Kits, Spares, Service and Support Call: +44 (0) 1628 588755 E-mail: support@colourgen.com...
- Page 3 Copyright notice COPYRIGHT © 4/11/09 Mutoh Europe nv All rights reserved. Mutoh Europe nv reserves the right to modify the information contained in this manual at any time without prior notice. This document may not be reproduced by any means, in whole or in part, without written permission of the copyright owner.
- Page 4 User’s Guide ViperTX Extreme AP-75340 - Revision 1.0...
-
Page 5: Table Of Contents
User’s Guide ViperTX Extreme Table of contents Chapter 1 Safety instructions ......9 Compliance with the following regulations ....10 Handling inks and waste. - Page 6 ........62 Done by an authorized Mutoh technician ....67 Overview .
- Page 7 User’s Guide ViperTX Extreme Chapter 5 Printer menu ....... 69 How to work in the menu .
- Page 8 User’s Guide ViperTX Extreme Setup menu 4/7 ........100 Utility .
-
Page 9: Safety Instructions
Warning labels ..........14 This chapter explains the installation of ViperTX Extreme, warning terms that operators need to know, caution items and warning labels on the printer main unit. -
Page 10: Safety Instructions
User’s Guide ViperTX Extreme Safety instructions The CE marking is a mandatory European marking for certain product groups to indicate conformity with the essential health and safety requirements set out in European Directives. By affixing the CE marking, the manufacturer, his authorized... - Page 11 Do not disassemble ink holder. Otherwise, ink may get in your eyes or on your skin. A disassembled ink holder cannot be used either. When refilling ink, use original manufacturer's ink. Our Mutoh printers are designed to use original ink. If you use ink which are not produced by the original manufacturer:...
- Page 12 Contains important information and useful tips on the operation of your Notes printer. Machines must be installed according to Mutoh's Installation Guide also after moving machines to another location; maintenance needs to be done according to the service manual. To prevent fire or electrical shock, never use a power supply source other than the one rated for the product in the country where you purchased the product.
- Page 13 User’s Guide ViperTX Extreme Safety instructions Do not place the machine in the following areas. Doing so may result in the machine tipping or falling over and causing injury. Unstable surfaces Sloping floors Areas subject to vibration by other equipment Do not stand on or place heavy objects on your machine.
- Page 14 When cleaning labels, use a cloth with water or neutral detergent. Do not use a solvent or gasoline. If a warning label is damaged, lost or cannot be recognized, replace the label. When replacing warning labels, contact your local Mutoh dealer. This label warns you to be careful not to pinch your fingers.
- Page 15 User’s Guide ViperTX Extreme Safety instructions It is very important to have the latest firmware installed on your printer before performing the first ink load. Bugfixes or other innovative features may be implemented in a newer firmware. Some parts need to be removed first before powering ON the print.
- Page 16 User’s Guide ViperTX Extreme Safety instructions Ink label order label. To know in which order the ink cassettes have to be Refer to for all the inserted. other possible ink configurations and ink cassette order. An overview of all the...
-
Page 17: Product Overview
User’s Guide ViperTX Extreme Product overview Printer ........... . . 18 Front. -
Page 18: Printer
User’s Guide ViperTX Extreme Product overview N° Description Function Sets the operational conditions, the status of Operation panel the printer, and other functions. Keeps the operator safe from the drive parts of the printer while it is operating. Only open... - Page 19 User’s Guide ViperTX Extreme Product overview N° Description Function Additional coated feeding cylinder Support the fabric during printing Waste bottle To collect the waste ink during printing Ink slots This is the place for installing ink cassettes. Swingbar To keep the fabric under tension...
- Page 20 User’s Guide ViperTX Extreme Product overview N° Name In the main screen In the setup menu Switch the power ON/OFF Switch the power ON/OFF Executes the function assigned to F1 Executes the function assigned to F1 Executes the function assigned to F2 Executes the function assigned to F2...
- Page 21 User’s Guide ViperTX Extreme Product overview N° Name In the main screen In the setup menu Changes the LCD monitor display to Change the menu in reverse order the setup menu status Changes the LCD monitor display to Change the menu in forward order...
- Page 22 User’s Guide ViperTX Extreme Product overview N° Description Function Section to control to unwinder 100 Section to control the winder 100 Print side selector Select whether the fabric is inside or outside printable Unwinder 100 switch Switch between automatic (I) and manual mode (0) The LED will light up when pushing one of the unwinder buttons.
-
Page 23: Printer
User’s Guide ViperTX Extreme Product overview It is very important that the installation environment fulfils following conditions to obtain a good print quality: Choose a place for printer installation following the requirements in the table below. Floor load capacity 2940 Pa (300 kg/m²) or more... - Page 24 Places where direct sunlight or excessive lighting are experienced. Places where air conditioners blow directly. MUTOH recommends that the printer should be installed where air conditioning can be adjusted easily. Please note that some inks require a humidity of more than 50%, other inks can be used at 30% humidity.
-
Page 25: Basics
User’s Guide ViperTX Extreme Basics Printing flow ..........27 Switching the power ON/OFF . - Page 26 User’s Guide ViperTX Extreme Basics Features to improve print quality ....... 39 Nozzlecheck.
- Page 27 User’s Guide ViperTX Extreme Basics Before the first jobs roll out of your printer, a lot of things should be done and decided. Find below a schematic overview. > Select the fabric you want to print on Refer to the fabric compatibility list on >...
- Page 28 User’s Guide ViperTX Extreme Basics Before powering ON the printer, make sure that the waste bottle is installed and that the waste tubes are connected to the waste bottle. Power ON the printer according to the procedure below: Press the key on the operation panel.
- Page 29 User’s Guide ViperTX Extreme Basics Several features of the textile printer have been developed to ensure maximal ease of use and reliable printing. The UW/W 100 system always provides an equal tension on the fabric when printing, this ensures perfect fabric tracking.
- Page 30 User’s Guide ViperTX Extreme Basics To tension the fabric for a perfectly straight printing surface To inhibit smearing of the ink at the backside of the fabric To lift a pressure roller from the fabric when the application and / or fabric require it.
- Page 31 User’s Guide ViperTX Extreme Basics Fabric retainers has been developed to avoid that the edges of the fabrics curl up and cause headstrikes and a bad printing output. They fit in the gutter and leave space at the bottom for the ink to flow away to the waste bottle.
- Page 32 User’s Guide ViperTX Extreme Basics These absorbents are developed to absorb the ink spoiled at the edges of the fabrics. This tool is meant for especially edge-to-edge printing. It is also possible to install the absorbents for standard printing (with margin) when you do not (need to) use the fabric retainers.
- Page 33 User’s Guide ViperTX Extreme Basics Loading and handling fabrics is one of the most important actions to take before you are able to print. When the fabrics are not loaded properly, undesirable outputs could be the result. Use fabric in an appropriate environment. Following are the appropriate temperature and humidity ranges for printing.
- Page 34 User’s Guide ViperTX Extreme Basics Make sure the printer and Unwinder/Winder 100 are powered ON. Raise the pressure rollers of the printer. Open the front cover. Make sure both unwinder (REAR) and winder (FRONT) unit are set to MANUAL mode (=0).
- Page 35 User’s Guide ViperTX Extreme Basics Loosen the handles to move the roll units left and right until the fabrics core fits. Install the fabrics between the two roll units at the back of the machine. Move the fabrics and roll units to the middle and tighten them with the handles.
- Page 36 User’s Guide ViperTX Extreme Basics Install an empty core between the front roll units in the same way as described above. Make sure the core is longer than the width of the fabric. Load it central as described in previous step Tighten the wheel at the side to fix the core between the two roll units.
- Page 37 User’s Guide ViperTX Extreme Basics Take the centre of the fabrics at the front of the printer and pull it straight down until the rear tensioning system gently hits the back of the machine. This to become an equal tension.
- Page 38 User’s Guide ViperTX Extreme Basics Set the winder and unwinder to automatic (“I”). The front and rear tensioning system will go to its initial position. Refer to Be sure to make the correct settings on the control panel of the winding system.
- Page 39 User’s Guide ViperTX Extreme Basics Before starting to print it is necessary to check a few things. In this chapter you can read which handlings should or can be done to improve overall print quality. One of the most important issues is that all nozzles are present before you start printing. If there are some nozzles blocked, a bad output, resulting in lines in the print, will be obtained.
- Page 40 User’s Guide ViperTX Extreme Basics When there are some missing (clogged) nozzles, a head cleaning should be performed. It is not necessary to clean all the heads at once. You will have the possibility to select which heads should be cleaned and with which power.
- Page 41 One of the key factors for obtaining constant output quality is the correct distance adjustment, also called “step”, on your Mutoh inkjet printer. Every image is printed in several print passes. After every pass, the fabric is fed an amount of millimetres.
- Page 42 User’s Guide ViperTX Extreme Basics It is recommended to start printing with a step of 100% and to adjust it afterwards. Once a step is set for a particular fabric, it will not change on the following conditions: The step is only applicable on the printer in question and not interchangeable.
- Page 43 User’s Guide ViperTX Extreme Basics the step is necessary with Print the test pattern again until no gap or overlap is visible anymore. However it is recommended to determine the step before you start a job on a new fabric, it is...
- Page 44 Open the front and left maintenance cover. Slide the carriage into the left maintenance area. Clean the edges of the heads with a cleaning swab wetted with Mutoh waterbased textile cleaning. Be sure not to touch nor clean the nozzle plate to avoid damage and bad printing quality.
- Page 45 User’s Guide ViperTX Extreme Basics When handling ink cassettes, be careful that ink does not get in your eyes or on your skin. However, if this happens, flush immediately with water. Otherwise, your eyes may become congested or inflamed slightly. If you feel discomfort, consult a doctor imfabrictely.
- Page 46 User’s Guide ViperTX Extreme Basics As from the moment the following message is displayed, the waste bottle need to be replaced. Open the lid and remove the waste bottle. As soon as the waste bottle has been removed, the following message appears Pour the waste liquid in another bottle and dispose it according to the local regulations.
- Page 47 Dummy cassettes can be ordered at your Mutoh distributor. Empty the waste bottle. Clamp all waste tubings. Clamps can be ordered at Mutoh distributor Secure all the covers which can be opened with tape. Use a tape that does not leave any glue marks after removal.
- Page 48 Basics Insert 8 open ink cassettes. The ViperTX Extreme is shipped with 16 open cassettes. Eight cassettes are used for the ink and the other 8 can be used for this procedure. It is no problem to switch from Mutoh waterbased cleaning and Mutoh shipping liquid. These liquids are fully compatible.
- Page 49 Basics As from the moment the main screen appears, the first switch has been completed. Empty the cassettes and fill them half with Mutoh shipping liquid. Mutoh shipping liquid can be order in a bottles 2 litres. The part number is...
- Page 50 User’s Guide ViperTX Extreme Basics AP-75340 - Revision 1.0...
- Page 51 Replace wipers ..........64 Done by an authorized Mutoh technician ......67 Overview .
- Page 52 Refer to Please use Original Mutoh spare parts. Any problems caused by use of non-original Mutoh inks, spare parts, consumables, ... will not be covered by the warranty. This maintenance is based on use: 8 hours / day, 5 days / week and 44 weeks / year.
- Page 53 This kit will have enough tools to maintain your printer for 6 months. N° Description Absorbent change plate Wipers Rinse bottle 500 ml Mutoh waterbased textile cleaning liquid of 500 ml Instruction sheet Good shape kit N° Description Gloves Pipettes...
- Page 54 User’s Guide ViperTX Extreme Periodical maintenance Part Partnumber Maintenance cycle 6 months KY-80249 Good shape kit KY-80228 500 ml MY-80844 Mutoh waterbased textile cleaning 1000 ml MY-80845 2000 ml MY-80846 Mutoh shipping liquid 2000 ml MY-80467 If some nozzles are missing or misfiring, perform cleaning cycles until all nozzles are in good shape.
- Page 55 User’s Guide ViperTX Extreme Periodical maintenance Clean the wipers with a polyknit wiper. Use some Mutoh waterbased textile cleaning to remove the ink. Close the front cover. Press to make the carriage go back to its home position. Perform a tubingflush...
- Page 56 User’s Guide ViperTX Extreme Periodical maintenance Open the front cover. Inject Mutoh waterbased textile cleaning in cap 1, 4, 5, 8 ( ) using a pipette until the caps do not change colour anymore. Press to activate the pumps of cap 2,3, 6, 7 ( ) and inject cleaning in the same way.
- Page 57 User’s Guide ViperTX Extreme Periodical maintenance Procedure Clean the edges of the caps with a cleaning swab and use some Mutoh waterbased textile cleaning if necessary. Clean the area around the caps with a polyknit wiper. Press to end the Shut down the printer.
- Page 58 User’s Guide ViperTX Extreme Periodical maintenance When After cleaning the caps Tools necessary Water Rinse bottle Gloves Paper Procedure Drain the gutter with water using the rinsing bottle. Dry the gutter with some paper until it is dry and clean.
- Page 59 Open the left maintenance cover. Clean the edges of the heads with a cleaning swab wetted with Mutoh waterbased textile cleaning. Be sure not to touch nor clean the nozzle plate to avoid damage and bad printing quality.
- Page 60 Carefully remove the spitting box mesh. Try not to touch the middle of the mesh but only the supported sides. Rinse the mesh with Mutoh waterbased textile cleaning using a pipette. Do this until all the ink has been removed.
- Page 61 User’s Guide ViperTX Extreme Periodical maintenance Place the mesh on a polyknit wiper for 1 minute to drain most of the cleaning. Rinse the spitting box waste tube Refer to When At the end of the week, after cleaning the spitting box mesh...
- Page 62 User’s Guide ViperTX Extreme Periodical maintenance Reinstall the spitting box mesh correctly (the holes should match). Close the front cover Press to make the carriage go back to its home position. When Every month Tools necessary Soft brush Cloth Water Procedure Do not use thinner, benzene, alcohol or other active agents.
- Page 63 User’s Guide ViperTX Extreme Periodical maintenance Procedure Power ON the printer and browse to the menu. Press to unlock the carriage. Open the front cover. Slide the carriage away from the capping station. Loosen the 2 screws fixing the capping station sponge assembly.
- Page 64 User’s Guide ViperTX Extreme Periodical maintenance Replace the sponge and fix it again with the 2 screws. Close the front cover. Press to make the carriage go back to its home position. When Every 6 months Tools necessary Tweezers Gloves...
- Page 65 Use a pair of tweezers to avoid this. Clean the wipers with appropriate cleaning liquid when they are dirty. Moisten the new wipers with Mutoh waterbased textile cleaning before installing them. AP-75340 - Revision 1.0...
- Page 66 User’s Guide ViperTX Extreme Periodical maintenance Install the new wipers with a pair of tweezers. Orientation of the wiper when Be sure that the wiper clicks standing in front of the in the wiper holder machine Close the front cover.
- Page 67 Please refer to the table below to know what the Authorized Mutoh technician should do. Please use Original Mutoh spare parts.
- Page 68 User’s Guide ViperTX Extreme Periodical maintenance AP-75340 - Revision 1.0...
- Page 69 User’s Guide ViperTX Extreme Printer menu How to work in the menu ........72 Main screen .
- Page 70 User’s Guide ViperTX Extreme Printer menu Setup menu 2/7 ..........86 PrintMode.
- Page 71 User’s Guide ViperTX Extreme Printer menu Language ..........105 Initialization .
- Page 72 User’s Guide ViperTX Extreme Printer menu Please find below all necessary information on how to switch, select and cancel menu items. Refer to for the function of each key. When powering ON the printer, it will (when no errors occur) start up in its main screen. The function of each key is explained below.
- Page 73 User’s Guide ViperTX Extreme Printer menu In the SetupMenu, changes can be made to the printer settings. The content displayed on the LCD monitor of the operation panel is as follows: N° Position Description First line Displays the menu currently set Second line - left Displays the function assigned to [F1] key.
- Page 74 User’s Guide ViperTX Extreme Printer menu This section describes functions operated on the operational panel when the printer is in the normal status. Refer to for the function of each key. When you want to feed the fabric forward or backward, follow the steps below:...
- Page 75 User’s Guide ViperTX Extreme Printer menu When there are some missing nozzles, a cleaning should be done. Depending on the quantity of missing nozzles and which head, a little, normal or powerful cleaning on head 1-2, head 3-4 or ALL could be done.
- Page 76 User’s Guide ViperTX Extreme Printer menu Press this key to cancel a print or data transfer. Press this key to either lower or higher the pressure rollers. It is also possible to operate the pressure rollers with the footpedal. Be sure that:...
- Page 77 User’s Guide ViperTX Extreme Printer menu It is possible to adjust the step when encountering a step mismatch (overfeed or underfeed) during printing. Refer to for all information regarding the step, how to analyse and how to adjust. It is possible to clean the heads when encountering missing nozzles during printing.
- Page 78 Open the front and left maintenance cover. Slide the carriage into the left maintenance area. Clean the edges of the heads with a cleaning swab wetted with Mutoh waterbased textile cleaning. Be sure not to touch nor clean the nozzle plate to avoid damage and bad printing quality.
- Page 79 User’s Guide ViperTX Extreme Printer menu This section explains which kind of settings can be made via the printer interface. Find below an overview of all main menus. Inkstatus Check the ink remaining OriginSet Set the printing start position TestPrint...
- Page 80 User’s Guide ViperTX Extreme Printer menu The amount of ink left in the cassette will be displayed. Menu Parameter Description Display Line 2: Ink cassette 1-3 Line 3: Ink cassette 4-6 Line 4: Ink cassette 7-8 Symbols Ink colour K = black...
- Page 81 User’s Guide ViperTX Extreme Printer menu Set the printing start position (origin) for printing data. You can use this setting when you want to reprint a black area on the printed fabric by changing the layout of the printing data.
- Page 82 A serie of testprints has been collected in this menu. Most of the tests are meant for an authorized Mutoh technician to evaluate the quality of the printer. However, the distance adjustment check and nozzlecheck should be key test prints before you start to print.
- Page 83 User’s Guide ViperTX Extreme Printer menu Make various fabric related settings. Menu Parameter Description Choose between the 8 profiles (user 1 - 8) of which you want to change/store the following settings. Fabric FabricSet Set the distance to be fed before the printer starts to TopFeed print.
- Page 84 User’s Guide ViperTX Extreme Printer menu Set the distance (head height) between the print head and the fabric. Choose the best head height in relation to the amount of fibres sticking out of the fabric Always try to work with the lowest head height to obtain the best printing quality.
- Page 85 User’s Guide ViperTX Extreme Printer menu Set the distance to be fed before the printer starts to print. Typical used in combination with roll fabrics. Menu Description Increase value Decrease value TopFeed 0mm - 400 mm ENTER Store set value...
-
Page 86: Printmode
User’s Guide ViperTX Extreme Printer menu Make various print mode related settings. Menu Parameter Description Choose between the 8 profiles (user 1 - 8) of which you want to change/store the following settings. Fabric PrintMode CANCEL Go back to the previous menu... - Page 87 User’s Guide ViperTX Extreme Printer menu Select printing quality with consideration to applications of printing data and printing speed. ViperTX Extreme 65/90 in 4 colour mode Print resolution Print mode Dot amount (ng) (CR x PF) 360x360 normal 41,5 360x360...
-
Page 88: Condition
User’s Guide ViperTX Extreme Printer menu Menu Parameter Description 360 x 360 dpi After selecting the required print mode, the interlace menu will be displayed. Decide in how many passes 720 x 360 dpi you want to print. Condition (1/5) -
Page 89: Direction
User’s Guide ViperTX Extreme Printer menu Set print head moving direction for printing. Menu Parameter Description UniDir Only print in 1 direction (right to left) Direction BiDir Print in both directions CANCEL Go back to the previous menu Select the head set mode when it is impossible to set this in your RIP software. - Page 90 User’s Guide ViperTX Extreme Printer menu This feature enables the printhead to reprint several times over the same print data, with the possibility to set an extra dry time. Menu Parameter Description To set the number of reprints per line of printing.
-
Page 91: Weaving
User’s Guide ViperTX Extreme Printer menu Menu Parameter Description Optimized for flag applications, double-sided printing Weave set 1 applications, polyester applications… when using Mutoh’s Water-based disperse dye inks. Weaving (1/4) Optimized for applications requiring a steam and Weave set 2... - Page 92 User’s Guide ViperTX Extreme Printer menu 4 colour mode 6 or 8 colour Weave set mode overview Double Native Mixed Fast table density Native Weave set 1 Weave set 2 Weave set 3 (*) In the FAST modes, it is impossible to print with wave set 1, 2 and 3. In case you have selected a weave set in the fast modes, the printer will automatically switch to the sign weave.
-
Page 93: Scanwidth
User’s Guide ViperTX Extreme Printer menu It is possible to specify the carriage movement along the fabric – printed area. This will have a direct effect on the drying time! Please find more details below. Menu Parameter Description Carriage moves only over the printing area... -
Page 94: Command
User’s Guide ViperTX Extreme Printer menu To perform various settings for printer commands. Menu Parameter Description Step Not applicable Resolution Not applicable Command Makes settings for the time between the end of OnlineTimer receiving printing data from a computer and recognizing the end of printing data. -
Page 95: Joint
User’s Guide ViperTX Extreme Printer menu Makes various settings on layout function. The layout function automatically determines the size of printing data sent from the computer, and then determines the amount of roll fabric required without wasting fabric. Menu Parameter... -
Page 96: Function
User’s Guide ViperTX Extreme Printer menu To perform various settings for processing of printing data. Menu Parameter Description Function CMY -> K Makes settings for printing method to present black. CANCEL Go back to the previous menu To set how to replace CMY values with K (Black). -
Page 97: Centronics
User’s Guide ViperTX Extreme Printer menu When you know the length of a roll remaining, it is recommended to set the length in the roll setup menu. In the lower right corner of the main screen, the remaining length will be displayed. - Page 98 User’s Guide ViperTX Extreme Printer menu To make the settings for the network interface. The Network Setup menu is not displayed if the network interface board has not been installed. Be sure to consult the network administrator before making the settings in the Network Setup menu.
-
Page 99: Subnetmask
User’s Guide ViperTX Extreme Printer menu To set the subnetmask of the product. Menu Description Move one digit to the left Increase the value SubnetMask Move one digit to the right 000.000.000.000 - Decrease the value 255.255.255.255 ENTER Store set value... -
Page 100: Utility
User’s Guide ViperTX Extreme Printer menu A lot of handy features are gathered in the utility menu Menu Parameter Description To set display method to the operation panel when ErrorDisp. minor error occurred. FabricDet. Which kind of fabric measurement should be done. -
Page 101: Unwinder/Winder 100
No automatic fabric detection will be done. You should also set the fabric width and start position manually. Refer to Use this setting when working with Mutoh’s Unwinder/Winder 100 and the fabric is loaded at Fabric the right side. - Page 102 User’s Guide ViperTX Extreme Printer menu When the fabric detection is disabled, it is necessary to set the start position of the fabric. On the front of the printer, a lineal has been attached to read out the start position in mm.
-
Page 103: Oncleaning
User’s Guide ViperTX Extreme Printer menu It is possible to let the printer automatically perform a cleaning at start-up. You can also disable this function. It is recommended to first perform a nozzle check and depending on the result an eventual cleaning. -
Page 104: Autoclean
User’s Guide ViperTX Extreme Printer menu In normal printing conditions, it is not recommended to use this function. When experiencing regular nozzle loss, one of the three AutoCleaning features can be used. When using this function, the wiping activity will be much higher, so be sure to securely perform your daily and weekly maintenance. -
Page 105: Language
User’s Guide ViperTX Extreme Printer menu The user interface is standard an English version. However, there are several language packs available to have the user interface in your native tongue. The extra languages will only be added to this menu when one or maximum 2 language packs have been installed. -
Page 106: Datadump
Description Set the ink configuration of the printer when not Smart-Chip working in SmartChip mode InkManager Use this function to clean the ink tubings with Mutoh (1/2) Wash direct textile cleaning. InkLoad Use this function to load ink into the printer. - Page 107 User’s Guide ViperTX Extreme Printer menu Choose to enable or disable the Mutoh Smartchips. Menu Parameter Description The printer can only keep track of the ink Mutoh consumption when the smartchips are enabled. In this mode the smart-chips are disabled. The printer...
- Page 108 User’s Guide ViperTX Extreme Printer menu There are a lot of different ink configurations possible. Therefore a decision scheme has been made to choose the mode . These 4 colour modes are not advised but still supported as they offer backwards compatibility with the previous model: ViperTX.
-
Page 109: Manual Mode
User’s Guide ViperTX Extreme Printer menu Menu Parameter Description 2 x 4 dye sublimation ink Dye4 2 x CMYK (not advised, preferably work with Dye1C1H_X) 2 x 4 pigmented waterbased ink Pig4 2 x CMYK (not advised, preferably work with Pig1C1H_X) - Page 110 Pig1C1H_X KYCM MCYK (highly recommended mode) CANCEL Go back to the previous menu Use this function to clean the ink tubings with Mutoh direct textile cleaning. Menu Parameter Description Pump 1-2 Wash cycle for tubings of ink slots 1-4-5-8 HeadWash...
-
Page 111: Inkload
Ink load cycle of ink slots 2-3-6-7 Ink load cycle of all ink slots CANCEL Go back to the previous menu Enable this parameter when working with Mutoh’s bulk ink system. Menu Parameter Description Use Mutoh direct textile ink cassettes InkSupply Use Mutoh’s bulk ink system... - Page 112 User’s Guide ViperTX Extreme Printer menu Especially for periodical maintenance purposes the head need to be unlocked. Refer to Menu Parameter Description Do not unlock the head Unlock the head. Press to lock the head again after servicing the printer.
-
Page 113: Head Unlock
User’s Guide ViperTX Extreme Printer menu Use this menu when the wipers need to be cleaned. The head will unlock and moves to the left maintenance station. The wiper arm assembly will come out. Menu Parameter Description Do not unlock the head to perform a wiperclean Unlock the head to perform a wiper clean. - Page 114 User’s Guide ViperTX Extreme Printer menu Check which firmware has been installed on your printer. Check the total amount of the printed area (x.xx m²) in the printer’s life time. AP-75340 - Revision 1.0...
- Page 115 User’s Guide ViperTX Extreme Troubleshooting Introductions..........117 Failures and malfunctions of the printer .
- Page 116 User’s Guide ViperTX Extreme Troubleshooting Other error messages........124 Data errors .
- Page 117 User’s Guide ViperTX Extreme Troubleshooting This chapter explains troubles that may occur when using the printer and how to solve them. If you encounter an error not described in this chapter, refer to "Error messages" and contact your local MUTOH dealer.
- Page 118 User’s Guide ViperTX Extreme Troubleshooting N° Possible cause Solution(s) You did not connect the interface cable Connect the interface cables One or more ink cassettes are not installed Install (an) ink cassette(s) Ink cassette is empty Replace the ink cassette N°...
- Page 119 User’s Guide ViperTX Extreme Troubleshooting N° Possible cause Solution(s) Close the front cover and lower the The front cover is open or the Pressure rolls are up pressure rolls Some of the 8 ink cassettes are not loaded properly Load all of the 8 cassettes properly N°...
- Page 120 User’s Guide ViperTX Extreme Troubleshooting N° Possible cause Solution(s) The loading position of the fabric is not correct Load the fabric correctly N° Possible cause Solution(s) The fabric has very hairy surface Set the head height one setting higher Use fabric retainers to keep the fringes...
- Page 121 User’s Guide ViperTX Extreme Troubleshooting N° Possible cause Solution(s) The Centronics interface cable was not connected Connect the Centronics interface cable correctly correctly When the printing data is transferred from the If the DATA lamp is not lit, contact the...
- Page 122 Solution(s) Print at a correct and stable ink level = Dripping excess ink appears on fabric needle level at all times or use Mutoh Ink level is higher than needle level original ink cassettes Print at a correct and stable ink level = Ink falls out resulting into white lines.
- Page 123 User’s Guide ViperTX Extreme Troubleshooting This chapter explains the messages displayed on the operation panel both when the printer works normally and when an error occurs, and possible solutions. The following messages can be displayed when the printer works normal.
- Page 124 User’s Guide ViperTX Extreme Troubleshooting The following are the message type error display and solutions. The following message type errors are displayed when an error occurs while operating the printer. When one of the following message type error displays appear, the printer may stop operation. If the printer stops operation, solve the problem to delete the error message and restart the printer.
- Page 125 If an error requiring a restart has occurred, solve the problems to restart the printer and delete the error. If the same error message is displayed again, contact your local MUTOH dealer. Be sure to note the code numbers of the error messages.
- Page 126 User’s Guide ViperTX Extreme Troubleshooting Follow the procedure below when the fabric is jammed in the printer or a head crash occurs. Higher the pressure rollers using the footswitch or operation panel ( ). Power OFF the printer. Open the front cover and remove the jammed fabric.
- Page 127 User’s Guide ViperTX Extreme Troubleshooting Never leave the printer in this situation during a down-time for longer than 1 day. Print heads might dry out and can be damaged! Remove the wiper arm assembly by loosening the 4 thumb screws.
- Page 128 User’s Guide ViperTX Extreme Troubleshooting When the carriage is above the capping-station, turn back the head-height slide-gear. Make sure the arrow is in the DOWN-position. Move the carriage to the utter most right position. Make sure the slide gear is not blocking.
- Page 129 User’s Guide ViperTX Extreme Index Adjustable head height ....32 Fabric feed compensation (step) ..41 Area menu .
- Page 130 User’s Guide ViperTX Extreme i² technology ......90 Maintenance Daily ......54 Initialization menu .
- Page 131 User’s Guide ViperTX Extreme Packing the machine ....49 Safety instructions ..... 12...
- Page 132 User’s Guide ViperTX Extreme Underfeed ......41 Unwinder/winder 100 ....29 Utility menu .
Need help?
Do you have a question about the ViperTX Extreme and is the answer not in the manual?
Questions and answers