Table of Contents
Advertisement
Available languages
Available languages
Quick Links
hatcocorp.com
Register Online!
(see page 2)
S'inscrire en ligne !
(voir page 16)
Installation and Operating Manual
Manuel d'installation et d'utilisation
WARNING
Do not operate this equipment unless you
have read and understood the contents
of this manual! Failure to follow the
instructions contained in this manual
may result in serious injury or death.
This manual contains important safety
information concerning the maintenance,
use, and operation of this product. If
you're unable to understand the contents
of this manual, please bring it to the
attention of your supervisor. Keep this
manual in a safe location for future
reference.
English = p 2
P/N 07.04.1061.00
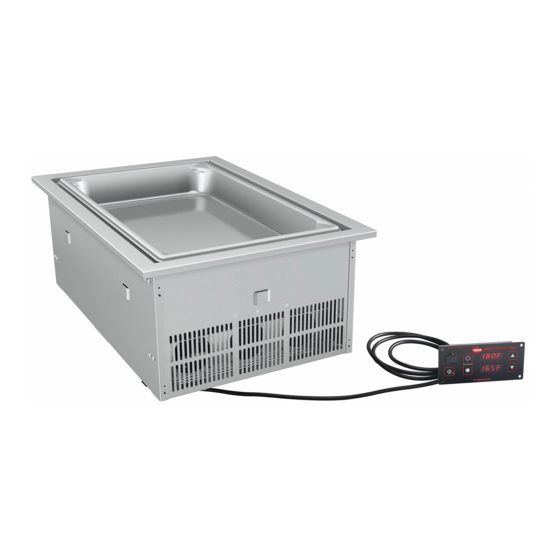
Induction Dry Well
Puits sec à induction
IWEL Series/Série
ADVERTENCIA
No opere este equipo al menos que haya
leído y comprendido el contenido de este
manual! Cualquier falla en el seguimiento
de las instrucciones contenidas en
este manual puede resultar en un serio
lesión o muerte. Este manual contiene
importante información sobre seguridad
concerniente al mantenimiento, uso y
operación de este producto. Si usted
no puede entender el contenido de
este manual por favor pregunte a su
supervisor. Almacenar este manual en
una localización segura para la referencia
futura.
AVERTISSEMENT
Ne pas utiliser cet équipement sans avoir
lu et compris le contenu de ce manuel ! Le
non-respect des instructions contenues
dans ce manuel peut entraîner de
graves blessures ou la mort. Ce manuel
contient des informations importantes
concernant l'entretien, l'utilisation et le
fonctionnement de ce produit. Si vous ne
comprenez pas le contenu de ce manuel,
veuillez le signaler à votre supérieur.
Conservez ce manuel dans un endroit
sûr pour pouvoir vous y référer plus tard.
Français = p 16
© 2023 Hatco Corporation
Advertisement
Chapters
Table of Contents

Related Manuals for Hatco IWEL Series


Summary of Contents for Hatco IWEL Series
- Page 1 Almacenar este manual en sûr pour pouvoir vous y référer plus tard. reference. una localización segura para la referencia Français = p 16 futura. English = p 2 P/N 07.04.1061.00 © 2023 Hatco Corporation...
-
Page 2: Table Of Contents
“Warranty”. This device complies with Part 18 of the FCC Rules. INTRODUCTION Hatco Induction Dry Wells are specially designed to hold heated This manual provides the installation, safety, and operating foods at safe serving temperatures. Their high efficiency and instructions for Hatco Induction Dry Wells. -
Page 3: Important Safety Information
This unit has no “user-serviceable” parts. If service • Do not pull unit by power cord. is required on this unit, contact an Authorized Hatco Service Agent or contact the Hatco Service Department at • Discontinue use if power cord is frayed or worn. -
Page 4: Model Description
Induction Dry Wells are designed, IWELB-FUL-A Model manufactured, and tested to maintain safe food holding NOTE: For the latest firmware updates, go to the Hatco website: temperatures. www.hatcocorp.com. Click on the “Resources” drop NOTE: Induction Dry Wells are for holding warm foods, not for down menu and select “Firmware Download”. -
Page 5: Specifications
CCC 10A NOTE: The specification label is located on the bottom of the unit. See label for serial number and verification of unit Plug Configurations electrical information. NOTE: Receptacle not supplied by Hatco. Electrical Rating Chart Model Voltage Watts Amps... -
Page 6: Installation
INSTALLATION English General 4. After installation of the unit and control panel are complete: Induction Dry Wells are shipped completely assembled and a. Plug the detachable power cord into the bottom of the ready for use after installation into a countertop. Care should be unit. -
Page 7: Installing The Unit
INSTALLATION English Installing the Unit Preparing the Installation Site Both types of built-in installation require the same general The Induction Dry Wells can be installed using the standard, cabinet specifications. The unit is designed to allow easy drop-in countertop method or an undermount method. Refer removal of the electronic components from the underside of the to the appropriate procedure below for the desired method of unit without having to remove the installed ceramic glass top. - Page 8 INSTALLATION English Under Mount Installation 5. With the L-brackets removed, carefully lower the unit into the cutout. Under mount installation requires a prepared, stainless steel countertop and provides a seamless transition between the • The front of the unit is labeled and corresponds to the countertop and the induction well.
-
Page 9: Installing The Control Panel
INSTALLATION English Installing the Control Panel Under Mount using Mounting Studs 1. Carefully measure and cut the opening in the countertop. Use the following procedure to install the control panel. Use the “Under Mount Countertop Opening Dimensions” below as a guide. WARNING Countertop Countertop... -
Page 10: Operation
OPERATION English General Operating the Unit Use the following information and procedures to operate Startup Induction Dry Wells. 1. Before turning on the unit each day, clean the glass surface using an appropriate cleaning wipe, damp paper towel, or a WARNING damp cloth. -
Page 11: Changing The Temperature Setpoint
210° 97° General Setting Information Hatco recommends adjusting the temperature setpoints up or down during operation to find the best setting for a particular pan, amount of food, and heating desired. Once a good setpoint has been determined, use this setting in the future for holding... -
Page 12: Locking The Control Panel
Induction Dry Well from an external USB drive. 1. Press and hold both for 3 seconds to lock the NOTE: For the latest firmware updates, go to the Hatco website: control panel. www.hatcocorp.com. Click on the “Resources” drop • The LED on the button will flash to indicate the down menu and select “Firmware Download”. -
Page 13: Maintenance
MAINTENANCE English General CAUTION Hatco Induction Dry Wells are designed for maximum durability and performance with minimum maintenance. Use only wipes, pads, and cleaners designed specifically for cleaning ceramic glass surfaces. WARNING Wipe up all spills and splashes immediately. Make sure unit is dry before using. -
Page 14: Troubleshooting Guide
Non-Warranty Problems If you experience a non-warranty problem that requires The warranty on Hatco Induction Dry Wells is for two (2) years assistance, please contact the nearest Authorized Hatco from date of purchase or 30 months from date of shipping from Service Agency. -
Page 15: Limited Warranty
Notwithstanding anything herein to the contrary, the limited warranty herein will not cover components in Seller’s sole Hatco Corporation (Seller) warrants that the products it discretion such as, but not limited to, the following: coated manufactures (Products) will be free from defects in materials... -
Page 16: Informations Importantes Pour Le Propriétaire
Leurs efficacité et précision supérieures Hatco vous recommande de lire l’ensemble des instructions font des puits secs à induction Hatco le choix idéal pour les d’installation, de sécurité et de fonctionnement contenues dans entreprises de restauration de qualité. -
Page 17: Consignes De Sécurité Importantes
Hatco d’origine. Utilisez des l’utilisateur. Si cet appareil doit être réparé, contactez un pièces détachées Hatco authentiques sous peine réparateur Hatco agréé ou le Service après-vente Hatco au d’annuler toutes les garanties et d’exposer l’utilisateur +1-414-671-6350. à des tensions électriques dangereuses pouvant entraîner une électrocution ou des brûlures. -
Page 18: Description Du Modèle
MODE D'EMPLOI de ce manuel pour connaître les détails concernant les récipients adaptés et leurs dimensions. Les puits secs à induction Hatco disposent de plusieurs dispositifs de sécurité encastrés qui permettent de protéger les appareils ainsi que les utilisateurs. -
Page 19: Caractéristiques Techniques
NOTE: The specification label is located on the bottom of the unit. Consultez la plaque signalétique pour connaître NOTA: La prise murale n’est pas fournie par Hatco. L’appareil le numéro de série et vérifier les caractéristiques doit être connecté à un circuit dédié. -
Page 20: Installation
INSTALLATION Français Généralités • Veillez à bien préparer le lieu d'installation, tel que cela est expliqué dans la partie « Préparer le lieu Les puits secs à induction sont expédiés entièrement montés d'installation » de cette section. et prêts à l'emploi après installation dans un plan de travail. •... -
Page 21: Installer L'unité
INSTALLATION Français Installation en surface Préparer le lieu d'installation Suivez la procédure suivante pour l'installation en surface. Les deux types d'installation encastrée peuvent être effectués dans des meubles répondant aux mêmes caractéristiques. 1. Prenez soigneusement les mesures nécessaires et L'élément est conçu pour permettre un retrait facile des pratiquez la découpe dans le plan de travail. - Page 22 INSTALLATION Français 5. Retirez les pattes de fixation en L et placez doucement Installation sous plan à rebords l'appareil dans l'ouverture pratiquée. 1. Prenez soigneusement les mesures nécessaires et pratiquez une découpe dans le plan de travail avec des • L'avant de l'appareil présente une étiquette et rebords.
-
Page 23: Installer Le Panneau De Commande
INSTALLATION Français Installer le panneau de commande Installation sous plan à l'aide de goujons de montage 1. Prenez soigneusement les mesures nécessaires et Suivez la procédure suivante pour installer le panneau de pratiquez la découpe dans le plan de travail. Aidez-vous commande. -
Page 24: Mode D'emploi
MODE D’EMPLOI Français Généralités Flèches vers le haut et vers le bas Les flèches vers le haut et vers le bas ( ) servent à Utilisez les informations et procédures suivantes pour utiliser régler la température de l'appareil. les puits secs à induction. Bouton marche/arrêt AVERTISSEMENT Le bouton marche/arrêt (... -
Page 25: Modification De La Température De Consigne
MODE D’EMPLOI Français Modification de la température de consigne 7. Remplacez le récipient vide par un récipient contenant des aliments. Suivez cette procédure pour modifier la température de 8. Ajustez le niveau de température à votre convenance. consigne. 1. Appuyez sur le bouton de zone . -
Page 26: Mode Sync
Français Réinitialisation du logiciel Informations générales sur les réglages Hatco recommande d'augmenter ou de baisser la température Suivez la procédure suivante si le puits sec à induction ne de consigne pendant le fonctionnement de l'appareil de sorte à répond pas et si le ou les affichages de commande apparaissent définir le réglage le plus approprié... -
Page 27: Maintenance
Français Généralités Nettoyage quotidien Les puits secs à induction Hatco ont été conçus pour offrir une Pour maintenir la performance et préserver le revêtement du durabilité et des performances maximales avec un minimum puits sec à induction, nettoyez ce dernier quotidiennement. -
Page 28: Guide De Dépannage
Vous avez des questions en ce qui concerne les pannes? Si le problème persiste, veuillez contacter l’agence d’entretien agréée Hatco la plus proche ou Hatco pour obtenir une assistance. Pour trouver l’agence d’entretien la plus proche, rendez-vous sur le site Internet de Hatco (www.hatcocorp.com) et sélectionnez le menu déroulant Support (Assistance), puis cliquez sur «... -
Page 29: Options Et Accessoires
(2) ans à compter de la date d’achat ou trente l’agence d’entretien agréée Hatco la plus proche. mois à compter de la date d’expédition par Hatco, selon l’événement intervenant en premier lieu. Pour trouver l’agence d’entretien la plus proche, connectez- vous à... -
Page 30: Garantie Limitée
GARANTIE, RECOURS EXCLUSIF : Garantie d’un (1) an pour les pièces et la main-d’œuvre, PLUS garantie de quatre (4) ans pour les pièces Hatco Corporation (le Vendeur) garantit que les produits uniquement : qu’elle fabrique (les Produits) seront exempts de défauts de Cuves 3CS et FR matériaux et de fabrication dans des conditions d’utilisation et... - Page 31 NOTAS Français IWELM-0123...
- Page 32 Duffy’s - AIS Sauquoit 800-836-1014 J.B. Brady, Inc. Syracuse 315-422-9271 Register your unit online! See IMPORTANT OWNER INFORMATION HATCO CORPORATION section for details. P.O. Box 340500 Milwaukee, WI 53234-0500 U.S.A. 414-671-6350 Enregistrez votre appareil en ligne ! support@hatcocorp.com www.hatcocorp.com Lisez la section INFORMATIONS IMPORTANTES POUR LE PROPRIETAIRE pour plus d’informations.
Need help?
Do you have a question about the IWEL Series and is the answer not in the manual?
Questions and answers