Advertisement
Quick Links
Advertisement

Subscribe to Our Youtube Channel
Related Manuals for Balcrank Lion HP 1150-015


Summary of Contents for Balcrank Lion HP 1150-015
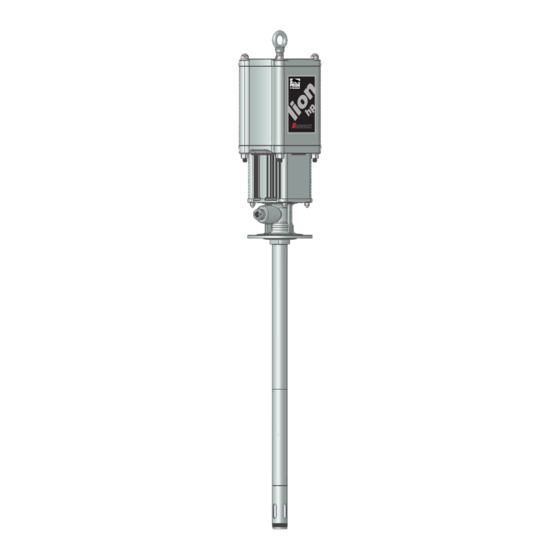
- Page 1 Service Bulletin SB 1074 Rev. H 12/15 ® Lion HP 50:1 Grease Pump Series ® Model # Pump Version 1150-015 400lb. Drum 1150-018 Tote Stub Thoroughly read and understand this manual before installing, operating or servicing described equipment. Operation, Installation, Maintenance and Repair Guide...
- Page 2 General Safety Thoroughly read and understand this manual before WARNING installing, operating or servicing the described products. WARNING: The Lion HP 50:1 pump ® (1150-015,-018) develops 7500 psi (517 IMPORTANT Bar) maximum working pressure at 150 psi (10.3 Bar) maximum inlet air pressure and stall conditions.
-
Page 3: Table Of Contents
Table of Contents Cover ..............1 Pump Repair/Servicing ........5-8 General Safety Information........2 Troubleshooting Guide .......... 9 Product Description ..........3 Parts List.............. 10 Technical Data ............3 Parts Diagrams ..........11-16 Pump Installation ........... 4 Pump Dimensions ..........17 Operation ............... -
Page 4: Pump Installation
® grease upon factory assembly and can run mounting the pump to a grease drum. without lubricated air, Balcrank recommends an in-line F.R.L. be installed in the pumping system. Using four 3/8"-16 bolts and lock washers, secure Never let the pump run dry of the grease being the pump to the drum cover. -
Page 5: Pump Repair/Servicing
Direct pump outlet hose into an approved waste maintenance be replaced afterwards. Contact oil container. your local Balcrank distributor, using the above part number, for replacement grease. Slowly adjust the air regulator until the pump is primed and running smoothly. Be sure all air has been purged from the system. - Page 6 remove them now, along with the four 5/16" Hex Bolts to separate the joint of the Air Piston and Coupler. [14] and Lock washers [12] which secure them. Figure 3 Mount the Air Motor horizontally in a bench vise. Secure the assembly horizontally in a bench Clamp the vise to the Upper Body [2] of the pump vise, clamping the parts at the flats located on and use elastic jaw cushions in the vise to prevent...
- Page 7 Figure 8 Rod [48] to Lower Rod [49]. Using a 5/16" punch and a pipe wrench, detach Figure 9 the Upper Rod [48] from the Lower Rod [49]. Set Substitute rebuild kit parts in place of old items all parts aside. where applicable.
- Page 8 Apply Loctite 263 to the internal threads of the [3]. Install the Center Insert [3] on the subassembly by sliding it gently onto the Air Piston. Spring Retainer, Threaded [34]. Install the Spring Retainer, Threaded on the end of the Trip Rod [32] Install the Bolts [7, qty=4] as shown in figure and tighten the entire assembly to 100 in-lbs torque.
-
Page 9: Troubleshooting Guide
Troubleshooting Guide WARNING: Before beginning pump repair, NOTE: Check all other possible causes of all internal pressure must be relieved. To reduce operating problems, and apply remedial action, risk of personal injury, follow the Pressure Relief before disassembling pump. Procedure shown on pages 2 and 5. Trouble Probable Cause Corrective Action... -
Page 10: Parts List
Service Kits Parts List 900029 Pump Lower Rebuild Kit Lion HP 50:1 Ratio Pump ® 900027 Air Motor Rebuild Kit (*see note) 1150-015 400lb. Drum 900028 Air Motor Soft Parts Kit (*see note) 1150-018 Stub Tote Pump Service Kit Item Part Number Description Quantity... - Page 11 Service Kits Parts List 900029 Pump Lower Rebuild Kit Lion HP 50:1 Ratio Pump ® 900027 Air Motor Rebuild Kit (*see note) 1150-015 400lb. Drum 900028 Air Motor Soft Parts Kit (*see note) 1150-018 Stub Tote Pump Service Kit Item Part Number Description Quantity...
- Page 12 Green 638 Red 263 Green 638 Figure 2 Head Assembly Assembly Stage 1 Red 263 Exploded Views Lion HP 50:1 Ratio Pump ® 1150-015 1150-018 Figure 3 Air Motor Head Assembly Assembly Stage 2 - Item number, see page 10 - Grease application point, see detail in written procedure - Loctite application point, see detail in written procedure...
- Page 13 Green 638 White 567 1 drop only Exploded Views Figure 4 Lion HP 50:1 Ratio Pump ® Head Assembly 1150-015 Assembly Stage 3 1150-018 Air Motor - Item number, see page 10 - Grease application point, see detail in written procedure - Loctite application point, see detail in written procedure...
- Page 14 36 Label on Back Side Exploded Views Lion HP 50:1 Ratio Pump ® 1150-015 1150-018 Air Motor Figure 5 Head Assembly - Item number, see page 10 Assembly Stage 4 - Grease application point, see detail in written procedure - Loctite application point, see detail in written procedure...
- Page 15 Figure 7 Bare Pump Assembly Assembly Stage 6 Red 263 Red 263 1 drop only 1 drop only Figure 8 Red 263 Bare Pump Assembly Assembly Stage 7 1 drop only Red 263 1 drop only Red 263 1 drop only Exploded Views Lion HP 50:1 Ratio Pump...
- Page 16 Red 263 ** Items 56, 57, 58, and 59 are contained in item 1 drop only 60 (832833 - seal case assembly) Red 263 1 drop only Figure 9 Bare Pump Assembly Assembly Stage 8 Figure 10 Bare Pump Assembly Exploded Views Assembly Stage 9 Lion HP...
- Page 17 Complete Air Motor Subassembly Complete Lower Pump Subassembly Red 263 Tube end threads Exploded Views Lion HP 50:1 Ratio Pump ® 1150-015 1150-018 Complete Pump Figure 11 - Item number, see page 10 Final Pump Assembly Assembly Stage 10 - Grease application point, see detail in written procedure - Loctite application point, see detail in written procedure...
- Page 18 1/2" NPT (F) 3/8" NPT(F) 11.5 2.63 54.7 45° .453 Ø .453 4 places 4 places equally spaced equally spaced .6125 Ø 6.125 hole circle hole circle 31.9 (1150-015) 21.4 (1150-018) 2.17 2.17 Figure 12 Complete Pump Dimensions & Features Lion HP 50:1 Ratio Pump ®...
-
Page 19: Warranty Statement
Revision Log: New Release - 7/06 Rev A - Added Tote Stub Model 1150-018 Rev B - Updated item number 16 Rev C - Added note about kits 900027 & 900028 to pages 10 & 11 and updated warranty statement Rev D - Changed part number for item 2 in parts list Rev E - Added part number 832833 (seal case assembly) to pages 11 &... - Page 20 For Warranty Information Visit: www.balcrank.com Balcrank Corporation ® Weaverville, NC 28787 800-747-5300 800-763-0840 Fax www.balcrank.com Service Bulletin SB 1074 Rev. H 12/15...
Need help?
Do you have a question about the Lion HP 1150-015 and is the answer not in the manual?
Questions and answers