S&C VacuFuse II Installation And Operation Manual
Self-resetting interrupter
Hide thumbs
Also See for VacuFuse II:
- Instruction sheet (23 pages) ,
- Quick operation manual (2 pages) ,
- Quick operation manual (2 pages)
Table of Contents
Advertisement
Quick Links
VacuFuse
®
II Self-Resetting Interrupter
Outdoor Distribution (12.47 kV through 27.0 kV)
Table of Contents
Introduction � � � � � � � � � � � � � � � � � � � � � � � � � � � � � 2
Qualified Persons . . . . . . . . . . . . . . . . . . . . . . . . . . . 2
Read this Instruction Sheet . . . . . . . . . . . . . . . . . . . 2
Retain this Instruction Sheet . . . . . . . . . . . . . . . . . . 2
Proper Application . . . . . . . . . . . . . . . . . . . . . . . . . . 2
Operating Considerations . . . . . . . . . . . . . . . . . . . . . 3
Warranty . . . . . . . . . . . . . . . . . . . . . . . . . . . . . . . . . . 3
Warranty Qualifications . . . . . . . . . . . . . . . . . . . . . . 4
Application Note . . . . . . . . . . . . . . . . . . . . . . . . . . . . 4
Safety Information � � � � � � � � � � � � � � � � � � � � � � � � 5
Understanding Safety-Alert Messages . . . . . . . . . . . 5
Following Safety Instructions . . . . . . . . . . . . . . . . . . 5
Replacement Instructions and Labels . . . . . . . . . . . 5
Location of Safety Labels . . . . . . . . . . . . . . . . . . . . . 6
� � � � � � � � � � � � � � � � � � � � � � � � �
Shipping and Handling � � � � � � � � � � � � � � � � � � � � 8
Inspection . . . . . . . . . . . . . . . . . . . . . . . . . . . . . . . . . 8
Packing . . . . . . . . . . . . . . . . . . . . . . . . . . . . . . . . . . . 8
Handling . . . . . . . . . . . . . . . . . . . . . . . . . . . . . . . . . . 8
Storage . . . . . . . . . . . . . . . . . . . . . . . . . . . . . . . . . . . 8
Returning . . . . . . . . . . . . . . . . . . . . . . . . . . . . . . . . . 8
Before Starting � � � � � � � � � � � � � � � � � � � � � � � � � � 9
VacuFuse II Interrupter Parts . . . . . . . . . . . . . . . . . . 9
Understanding the Closing Sequence . . . . . . . . . . .10
December 19, 2022
© S&C Electric Company 2022, all rights reserved
Installation and Operation
7
For Overhead Distribution Transformer
Protection
Installation � � � � � � � � � � � � � � � � � � � � � � � � � � � � � 12
Installing the Cutout Mounting . . . . . . . . . . . . . . . . .12
Operation � � � � � � � � � � � � � � � � � � � � � � � � � � � � � � 15
Has Dropped Open . . . . . . . . . . . . . . . . . . . . . . .15
from the Cutout Mounting . . . . . . . . . . . . . . . . . . .18
The S&C Loadbreak Tool . . . . . . . . . . . . . . . . . . .19
Troubleshooting � � � � � � � � � � � � � � � � � � � � � � � � 23
Mounting . . . . . . . . . . . . . . . . . . . . . . . . . . . . . . . 23
In Mounting With Contacts Open . . . . . . . . . . . . . . 23
Vacuum Interrupter Cannot Be Closed . . . . . . . . . . 23
Instruction Sheet 466-500
Advertisement
Table of Contents

Related Manuals for S&C VacuFuse II


Summary of Contents for S&C VacuFuse II
-
Page 1: Table Of Contents
VacuFuse II Interrupter Parts . . . . . . . . . . . . . . . . . . -
Page 2: Introduction
Safety Precautions on pages 5 through 7 . The latest version of this publication is available online in PDF format at sandc�com/en/support/product-literature/ . Retain this This instruction sheet is a permanent part of the VacuFuse II Self-Resetting Interrupter. Designate a location where users can easily retrieve and refer to this publication. Instruction... -
Page 3: Operating Considerations
If the fault is still on the line, the VacuFuse II Self-Resetting Interrupter will lock open and drop out. If fault current is not still on the line, the Sequence Reset Time timer will begin timing. If another fault occurs during this time, the VacuFuse II Self-Resetting Interrupter will lock open and drop out. -
Page 4: Warranty Qualifications
S&C cutout mounting is shown in Figure 2 . The warranty set forth in S&C Price Sheet 150 does not apply to a VacuFuse II interrupter retrofitted in other than a present-production (“-R10” or “-R11”) S&C-provided cutout mounting . -
Page 5: Safety Information
Safety Information Understanding Several types of safety-alert messages may appear throughout this instruction sheet and on labels and tags attached to the VacuFuse II Self-Resetting Interrupter. Become familiar with Safety-Alert these messages and the importance of these signal words: Messages DANGER “DANGER”... -
Page 6: Location Of Safety Labels
OPEN and de-energized . G-9842 Device may be energized from either side… DANGER TCC Curve (Label displaying the VacuFuse II interrupter’s protection curve) ● ● Contact the nearest S&C Sales Office . S&C Instruction Sheet 466-500... -
Page 7: Safety Precautions
Safety Precautions DANGER The VacuFuse II Self-Resetting Interrupter operates at high voltage . Failure to observe the precautions below will result in serious personal injury or death . Some of these precautions may differ from your company’s operating procedures and rules . Where a discrepancy exists, follow your company’s operating procedures and rules . -
Page 8: Shipping And Handling
Interrupter or subject any of its parts to undue stress are present. If there is visible loss or damage: during installation . Only remove a VacuFuse II Self- Resetting Interrupter from the carton immediately 1. Notify the delivering carrier immediately. -
Page 9: Before Starting
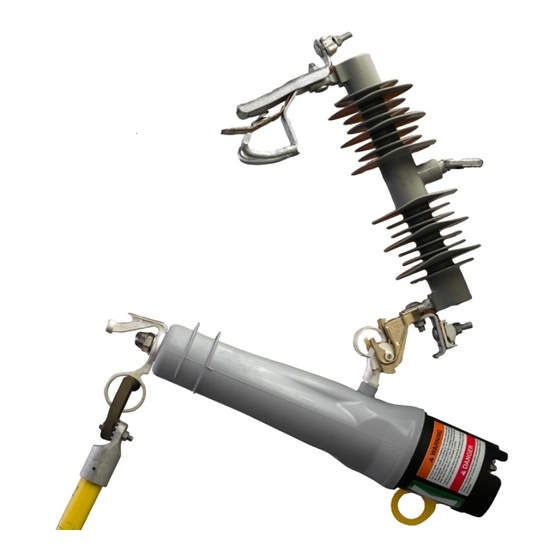
Before Starting VacuFuse II Interrupter Parts Become familiar with the parts of the VacuFuse II Self- Resetting Interrupter. See Figure 3. Jaw-end contact Pull-ring CHARGING LED READY TO CLOSE LED Hinge-end contact Trunnion POSITION indicator Manual operating lever Figure 3� An overview of the VacuFuse II Self-Resetting Interrupter�... -
Page 10: Understanding The Closing Sequence
CHARGING LED will blink at a 1-second interval if there is sufficient voltage present at the cutout mounting and Figure 4� The LEDs on the base of the VacuFuse II the vacuum interrupter is open. The unit will automati- interrupter�... - Page 11 Do not refer to the position of the manual operating lever to know the position of the vacuum interrupter. When the VacuFuse II interrupter trips in response to a fault, the lever does not move, leaving the lever in the Up position when the vacuum interrupter is in the Open position.
-
Page 12: Installation
Installation Installing the Cutout Mounting Carriage-bolt If a VacuFuse II interrupter is ordered without a cutout mounting, proceed to the “Installing a VacuFuse II Carriage bolt nut Interrupter into the Cutout Mounting” section on page 13. External Lockwasher tooth Complete the following steps to install the cutout... -
Page 13: Installing A Vacufuse Ii Interrupter Into The Cutout Mounting
The VacuFuse II interrupter is different from other cutout-mounted devices . Failure to properly handle Trunnion a VacuFuse II interrupter with a hotstick and/or an extendostick may lead to serious injury or death . Complete the following steps to install a VacuFuse II interrupter into a cutout mounting: If using an existing S&C cutout mounting... -
Page 14: Closing The Vacufuse Ii Interrupter Into The Cutout Mounting
Installation Closing the VacuFuse II Interrupter into the Cutout Mounting Complete the following steps to close a VacuFuse II Self- Resetting Interrupter into its mounting: NOTICE 45° Read the “Understanding the Closing Sequence” section on page 10 before closing the VacuFuse II Self-Resetting Interrupter into its cutout mounting . -
Page 15: Operation
. Closing without repairing the fault could result in equipment damage, injury, or death . After responding to an overcurrent event, the VacuFuse II interrupter’s vacuum interrupter will open and the POSITION indicator will show a green target. If the over- current event persists after the reclosing event, the unit will lock out and drop out from the cutout mounting. -
Page 16: If Maintenance Is To Be Performed On The Transformer
The vacuum interrupter inside the VacuFuse II Self-Resetting Interrupter can be opened using the yellow manual operat- ing lever on the side of the VacuFuse II interrupter, with or without power. The interrupter must be closed in the cutout mounting with sufficient voltage present for at least 45 seconds before the vacuum interrupter can be closed by moving the lever to the Closed position. - Page 17 Talon tool or a distribution prong. The vacuum interrupter inside the VacuFuse II interrupter will close after 45 seconds of sufficient voltage being present at the cutout mounting, and the POSITION indicator will show the red target. See Figure 13.
-
Page 18: Removing The Vacufuse Ii Interrupter
Removing the VacuFuse II Interrupter from the Cutout Mounting WARNING DO NOT attempt to remove a VacuFuse II Self- Resetting Interrupter from its cutout mounting with the vacuum interrupter in the Closed position . The vacuum interrupter is in the Closed position when the POSITION indicator at the base of the VacuFuse II interrupter displays a red target . -
Page 19: The S&C Loadbreak Tool
. WARNING Stay at least 5 feet (152 cm) below the VacuFuse II interrupter when operating the Loadbuster tool from a bucket truck . Operating the Loadbuster tool from... - Page 20 Interrupter. The pull-ring latch will deflect and, upon complete entry of the pull-ring, will spring back, locking the Loadbuster tool to the pull- ring. The Loadbuster tool is now connected across the upper contacts of the VacuFuse II Self-Resetting Interrupter, shown Figure 19 on page 22.
- Page 21 Successful operation is independent of the speed with which the VacuFuse II Self-Resetting Interrupter is opened. Avoid jerking and hesi- tation. The resetting latch will keep it open.
- Page 22 To reset the Loadbuster tool for the next STEP 7� operation, hold it as shown in Figure 20. Extend Figure 19� The Loadbuster tool attached to a VacuFuse II the tool slightly and lift the resetting latch with Self-Resetting Interrupter�...
-
Page 23: Operation Using Loadbuster
Unable to Close a VacuFuse II Interrupter Vacuum Interrupter Cannot Be Closed into its Mounting If the VacuFuse II interrupter can be closed into the cutout mounting and sufficient voltage is present in the If a VacuFuse II interrupter’s vacuum interrupter is in the mounting—but the vacuum interrupter cannot be closed...