DeLonghi EC260 Instructions For Use Manual
Hide thumbs
Also See for EC260:
- User manual ,
- Instructions for use manual (40 pages) ,
- Manual (16 pages)
Table of Contents
Advertisement
Available languages
Available languages
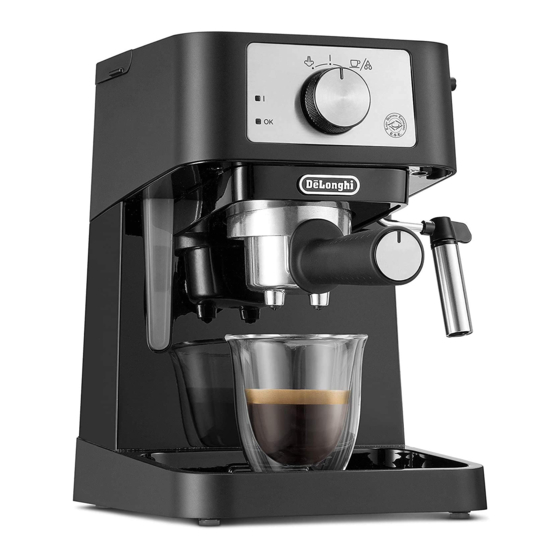
EC260 - 265
ESPRESSO MAKER
Instructions for use. Keep these instructions
Visit www.delonghi.com for a list of service
centers near you.
ELECTRIC CHARACTERISTICS
120 V~ 60 Hz 1100 W
MACHINE À CAFÉ
Mode d' e mploi . Conservez cette notice
Visitez www.delonghi.com pour y voir une
liste des centres de réparation proches de
chez vous.
CARACTÉRISTIQUES ÉLECTRIQUES
120 V~ 60 Hz 1100 W
CAFETERA
Repase y guarde estas instrucciones.
Lea cuidadosamente este instructivo antes de
usar su aparato.
Visite www.delonghi.com para ver la lista de
centros de servicios cercanos a usted.
CARACTERISTICAS ELECTRICAS:
120 V~ 60 Hz 1100 W
Advertisement
Chapters
Table of Contents

Related Manuals for DeLonghi EC260


Summary of Contents for DeLonghi EC260
- Page 1 EC260 - 265 ESPRESSO MAKER Instructions for use. Keep these instructions Visit www.delonghi.com for a list of service centers near you. ELECTRIC CHARACTERISTICS 120 V~ 60 Hz 1100 W MACHINE À CAFÉ Mode d’ e mploi . Conservez cette notice Visitez www.delonghi.com pour y voir une...
-
Page 2: Table Of Contents
EN CONTENTS IMPORTANT SAFEGUARDS .........3 SHORT CORD INSTRUCTIONS ......3 1. DESCRIPTION OF THE APPLIANCE ....4 2. DESCRIPTION OF THE CONTROL PANEL ..5 3. DESCRIPTION OF THE ACCESSORIES .....5 4. FIRST USE ..........6 5. MAKE ESPRESSO COFFEE ......7 5.1 Tips for a hotter co ee........8 6. -
Page 3: Important Safeguards
IMPORTANT SAFEGUARDS When using electrical appliances, basic safety precautions should always be followed, including the following: • Read all instructions. • Do not touch hot surfaces. Use handles and knobs. • To protect against re, electrical shock and personal injury, do not immerse cord, plug or appliance in water or other liquid. -
Page 4: Description Of The Appliance
1. DESCRIPTION OF THE APPLIANCE A1. Lid A8. Cappuccino maker A2. Removable water tank A9. Cappuccino maker nozzle A3. Accessories holder (co ee lters) A10. Drip tray housing A4. Cup shelf A11. Drip tray A5. Steam/hot water delivery knob A12. Drip tray full grille A6. -
Page 5: Description Of The Control Panel
2. DESCRIPTION OF THE CONTROL PANEL B1. Steam function B5. Selector dial B2. Machine OFF B6. ON pilot light B3. Machine ON B7. READY pilot light B4. Co ee/Hot water delivery 3. DESCRIPTION OF THE ACCESSORIES C1. Porta lter C2. Measuring spoon/tamper Important! C3. -
Page 6: First Use
4. FIRST USE 1. Open the lid. 2. Remove the water tank. 3. Fill the water tank up to 4. Insert the water tank in the max level. its housing. 5. Push the water tank down. 6. Close the lid. 7. -
Page 7: Make Espresso Coffee
4. FIRST USE STOP Repeat steps 1 to 6 & 11 to 14 13. Turn the steam dial back 14. Empty the container and 15. Proceed with a second 16. Remove the porta lter. to 0 and the selector dial put it back under the rinsing. -
Page 8: Tips For A Hotter Co Ee
5. MAKE ESPRESSO COFFEE 5. Attach the porta lter to 6. Place the cup or cups 7. Wait until the READY light 8. Turn the selector to the appliance and turn it under the porta lter turns on. counterclockwise (always spouts. -
Page 9: How To Make Cappuccino
6. MAKE CAPPUCCINO 5°C Milk 3.38 .oz / 100ml 1. Prepare the espresso co ee 3. Fill a jug with about 3.38 4. Place the jug under the cap- 2. Turn the selector to as described in the previous .oz. of milk for each cap- puccino maker. -
Page 10: Hot Water
7. HOT WATER 60s Max. 1. Turn the selector dial to ON. 2. Place a cup under the cap- 4. Hot water is delivered from 3. Turn the dial to and at the same time, the cappuccino maker. puccino maker. Wait for the READY indica- rotate the steam dial to tor light to turn on. -
Page 11: Descaling
2. Disassemble all the components and rinse them with fresh water. 3. Rinse the lters under running water. 4. Clean the perforated lter with a brush. Make sure the holes are not clogged. If necessary, clean with a pin. 5. Reassemble the components making sure to insert the pin on the plastic disk into the hole in the gasket indicated by the arrow. -
Page 12: Troubleshooting
10. TROUBLESHOOTING PROBLEM POSSIBLE CAUSE SOLUTION The grounds are very damp You haven’t added enough ground co ee Add more co ee Ground co ee is not tamped enough Press the ground co ee more No co ee is delivered No water in the tank Fill the tank with water Filter is dirty... - Page 13 PROBLEM POSSIBLE CAUSE SOLUTION The espresso leaks over the edges of the The porta lter is not positioned correctly Put the porta lter in place and lock it lter (turning it counterclockwise as far as it will go) The rim of the porta lter is encrusted Remove excessive co ee grounds and with co ee grounds clean the grid through which water pas-...
-
Page 14: Instructions Relatives Au Cordon Court
CONTENUS INSTRUCTIONS RELATIVES AU CORDON COURT .. 14 MESURES DE PROTECTION IMPORTANTES ..15 1. DESCRIPTION DE L’APPAREIL ....16 2. DESCRIPTION DU PANNEAU DE COMMANDE 17 3. DESCRIPTION DES ACCESSOIRES ....17 4. PREMIÈRE UTILISATION ......18 5. FAIRE DU CAFÉ EXPRESSO ......19 5.1 Astuces pour un café... -
Page 15: Mesures De Protection Importantes
MESURES DE PROTECTION IMPORTANTES Lors de l'utilisation d'appareils électriques, des précautions de sécurité de base doivent toujours être suivies, notamment les suivantes : • Lire toutes les instructions. • Ne pas toucher les surfaces chaudes. Utiliser les poignées et les boutons. •... -
Page 16: Description De L'appareil
1. DESCRIPTION DE L’APPAREIL A1. Couvercle A8. Machine à cappuccino A2. Réservoir d'eau amovible A9. Buse de machine à cappuccino A3. Porte-accessoires ( ltres à café) A10. Boîtier du bac d'égouttement A4. Étagère à tasses A11. Bac d’ é gouttement A5. -
Page 17: Description Du Panneau De Commande
2. DESCRIPTION DU PANNEAU DE COMMANDE B1. Fonction vapeur B5. Molette de sélection B2. Machine éteinte OFF B6. Veilleuse activée ON B3. Machine en marche ON B7. Veilleuse PRÊTE B4. Distribution Café/Eau chaude 3. DESCRIPTION DES ACCESSOIRES C1. Porte- ltre C2. -
Page 18: Première Utilisation
4. PREMIÈRE UTILISATION 1. Ouvrir le couvercle. 2. Enlever le réservoir 3. Remplir le réservoir d'eau 4. Insérer le réservoir d'eau d’ e au. jusqu'au niveau maximum. dans son logement. 5. Pousser le réservoir d’ e au 6. Fermer le couvercle. 7. -
Page 19: Faire Du Café Expresso
4. PREMIÈRE UTILISATION STOP Répéter Opérations 1 à 6 & 11 à 14 13. Remettre le cadran va- 14. Vider le récipient et le 15. Procéder à un deuxième 16. Retirer le porte- ltre. peur sur 0 et le cadran remettre sous les buses rinçage. -
Page 20: Astuces Pour Un Café Plus Chaud
5. FAIRE UN CAFÉ EXPRESSO 5. Fixer le porte- ltre à l'ap- toujours aussi loin que 6. Placer la ou les tasses sous 7. Attendre que le voyant pareil et le tourner dans le possible). les buses du porte- ltre. PRÊT s'allume. -
Page 21: Faire Un Cappuccino
6. FAIRE UN CAPPUCCINO 5°C Lait 3.38 .oz / 100 ml 1. Préparer le café expresso 2. Tourner le sélecteur sur 3. Remplir un pichet d'en- 4. Placer le pichet sous la buse comme décrit dans les sec- et attendre que le viron 3,38 . -
Page 22: Eau Chaude
7. EAU CHAUDE 60s Max. 3. Tournez le sélecteur rotatif 1. Tourner le sélecteur rotatif sur 2. Placer une tasse sous la 4. De l'eau chaude est dis- et simultané- ON. Attendre que le voyant tribuée de la buse à buse à... -
Page 23: Détartrage
2. Démonter tous les composants et les rincer à l'eau claire. 3. Rincer les ltres à l'eau courante. 4. Nettoyer le ltre perforé avec une brosse. S’assurer que les ori ces ne sont pas engorgés. Si nécessaire, nettoyer avec une épingle. 5. -
Page 24: Dépannage
10. DÉPANNAGE PROBLÈME CAUSE POSSIBLE SOLUTION Le marc de café est très humide Vous n'avez pas ajouté su samment de Ajouter plus de café café moulu Le café moulu n’ e st pas su samment Appuyez plus sur le café moulu tassé... - Page 25 PROBLÈME CAUSE POSSIBLE SOLUTION Le réservoir d'eau fuit lorsqu'il est tran- La valve au fond du réservoir est sale ou Nettoyer le réservoir d'eau sporté défectueuse La valve est bloquée par du calcaire Détartrer la machine selon les in- structions du manuel d'utilisation L'expresso fuit sur les bords du ltre Le porte- ltre n'est pas positionné...
-
Page 26: Instrucciones Cable Corto
ÍNDICE INSTRUCCIONES CABLE CORTO ......26 ADVERTENCIAS DE SEGURIDAD ......27 1. DESCRIPCIÓN DEL APARATO ...... 28 2. DESCRIPCIÓN DEL PANEL DE MANDOS ..29 3. DESCRIPCIÓN DE LOS ACCESORIOS ..... 29 4. PRIMER USO ..........30 5. PREPARAR CAFÉ ESPRESSO ...... 31 5.1 Consejos para un café... -
Page 27: Advertencias De Seguridad
ADVERTENCIAS DE SEGURIDAD Cuando se usan electrodomésticos, deben cumplirse algunas precauciones básicas de seguridad, incluidas las siguientes: • Lea todas las instrucciones. • No toque las super cies calientes. Use asas o pomos. • Para protegerse de fuego, descargas eléctricas y lesiones personales, no sumerja el cable, enchufe o apa- rato en agua o cualquier otro líquido. -
Page 28: Descripción Del Aparato
1. DESCRIPCIÓN DEL APARATO A1. Tapadera A8. Capuchinador A2. Depósito de agua extraíble A9. Boquilla capuchinador A3. Soporte para accesorios ( ltros de café) A10. Soporte bandeja de goteo A4. Bandeja apoya tazas A11. Bandeja de goteo A5. Perilla de suministro agua caliente/vapor A12. -
Page 29: Descripción Del Panel De Mandos
2. DESCRIPCIÓN DEL PANEL DE MANDOS B1. Función vapor B5. Mando selector B2. Aparato APAGADO B6. Indicador luminoso ENCENDIDO B3. Aparato ENCENDIDO B7. Indicador luminoso READY (LISTO) B4. Suministro agua caliente/café 3. DESCRIPCIÓN DE LOS ACCESORIOS C1. Porta ltro C2. Medidor/prensador ¡Atención! C3. -
Page 30: Primer Uso
4. PRIMER USO 1. Abra la tapadera. 2. Retire el depósito de 3. Llene el depósito de agua 4. Introduzca el depósito agua. hasta el nivel máximo. de agua en su soporte. 5. Empuje hacia abajo el de- 6. Cierre la tapadera. 7. -
Page 31: Preparar Café Espresso
4. PRIMER USO STOP Repetir pasos de 1 a 6 11 a 14 13. Gire el mando de vapor 14. Vacíe el recipiente y colóq- 15. Proceda con un segundo 16. Retire el porta ltro. atrás a 0 y el mando se- uelo bajo las boquillas enjuague. -
Page 32: Consejos Para Un Café Más Caliente
5. PREPARAR CAFÉ ESPRESSO 5. Enganche el porta ltro en pre girarlo hasta llegar al 6. Coloque la taza o tazas 7. Espere a que se encienda el aparato y gire en sentido tope). bajo las boquillas del el indicador luminoso antihorario (procure siem- READY (LISTO). -
Page 33: Preparar Capuchino
6. PREPARAR CAPUCHINO 5°C Leche 3.38 .oz / 100ml 1. Prepare café espresso según 3. Llene una jarra con unos 4. Coloque la jarra bajo el 2. Gire el selector a y es- se describe en las secciones 3.38 .oz. de leche por capuchinador. -
Page 34: Agua Caliente
7. AGUA CALIENTE 60s Max. 1. Gire el mando selector a 2. Coloque una taza bajo el 4. El capuchinador suministra 3. Gire el selector a ENCENDIDO. Espere a que y, a la vez, gire el mando agua caliente. capuchinador. se encienda el indicador vapor a luminoso READY LISTO . -
Page 35: Descalcificación
2. Desmonte todos los componentes y enjuáguelos con agua fresca. 3. Enjuague los ltros bajo agua corriente. 4. Limpie los ltros perforados con un pincel. Asegúrese de que los ori cios no están atascados. De ser necesario, límpielos con un al ler. 5. -
Page 36: Solución De Problemas
10. SOLUCIÓN DE PROBLEMAS PROBLEMA CAUSA POSIBLE SOLUCIÓN Los posos de café están muy húmedos No se ha añadido su ciente café molido Añadir más café No sale café No hay agua en el depósito Llene el depósito con agua El ltro está... - Page 37 PROBLEMA CAUSA POSIBLE SOLUCIÓN El depósito de agua pierde agua cuando La válvula en el fondo del depósito está Limpie el depósito de agua se transporta sucia o defectuosa La válvula está atascada por la cal Efectúe la descalci cación de acuerdo con las instrucciones incluidas en el manual de usuario El espresso gotea por el borde del ltro...
- Page 38 De’Longhi Appliances via Seitz, 47 31100 Treviso Italia www.delonghi.com...
Need help?
Do you have a question about the EC260 and is the answer not in the manual?
Questions and answers
Filter stuck in portafilter - how to remove????