Table of Contents
Advertisement
Quick Links
+++ DIGITAL
Integrated VIACCESS decoding unit and
PCMCIA interface for two independently
operating CA modules. Receives free-to-air
as well as encoded/scrambled (e.g. VIAC-
CESS, CRYPTOWORKS, SECA, etc.) DVB
programmes via ASTRA and EUTELSAT
satellites.
+++ DIGITAL
Get user manuals:
See SafeManuals.com
+++ DIGITAL
+++ DIGITAL
TechniBox
VIACAM
Instruction Manual
+++ DIGITAL
+++ DIGITAL
+++ DIGITAL
+++ DIGITAL
+++ DIGITAL
+++ DIGITAL
+++
+++
Advertisement
Table of Contents

Related Manuals for TechniSat TechniBox VIACAM


Summary of Contents for TechniSat TechniBox VIACAM
- Page 1 +++ DIGITAL +++ DIGITAL +++ DIGITAL +++ DIGITAL +++ DIGITAL TechniBox VIACAM Instruction Manual Integrated VIACCESS decoding unit and PCMCIA interface for two independently operating CA modules. Receives free-to-air as well as encoded/scrambled (e.g. VIAC- CESS, CRYPTOWORKS, SECA, etc.) DVB programmes via ASTRA and EUTELSAT satellites.
- Page 2 Remote control On/standby mode Sound on/off TV / Sat mode Numeric keypad Programme + Programme - Language selection Delete (red) Back Transponder information (green) Arrow up Programme info information (blue) Volume - Arrow left TV/radio mode Volume + Arrow right Menu on/off Arrow down Programme list on/off...
-
Page 3: Table Of Contents
Contents 4.1 Mains connection ........9 4.2 External unit . - Page 4 6.13.7 EPG functions ........24 6.13.7.1 EPG information .
- Page 5 Get user manuals: See SafeManuals.com...
- Page 6 Please read this first > Before connecting the receiver, first check that you have received all necessary parts. The following are included: 1 receiver 1 mains cable 1 remote control unit 1 instruction manual 1 guarantee card 2 batteries (1.5V size AAA) >...
- Page 7 3 Safety Advice For your own safety, you should read the safety instructions carefully before switching on your new receiver for the first time. The manufacturer can accept no responsibility for damage caused by inappropriate handling, or by ignoring the safety advice. >...
- Page 8 Get user manuals: See SafeManuals.com...
-
Page 9: Mains Connection
4 Connections The references in bold type - a b c etc. refer to the diagram on page 8. 4.1 Mains connection The receiver should only be connected to the mains supply after all connections with other components and equipment have been made. This helps to eliminate the likelihood of dama- ge to the receiver or other components. -
Page 10: Adjusting The Uhf Output Channel
different transmission channel within the receiver's range of 21 to 61. 4.4 Setting the UHF Output Channel The procedure is as follows: Use the Menu key to select the Main Menu > Now select the entry Settings, marking it in blue by using the up/down arrow keys >... -
Page 11: Connecting A Video Cassette Recorder (Vcr)
> Once you have found a UHF channel with optimal quality, please remember to enter it into the memory of your TV set. You can now select further settings in the Audio/Video Settings menu, or you can press the Menu key to return to normal operation. The selected setting will be auto- matically stored in memory when you exit the menu. -
Page 12: Serial/Parallel Connection/Interface
4.8 Serial Interface RS 232 The RS 232 interface can be used to update the operating software, and in order to pre-pro- gramme the receiver via a PC. 4.9 USB Interface The USB interface can be used to exchange data between a PC and the receiver. 5 Installation Now that you have made all the necessary connections to and from your receiver, and have switched it on, you may, if necessary resp. -
Page 13: Basic Settings
5.2 Basic Settings In order to gain the optimal benefit from your DVB receiver, you can still set several individu- al preferences. Press the Menu key to call up the Main Menu display. > Use the up/down arrow keys to mark the entry Settings. >... -
Page 14: Audio And Video Settings
Country This function provides an automatic change-over between standard (winter) time and day- light savings (summer) time. Mark the entry Country to select your home country, and con- firm by pressing the OK key. As this information is currently not broadcast by all programme providers, you should initially select None for this setting. -
Page 15: Adjusting To Conform To External Unit
Picture format TV Set: Use the OK key to select either the 4:3(standard) or 16:9(widescreen) picture format, in accordance with the features of your TV set. This function automatically adjusts the picture format to the specifications of your TV set. Sound (Audio) Use the OK key to select your preferred language. - Page 16 Now use the up/down arrow keys to select the entry LNB Settings > Confirm by pressing the OK key. > The menu LNB Settings will be displayed. The following selections can be made in this sub-menu: 5.4.1 Switching DiSEqC on or off DiSEqC (Digital Satellite Equipment Control) is a digital signal that can control the functions of DiSEqC-compatible components via the antenna connection.
- Page 17 Confirm by pressing the OK key. > The highlighted entry will now be inserted in the menu >Settings>LNB at the pre- viously selected position In this way, you can continue to customise the Menu>Settings>LNB until all the information in this menu correspond to those of your receiving unit. For those switiching criteria you do not require you should select the setting No Satellite.
-
Page 18: On/Off Switch
Polarisation Use the OK key to enter the appropriate polarisation plane (horizontal or vertical) on which the selected programme is broadcast. Symbol rate The symbol rate is an indication of the volume of data being transmitted per second. A typi- cal rate might be 27000, indicating that 27000 symbols per second are being transmitted. -
Page 19: Infobox
When entering programme numbers consisting of more than one digit, you have about 3 seconds after pressing one digit to enter the next digit, in order to complete the entry in such a way that the receiver recognises all digits as part of one selection. If you are entering a programme number with only one or two digits, you can speed up the selection process by pressing OK after entering the last digit. -
Page 20: Volume Adjustment
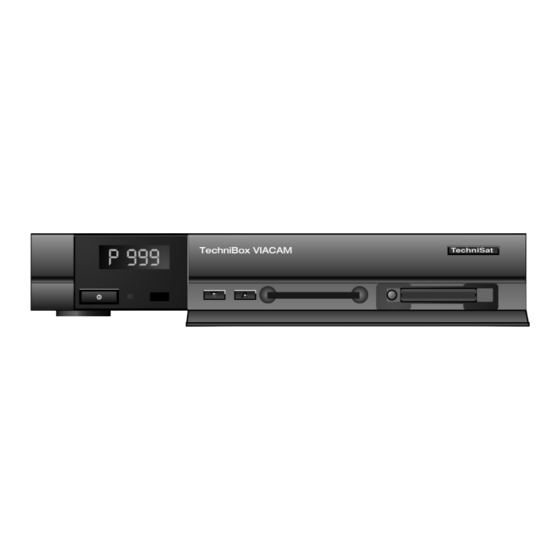
> Open the cover on the right side of the front panel of the receiver, by opening the cover downwards as indicated. > Either insert the VIACCESS card into the slot of the integrated card reader, > Insert a CA module in one of the two slots provided. >... -
Page 21: Tv/Radio Switching
grammes, the language and other sound settings revert to the default settings, resp. your pre-selected settings. If you wish to continue receiving sound in AC3 format, you will have to repeat the selection procedure as described above. 6.6 TV/Radio selection Your receiver has been pre-programmed with a selection of radio as well as TV programmes. -
Page 22: Display Sub-Titles
6.12 Sub-titles The symbol displayed in the on-screen information window will indicate when sub-titles are being broadcast. If you have enabled the Sub-title function as per Point 5.3, these will be displayed automatically if they are being broadcast in the language selected (Point 5.3). If you have not enabled the Sub-title function, or if sub-titles are only being provided in other languages, you can also enable their display manually as follows: Press the red function key. -
Page 23: Table Of Current Contents
6.13.3 Viewing the Electronic Programme Guide > Switch on your receiver as well as your TV set. Press the EPG key on the remote control of your receiver. > The Electronic Programme Guide will now be displayed on the screen. The list will include the programmes preprogrammed at the factory, or those selected by you. -
Page 24: Preview
> The EPG functions as per Point 6.13.3 are now available Press the right arrow key to view the table Preview (Point 6.13.6) > Press the Back key to return to the previous table Now > Press the TV/Radio key to return to normal signal reception. >... -
Page 25: Pre-Selecting A Programme
6.13.7.2 Preselect Programme Mark the desired programme by using the arrow keys. > Pressing the OK key will automatically preselect the programme, and it can be > viewed as soon as the programme begins broadcasting. Press the Back key to return to the previous table. >... -
Page 26: Searching The Epg
Use the up/down arrow keys to select the required programme resp. time. > If available, the left/right arrow keys can be used to display the programme con- > tents for the next few days. Displaying EPG Summary of other Channels While the menu EPG Summary is being displayed, press the green function key. - Page 27 Now, if required, use the numeric key pad to enter a date for the EPG search. > By pressing the right arrow key you can move the marker to the "from, to" > columns, where you can also enter the time period by means of the numeric key pad.
-
Page 28: Manual Programming Of Timer
The screen display will show "No Entries Found" Press the Back key to return to the column Programme Types, and continue > your search for other types of programmes. 6.13.7.6 Programming the Timer Apart from using the EPG to programme the timer, you can also do this manually: Press the EPG key >... - Page 29 In order to ensure a smooth operation, there should be a gap of at least one minute between the end of one timer period and the start of the next timer period! Switching Timer on - Repeat Use the right arrow key to mark the column Rep. >...
-
Page 30: Adding/Deleting Programmes
Use the up/down arrow keys to move the marker by one line at a time. > Use the left/right arrow keys to move backwards or forwards through the list one > page at a time. When you have completed your programming session, press the yellow function >... - Page 31 Use the up/down arrow keys to mark the entry Select. > Confirm with the OK key. > The sub-menu >Programmes>Select will be displayed. This table lists the various bouquets with their respective channels. Existing channels will be shown in black type, newly found channels will be displayed in red type. Channels that also appear in the User List are marked with a red cross.
-
Page 32: Sorting Programmes
New channels added to the User List will be positioned at the end of the list, and can then be sorted to any desired position. 7.2 Sorting Channels In order to sort the User List of channels according to your own preferences, proceed as fol- lows: Use the Menu key to display the Main Menu >... -
Page 33: Changing The Pin
7.4 Changing the PIN The PIN is set at the factory to 0000. In order to activate the programme blocking function, you must still enter your own personal PIN in the place of the factory setting. Please Note! Be sure not to forget your PIN number. If you do ever forget it, please contact your retailer. - Page 34 Use the up/down arrow keys to mark the entry EPG. > Press the OK key to display the sub-menu EPG. > You may now proceed to use the arrow keys in order to select individual channels. > Press the OK key to add a channel to the Electronic Programme Guide (cross appears in display) or delete a channel from the guide (cross disappears from dis- play).
-
Page 35: Unblocking Reception Of Specific Programmes
7.6 Unblocking the parental lock for individual channels Enter your PIN in order to get to the appropriate menu, then proceed as described in Point 7.3, removing individual red crosses by pressing the OK key. In this manner, individu- al channels can be excluded from the parental lock control. 7.7 Programme Search As mentioned previously, your receiver has been pre-programmed to receive signals from the ASTRA and EUTELSAT satellites. -
Page 36: All Programmes
Use the arrow keys to select the search mode to be used. > Press the OK key to display the relevant sub-menu. > 7.7.1 All When this search mode is activated, all satellites and transponders available in the system will be scanned. At the end, new programmes will be displayed in yellow type in the pro- gramme/channel list. -
Page 37: Programme
Satellite In this line you must select the satellite corresponding to the selected transponder. Use the up/down arrow keys to select the Satellite option. > Press OK to display a table listing four satellites. > Use the up/down arrow keys to mark the selected satellite. >... -
Page 38: Conditional Access
This menu differs from the Transponder menu only in terms of the list item Service ID. > Proceed as described in Point 7.7.3 above. Use the up/down arrow keys to mark the entry Service ID. > Use the numeric key pad to enter the Service ID number. >... - Page 39 Use the up/down arrow keys to mark the entry Factory Setting > Confirm with the OK key. > The sub-menu >Factory Setting will be displayed. Activate Factory Setting This function will delete all personal settings, and will restore all default settings as program- med in the factory.
- Page 40 Confirm to yes by pressing the OK key. > Now confirm the notice displayed by again pressing the OK key. > Press the Menu key to return to normal operation. > In order to load the updated software overnight, the receiver must be left in the Standby mode.
- Page 41 11 GHz range from 10.70 GHz to 11.70 GHz, 12 GHz range from 11.70 to 12.75 GHz b) Receiver - Intermediate Frequency or 1st Intermediate Frequency 950 to 2150 MHz Unit of frequency Name Oscillations per second 1 Hz 1 Hertz 1 kHz 1 Kilohertz 1.000...
- Page 42 Satellite Receiver: The signals received and modulated by the LNB cannot be processed by the TV set. The receiver alters the frequency of these signals so that usable audio and video signals (AV) are generated at its outputs, which are transmitted to the TV set. SCART: Type of connector used in conjunction with TV sets, video players, satellite receivers and other electronic equipment in order to transmit audio and video signals (AV).
- Page 43 Letterbox filtering for 4:3 TV sets Audio decoding: Audio compression MPEG-1 and MPEG-2 Layer I and II Audio mode Dual (main/sub), stereo Sampling frequencies 32 kHz, 44.1 kHz, 48 kHz, 16 kHz, 22.05 kHz, 24 kHz Audio parameters: Analogue output: Output level L/R 0.5 V RMS (nominal) Output impedance...
- Page 44 Weight 1.6 kg Your receiver bears the CE control label, and complies with all relevant EU standards. Subject to change and printing errors. Correct at 08/00 TechniSat and VIACAM are registered trademarks of TechniSat Digital GmbH P.O.Box 560 D-54541 Daun,Germany www.technisat.de...
- Page 45 10 Troubleshooting Guide Problem Possible Cause Solution No picture, no sound, No power Check power plug and cable Display off Check status of power switch on back panel No picture, no sound, Display Short circuit in LNB connection Switch receiver off, repair short, switch receiver on again Defective or missing Cable Check all cable connections...
- Page 46 Summary for everyday use Switching on and off Switch the receiver on by pressing the On/Standby key on the front panel of the > receiver, or on the remote control unit > Press the key again, either on the front panel of the receiver or on the remote control, to switch the receiver off.
Need help?
Do you have a question about the TechniBox VIACAM and is the answer not in the manual?
Questions and answers