Table of Contents
Advertisement
Advertisement
Table of Contents

Related Manuals for ARCCAPTAIN ARC160


Summary of Contents for ARCCAPTAIN ARC160
- Page 1 Inverter Welding Machine ARC160/ARC200 User Manual www.arccaptain.com...
- Page 2 Dear Valued Customer, Thank you very much for being our valued customer. ARCCAPTAIN welder was built by high quality components, every single unit machine was passed multiple industry leading laboratory tests to provide a great welding experience and performance. For your safety, please read and understand this manual carefully before using this product.
-
Page 3: Table Of Contents
TABLE OF CONTENTS 1. SAFETY ......................1 1.1 Working Environment ................2 1.2 Safety Tips ....................2 2. PRODUCT OVERVIEW .................3 2.1 Features ....................4 2.2 Specifications ..................4 2.3 Package List ................... 4 3. TECHNICAL PARAMETERS ................5 4. OPERATION AND DESCRIPTION ...............6 5. -
Page 4: Safety
1. SAFETY Welding may result in injury to you and others, so please implement protection during welding. See more details in Safety Protection Guidebook for Operator which meets the requirements to manufactures on accident prevention. Operate this equipment by trained professional only! ·Use welding labor protection supplies with approval of safety supervisory authority! ·Operators must be the special workers with valid work permits of... -
Page 5: Working Environment
Hot workpiece can cause severe scald. ·Do not touch hot workpiece with bare hands. ·Cool the welding torch for a while after continuously working. Excessive noise does great harm to people’s hearing. ·Wear ear covers or other hearing protectors when welding. ·Give warning to onlooker that noise may be potentially hazardous to hearing. -
Page 6: Product Overview
Therefore, please note: 1) Ventilation This industrial welder can create powerful welding current that has strict cooling requirements that cannot be met with natural ventilation. Therefore two internal fans are very important in enabling the machine to work steadily with effective cooling. The operator should make sure that the louvers be uncovered and unblocked. -
Page 7: Features
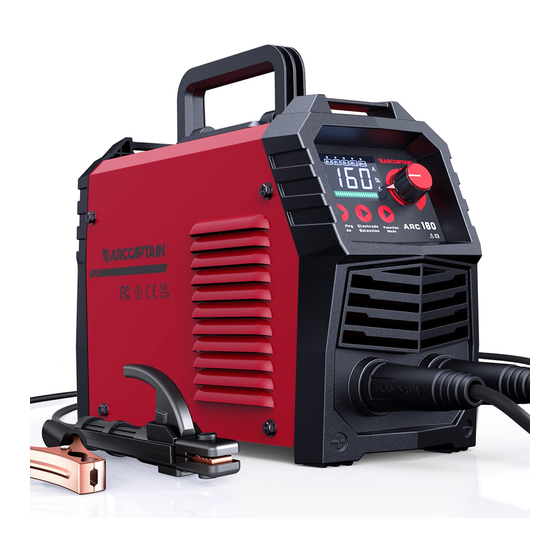
LED Meter display Package 1X MMA Welder 1X 10ft Electrode Holder 1X 10ft Earth Clamp 1X Conversion plug 1X Wire Brush 1X Shoulder Strap 1X User Manual Arc160 ARC200 Pic 2... -
Page 8: Technical Parameters
3. TECHNICAL PARAMETERS Model TECHNICAL Units PARAMETERS ARC160 ARC200 AC110V±15% AC220V±15% AC110V±15% AC220V±15% Rated input voltage 50/60HZ 50/60HZ 50/60HZ 50/60HZ Rated input power 20-160 20-160 20-200 20-200 Welding current range(MMA) 20.8-26.4 20.8-26.4 20.8-28 20.8-28 Welding current 20-160 20-160 20-200 20-200 range(TIG) -
Page 9: Operation And Description
4. OPERATION AND DESCRIPTION 1. Current knob: Welding current, arc-force current and hot start arc igniting current can be adjusted from low to high by rotating the knob clockwise. : It is MMA mode where electrode diameter cannot be adjusted but arc-force and hot start can be adjusted with indicator on. - Page 10 by pressing this button: indicator is on under lift TIG argon arc welding; “SYN”indicator is on under electrode diameter selection mode; indicator is on under MMA mode. 12 , Electrode Selection: When“SYN” indicator is on, electrode diameter can be selected by pressing this button. 13 ,...
-
Page 11: Installation And Operation
Press the key combination to display the code table Digital tube display code Code meaning -0/ -1 -0:Represents no VRD; -1:Representative has VRD -0/ -1 -0:Represents no anti-stick; -1:Representative has anti-stick 5. INSTALLATION AND OPERATION Note: Please install the machine strictly according to the following steps. Turn off the power supply switch before any electric connection operation. - Page 12 5.2 Strap Installation Step 1: Separate the velcro. Step 2: Pull out one side through the strap hole on the front panel with hook side of the velcro Step 3: Pull out it to well stick hook side of the velcro to loop side and across the nylon buckle.
-
Page 13: Operation
5.3 Operation After being installed according to the above method, and the power switch being switched on, the machine is started with the power LED on and the fan working. Pay attention to the polarity when connecting. There are two connection modes for DC welder in general, one of which is straight polarity in which electrode holder is connected to negative pole and workpiece is connected to positive pole, the other is reverse polarity to which is opposite. - Page 14 Common Malfunction Analysis and Solution: Malfunction Causes and Solutions Phenomena Turn on the machine, the power indicator is off, the Check if the power switch is closed. fan doesn't work, and no Make sure there is power for input cable. welding output.
-
Page 15: Maintenance
7. MAINTENANCE The following operation requires sufficient professional knowledge on electric aspect and comprehensive safety knowledge. Operators should be holders of valid qualification certificates which can prove their skills and knowledge. Make sure the input cable of the machine is disconnected from the electricity utility before uncovering the welding machine.
Need help?
Do you have a question about the ARC160 and is the answer not in the manual?
Questions and answers