
Subscribe to Our Youtube Channel
Related Manuals for Danfoss DEVIreg Touch


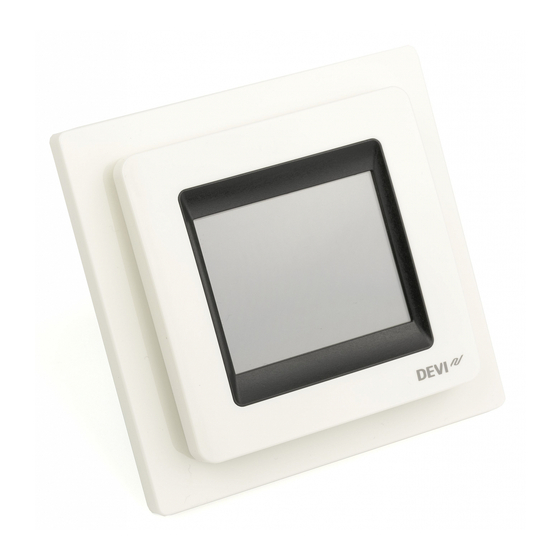
Summary of Contents for Danfoss DEVIreg Touch
- Page 1 Installation Guide DEVIreg™ Touch Electronic Intelligent Timer Thermostat www.DEVI.com...
- Page 2 DEVIreg™ Touch Installation Guide...
-
Page 3: Table Of Contents
DEVIreg™ Touch Table of Contents Introduction � � � � � � � � � � � � � � � � � � � � � � � 3 1.1 Technical Specifications ....4 1.2 Safety Instructions . -
Page 4: Technical Specifications
DEVIreg™ Touch • An installation wizard with room/floor type-specific setup. • Support for multiple frame systems. • Compatible with several 3rd party NTC sensors. • Thermostat settings can be specified before installa- tion and imported to the thermostat using a web-gen- erated code, or copied from a thermostat in a similar installation. - Page 5 DEVIreg™ Touch Sensing units NTC 6.8 kOhm at 25°C NTC 10 kOhm at 25°C NTC 12 kOhm at 25°C NTC 15 kOhm at 25°C (Default) NTC 33 kOhm at 25°C NTC 47 kOhm at 25°C Sensing values: (Default NTC 15 K) 0°C 42 kOhm 20°C...
- Page 6 DEVIreg™ Touch Sensor failure The thermostat has a built-in monitoring monitoring circuit, which will switch off the heating if the sen- sor is disconnected or short- circuited Cable specification 1x4 mm or 2x2,5 mm max. Ball pressure test 75°C temperature Pollution degree 2 (domestic use) Controller type...
-
Page 7: Safety Instructions
DEVIreg™ Touch 1�2 Safety Instructions Make sure the mains supply to the thermostat is turned off before installation. IMPORTANT: When the thermostat is used to control a floor heating element in connection with a wooden floor or similar material, always use a floor sensor and never set the maximum floor temperature to more than 35°C. -
Page 8: Mounting Instructions
DEVIreg™ Touch Mounting Instructions Please observe the following placement guidelines: Place the thermostat at a suitable height on the wall (typically 80-170cm.). The thermostat should not be placed in wet rooms. Place it in an adjacent room. Always place the thermostat according to local regulation on IP classes. - Page 9 DEVIreg™ Touch Note: A floor sensor enables a more accurate temperature control and is recommended in all floor heating applications and mandatory under wooden floors to reduce the risk of over-heating the floor. • Place the floor sensor in a conduit in an appropriate place where it is not exposed to sunlight or draft from door openings.
- Page 10 DEVIreg™ Touch Follow the steps below to mount the thermostat: Open the thermostat: Important: Do NOT press on the display screen when removing the front part. Press your fingers under the side of the front part and pull toward you: Connect the thermostat according to the connection diagram.
- Page 11 DEVIreg™ Touch The screen of the heating cable must be connected to the earth conductor of the power supply cable by using a separate connector. Note: Always install the floor sensor in a conduit in the floor. Mount and reassemble the thermostat. •...
-
Page 12: Settings
DEVIreg™ Touch Initially main supply the thermostat for 15 hours to fully charge the battery. The current time and day is then kept for 24 hours if mains supply is off. All other settings are stored permanently. Settings 3�1 Initial Settings Initial settings must be specified when the unit is activated for the first time: Use the arrows in the... - Page 13 DEVIreg™ Touch Press the hour numbers and use the < and > arrows to set the hour. Press to confirm. Press the minutes numbers and use the < and > arrows to set the minutes. Press to confirm. Press again to go to the SET DATE screen.
- Page 14 DEVIreg™ Touch On the SETUP information screen, press to start. Use the < and > arrows to select whether only a floor sensor or a combination of room and floor sensors should be used. Press confirm. Note: A “room only” option may also be available. For details, see the “Maximum Floor Temperature”...
- Page 15 DEVIreg™ Touch Use the < and > arrows to select the flooring type. Press to confirm. 10. Use the < and > arrows to select the room type. Press to confirm. 11. Use the < and > arrows to select the approximate load of the heating element.
-
Page 16: Forecast
DEVIreg™ Touch 12. Use the < and > arrows to select whether the timer should be activated or not. Press to confirm and end the initial thermostat setup. Skip Step 13. 13. Enter your web-generated code. Then press to end the initial thermostat setup. - Page 17 DEVIreg™ Touch The forecast feature also optimises heating stop when switching from comfort temperature to economy tempera- ture. How to turn the forecast feature on and off� Touch the thermostat display to activate it, then press menu. Press SETTINGS in the bottom right corner of the menu.
-
Page 18: Window Open
DEVIreg™ Touch Press FORECAST. Then press ON to optimise heating start/stop or OFF to simply let the heating start/stop at the specified time. Press to confirm. To return to the normal temperature display, press the back arrow in the upper left corner of the screen until you get to the main menu, then press 3�3 Window Open... -
Page 19: Maximum Floor Temperature
DEVIreg™ Touch Press WINDOW OPEN. Then press ON to temporarily turn off heating in case of a sudden temperature drop in the room or OFF to let the thermostat heat during sudden temperature drops in the room. Press confirm. To return to the normal temperature display, press the back arrow in the upper left corner of the screen until you get to the main menu, then press 3�4... - Page 20 DEVIreg™ Touch Press SETTINGS in the bot- tom right corner of the menu. Then press INSTALLATION and MANUAL SETUP. Press MAX� FLOOR. Then use the < and > arrows to set the allowed maximum floor temperature. Press confirm. To return to the normal temperature display, press the back arrow in the upper left corner of the screen until you get to the main menu, then press Installation Guide...
- Page 21 DEVIreg™ Touch If you break the small plastic seal on the back of the display module, e.g. using a screwdriver, it will be possible to set the maximum floor temperature up to 45°. Furthermore, it will be possible to use only a room sensor.
- Page 22 DEVIreg™ Touch Thermal Examples of Details Approximate resis- flooring setting for tance 25°C [m2K/W] floor tem- perature 0.05 8 mm HDF based > 800 kg/m 28°C laminate 0.10 14 mm beech 650 - 31°C parquet 800 kg/m 0.13 22 mm solid oak >...
-
Page 23: Symbols
DEVIreg™ Touch Symbols The following symbols may appear in the upper left corner of the temperature display: Symbol What it means The thermostat is in manual mode, i.e. the timer function is off. The timer lets you automatically switch between economy and comfort temperatures according to a predefined schedule. -
Page 24: Warranty
All work will be invoiced in full if Danfoss is required to inspect or repair faults that have arisen as a result of any of the above. The DEVIwarranty shall not extend to products which have not been paid in full. - Page 25 DEVIreg™ Touch Installation Guide...
-
Page 26: Disposal Instruction
DEVIreg™ Touch Disposal Instruction Installation Guide... - Page 27 DEVIreg™ Touch Danfoss A/S Nordborgvej 81 6430 Nordborg, Syddanmark Denmark 08091392 & AN420938619179en-010101 Produced by Danfoss © 07/2022...
Need help?
Do you have a question about the DEVIreg Touch and is the answer not in the manual?
Questions and answers