Clearaudio Emotion SE User Manual
Hide thumbs
Also See for Emotion SE:
- User manual (17 pages) ,
- User manual (36 pages) ,
- User manual (32 pages)

Subscribe to Our Youtube Channel
Related Manuals for Clearaudio Emotion SE


Summary of Contents for Clearaudio Emotion SE
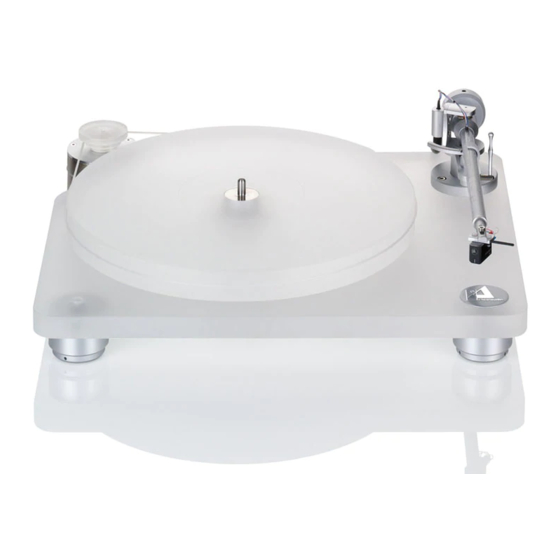
- Page 1 Emotion SE User manual Bedienungsanleitung Pic. similar / Abb. ähnlich © clearaudio electronic GmbH, 2022-11 Made in Germany...
- Page 2 Follow the instructions carefully to avoid any potential damage. Not following our instructions could void your warranty. Emotion SE We wish you a lot of musical enjoyment with your new Clearaudio turntable. Clearaudio electronic GmbH ©...
- Page 3 5. Maintenance Never use agressive cleaning detergent. Do not use dry cloths for cleaning as this generates static electricity. Suitable cleaning and care products from Clearaudio are available from www.analogshop.de or from specialist retailers. The bearing of the turntable platter can be lubricated every 2 years with the oil provided.
- Page 4 Otherwise serious damage can occur. Remove also the pulley from the motor axle to avoid any damage during transport. Clearaudio assumes no liability for any damage that may occur due to incorrect packing. 9. Disposal Do not dispose this product together with other waste.
-
Page 5: Table Of Contents
User manual / Bedienungsanleitung Contents 1. Packing overview ..............6 2. List of components ...............7 - 8 3. Installation and setup ............9 - 16 4. Troubleshooting ..............17 - 18 5. Technical data ..............19 Warranty information ..............38 - 39 Made in Germany Page / Seite 5... -
Page 6: Packing Overview
Motor-unit, motor-base (not shown) top of bearing, belt, pulley, fittings and accessories. If ordered as package: Clearaudio Satisfy Kardan tonearm and/ or Clearaudio pickup 2. layer (middle): Turntable – chassis with integrated lower bearing part 3. layer (bottom): Platter Pic. 1: Packing overview ©... -
Page 7: List Of Components
User manual / Bedienungsanleitung 2. List of components Clearaudio has developed a special and secure turntable packing to prevent your Emotion SE turntable from any transportation damage. Please store this original packing, in case you need to ship the turntable. - Page 8 Warranty card, Clearaudio Quality Certificate and return delivery note 3 pcs. hex wrench Not shown: Optional: Clearaudio MM Cartridge (sizes: 1.5 / 2.5 / 3) Smart Stylus Gauge , only when ordered as package © clearaudio electronic GmbH, 2022-11 Page / Seite 8...
-
Page 9: Installation And Setup
User manual / Bedienungsanleitung 3. Installation and set up Emotion SE The setup and installation of the is done quickly and very easy. Please use the white gloves during this procedure, to avoid scratches. You should consider a safe and clean working area for the installation, as near as possible to the... - Page 10 Adjust the height of the turntable by turning the feet counter wise with the delivered hex wrench (shown in picture 6). Pic. 6: Height adjustment Only if the turntable is proper aligned you will receive the best possible sound. © clearaudio electronic GmbH, 2022-11 Page / Seite 10...
- Page 11 Please follow the instructions according the manual of the cartridge you use. If you are using a Clearaudio Moving Magnet cartridge you can adjust the tracking force or the wiring of the tonearm (about 20 mN), by turning the tonearm`s counter weight on the threaded bolt (backside view of the tonearm).
- Page 12 Smart Stylus Gauge Pic. 8: Use of the If you would like even more professional set up tools, you can also use other tools like the clearaudio Weight Watcher gauge (Art. No. AC094). For more information on that, please contact your specialist dealer or directly Clearaudio www.analogshop.de.
- Page 13 You have to make sure that the upper edge of the cartridge is parallel to the record surface. This adjustment had been set up perfectly by Clearaudio. Only if it is necessary, you can adjust the cartridge position, while carefully screw the small allen screw on the bottom side of the tonearm (Caution: please don’t unscrew the allen screw...
- Page 14 This also depends on the tracking force of the cartridge and the diamond shape. Pic. 12: Correct installation After setting up the cartridge, please tighten the tonearm in its base to fix it in this position. © clearaudio electronic GmbH, 2022-11 Page / Seite 14...
- Page 15 User manual / Bedienungsanleitung 3.2 Adjustment of the Antiskating alignment of the antiskating tracking force posiion of the antiskating screw minimal antiskating 10 - 15 mN see illustration 1 medium antiskating 15 - 20 mN see illustration 2 maximum antiskating 20 mN and more see illustration 3 Illustration 1 :...
- Page 16 You will find the main switch on the motor (see picture): I = ON O = OFF Pic. 15: Main switch Emotion SE We wish you a lot of pleasure with your new turntable. Your Clearaudio Team © clearaudio electronic GmbH, 2022-11 Page / Seite 16...
-
Page 17: Troubleshooting
Is the stylus damaged? Check the stylus and have the cartridge checked by a specialist if necessary. Clean the record / or the cartridge. Clearaudio Is the record or the stylus dirty or damaged? offers many helpful accessories for care and cleaning. - Page 18 User manual / Bedienungsanleitung Clean the record / or the cartridge. Clearaudio Is the record or the stylus dirty or damaged? offers many helpful accessories for care and cleaning. In the event of damage, we recommend an assessment by a specialist and, if necessary, Needle bounces an exchange.
-
Page 19: Technical Data
Approx. 15.75 x 12.99 x 3.94 inches (without tonearm) Manufacturer’s warranty: 3 years* * Provided that the warranty card is correctly completed and returned to Clearaudio, or your product is registered online at https://clearaudio.de/en/service/registration.php, within 14 days of purchase. Made in Germany... - Page 20 Laufwerkes nutzen zu können, lesen Sie bitte diese Bedienungsanleitung aufmerksam durch. Alle Hinweise dienen dazu, Ihnen viele Jahre ungetrübten Musikgenuss zu bereiten und Fehlbedienungen zu verhindern. Wir bedanken uns für Ihr Vertrauen und wünschen Ihnen viel Freude mit Ihrem neuen clearaudio Emotion SE Laufwerk.
- Page 21 Handlift von der der Platte gehoben und der Plattenspieler manuell abgeschaltet werden. Nicht für Kinder geeignet! Lieferumfang kann verschluckbare Kleinteile enthalten. 2. Bestimmungsgemäßer Gebrauch Emotion SE ist ein Plattenspieler, zur Wiedergabe von Schallplatten. Emotion SE Der bestimmungsgemäße Gebrauch des Laufwerks ist die Verwendung in Übereinstimmung mit den in der...
- Page 22 Entfernen Sie auch unbedingt das Antriebsrad von der Achse des Motors, da sich diese sonst durch Krafteinwirkung beim Transport verbiegen könnte. Clearaudio kann für Schäden, die beim Transport entstehen und die durch falsches Einpacken verursacht wurden, keine Haftung übernehmen. 9. Entsorgung Dieses Produkt darf nicht zusammen mit Restmüll entsorgt werden.
- Page 23 User manual / Bedienungsanleitung Inhaltsverzeichnis 1. Verpackungsübersicht ...........24 2. Lieferumfang ..............25 - 26 3. Aufbau und Inbetriebnahme .........27 - 34 4. Fehlerbehebung .............35 - 36 5. Technische Daten ............37 Garantie Informationen ............38 - 39 Made in Germany Page / Seite 23...
-
Page 24: Verpackungsübersicht
User manual / Bedienungsanleitung 1. Verpackungsübersicht 1. Etage (Karton oben): Motoreinheit, Motorbasis (nicht abgebildet) Lageroberteil, Antriebspulley, Zubehör Sofern Emotion SE im Paket bestellt: clearaudio Satisfy Kardan (dw) Tonarm und/oder clearaudio Tonabnehmer 2. Etage (Karton mittig): Plattenspielerkörper mit Lagerunterteil 3. Etage (Karton unten): Plattenteller Abb. -
Page 25: Lieferumfang
User manual / Bedienungsanleitung 2. Lieferumfang Emotion SE Das clearaudio Laufwerk verlässt unsere Fertigung in einer besonders sicheren und eigens für dieses Laufwerk konzipierten Verpackung. Bewahren Sie diese Verpackung auf, um jederzeit einen sicheren Transport Ihres Gerätes zu gewährleisten. Bitte kontrollieren Sie anhand der unten aufgeführten Liste den Lieferumfang Ihres neu erworbenen... - Page 26 2x Antriebsriemen (2 x 292 mm) o. Abb.: Garantiekarte, Qualitätskarte, Rücklieferschein 3x Innensechskantschlüssel Optional und o. Abb.: Größe: 1,5 / 2,5 / 3 Einstellschablone zur Tonarm/ Tonabnehmerjustage und Kippelwaage (Optional im Paket mit Tonabnehmer) © clearaudio electronic GmbH, 2022-11 Page / Seite 26...
-
Page 27: Aufbau Und Inbetriebnahme
3. Aufbau und Inbetriebnahme Der Aufbau des Laufwerks ist mit wenigen Handgriffen zu bewerkstelligen. Benutzen Sie bitte zum Aufbau unbedingt die mitgelieferten weißen Handschuhe, um Kratzer zu vermeiden. Emotion SE Für den Zusammenbau des benötigen Sie eine saubere und staubfreie Arbeitsfläche. - Page 28 Höhenverstellung der Laufwerksfüsse: Ab Werk werden alle Laufwerksfüsse auf die Position „Null“ voreingestellt. Drehen Sie nun das untere Teil des Fußes im Uhrzeigersinn, um die Höhe zu verstellen (Abb. 6). Abb. 6: Höhenverstellung © clearaudio electronic GmbH, 2022-11 Page / Seite 28...
- Page 29 User manual / Bedienungsanleitung Die folgenden Einstellungen beziehen sich auf die Montage eines Emotion SE Pakets (mit clearaudio Tonarm und Tonabnehmer). Falls Sie Fabrikate anderer Hersteller montieren wollen, nehmen Sie bitte die jeweilige Bedienungsanleitung zur Hand. 3.1 Tonarmjustage Satisfy Kardan...
- Page 30 Moving Magnet Tonabnehmer verwenden, können Sie die Auflagekraft auf ca. 20mN (2,0 gr.) einstellen, indem Sie das Gegengewicht des Tonarmes vorsichtig auf den Gewindegängen verdrehen. Optional erhalten Sie im Emotion SE zur leichteren Einstellung eine clearaudio Kippelwaage. Diese Position der Nadel entspricht einer Auflagekraft von 20 mN (2.0g).
- Page 31 User manual / Bedienungsanleitung Zu den nachfolgenden Einstellungen legen Sie eine Schallplatte Ihrer Wahl auf den Plattenteller und entfernen Sie den Nadelschutz des Tonabnehmers. Wenn Sie den Tonabnehmer etwa auf Plattenmitte absenken, sollte seitlich betrachtet, die Oberkante des Tonabnehmerkörpers parallel zur Schallplattenoberfläche verlaufen. Als Orientierung kann hier auch das Tonarmrohr dienen.
- Page 32 Fixieren Sie anschließend alle von den Einstellungen betroffenen Schrauben etwas kräftiger. Abb. 12: Korrekte Position des Abtastdiamanten Nach Abschluss der Höheneinstellung können Sie durch festes Anschrauben dieser beiden Justierschrauben den Tonarm endgültig in seiner Position fixieren. © clearaudio electronic GmbH, 2022-11 Page / Seite 32...
- Page 33 User manual / Bedienungsanleitung 3.2 Antiskating Einstellung Einstellung des Antiskating: Auflagekraft Position der Antiskatingschraube Minimales Antiskating 10 - 15 mN siehe Abbildung 1 Mittleres Antiskating 15 - 20 mN siehe Abbildung 2 Maximales Antiskating 20 mN und größer siehe Abbildung 3 Abbildung 1: Abbildung 2: Abbildung 3:...
- Page 34 Benutzung ist, schalten Sie das Gerät am Hauptschalter O = OFF komplett aus. Der Hauptschalter befindet sich am Motorgehäuse (siehe Bild links). Abb. 15: Hauptschalter Emotion SE clearaudio wünscht Ihnen viel Vergnügen mit Ihrem neuen Plattenspieler! © clearaudio electronic GmbH, 2022-11 Page / Seite 34...
-
Page 35: Fehlerbehebung
Tonabnehmer ggfs. einem Spezialisten überprüfen. Ist die Schallplatte oder der Reinigen Schallplatte bzw. Nadelträger verschmutzt oder Tonabnehmer. Clearaudio bietet viele hilfreiche beschädigt? Zubehörprodukte zur Pflege und Reinigung an. Bei Beschädigung empfehlen wir eine Begutachtung durch einen Spezialisten ggfs. einen Austausch. - Page 36 User manual / Bedienungsanleitung Ist die Schallplatte oder der Reinigen Schallplatte bzw. Tonabnehmer. Clearaudio bietet viele hilfreiche Nadelträger verschmutzt oder beschädigt? Zubehörprodukte zur Pflege und Reinigung an. Bei Beschädigung empfehlen wir eine Begutachtung durch einen Spezialisten ggfs. einen Austausch. Nadel hüpft oder Ist eine zu hohe Auflagekraft Justieren Sie die Auflagekraft.
-
Page 37: Technische Daten
Abmessungen (B/T/H): ca. 400 x 330 x 100 mm (ohne Tonarm) Herstellergarantie: 3 Jahre* * Nur bei korrekt ausgefüllter und eingesandter Garantiekarte an clearaudio oder online registrierter Garantie innerhalb von 14 Tagen (https://clearaudio.de/de/service/registration.php). Made in Germany Page / Seite 37... -
Page 38: Warranty Information
The full, extended warranty period for the turntable is 3 years. To receive this full Clearaudio warranty, you must either complete and return the relevant section of the warranty registration card to Clearaudio, or register your product online at https://clearaudio.de/en/service/registration.php, within 14 days of purchase. - Page 39 ESPAÑOL GARANTIA Para obtener información acerca de la garantia póngase en contacto con su distribuidor Clearaudio. GUARDE SU RECIBO DE COMPRA Su recibo de compra es su prueba permanente de haber adquirido un aparato de valor, Este recibo deberá guardarlo en un lugar seguro y utilizarlo como referencia cuando tenga que hacer uso del seguro o se ponga en contacto con Clearaudio.
- Page 40 Handmade in Germany Clearaudio Electronic accepts no liability for any misprints. Technical specifications are subject to change or improvement without prior notice. Product availability is as long as stock lasts. Copies and reprints of this document, including extracts, require written consent from Clearaudio Electronic GmbH, Germany.
Need help?
Do you have a question about the Emotion SE and is the answer not in the manual?
Questions and answers