Clearaudio Emotion SE User Manual
Hide thumbs
Also See for Emotion SE:
- User manual (40 pages) ,
- User manual (32 pages) ,
- User manual (32 pages)
Table of Contents
Advertisement
Quick Links
E
m
o
t
i
o
n
E
m
o
t
i
o
Emotion SE
Hi-Fi Components
Spardorfer Str. 150
www.clearaudio.de
S
E
n
S
E
S
e
c
o
S
e
c
o
clearaudio
D-91054 Erlangen
www.analogshop.de
n
d
E
d
i
t
i
o
n
n
d
E
d
i
t
i
o
n
Made in Germany
®
electronic
Tel. +49(0) 1805/059595
info@clearaudio.de
copyright clearaudio 2009
User manual
Bedienungsanleitung
GmbH
FAX +49(0) 09131/51683
Version 1.2_SE._12.08.09_E+D
Advertisement
Table of Contents

Related Manuals for Clearaudio Emotion SE


Summary of Contents for Clearaudio Emotion SE
-
Page 1: User Manual
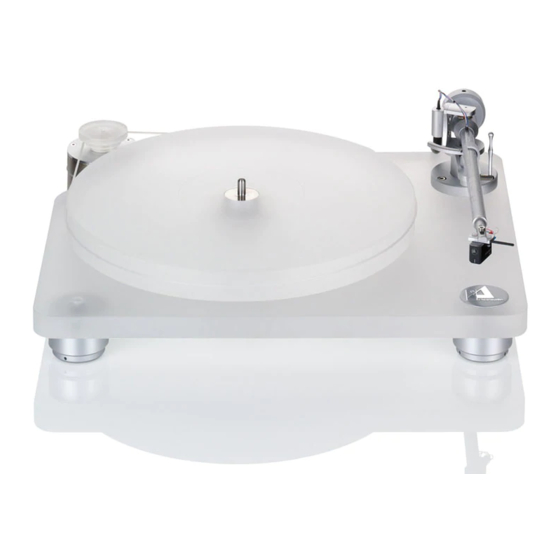
User manual Bedienungsanleitung Emotion SE Made in Germany ® clearaudio electronic Hi-Fi Components GmbH Spardorfer Str. 150 D-91054 Erlangen Tel. +49(0) 1805/059595 FAX +49(0) 09131/51683 www.clearaudio.de www.analogshop.de info@clearaudio.de copyright clearaudio 2009 Version 1.2_SE._12.08.09_E+D... - Page 2 A resonance minimized shape in combination with a stand alone motor unit, guarantees total isolation of resonances from the turntable chassis, providing the best music reproduction and authentic High End imaging. A high precision, patented clearaudio - CMB-bearing- technology is completing the analogue pleasure.
-
Page 3: Table Of Contents
3 – 15 Bedienungsanleitung 16 - 31 Contents Page 1. Packing overview 2. Packing contents 3. Installation and set up 6-13 4. Service 5. Special information 6. Technical data Warranty information Page / Seite 2 clearaudio electronic GmbH 2009... -
Page 4: Packing Overview
If ordered as package: clearaudio Satisfy carbon tonearm and/or clearaudio pickup 2. Layer (middle): Turntable – chassis with integrated lower bearing part 3. Layer (bottom): Platter Pic. 1: Packing overview Page / Seite 3 clearaudio electronic GmbH 2009... -
Page 5: Packing Contents
Emotion SE User manual / Bedienungsanleitung 2. Packing contents Clearaudio has developed a special and secure turntable packing to prevent your Emotion SE – turntable from any transportation damage. Please store this original packing, in case you need to ship the turntable. - Page 6 1 Pair of white gloves Grounding - wire for the turntable clearaudio logo, self - adhesive Level gauge for the turntable alignment 2 pcs. drive belt ( 2 x 292 mm) 3 pcs. allen – key (sizes: 1.5 / 2.5 / 3)
-
Page 7: Installation And Set Up
Avoid major side force to prevent any damages to the ceramic bearing! Pic. 2: Placing the bearing Pic. 3: Placing the platter Make sure with gentle pressure that the platter is applying on the complete surface of the bearing. Page / Seite 6 clearaudio electronic GmbH 2009... - Page 8 4.) Alignment of the turntable The following adjustment is very important! Place the clearaudio level gauge on the platter (see pic. 4) and bring the turntable in level by turning the corresponding feet in the right direction. Pic. 4: Alignment of the turntable The turntable is in level, when the air bubble in the level gauge is in the center.
- Page 9 Please follow the instructions according the manual of the cartridge you use. If you are using a clearaudio Moving Magnet cartridge you can adjust the tracking force or the wiring of the tonearm(about 20 mN) , by turning the tonearm`s counter weight on the threaded bolt (backside view of the tonearm).
- Page 10 User manual / Bedienungsanleitung For a more comfortable adjustment, please take the delivered “Smart Stylus gauge” (only in the Emotion SE package with tonearm and cartridge) and adjust the tracking force by using the gauge. Please place the Smart Stylus gauge on the platter and put the cartridge on the fine line which is marked with the recommend tracking force for your cartridge (e.g.
- Page 11 You have to make sure that the upper edge of the cartridge is parallel to the record surface. This adjustment had been set up perfectly by clearaudio. Only if it is necessary, you can adjust the cartridge position, while carefully screw the small allen screw on the bottom side of the tonearm tube near the headshell (Caution: please don’t unscrew the allen screw...
- Page 12 This also depends on the tracking force of the cartridge and the diamond shape. Pic. 11: Correct installation After setting up the cartridge, please tighten the tonearm in it`s base to fix it in this position. Page / Seite 11 clearaudio electronic GmbH 2009...
- Page 13 1/3 rpm and the larger diameter for 45 rpm. The position „I” on the motor-switches the motor on. Pic. 14: Drive belt mounting Before first use, let the turntable run in for the first 15 to 30 minutes. Page / Seite 12 clearaudio electronic GmbH 2009...
- Page 14 Pic. 15: Connecting the ground wire to the turntable The set up is now completed. Emotion SE We wish you a lot of pleasure with your new - turntable. Your clearaudio-team Page / Seite 13 clearaudio electronic GmbH 2009...
-
Page 15: Service
(chapter 3) 5. Special information To achieve the full clearaudio warranty, it is necessary that you fill out and send the corresponding part of the warranty registration card back to clearaudio, within two weeks after purchase. Only if the product is returned in it’s original packing clearaudio can provide the warranty. -
Page 16: Technical Data
Warranty: 3 years* (see page 31) * Only if the warranty card is filled out correctly and sent back to clearaudio. Please see page 31! Clearaudio electronic is not responsible for typographical errors in descriptions. Technical specifications subject to change or improvement without prior notice. Availability as long as stock lasts. -
Page 17: Warranty Information
RETAIN YOUR PURCHASE RECEIPT Your purchase receipt is your permanent record of a valuable purchase. It should be kept in a safe place to be referred to as necessary for insurance purposes or when corresponding with clearaudio. IMPORTANT When seeking warranty service, it is the responsibility of the consumer to establish proof and date of purchase. Your purchase receipt or invoice is adequate for such proof.
Need help?
Do you have a question about the Emotion SE and is the answer not in the manual?
Questions and answers