Table of Contents
Advertisement
Available languages
Available languages
Quick Links
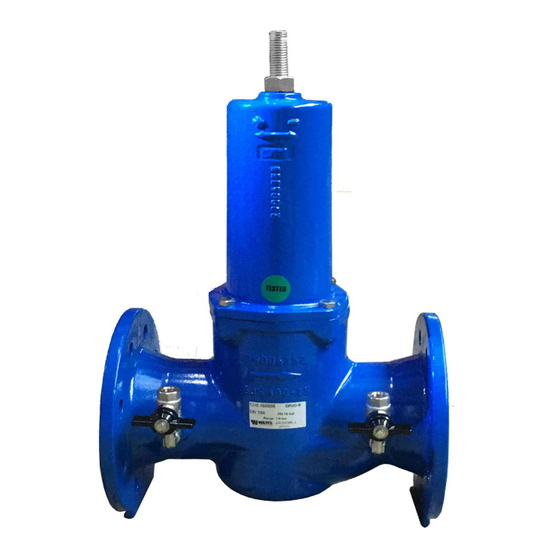
DRVD
DN50 - 100mm
DN125 - 200mm
Installation manual
Installation and Operation Manual
UK
Manuel d'Installation et d'Utilisation
FR
Manuale di Installazione e Uso
IT
Installatie- en bedieningshandleiding
NL
Installations- und Bedienungsanleitung
DE
Manual de instalación y funcionamiento
ES
Instrukcja instalacji i obsługi
PL
wattswater.fr
Advertisement
Table of Contents

Related Manuals for Watts DRVD


Summary of Contents for Watts DRVD
- Page 1 DRVD DN50 - 100mm DN125 - 200mm Installation manual Installation and Operation Manual Manuel d’Installation et d’Utilisation Manuale di Installazione e Uso Installatie- en bedieningshandleiding Installations- und Bedienungsanleitung Manual de instalación y funcionamiento Instrukcja instalacji i obsługi wattswater.fr...
-
Page 2: Table Of Contents
Contents General information General Fields of application Technical specifications Standards - Approval 1. Operating principle 2. Installation instructions 2.1 Preliminary inspection 2.2 Mandatory installation conditions 2.3 Conditions of use 3. Commissioning and adjustment 4. Maintenance instructions 5. Maintenance instructions DN 50-100 5.1 Maintenance to be carried out every 12 months 5.2 Maintenance to be carried out every 3 years 5.3 Modifying the adjustment range by changing the spring kit... -
Page 3: Installation Instructions
The DRVD is ideal for use as by a filter on the upstream side and a drain cock on the a main expansion valve or secondary circuit control valve. -
Page 4: Conditions Of Use
Loosen the locknut to release this screw. (220): for DN 50-100, (240): for DN125-200. 1 - All internal parts of the DRVD can be accessed by remo- • to increase pressure: turn clockwise, ving the cover and the lower flange located under the device (Item 200). -
Page 5: Maintenance Instructions Dn 50-100
5. Maintenance instructions DN 50-100 5.1 Maintenance to be carried out every 12 months valve housing Maintenance and assembly instructions: valve head 1- De-presurise the device and then isolate plate it from the system (remove from system if spring end necessary), washer seal-holder... -
Page 6: Maintenance Instructions Dn 125-200
6. Maintenance instructions DN 125-200 valve housing valve head 6.1 Maintenance to be carried out plate every 12 months piston Maintenance and assembly instructions: spring end 1- De-pressurise the system and then washer isolate the device from it (remove closing system from system if necessary), seal-holder 2- Fully release the spring (150) (turn the... -
Page 7: Modifying The Adjustment Range By Changing The Spring Kit
7- Re-fill with water and adjust as per the instructions provided above. 7. Replacement kits When ordering the kits, quote the information shown on the metal identification plate on the valve housing. 7.1 Seal kits PN16, PN25 and PN40 seal kits Watts code “ 2” 166922 2 ½’’... - Page 8 Index Informations générales Généralités Domaines d’application Caractéristiques techniques Normes - Agréments 1. Principe de fonctionnement 2. Instruction d’installation 2.1 Inspection préliminaire 2.2 Conditions d’installation obligatoires 2.3 Conditions d’emploi 3. Mise en service et réglage 4. Instructions de maintenance 5. Instructions de maintenance DN 50-100 5.1 Maintenance de 12 mois 5.2 Maintenance de 3 ans 5.3 Modification de plage de réglage par changement du Kit ressort...
- Page 9 Tuyauterie horizontale obligatoire, vis de tarage du DRVD Cet appareil réduit et stabilise la pression à une valeur dirigée vers le haut. Il est indispensable que le DRVD soit de consigne quelles que soient les variations de pression monté entre 2 vannes d’arrêt amont et aval et qu’il soit amont et de débit appelé...
- Page 10 3 - La vis de piston se dévisse avec une clé à tube standard • Ouvrir la vanne d’isolement de la purge d’air (3) ; le filtre (2) (ex. : clé à tube FACOM N°72) sauf pour les DRVD de dia- doit être propre, les manomètres installés, mètres 125, 150 et 200 où...
- Page 11 5. Instructions de maintenance DN 50-100 5.1 Maintenance de 12 mois Instructions de maintenance et de montage : corps chapeau 1- Isoler l’appareil du réseau après avoir fait chuter la pression interne (démonter du plaque réseau si nécessaire), presse ressort 2- Détendre complètement le ressort (110) porte joint (tourner la vis de tarage (100) en sens...
- Page 12 6. Instructions de maintenance DN 125-200 corps chapeau 6.1 Maintenance de 12 mois plaque Instructions de maintenance et de piston montage : presse ressort 1- Isoler l’appareil du réseau après avoir fait chuter la pression interne obturateur (démonter du réseau si nécessaire), porte joint 2- Détendre complètement le ressort bague sup.
- Page 13 7. Kits de rechange Pour commander les kits, il est nécessaire d’indiquer les informations figurants sur la plaque d’identification métallique placée sur le corps. 7.1 Kits de joint Kit joints PN16 et PN25 Code fabrication Code Watts “ 2” 166922 22L0599200 2 ½’’...
- Page 14 Index Informazioni generali Descrizione Campi di applicazione Caratteristiche tecniche Norme e approvazioni 1. Principio di funzionamento 2. Istruzioni di installazione 2.1 Ispezione preliminare 2.2 Condizioni di installazione obbligatorie 2.3 Condizioni d’esercizio 3. Messa in funzione e regolazione 4. Istruzioni di manutenzione 5.
- Page 15 I modelli È indispensabile inoltre che venga montato tra 2 valvole DRVD sono l’ideale per limitare la pressione sulla linea di d’arresto a monte e a valle e che sia protetto da un filtro a alimentazione principale o regolare i circuiti secondari.
- Page 16 (ad es. FACOM n. 72), eccezion deve essere pulito e i manometri installati. fatta per i riduttori DRVD con diametro 125, 150 e 200, che • Ridurre il valore di taratura (decomprimere completamente la necessitano di una chiave di tipo “Nervus” (ad es. Nervus molla) girando l’apposita vite (110) in senso antiorario.
- Page 17 5. Istruzioni di manutenzione DN 50-100 5.1 Manutenzione annuale Istruzioni di manutenzione e montaggio: corpo cappello 1- Isolare il dispositivo dalla rete dopo aver ridotto la pressione interna (se placca necessario, scollegare dalla rete). spingimolla 2- Decomprimere completamente la molla porta guarnizione (110), girando la vite di taratura (100) in guida...
- Page 18 6. Istruzioni di manutenzione DN 125-200 corpo cappello 6.1 Manutenzione annuale placca Istruzioni di manutenzione e montaggio: pistone 1- Isolare il dispositivo dalla rete dopo spingimolla aver ridotto la pressione interna (se necessario, scollegare dalla rete). otturatore porta guarnizione 2- Decomprimere completamente la molla (150), girando la vite di taratura anello sup.
- Page 19 7- Ripristinare l’alimentazione idrica e regolare come precedentemente indicato. 7. Kit di ricambio Per ordinare i kit, indicare le informazioni riportate sulla targhetta di identificazione metallica applicata al corpo del riduttore. 7.1 Kit guarnizioni Kit guarnizioni PN16, PN25 e PN40 Codice Watts “ 2” 166922 2 ½’’...
- Page 20 Index Algemene informatie Algemeen Toepassingsgebieden Technische gegevens Normen - Goedkeuringen 1. Werkingsprincipe 2. Installatie-instructies 2.1 Voorlopige inspectie 2.2 Verplichte installatievoorwaarden 2.3 Gebruiksvoorwaarden Inbedrijfstelling en aanpassing 4. Onderhoudsinstructies 5. Onderhoudsinstructies DN 50-100 5.1 Onderhoud na 12 maanden 5.2 Onderhoud na 3 maanden 5.3 Verandering van afstelbereik door vervanging van de veerset 6.
- Page 21 DRVD naar boven gericht. Het is essentieel dat de DRVD waarde, ongeacht variaties in de stroomopwaartse druk tussen 2 stroomopwaartse en stroomafwaartse afsluiters en het debiet in de pijpleiding. De DRVD is ideaal voor elke wordt gemonteerd en wordt beschermd door een filter hoofduitbreiding of regeling van secundaire circuits.
- Page 22 DRVD's met een diameter van 125, 150 en 200, waarvoor - Verminder de druk van de DRVD, (maak de veer volledig los) een pijpsleutel van het type "Nervus" nodig is (bijv. FACOM door de stelschroef (110) in tegengestelde richting te draaien, Nervus-sleutel nr.
- Page 23 5. Onderhoudsinstructies DN 50-100 5.1 Onderhoud na 12 maanden behuizing Onderhouds- en installatie-instructies: 1- Isoleer het apparaat van het netwerk plaatje nadat de interne druk is verlaagd veerpers (verwijder eventueel van het netwerk), afdichtingshou- 2- Maak de veer (110) volledig los (draai de stelschroef (100) tegen de klok in), geleiding zuiger...
- Page 24 6. Onderhoudsinstructies DN 125-200 behuizing 6.1 Onderhoud na 12 maanden plaatje Onderhouds- en installatie-instructies: zuiger 1- Isoleer het apparaat van het netwerk veerpers nadat de interne druk is verlaa- gd (verwijder eventueel van het sluitsysteem netwerk), afdichtingshouder 2- Maak de veer (150) volledig los bovenste ring (draai de stelschroef (110) tegen de onderste ring...
- Page 25 7- Vul water bij en stel af volgens de bovenstaande aanwijzingen. 7. Reservesets Om de sets te bestellen, moeten de gegevens worden vermeld die op het metalen identificatieplaatje op de behuizing staan. 7.1 Afdichtingssets Afdichtingsset PN16, PN25 en PN40 Watts-code “ 2” 166922 2 ½'' 202174 3”...
- Page 26 Index Allgemeine Informationen Beschreibung Einsatzbereiche Technische Eigenschaften Normen und Zulassungen 1. Funktionsprinzip 2. Installationsanleitung 2.1 Kontrolle vor der Installation 2.2 Vorgeschriebene Installationsvoraussetzungen 2.3 Einsatzbedingungen 3. Inbetriebnahme und Einstellung 4. Wartungsanleitung 5. Wartungsanleitung DN 50-100 5.1 Wartung alle 12 Monate 5.2 Wartung alle 3 Jahre 5.3 Ändern des Einstellbereichs durch Austausch des Federsets 6.
- Page 27 Prüfen Sie vor dem Einsatz, ob die Installation und die Wasserqualität den Anforderungen der für Frankreich geltenden Vorschriften NF EN 806-2, NF P40-20, NF DTU DRVD-Druckminderer sind für den Einsatz in Kalt- und 60.1, Verordnung Nr. 2001-1220 entsprechen. Trinkwasserinstallationen bestimmt. Sie haben die Aufgabe, einen höheren Eingangsdruck auf einen Sollwert des...
- Page 28 Einstellverfahren: (bei großen Nennweiten die Kolbenmutter) zu lösen, die hinter dem unteren Flansch an der Unterseite der Armatur • Sperren Sie den DRVD-Druckminderer ab. Schließen Sie die 2 Absperrventile (4). zugänglich ist. Halten Sie den Kolben mit einer Gripzange (z.
- Page 29 5. Wartungsanleitung DN 50-100 5.1 Wartung nach 12 Monaten Wartungs- und Montageanleitung 1 - Reduzieren Sie den Innendruck des Gehäuse Druckminderers und sperren Sie ihn Federhaube vom Netz ab (falls erforderlich, bauen Verschluss Sie ihn aus). Federteller 2 - Drehen Sie die Stellschraube (100) gegen den Uhrzeigersinn, um die Feder Dichtungshalter (110) vollständig zu entspannen.
- Page 30 6. Wartungsanleitung DN 125-200 Gehäuse 6.1 Wartung nach 12 Monaten Federhaube Wartungs- und Montageanleitung Verschluss 1 - Reduzieren Sie den Innendruck des Kolben Druckminderers und sperren Sie ihn vom Netz ab (falls erforderlich, bauen Federteller Sie ihn aus). Verschlussele- ment 2 - Drehen Sie die Stellschraube (110) gegen den Uhrzeigersinn, um die Dichtungshalter...
- Page 31 7 - Öffnen Sie die Absperrventile und stellen Sie den Druckminderer anhand der Anweisungen oben wieder ein. 7. Ersatzteilsets Geben Sie bei Ersatzteilbestellungen die Angaben auf dem Typenschild am Gehäuse an. 7.1 Dichtungssätze Dichtungssatz PN16, PN25 und PN40 Watts-Teilenummer “ 2” 166922 2 ½’’...
- Page 32 Índice Información general Descripción general Campos de aplicación Características técnicas Normas y aprobaciones 1. Principio de funcionamiento 2. Instrucciones de instalación 2.1 Inspección preliminar 2.2 Condiciones de instalación obligatorias 2.3 Condiciones de uso 3. Puesta en función y regulación 4. Instrucciones de mantenimiento 5.
- Page 33 Asegúrese de que las tuberías en las que se debe instalar la válvula estén libres de residuos de soldadura u otros La válvula DRVD no se ve afectada por las variaciones de desechos. Deje suficiente espacio alrededor de la misma presión aguas arriba.
- Page 34 • para disminuir la presión, gírelo hacia la izquierda; 2 - Libere el vástago desenroscando el tornillo del mismo (o la tuerca según el diámetro de la válvula DRVD), al que se pu- Los acoplamientos del manómetro de la válvula son de tipo ede acceder a través de la brida ubicada en la parte inferior...
- Page 35 5. Instrucciones de mantenimiento para DN 50-100 5.1 Mantenimiento a realizar cada 12 meses cuerpo Instrucciones de mantenimiento y montaje: sombrerete tapa de inspec- 1- despresurice la válvula y, luego, aíslela ción del sistema (retírela del sistema, si fuera arandela del ex- necesario);...
- Page 36 6. Instrucciones de mantenimiento para DN 125-200 cuerpo sombrerete 6.1 Mantenimiento a realizar cada 12 tapa meses de inspección Instrucciones mantenimiento vástago montaje: arandela del ex- 1- despresurice el sistema y, luego, tremo del muelle aísle la válvula del mismo (retírela del obturador sistema, si fuera necesario);...
- Page 37 7. Kit de recambio Al pedir los kit, indique la información presente en la placa metálica de identificación aplicada al cuerpo de la válvula. 7.1 Kit de juntas Kit de juntas PN16, PN25 y PN40 Código Watts “ 2” 166922 2 ½’’...
- Page 38 Zawartość Informacje ogólne Informacje ogólne Obszary zastosowań Charakterystyka techniczna Normy i zatwierdzenia 1. Zasada działania 2. Instrukcje montażu 2.1 Kontrola wstępna 2.2 Obowiązkowe warunki montażu 2.3 Warunki użycia 3. Uruchomienie i regulacja 4. Instrukcja konserwacji 5. Instrukcja konserwacji DN 50-100 5.1 Konserwacja do wykonania co 12 miesięcy 5.2 Konserwacja do wykonania co 3 lata 5.3 Zmiana zakresu regulacji poprzez wymianę...
- Page 39 Obowiązkowe jest stosowanie rur poziomych, śruba zadanej, niezależnie od zmian ciśnienia przed zaworem regulacyjna DRVD skierowana do góry. DRVD musi być i przepływu w rurach. DRVD jest idealny do stosowania zamontowany między 2 zaworami odcinającymi, z których jako główny zawór rozprężny lub zawór sterujący obwodu jeden znajduje się...
- Page 40 3 - Odkręcić śrubę tłoka za pomocą standardowego kluc- (3); wyczyścić filtr (2) i zamontowane manometry, za nasadowego (np. FACOM nr 72) z wyjątkiem DRVD o średnicach 125, 150 i 200, do których potrzebny jest klucz • Całkowicie zwolnić sprężynę DRVD, przekręcając śrubę...
- Page 41 5. Instrukcja konserwacji DN 50-100 Konserwacja powinna być przeprowadzana co 12 miesięcy obudowa za- woru Instrukcje dotyczące konserwacji i montażu: głowica zaworu 1- Rozhermetyzować urządzenie, płytka następnie odciąć je od systemu (w podkładka razie potrzeby wyjąć z systemu), końcówki 2- Całkowicie zwolnić sprężynę (110) sprężyny (przekręcić...
- Page 42 6. Instrukcja konserwacji DN 125-200 obudowa za- woru głowica zaworu Konserwacja powinna być przeprowadzana co 12 miesięcy płytka Instrukcje dotyczące konserwacji i tłok montażu: podkładka 1- Rozhermetyzować układ, a następnie końcówki odciąć od niego urządzenie (w razie sprężyny potrzeby wymontować z instalacji), system 2- Całkowicie zwolnić...
- Page 43 7- Napełnić wodą i wyregulować zgodnie z instrukcjami wskazanymi powyżej. 7. Zestawy zamienne Podczas zamawiania zestawów należy podać informacje podane na metalowej tabliczce identyfikacyjnej na obudowie zaworu. 7.1 Zestawy uszczelniające Zestawy uszczelniające PN16, PN25 i PN40 Kod Watts “ 2” 166922 2 ½’’...
- Page 44 NOTES:...
- Page 45 Los productos Watts se someten a pruebas minuciosas. La garantía cubre únicamente la susti- tución o - a total discreción de WATTS - la reparación gratuita de los componentes de los bienes Produkterna från Watts testas grundligt. Den nämnda garantin täcker endast utbyte eller (efter...
- Page 46 WATTS INDUSTRIES France 1590 avenue d’Orange • CS 10101 Sorgues 84275 VEDENE CEDEX • France Tel. +33 (0)4 90 33 28 28 • Fax +33 (0)4 90 33 28 39 contact@wattswater.com • www.wattswater.eu DRVD-IM-FR-W-UK-10-22-Rev.0 © 2022 Watts...
Need help?
Do you have a question about the DRVD and is the answer not in the manual?
Questions and answers