Advertisement

Quick Links

Installation, Operation and
Maintenance Manual
Model W-415-NF, W-525, W-525-NF, W-525P
WARNING
!
Read this Manual BEFORE using this equipment.
Failure to read and follow all safety and use information
can result in death, serious personal injury, property
damage, or damage to the equipment.
Keep this Manual for future reference.
WARNING
!
Do not use with water that is microbiologically unsafe or of
unknown quality without adequate disinfection before or after the
system.
IMPORTANT
!
If you are unsure about installing your WATTS water filter, contact
a WATTS representative or consult a professional plumber.
CAUTION
!
Test the water periodically to verify that the system is
performing satisfactory.
Discard small parts remaining after the installation.
NOTICE
Failure to install the system correctly voids the warranty. Handle all
components of the system with care. Do not drop, drag or turn
components upside down.
Be sure the floor under the water filter system is clean, level and
strong enough to support the unit.
Watts, 13700 HWY 90 West San Antonio, TX 78245
WQA Certified
58, and NSF/ANSI standard 372 for lead free
compliance.
to NSF/ANSI standard
IOM-WQ-W-415-NF_W-525_W-525-NF_W-525P
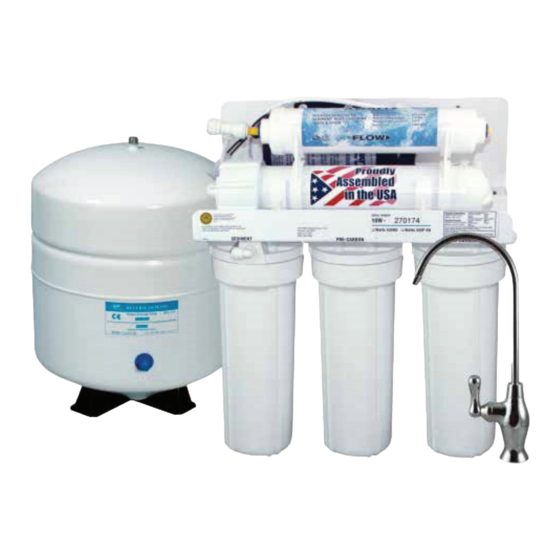
Model 525P Shown

Advertisement

Table of Contents
loading

Summary of Contents for Watts W-415-NF

  • Page 1 Model 525P Shown IMPORTANT If you are unsure about installing your WATTS water filter, contact a WATTS representative or consult a professional plumber. CAUTION Test the water periodically to verify that the system is performing satisfactory.
  • Page 2 Thank you for choosing the Watts Reverse Osmosis Drinking Water Recommended Tools Lists System. With proper care your water filtration system will produce * Variable speed drill high quality drinking water for many years. * 1/8" and 1/4" drill bits Read carefully and follow the instruction in this manual before * 7/16"...
  • Page 3 W-415-NF Filtration Process Specifications: 1st stage: Sediment filter, 5 micron, 10" 2nd stage: Carbon block filter, 5 micron, 10" 3rd stage: TFC membrane, 50GPD @ 60PSI 4th stage: Inline carbon filter Auto shut off valve Operating pressure: 40-100 PSI Operating temperature: 40-100°F...
  • Page 4 Inline carbon filter Auto shut off valve Operating pressure: 40-100 PSI Operating temperature: 40-100°F Please contact your local dealer at: Replacement Parts WATTS ITEM# DESCRIPTIONS SERVICE LIFE FPMB5-978 Sediment filter, 5 micron, 10" 6-12 months F109009 Carbon block filter, 5 micron, 10"...
  • Page 5 Inline carbon filter Auto shut off valve Operating pressure: 40-100 PSI Operating temperature: 40-100°F Please contact your local dealer at: Replacement Parts WATTS ITEM# DESCRIPTIONS SERVICE LIFE FPMB5-978 Sediment filter, 5 micron, 10" 6-12 months F109009 Carbon block filter, 5 micron, 10"...
  • Page 6: Installation Quick Look

    Installation Quick Look Please follow 4 color tubing diagram to complete installation Please follow 4 color tubing diagram to complete installation CAUTION: When cutting supplied tubes, predeter-mine the length by measuring the distance between the components to be connected. No tools are needed to connect 4 colored tubes. HOW TO MAKE A CONNECTION 1.
  • Page 7: Drill A Hole For The Faucet In A Porcelain Sink

    (If you are already using it for a sprayer or soap dispenser, see step 1) Porcelain sinks are extremely hard and can crack or chip easily. Use extreme caution when drilling. Watts accepts no responsibility for damage resulting from the installation of faucet. Diamond tip bit recommended.
  • Page 8 Typical RO Faucet Installation Non Air Gap Faucet Installation Drinking Feed Tube Connection Non Air Gap Faucet Locate the 3/8" threaded quick connect fitting in the parts bag. After the faucet has been mounted, thread the fitting on the to faucet stem.
  • Page 9: Drain Saddle Installation

    Feed Water Valve Installation Caution: Water supply line to the system must be from the cold water supply line only. Hot water will severely damage your system. Configuration for 3/8" Cold Configuration for 1/2" (with brass fittings) Supply Supply (without brass fittings) *Insert white washer WARNING Do not use Teflon tape with the Adapt-a-Valve.
  • Page 10: Mounting The Tank Ball Valve

    STEP 3: STEP 4: Mounting the Tank Ball Valve Mounting the Drain Clamp Note: Do not tamper with the air valve on low side of storage The drain saddle and part number to (SC500B14) will fit most stan- tank. It has been preset at 5-7 psi by the manufacturers. dard drain pipe ¼".
  • Page 11 START UP INSTRUCTION 1) Turn on the incoming cold water at the angle stop valve. Open the valve knob on the water feed Adapt-a-Valve by turning the knob counter clockwise. Check the system for leaks and tighten any fittings as necessary. (Check frequently over the next 24 hours to ensure no leaks are present).
  • Page 12: Cleaning Procedures

    Cleaning Procedures 1) Shut off the source water supply to the RO system. 2) Open the RO faucet and depressurize the RO system and storage tank. 3) Remove pre-filter cartridges, post-filter cartridges, and RO membrane. Discard or prepare for cleaning. If the RO membrane element is to be reused, disinfectant solution should be introduced into the permeate tube outlet sufficient to remove biofilm in this vulner- able area, before reinserting the membrane into the housing.
  • Page 13: Preventive Maintenance

    Preventive Maintenance These recommendations are intended for maximize efficiency of RO water production by your system. 1) Filter maintenance a) It is OK to store filters shrink wrapped on the shelf for several years. b) To store the sealed, unopened filter, we recommend that it be kept in an air tight container. This prolongs the shelf life of the carbon filter and avoids having the filter absorb any possible odor from the air.
  • Page 14 Treatment with chloramine (combined chlorine) is not sufficient to ensure complete conversion of trivalent arsenic to pentavalent arsenic. Please see the Arsenic Facts section of the Performance Data Sheet for further information. Depending on water chemistry, water temperature, and water pressure Watts RO Systems production and performance will vary. Avg. In.
  • Page 15 Based upon Watts field testing, it has been determined that the RO units are capable of reducing up to 67% of trivalent arsenic from the drinking...
  • Page 16: Troubleshooting

    TROUBLE SHOOTING Note: turn off the system before servicing PROBLEM CAUSE SOLUTIONS Milky colored water Air in system Air in the system is a normal occurrence with initial startup of the RO system. This milky look will disappear during normal use within 1 to 2 weeks. Noise from faucet Air gap faucet Will disappear after system shuts down...
  • Page 17: Limited Warranty

    How to obtain Warranty Service: Contact the dealer that you purchased the system from. Watts will work in conjunction with our dealer to repair or replace at our discretion any unit that is determined to be defective. No returns will be accepted with out the proper return authorization number.
  • Page 20 LIMITED WARRANTY: Certain Watts products come with a limited warranty from Watts. Other products may have no warranty or are covered by the original manufacturer’s warranty only. For specific prod- uct warranty information, please visit www.watts.com or the published literature that comes with your product. Any remedies stated in such warranties are exclusive and are the only remedies for breach of warranty.

This manual is also suitable for:

W-525W-525-nfW-525p

Table of Contents