
Related Manuals for NEC LED-FC009i


Summary of Contents for NEC LED-FC009i
- Page 1 Installation and Maintenance manual LED Module [Models for indoor use] LED-FC009i LED-FC012i LED-FC015i MODELS: LED-FC009i, LED-FC012i, LED-FC015i...
-
Page 2: Table Of Contents
Table of Contents Important Information ..............English-1 Contents ..................English-5 Related Items for Installation ............English-6 Parts Name ..................English-7 Installation Example ..............English-9 1. Installation location ....................... 9 2. Handle ........................10 3. Installation with brackets ..................... 11 4. Installation with a wall-mount frame ................14 5. -
Page 3: Important Information
Important Information Safety Precautions and Maintenance FOR OPTIMUM PERFORMANCE, PLEASE NOTE THE FOLLOWING WHEN SETTING UP AND USING THE LED DISPLAY SYSTEM: About the Symbols To ensure safe and proper use of the product, this manual uses a number of symbols to prevent injury to you and others as well as damage to property. - Page 4 ● Be sure to read the following before using the product to use it correctly and safely. WARNING Do not apply vibrations or shocks to the Install the product so that the vents are not product. obstructed. Make sure there are enough people available Do not install the product to unstable to ensure safety (at least two people) when locations or locations subject to vibrations.
- Page 5 CAUTION Do not use or store the product in the When connecting the power cord to the following places. product’s AC IN terminal, make sure the • Near heaters connector is fully and firmly inserted. • Places with lots of humidity or dust, or Do not damage the power cord.
- Page 6 Recommended Use & Maintenance About the LED lamps The surface of the pixel card is vulnerable to shocks, so do not press or hit the surface. LED lamps are sensitive to static electricity and surge voltage, which may damage their components and decrease their reliability.
-
Page 7: Contents
Contents The supplied parts are as follows. In case one of these parts is missing or damaged, contact the retailer. CAUTION Depending on the system you ordered, there is a cabinet without the upper connector. [Cabinet] [Pixel card] 8 cards per cabinet English - 5... -
Page 8: Related Items For Installation
Related Items for Installation The items required when installing the system are shown below. Contact your retailer for more details. [Power cord] To connect the LED module to the power distributor [LAN cable] To connect two LED modules together (120 mm for vertical connection, 1000 mm for horizontal connection) [Cabinet alignment bracket] [Connection screw for LED modules] [USB drive]... -
Page 9: Parts Name
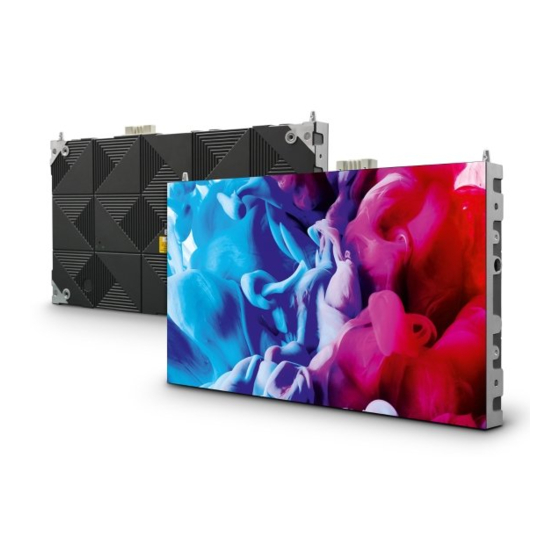
Parts Name ⑥ ② ④ ⑫ Front Rear ⑪ ⑦ ⑩ ⑧ ① ③ ⑤ ⑨ Name Description Interface connectors Input and output connectors for the signal and AC power. To input the signal from the LED controller or the previous LED module. 12 Signal input/output When a signal is input into 1, the signal is output from 2. - Page 10 There are two types of cabinets. (1) Type A The connectors are equipped on the top and bottom sides. There are guide pins on the top. Receiving Power unit card (2) Type B There are no connectors on the top side. There are no guide pins. Power unit Receiving card...
-
Page 11: Installation Example
Installation Example 1. Installation location Before the installation, be sure to review the following safety precautions to ensure proper and safe installation. CAUTION • Ask a technician to perform the installation. • Make sure the product is moved and installed by enough people to ensure safety. •... -
Page 12: Handle
Wall mounting setting < 40 °C min. distance to ceiling min. distance to floor 60 mm or more 60 mm or more 2. Handle Use the handles when carrying and installing the cabinet. Put the handles in their original positions after the installation work has been completed. When carrying or installing the Put the handles back after the cabinet, pull out the handles on... -
Page 13: Installation With Brackets
3. Installation with brackets A recommended example of installation when using the brackets is shown below. Ask a technician or your retailer for the installation procedure when not using the brackets. Install the brackets to the frame as shown in the figure below. Use screws with a length adapted to the cabinet thickness (30 mm). - Page 14 Then, secure the LED cabinets together using connection screws for LED modules. Do not tighten the screws completely. After you have installed two rows of cabinets, align the surfaces of the cabinets using the Adjustment plate. Secure the LED cabinets to the brackets with screws. English - 12...
- Page 15 Secure the LED modules to each other with screws. When the cabinets’ surfaces are aligned, completely tighten the screws securing the cabinets together and the screws securing the cabinets to the brackets. Remove the Adjustment plate after the screws have been tightened. Follow the same procedure to install the next row of cabinets and align their surfaces.
-
Page 16: Installation With A Wall-Mount Frame
8 x 8 frame set frame set frame set frame set (LED-FC012i) (LED-FC015i) (LED-FC009i) (LED-FC012i) Pixel card 152 x 171 x 10 mm pitch 1.2, 1.5, 1.9, 3.8 Cabinet Type A 608 x 342 x 39 mm (all rows except top row) - Page 17 4 x 4 5 x 5 6 x 6 8 x 8 frame set frame set frame set frame set (LED-FC012i) (LED-FC015i) (LED-FC009i) (LED-FC012i) Washer Corner frame top (left, right) Overframe (top) Screw for overframe Hexagon socket head screw (M8×16)
- Page 18 4.1 Mark the positions of the anchor points on the wall • Mark the positions of the holes you will make for the anchor points (refer to the figures below and the “Anchor points number and positions” table on the next page). •...
- Page 19 608 mm 608 mm 1216 mm 608 mm 608 mm 684 mm 684 mm 684 mm Anchor points positions: 8 x 8 frame set Anchor points number and positions Frame set 4×4 5×5 6×6 8×8 Anchor points 3×2 4×3 5×3 6×5 (horizontal x vertical) Horizontal distance...
- Page 20 4.3 Install the mounting bars (1) Install the mounting bars on the anchor points on the wall. (2) Check the distance between the mounting bars using the alignment bars. 608 mm 608 mm Alignment bar Alignment bar 4 x 4 frame set 608 mm 608 mm Alignment bar...
- Page 21 608 mm 608 mm Alignment bar 608 mm 608 mm Alignment bar 6 x 6 frame set 608 mm 608 mm Alignment bar 1216 mm 608 mm 608 mm Alignment bar 8 x 8 frame set English - 19...
- Page 22 (3) Check the evenness using a spirit level and the alignment bars together. Adjust the positions if required. M10 screws Wall mounted: Mounting bar installation (4 x 4 frame set) 4.4 Install the power bar Remove the power bar cover and install the power bar using Power bar screw (M8) screws. How to remove the power bar cover Sliding the power bar cover for removing.
- Page 23 Power bar screw (M8) Power bar When using the 8 x 8 frame set, use the power bar connecting part to install the power bar. English - 21...
- Page 24 4.5 Install the cabinet hanger pins to the back of the cabinets Turn the vertical alignment screw on the top corner of the cabinet so that it protrudes about 5 mm. Insert the hanger pins into the four corners of the cabinets up to where there is a difference in their diameter. Vertical alignment screw Hanger pin Vertical alignment screw...
- Page 25 4.6 Install the cabinets Hook the hanger pins, which have been inserted into the cabinets, into the holes on the mounting bars starting from the lowest row. Fix temporarily the cabinets of the first row to the power bar. English - 23...
- Page 26 Hook the hanger pins of the cabinets of the second row to the mounting bars. Secure the LED cabinets together using screws for connecting cabinets. Do not tighten the screws completely. Turn the center of vertical alignment screw with a flathead screwdriver for align the cabinet position. After you have installed two rows of cabinets, align the surfaces of the cabinets using the Adjustment plates.
- Page 27 Connect the power cord and the LAN cable from the opening at the back of the power bar. How to connect the power cord External power input Terminal in Power bar Power supply socket in Power bar Data cable WARNING Pay attention to the wire colors of the power cord when connecting the cord.
- Page 28 Install the power bar cover. English - 26...
- Page 29 Insert the slot nuts inside the over frame into the holes of the screw for connecting cabinets and fix them with screw for overframe (M8) screws. Install the corner parts to the corner frame top and install it on the top of the cabinets. Slot nut installation locations 4 x 4 frame set 5 x 5 frame set...
- Page 30 4.7 Assembly diagrams 4 x 4 frame set 2472 2432 Through hole for the LAN cable 5 x 5 frame set 3080 3040 Through hole for the LAN cable English - 28...
- Page 31 6 x 6 frame set 3688 3648 A’ A’ A’ A’ A’ A’ A’ A’ A’ A’ A’ A’ Through hole for the LAN cable 8 x 8 frame set 4904 1216 4864 Through hole for the LAN cable 608 274 English - 29...
-
Page 32: Wiring
5. Wiring (1) Maximum number of signal connections The maximum number of connections per LAN cable is shown below. Product name Maximum number of connections LED-FC009i 2 modules LED-FC012i 5 modules LED-FC015i 7 modules CAUTION The maximum number of connections may differ depending on the connected LED controller. Therefore, check the specifications of the LED controller you are using. - Page 33 *: This connection is an example of connection when using the maximum capacity. Please check the capacity of the switchboard to be connected. 6 x 6 frame set (LED-FC009i) 17 18 10 11 12 13 14 15 16 17 18...
- Page 34 8 x 8 frame set (LED-FC012i) LED Controller Main Control PC HDMI 1 100-120V/Max 20A* 100-120V/Max 20A* 100-120V/Max 20A* 100-120V/Max 20A* 200-240V/Max 20A* 200-240V/Max 20A* 200-240V/Max 20A* 200-240V/Max 20A* 200-240V/Max 20A* 200-240V/Max 20A* *: This connection is an example of connection when using the maximum capacity. Please check the capacity of the switchboard to be connected.
- Page 35 (4) Power cord connection Connect the power cords to the LED modules on the first row. Connect the power cords between the LED modules. CAUTION Make sure the connector is fully and firmly inserted. (5) LAN cable connection Connect the LAN cables for the signal between the LED modules. Use the through holes to pass the cables between the modules.
- Page 36 [Connection example 1] Connecting all the LED modules using a single LAN cable LAN cable from the LED controller Hub board Connect the cable to the LAN connector on the left. Do not use the LAN connector on the right. Insert the LAN cable into the through hole and connect it to the LAN connector on the left.
-
Page 37: Installing The Pixel Card
6. Installing the pixel card CAUTION • The pixel cards contain powerful magnets. If magnetic cards come close to the pixel cards, the data contained within may be damaged. Therefore, do not carry any magnetic card when installing the pixel cards. - Page 38 CAUTION The pixel cards contain powerful magnets. If magnetic cards come close to the pixel cards, the data contained within may be damaged. Therefore, do not carry any magnetic card when installing the pixel cards. The arrows (↑) at the back of the pixel cards indicate the upper side. Install the pixel card into the cabinet with the four guide holes of the pixel card aligned with the four guide pins of the cabinet (four pins for each pixel card).
-
Page 39: Screen Configuration
Screen Configuration Check that all the connections are completed, and then turn on the LED modules and the LED controller. Power distributor LED controller CONTROL INPUT OUTPUT Control signal Video signal WARNING Pay attention to the wire colors of the power cord when connecting the cord. If the cables are not connected correctly, it may lead to a fire or an electrical shock. - Page 40 Setting the screen configuration Perform the setting using the LCT-Mars control software by Novastar. Log in with the administrator privileges. Display the login screen as follows: User(U) → Advanced Synchronous System UserLogin(A). Enter the password (“admin” by default) to log in with the administrator privileges. To change the password, go to User(U) →...
- Page 41 The settings in “Sending Card Number” (e) and “Ethernet Port No.” (f) vary depending on the connected LED controller. Enter the value in the table below under “Receiving Card Size” (g). Product name LED-FC009i LED-FC012i LED-FC015i Pixel pitch 0.9 mm 1.2 mm...
- Page 42 [Configuration example] The setting values are given for the following example where 16 LED-E012i modules (pixel pitch of 1.25 mm) are installed in a 4 (columns) x 4 (rows) configuration. CONTROL INPUT OUTPUT (1) With a pixel pitch of 1.25 mm, enter Width=480 and Height=270 under “Receiver Card Size” (g). Do not use the buttons located next to the values.
- Page 43 (2) Since the configuration is 4 (columns) x 4 (rows), enter Columns=4 and Rows=4. A 4 (columns) x 4 (rows) screen configuration is displayed. English - 41...
- Page 44 (3) If multiple LED controllers are used, select the number of the connected LED controllers. Since only one controller is used in this example, it is not necessary to set “Sending Card Number” (e). (4) Configure the connection. (4)-1 Connecting from bottom to top using multiple ports The system is connected to port 1 of the LED controller.
- Page 45 Follow the same procedure for Port3 and Port4. English - 43...
- Page 46 (4)-2 Connecting all the LED modules using a single LAN cable The system is connected to port 1 of the LED controller. Select “1” (port 1) under “Ethernet Port No.” (f). Click (select) the connection pattern under “Quick Connection” (i). Since the modules are connected from the bottom left to the top right in the example, the pattern is as shown in the figure.
- Page 47 (5) Save the settings. (a) Click the “Send to HW” button (j). When the dialog box indicating that the process finished successfully is displayed, click OK. (b) Check that the image is correctly displayed, and then click the “Save” button (k). When the screen indicating that the process finished successfully is displayed, click OK.
-
Page 48: Image Setting
Image Setting You can adjust the brightness, the gamma correction value, and the color temperature. Click “Brightness” on the top screen to display the following window. Click “Advanced Settings” to expand the screen. English - 46... - Page 49 Click “Advanced Settings” ( ) (a) to expand the setting screen. (1) Brightness Set the brightness of the screen using the slider (b). Increasing the value increases the brightness. (2) Gamma correction Set the gamma correction value using the slider (c). Increasing the value makes the dark parts of the screen darker.
-
Page 50: Cleaning
Cleaning The screen brightness may decrease if dust or another foreign material is adhering to the surface of the pixel card. The magnet used to install the pixel cards also attracts magnetic metal particles, such as iron powder. Therefore, magnetic metal particles may adhere to areas near the magnet of the pixel card and the brightness homogeneity of the screen may decrease. -
Page 51: Maintenance
Maintenance CAUTION • Disconnect the power supply to the LED modules when performing the maintenance. • Use the correct screwdriver for the shape of the screws when removing (loosening) or setting (tightening) the screws. Pay attention not to drop the screws and the other parts you have removed. Pay attention not to lose the removed screws since they will be reused. - Page 52 Removing and installing the hub board (1) Removing the hub board (a) Disconnect the LAN cable from the hub board (b) Remove the 16 screws securing the hub board with a Phillips screwdriver (No. 1). (c) Since the hub board is connected to the power unit with pins and connectors, remove it by raising this part, as well as the part with the positioning holes.
- Page 53 (2) Installing the hub board Install the hub board into the cabinet following the procedure below. (a) Connect the status board to the hub board using the cable. (b) Install the hub board into the cabinet. Install it with the power unit pins and connectors aligned. Insert the pins and connectors completely and check that the hub board is securely attached and not bent.
- Page 54 Remove the two screws securing the power unit. Use a Phillips screwdriver (No. 2). Use a pair of pliers to hold the two magnets, rotate them, and remove them. Replace the power unit. Use the screws you have removed to secure the power unit. Tightening torque: 3 ±...
- Page 55 Replacing the receiving card The receiving card is fixed to the hub board with two board-to-board connectors. Hub board Receiving card Install the receiving card so that the arrow is orientated to the left. English - 53...
-
Page 56: Troubleshooting
Troubleshooting 1. Display problems Problem Solution Nothing is displayed on Check that power is being supplied to the LED modules. all the LED modules. Check that the LED controller is turned on. Check that a video signal is being input to the LED controller. Check that a LAN cable is correctly connected between the LED controller and the LED module. -
Page 57: State Monitoring Using The Software
2. State monitoring using the software In case of a problem, you will be able to determine the location where it occurred by monitoring the state of the system. 2-1 Display under normal conditions The display is green under normal conditions. Click “Monitoring”... - Page 58 2-2 Display under abnormal conditions (1) Problem with the input signal to the LED controller When the display is red, there is a problem with the LED controller. To display more details, click “Monitoring”, and then click “Sending card” on the screen that is displayed. No video signal is being input to the LED controller.
- Page 59 (2) Problem with the LED modules When the display is red, there is a problem with the LED module operation. To display more details, click “Monitoring”, and then click “Receiving card” on the screen that is displayed. In the example shown on the left, the following problems must be considered.
- Page 60 (3) Problem with the internal temperature of the LED modules There is a problem with the LED module operation. To display more details, click “Monitoring”, and then click “Temperature” on the screen that is displayed. The LED modules with a high temperature are displayed in warm colors.
- Page 61 (4) Communication problem When the display is grey, the communication is not established. → Check that the USB cable is connected. → Check that the LED controller is turned on. English - 59...
-
Page 62: Specifications
Specifications Models for indoor use LED-FC009i LED-FC012i LED-FC015i LED configuration Flip chip COB (chip size : 4mil*8mil) Pixel pitch 0.95 mm 1.26 mm 1.583 mm Number of displayed pixels (resolution/module) 640 × 340 480 × 270 384 × 216 Brightness... -
Page 63: Diagram
Diagram LED-FC009i / LED-FC012i / LED-FC015i 48.5 Rear 4 x M8 18.5 (Unit: mm) English - 61... - Page 64 LED-FC009i / LED-FC012i / LED-FC015i Adjustment plate 4-Φ5 (Unit: mm) English - 62...
Need help?
Do you have a question about the LED-FC009i and is the answer not in the manual?
Questions and answers