Table of Contents
Advertisement
Quick Links
USER'S AND INSTALLATION MANUAL
G20/G25 (Natural Gas) G30/G31 (Propane-Butane/Propane)
L3
L2
L1
L
H
H1
[mm]
183
3
183
3
Copyright Planika Sp. z o.o.
Galaxy Burner
L2
H4
H2
H3
157
101
82
157
101
82
www.planikafires.com
D
D1
D2
L
L1
L2
1150
932
109
2000
1782
109
IG0343#03
Scan for other languages
L3
D
D1
996
350
220
1809
350
220
18.11.2022
D2
320
320
Advertisement
Table of Contents

Related Manuals for Planika Galaxy Burner


Summary of Contents for Planika Galaxy Burner
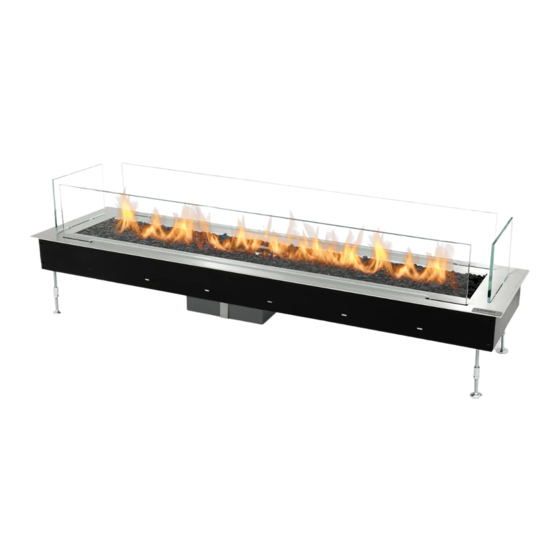
- Page 1 USER’S AND INSTALLATION MANUAL Galaxy Burner G20/G25 (Natural Gas) G30/G31 (Propane-Butane/Propane) Scan for other languages [mm] 1150 2000 1782 1809 Copyright Planika Sp. z o.o. www.planikafires.com IG0343#03 18.11.2022...
-
Page 2: Table Of Contents
T IS OBLIGATORY TO READ AND KEEP THIS INSTRUCTION MANUAL TABLE OF CONTENTS INTRODUCTION ........................................ 3 SAFETY INSTRUCTION ...................................... 4 2.1. Safety instruction regarding the use of the gas cylinder..........................5 INSTALLATION ........................................6 3.1. Box contents......................................6 3.2. Unboxing and installation ..................................6 MONTAGE ........................................ -
Page 3: Introduction
CE Declaration of conformity We hereby declare that both the design and construction of a gas heating device manufactured by Planika Sp. z o.o. (with registered office at Bydgoskich Przemysłowców 10 85-862 Bydgoszcz, Poland) meet the essential requirements contained in the Directive and the Ordinance on gas appliances. -
Page 4: Safety Instruction
A CO2 or a powder fire extinguisher needs to be placed near the device. • During the first ignition the Galaxy Burner fireplace needs to be burnt on maximum level for a few hours in order for the elements to acquire correct temperature and for the remains of paint, lacquer and lubricant to evaporate. -
Page 5: Safety Instruction Regarding The Use Of The Gas Cylinder
During the installation process do not allow an open flame or any ignited object to reach the gas cylinder. • The gas cylinder should be in a distance not shorter than 1,5 metres away from the Galaxy Burner fireplace. •... -
Page 6: Installation
Fig. 1 – Decorative stones location • In the case of Galaxy Burner powered with natural gas, to obtain the optimum image of the flame, cover the burner with a single layer of decorative stones leaving some spaces uncovered of approximately every 10 cm. -
Page 7: Montage
1 metre radius from the fire. Additionally, Non-flammable Planika doesn't recommend placing heat- materials sensitive objects above the fireplace as it may shorten their lifetime. Planika will not be responsible for any damage caused by high temperature affecting objects installed above the fire. -
Page 8: Directions Of How To Design A Cavity For The Fireplace
Carefully remove cardboard and foam foil from the glass guards. • Remove all contaminations from the glass guards which could burn out on the glass during operation of the Galaxy Burner (in particular fingerprints). • Install glass guards in the corresponding slots on the appliance as shown below Fig. -
Page 9: Possible Housing Variants
4.3. Possible housing variants Fig. 5 – Installation with glass enclosure 4.4. Gas cylinder montage WARNING! In case of LPG version it is crucial to manufacture a slot in the side of the housing where the insert is placed for the gas linkage and the pressure regulator. Fig. - Page 10 The gas linkage attached to the device allows to place the gas cylinder maximally 3 metres away from the connected control panel, however it cannot be placed nearer to the device than 1,5 metres. Fig. 7 – Location of gas cylinder •...
-
Page 11: Installation Of The Gas Linkage
5.2. Connection and replacement of the gas cylinder (LPG version) The Galaxy Burner is delivered together with an elastic gas linkage which, on one end is connected to the valve of the device and on the other end to the 37mbar regulator (in the twist-on version) ready to be connected to the gas cylinder. - Page 12 Gas cylinder connection Twist-on connection Quick-release 1. Check if the bottle valve is TURNED OFF turning it Remove the protection tip. Do not use any tools, clockwise leave the tip hanging freely. 2. Remove the protection tip and store it for later use. 3.
- Page 13 Twist-on connection Quick-release Turn off the Galaxy Burner – put it into the OFF position. The main and pilot burner need to be turned off. 2. Turn the bottle valve into the OFF position 2. Turn the switch into the OFF position.
-
Page 14: Pressure Regulator Replacement (Lpg Version)
5 years. Allowed pressures: 30 mbar, 37 mbar (recommended), 50 mbar. Use only the redactors that comply with the EN16129 European Norm. 2. Turn off the Galaxy Burner – the „OFF” position. The main burner and the pilot burner need to be turned off. 3. Disconnect the regulator from the gas cylinder (description above). -
Page 15: Operating Instructions
6. OPERATING INSTRUCTIONS The Galaxy Burner fireplace has a remotely control valve with a built-in ignition for the pilot flame. The flame height of the main burner may be appropriately regulated by Wall Switch (Touch Panel) or remote control (optionally). - Page 16 • Determine the location for the control panel (Wall Switch) taking into account the size of the box on backside. Fig. 11 – Size of the wallswitch • Unscrew the sealed box on backside of the wallswitch. Fig. 12 – Opening the back of the wallswitch •...
-
Page 17: Installing The Battery Box
• Connect the wires back and screw the cable gland. Screw back the cover of sealed box. Fig. 15 – Closing the back of the wallswitch • Mount the control panel via pre made holes. Cover the fasteners by placing the magnesium sticker on the front of the panel Fig. -
Page 18: Replacing The Batteries
6.4. Replacing the batteries If the batteries are inserted incorrectly, the electronics or drive may be irreparably damaged. Only replace the batteries when the appliance has been completely switched off. NOTE: If the appliance is equipped with a 230 VAC connection, no batteries are present in the receiver or in battery box. -
Page 19: Remote Control
6.5. Remote control Galaxy Burner can be operated by radio remote control. This comprises a hand-held transmitter and a receiver. The receiver is part of the gas control block assembly. • Electrical connections and batteries: Hand-held transmitter: 2x 1.5V AAA battery Receiver: 4x1.5V AA battery or 6 VDC... -
Page 20: Stand-By Mode (Pilot Flame)
• This can take few seconds to ignite to pilot flame especially when you have replaced and installed a new LPG gas cylinder. • If the pilot light does not ignite after 3 ignition attempts close the gas tap and contact the fitter. •... -
Page 21: Flame Height Directly To Minimum Position
6.5.4. Flame height directly to minimum position „-“ Pressing the button twice automatically decreases the flames to the LOW position NOTE: Flame goes to high fire first before going to low fire. 6.5.5. Flame height directly to maximum position „+“ Pressing the button twice automatically increases the flames to the HIGH position... -
Page 22: Wall Switch
Low Battery Receiver With low battery power in the receiver the system shuts off the fire completely. This will not happen if the power supply is interrupted. On-Demand Pilot • This green feature eliminates gas energy consumption during extended appliance inactivity. When the appliance is inactive for an extended period of time the system automatically extinguishes the pilot. -
Page 23: Testing
If the problem happens again please contact the dealer. 7.2. Checking the flame appearance • Burn the Galaxy Burner on max flame height and check the appearance of the flame. • The flame should be linear and evenly placed on the whole length of the main burner. •... -
Page 24: Glass Cleaning (If Optionally Installed)
8.2. Glass cleaning (if optionally installed) Most of the existing types of smudges may be wiped with a dry cloth. In case of more substantial smudge you may use liquids normally applied to ceramic tiles or windows. Always dry the glass screen to avoid damp patches which could irreversibly embed into the glass. -
Page 25: Technical Specification
WARRANTY Planika Sp. z o.o. grants the Client guarantee of quality for the smooth operation of the goods specified on the sales document. The warranty is determined for a given period from the date of purchase (based on the warranty card together with the receipt of purchase). - Page 26 SELLER Name: Address: Tel/fax: Date of sale: Seller’s seal and signature BUYER Name: Address: Tel/fax: Date of purchase: The gas fireplace should be installed by a qualified Installer in accordance with the applicable national building regulations and in accordance with the guidelines contained in the Installation and User's Manuals. I hereby declare that having read the User's Manual and the Guarantee Conditions.
Need help?
Do you have a question about the Galaxy Burner and is the answer not in the manual?
Questions and answers