Table of Contents
Advertisement
Available languages
Available languages
Quick Links
Seghetto alternativo
ISTRUZIONI D'USO
Istruzioni originali
Jigsaw
OPERATING INSTRUCTIONS
Translation of the original instructions
ATTENZIONE! Prima di usare la macchina, leggete e comprendete le istruzioni di sicurezza e le istruzioni d'uso fornite
WARNING! Before using the machine, read and understand the supplied safety instructions and operating instructions
Final dimension: A5
S665EPQ
S411134
09.02.2017
Advertisement
Table of Contents

Related Manuals for Valex S665EPQ


Summary of Contents for Valex S665EPQ
- Page 1 Final dimension: A5 S411134 09.02.2017 S665EPQ Seghetto alternativo ISTRUZIONI D’USO Istruzioni originali Jigsaw OPERATING INSTRUCTIONS Translation of the original instructions ATTENZIONE! Prima di usare la macchina, leggete e comprendete le istruzioni di sicurezza e le istruzioni d’uso fornite WARNING! Before using the machine, read and understand the supplied safety instructions and operating instructions...
-
Page 2: Dati Tecnici
è conforme ai requisiti essenziali di sicurezza e file is in salute contenuti nelle seguenti direttive europee: 2006/42/CE, 2014/30/CE, 2011/65/CE Valex SpA - Via Lago Maggiore, 24 DECLARATION OF CONFORMITY 36015 Schio (VI) - Italy The firm indicated on the label declares, under 02.2017... - Page 3 - 3 -...
- Page 4 - 4 -...
- Page 5 - 5 -...
- Page 6 - 6 -...
- Page 7 - 7 -...
-
Page 8: Installazione
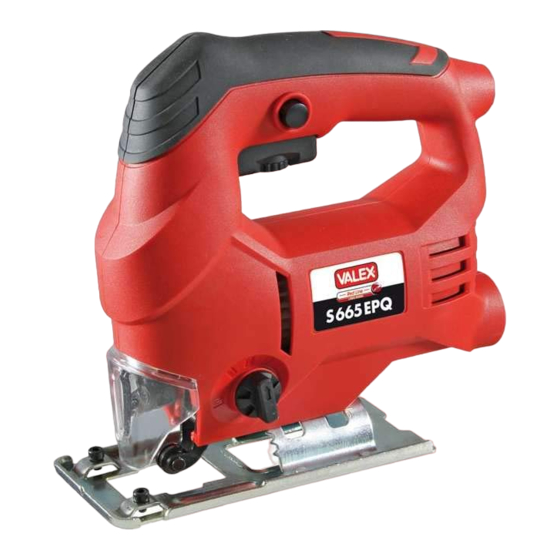
COMPONENTI Fare riferimento alla fig. A e seguenti, allegate alle presenti istruzioni. ATTENZIONE! Il seghetto alternativo è idoneo a tagliare, mediante una specifica 1.Interruttore avvio/arresto con regolatore di lama, pannelli di legno o materiale plastico e velocità lamiere di metallo a basso tenore di carbonio. 3. -
Page 9: Avviamento Ed Arresto
agenti atmosferici. 7. Rilasciate la leva che dovrà ritornare automa- - che attorno sia prevista un’ampia zona opera- ticamente nella posizione iniziale e muovete tiva libera da impedimenti. leggermente la lama in modo da favorirne - che vi sia una buona illuminazione. l’innesto. - Page 10 premere l’interruttore (1) e poi rilasciarlo subito. Materiale TPI denti Materiale Finitura del ta- ATTENZIONE! In caso di interruzione per pollice lama glio e dei bordi dell’alimentazione elettrica, posizionare l’in- (25,4mm) (in funzione del terruttore nella posizione di arresto, in modo numero di denti) da evitare un riavvio inatteso.
- Page 11 Indossate i dispositivi di protezione individuale Materiali Velocità Movimento pendolare (non inclusi). Vedi ‘ISTRUZIONI DI SICUREZZA’. Legno e pannelli di Massimo (posizione Alte masonite 2 o 3) 1. Impugnate l’utensile con la mano. Il cavo di alimentazione deve essere tenuto lontano Materiali plastici, Medie Minimo (posizione 1)
-
Page 12: Sostituzione Della Lama
opposta), appoggiatelo al banco e staccate agenti chimici. la spina dall’alimentazione elettrica. - Eliminate eventuali tracce di resina che si depositeranno sull’utensile. Nel taglio dei metalli raffreddate costantemente la - Prestate particolare attenzione alla pulizia lama versando delle gocce di olio da taglio (non dell’interruttore, alle feritoie di ventilazione del incluso), in caso contrario si avrà... -
Page 13: Problemi, Cause E Rimedi
PROBLEMI, CAUSE E RIMEDI IMMAGAZZINAMENTO Effettuate una accurata pulizia di tutto l’utensile PROBLEMA CAUSE RIMEDI e sue parti accessorie (vedi paragrafo Manuten- zione). Proteggete le parti non verniciate con un L’ u t e n s i l e Linea di alimenta- Verificate la linea olio protettivo ed utilizzate l’imballo originale o la elettrico non... -
Page 14: Installation
COMPONENTS Refer to fig. A and the following figures, attached to these instructions. IMPORTANT! The jigsaw is suitable for cutting, by means of a specific blade, panels 1. On/Off switch with speed regulator of wood or plastic material and sheet metal 3. -
Page 15: Switching On And Off
differential switch. CONNECTING TO AN ELECTRICAL VACUUM - that the power supply system is earthed and CLEANER (not included) conforms to the standards (only if the power It is mandatory to connect the dust extraction tool is class 1, which is equipped with a plug adaptor (12) to an electrical vacuum cleaner, with earth cable). - Page 16 and solutions”. During use, the blade wears, loses its sharpness, When not using the tool, switch it off and di- becomes damaged, breaks: always make a vi- sconnect the plug from the socket. sual check before using and replace if necessary. Remember that a successful cut also depends on the blade condition.
- Page 17 while the rest of the tool (and the blade) will be workpiece but does not touch it. At this point, at an angle. the blade will be completely exposed once you 1. Unplug from the power supply switch on the power tool. 2.
-
Page 18: Maintenance
chips and sawdust will fall to the floor and not nents of the tool and fig.D. If you are not familiar toward you or the tool. with handling and assembling mechanical components, we recommend that you consult Ceiling cuts must be done with extreme caution an authorised service centre. -
Page 19: Problems, Causes And Solutions
PROBLEMS, CAUSES AND SOLUTIONS STORAGE Clean the tool and all its accessories thoroughly PROBLEM CAUSE SOLUTION (see Maintenance section). Protect the unpainted parts with protective oil and use the original The power tool The power cord is Check the power packaging or case (where fitted) to protect it.
Need help?
Do you have a question about the S665EPQ and is the answer not in the manual?
Questions and answers