Advertisement
Quick Links
Advertisement

Related Manuals for SOLIS TURBO ENERGY Lithium Series


Summary of Contents for SOLIS TURBO ENERGY Lithium Series
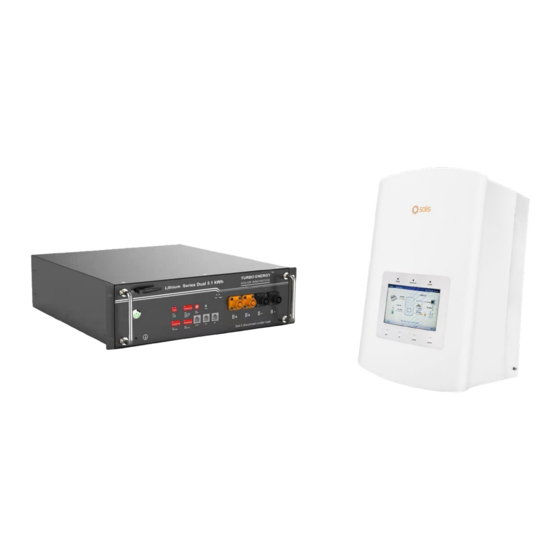
- Page 1 QUICK INSTALLATION GUIDE Lithium Series Dual 48V 5.1kWh Solis Inverter www.turbo-e.com...
- Page 2 Solis Inverter Configuration For the configuration of the inverter, it is necessary to select USER-Define in the Battery Module within Battery Select. www.turbo-e.com...
- Page 3 It will be verified that the communication is correct if the main screen shows CAN OK between the battery and the inverter. Also, on page 3 of Information the BMS Status must appear as NORMAL 2. Battery on and off To turn on the battery, press the power button for a few seconds.
- Page 4 3. Configuration Lithium Series Dual 48V 5.1 kWh Each module has 5 DIP switches (SW1, SW2, SW3, SW4, and SW5) that will be set differently based on system requirements, battery connection, and inverter. SW1 is for the communication protocol with the inverter. If the CAN protocol is used, 1 and 2 must be ON.
- Page 5 3.1. DIPS FOR COMMUNICATION ON SERIES SW2 and SW3 are for communication between batteries. Connected battery Group Series connect Address Set number Primary Primary Sub1 Sub2 Primary Sub1 Sub2 Sub3 www.turbo-e.com...
- Page 6 Connected battery Group Series connect Address Set number Primary Sub1 Sub2 Sub3 Sub4 Primary Sub1 Sub2 Sub3 Sub4 Sub5 www.turbo-e.com...
- Page 7 Connected battery Group Series connect Address Set number Primary Sub1 Sub2 Sub3 Sub4 Sub5 Sub6 www.turbo-e.com...
- Page 8 Connected battery Group Series connect Address Set number Primary Sub1 Sub2 Sub3 Sub4 Sub5 Sub6 Sub7 Make sure DIP switch SW2 is selected correctly. If the battery is connected in parallel mode, but DIP8 is in the ON position, a serious and dangerous fault may occur.
- Page 9 3.2. DIPS FOR COMMUNICATION ON PARALLEL SW2 and SW3 are for communication between batteries. Connected battery Group Parallel connect Address Set number Primary Primary Sub1 Sub2 Primary Sub1 Sub2 Sub3 www.turbo-e.com...
- Page 10 Connected battery Group Parallel connect Address Set number Primary Sub1 Sub2 Sub3 Sub4 Primary Sub1 Sub2 Sub3 Sub4 Sub5 www.turbo-e.com...
- Page 11 Connected battery Group Parallel connect Address Set number Primary Sub1 Sub2 Sub3 Sub4 Sub5 Sub6 www.turbo-e.com...
- Page 12 Connected battery Group Parallel connect Address Set number Primary Sub1 Sub2 Sub3 Sub4 Sub5 Sub6 Sub7 Make sure DIP switch SW2 is selected correctly. If the battery is connected in parallel mode, but DIP8 is in the ON position, a serious and dangerous fault may occur.
-
Page 13: Wiring Configuration
4. Wiring Configuration The cable needed to make the A standard pin-to-pin cable For the connection between connection is the RJ45. This is with an RJ45 connector the inverter and the battery, a cable made up of 8 smaller should be used. the RJ45 cable will be cables each with a different connected to the ‘’Inverter’’...
Need help?
Do you have a question about the TURBO ENERGY Lithium Series and is the answer not in the manual?
Questions and answers