Table of Contents
Advertisement
Quick Links
Advertisement
Table of Contents

Related Manuals for Kaiterra SensedgeMini


Summary of Contents for Kaiterra SensedgeMini
- Page 1 Kaiterra Sensedge Mini Air Quality Monitor Deployment Guide OCTOBER 2022...
-
Page 2: Table Of Contents
Table of Contents 1 Introduction………………………………………………………………………………………….…….…….…………………………………………………2 2 Layout Considerations...........................3 Placement Guidelines..........................6 Enclosed Spaces............................8 Open Spaces.............................11 3 Power Considerations..........................14 4 Network and Data Considerations......................17 5 Dashboard Setup............................20 6 Device Setup..............................23 7 Device Configuration............................25 8 Resources................................28 Page 1... -
Page 3: Introduction
To evaluate the performance of the filtration and HVAC systems This guide will assist you in determining the best place to install your Kaiterra Sensedge Mini air quality monitors for individual rooms, large open spaces, and entire building projects. -
Page 4: Layout Considerations
Locker Rooms Not recommended For any of Kaiterra’s enterprise air quality monitors, we recommend an area coverage of 3,500ft² (325m²) with the area of each enclosed space calculated individually*. *Our guidelines follow the standards outlined in RESET and WELL v2 for sensor area coverage. - Page 5 IAQ monitoring and the budget available for the project. Feel free to contact your account representative at Kaiterra to discuss this further. The following is a sample floor plan that demonstrates how our air quality monitors should be distributed throughout a typical building floor plan.
- Page 6 Image 1. Example of a 22,500ft² (2090m²) office space with multiple rooms. Page 5...
-
Page 7: Placement Guidelines
Placement Guidelines Image 2. A room demonstrating proper air quality monitor placement. For placement, we recommend the guidelines required for RESET Air certification, which requires RESET Air Accredited Monitors to be installed according to the following requirements: A. Wall-mounted and centrally-located within monitored spaces. B. - Page 8 E. Hard-wired to a permanent power source (recommended but not mandatory). Other things to consider: Air is drawn into the Sensedge from both the sensor modules on the bottom and the air intake on the top. It is vital that neither side of the device is covered as any changes in the airflow may affect the readings and accuracy of our devices.
-
Page 9: Enclosed Spaces
Enclosed Spaces Definition: A room enclosed by four walls and a door, which is smaller than 3,500ft². Image 3. A 2,500ft² (232m²) room with three (3) suggested AQM installation locations. Page 8... - Page 10 -- but for this example, location one (1) is acceptable. Kaiterra air quality monitors should be as central to the room as possible. Because of this, location two (2) is not ideal. However, since the door on the right is 40 feet (12 meters) away, the installer could shift location two (2) toward the center of the room to become a better option.
- Page 11 As a comparison, the same example now has a diffuser and a window added to the layout. Given the RESET placement requirements and Kaiterra’s best practices, the only acceptable air quality monitor placement for this scenario is position three (3): It is centrally located -- especially for the regularly occupied space in the room ...
-
Page 12: Open Spaces
Open Spaces Definition: An open space, uninterrupted by walls for more than 3,500ft². For open spaces, the best way to approach this is to take a look at the entire space as a whole and determine two key things: 1. How big is the space you are trying to collect data from? 2. - Page 13 Image 5. A 10,000ft² (929m²) open space with three (3) AQMs installed for optimal air data coverage. For the example above (Image 5), we have a 10,000ft² (929m²) open space. In order to achieve optimal coverage for this space, you will want three (3) air quality monitors installed -- which would meet both WELL and RESET certification requirements.
- Page 14 For non-certification projects with a similar scenario as above, you will still want to prioritize the regularly occupied spaces. However, you could reduce the number of monitors in the space from three (3) to two (2) by removing the bottom monitor as this would still provide great coverage of the regularly occupied areas.
-
Page 15: Power Considerations
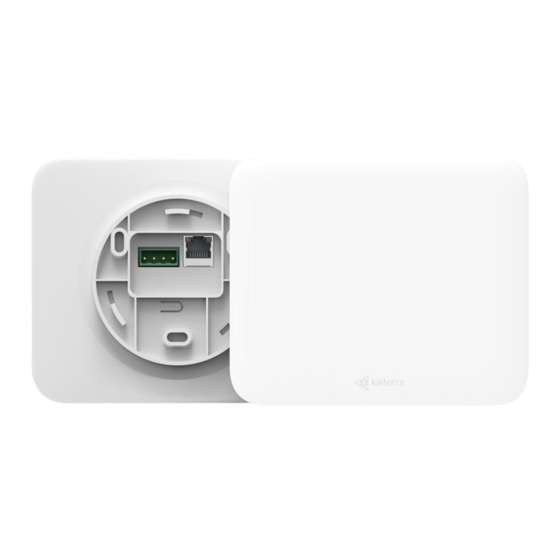
Power Considerations Depending on the enterprise air quality monitor you choose for your installation, you will need to have access to varying types of power in order to properly power your device(s). The Sensedge Mini natively supports: 100-240V AC via USB-C cable and adapter Connect the USB-C cable to the wall plug adapter provided with your Sensedge Mini. - Page 16 12-30V DC via direct wiring To power your device via direct wiring, connect the electrical wires from your low voltage transformer to the 4-pin Phoenix pin plug provided. Check the “+” and “-” marks on the back of the device to make sure the wires are connected in the right order, and fasten the screws on the Phoenix pin plug to secure.
- Page 17 Power over Ethernet (SE-200P only) Run your Ethernet cable from your PSE (Power Sourcing Equipment) through the opening on the plate, and into the Ethernet port on the back side of the device. Once the device is connected to the Ethernet cable, configure your PSE accordingly. Consult your IT department for PSE configuration details.
-
Page 18: Network And Data Considerations
Secondary MQTT via Wi-Fi or Ethernet Open API via Wi-Fi or Ethernet via the Kaiterra Cloud Some network connections may require additional wiring, such as RS-485 or a recommended Ethernet cable connection. We do not provide any additional wiring with our devices, so if you wish to use any of the communication protocols above, please make sure you are able to properly connect to them and provide any necessary wiring. - Page 19 Wi-Fi or Ethernet connection to the Internet. This will allow your data to be uploaded to the Kaiterra Cloud and Dashboard for ease of access via Primary MQTT and also enables many other communications and features that require the Internet, such as our Open API and the Kaiterra Dashboard.
- Page 20 MAC address for the Sensedge Mini can be found directly on the device, printed above the sensor module bays. While Internet Network connectivity is recommended, our Kaiterra Air Quality Monitors can be used in offline settings. For example: BACnet/IP communication can be established via Ethernet, but the Ethernet connection does not have to connect online.
-
Page 21: Dashboard Setup
Dashboard Setup The Kaiterra Dashboard allows you to view the data from your Kaiterra air quality monitors. Go to dashboard.kaiterra.com and create an account. Then, click “Add Device” and use the Unique Identifier (UDID) of each device to add them to the dashboard. - Page 22 However, for large scale projects, the process of adding each individual device to the Kaiterra Dashboard can be difficult. When configuring a device with the Kaiterra Enterprise Configuration Tool, it saves every device you configure under the Options → History tab and provides a way for you to link any of the devices that were configured by that specific computer or smartphone to the Kaiterra Dashboard.
- Page 23 Once all of the devices are added to the Kaiterra Dashboard, there are plenty of things you can do with it, such as creating alerts to notify you when a pollutant reading has gone too high or you can put your air quality readings on display using our Kiosk View.
-
Page 24: Device Setup
When inserting, make sure the sensor modules have their pin connectors facing upward and the Kaiterra logo facing toward you. *For a complete list of components, refer to our Sensedge Mini introduction video. Page 23... - Page 25 Press the sensor modules into their module bays. You should hear a click when they are fully inserted. If the device is turned on during insertion, the module bay light will briefly light up, indicating a successful connection. For installation instructions, refer to our Sensedge Mini installation guides.
-
Page 26: Device Configuration
Open up the Kaiterra Enterprise Configuration Tool and connect to the WiFi signal with “Kaiterra” at the start of its name (SSID). If multiple Sensedge Minis are being configured at once, there may be multiple WiFi signals appearing with a similar SSID. You can find the correct SSID printed on the front of the device above the sensor module bays. - Page 27 Select the “Configure” tab to configure the device. For basic configuration, fill in the information for: Project for easier project identification via the History tab Device (Name) for easier device identification on the dashboard Either the WiFi or Ethernet settings ...
- Page 28 For advanced configuration, scroll down and fill in the information for: Secondary MQTT (Broker URI, Broker Port, and Frequency) Modbus (Address, Rate, Parity, and AQI Calculation) BACnet (ID -- leaving this blank will disable BACnet) Once complete, click “Configure device” at the bottom. The device will then use your configured settings to connect to the network/BMS*.
-
Page 29: Resources
Sensedge Mini Installation Guide Sensedge Mini BACnet User Manual Sensedge Mini Modbus User Manual Sensedge Mini Connectivity FAQs and Troubleshooting Guide Kaiterra Dashboard Navigating Your Kaiterra Dashboard (Video) Miscellaneous Secondary MQTT Documentation API Documentation Understanding Your Air Quality Readings Page 28...
Need help?
Do you have a question about the SensedgeMini and is the answer not in the manual?
Questions and answers