Table of Contents
Advertisement
Quick Links
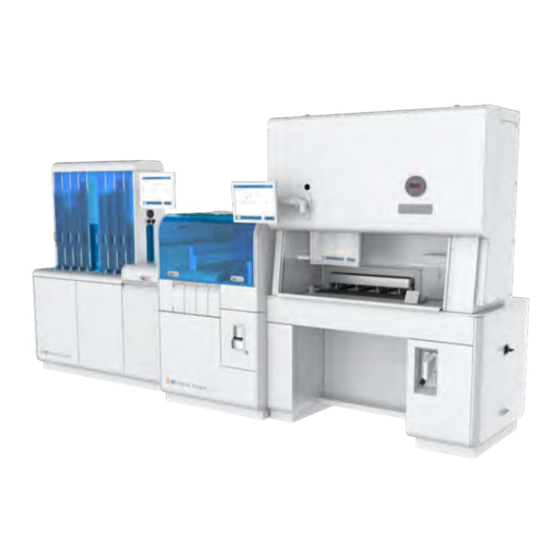
Kiestra™ InoqulA
User's Manual
BD Kiestra B.V.
Marconilaan 6
9207 JC Drachten, The Netherlands
BD Switzerland Sàrl
Terre Bonne Park – A4
Route de Crassier 17
1262 Eysins, Switzerland
Australian and New Zealand Sponsors:
Becton Dickinson Pty Ltd.
66 Waterloo Road
Macquarie Park NSW 2113, Australia
Becton Dickinson Limited
14B George Bourke Drive
Mt. Wellington Auckland 1060, New Zealand
L012127(09) 2022-06
446958, 446971, 446972, 446973
English
bd.com/e-labeling
Advertisement
Table of Contents

Related Manuals for BD Kiestra InoqulA


Summary of Contents for BD Kiestra InoqulA
- Page 1 Kiestra™ InoqulA User's Manual BD Kiestra B.V. Marconilaan 6 9207 JC Drachten, The Netherlands BD Switzerland Sàrl Terre Bonne Park – A4 Route de Crassier 17 1262 Eysins, Switzerland Australian and New Zealand Sponsors: Becton Dickinson Pty Ltd. 66 Waterloo Road...
- Page 2 SA slide dispenser. Added detail for SPM ink cartridge maintenance. BD, the BD Logo, BBL, ESwab, Kiestra, MAX, Phoenix, Synapsys, and Vacutainer are trademarks of Becton, Dickinson and Company or its affiliates. All other trademarks are the property of their respective owners. © 2022 BD. All rights reserved.
-
Page 3: Table Of Contents
Table of Contents Instructions for use guidance Customer release notes Conventions Notes, cautions, and warnings Symbols glossary Depiction of patient information Introduction Intended use Module description 2.2.1 Deck layout and plate path 2.2.2 User interface 2.2.2.1 BarcodA user interface 2.2.2.2 InoqulA user interface Configuration BarcodA configuration... - Page 4 BD Kiestra™ InoqulA User's Manual Operation Startup Login Starting normal operation Responding to notifications Pausing operation Emergency stop Managing consumables 4.7.1 Selecting a media template 4.7.2 Filling destackers with plates 4.7.3 Loading pipette tips 4.7.4 Beads 4.7.5 Loading the SPM slide rack 4.7.6...
- Page 5 Table of Contents Troubleshooting Responding to errors Stacker errors Bead dispenser errors BarcodA error messages InoqulA error messages Supporting applications Specimen Creator Spreading patterns 7.2.1 Description of spreading patterns 7.2.2 Selecting a pattern based on specimen type 7.2.3 Specimen application methods 7.2.4 Primary patterns 7.2.4.1...
- Page 6 BD Kiestra™ InoqulA User's Manual...
-
Page 7: Instructions For Use Guidance
EU Only: Users shall report any serious incident related to the device to the Manufacturer and National Competent Authority. Outside EU: Contact your local BD representative for any incident or inquiry related to this device. Technical Service and Support: In the United States contact BD at 1.800.638.8663 or bd.com. -
Page 8: Symbols Glossary
INFORMATION ON AN ACTIVITY WHICH POTENTIALLY COULD CAUSE INJURY TO THE USER IS PRESENTED AS A WARNING. Symbols glossary Some symbols listed below may not apply to this product. US Customers only: For symbols glossary, refer to bd.com/symbols-glossary. Symbol Meaning CE marking; Signifies European... -
Page 9: Depiction Of Patient Information
1 - Instructions for use guidance Symbol Meaning Danger of crushing Do not step Earth terminal to ground Electrical shock Frame/chassis Hot surface Class 2 laser Low clearance Moving parts - pinch point Pinch point Refer to accompanying documentation Sharp point UV lamp Indicates internal high voltage cables that remain powered after the power... - Page 10 BD Kiestra™ InoqulA User's Manual...
-
Page 11: Introduction
2.2.2 User interface Intended use The BD Kiestra™ InoqulA is an in vitro diagnostic device system which is intended to automate specimen processing according to user-defined procedures and protocols. In Fully Automated (FA) mode, this includes opening and closing sample container(s), barcoding, inoculating and streaking plated media, and inoculating tubes and slides. -
Page 12: Deck Layout And Plate Path
BD Kiestra™ InoqulA User's Manual 2.2.1 Deck layout and plate path 1. Destacker positions: The user loads stacked media plates in the user defined destacker positions. Plates are dispensed and travel on the belt to be processed. 2. Stacker positions: After processing, the inoculated plates are stacked in the stacker positions. -
Page 13: User Interface
2 - Introduction 8. FA module inoculation position: Liquid specimen material is aspirated with the pipettor and applied to a plate, tube, or slide. 9. SA module inoculation position: Plates are supplied for manual inoculation at the workstation. After the specimen is verified, plate lids are opened automatically. Any required tubes and slides may be manually labeled and inoculated here. -
Page 14: Barcoda User Interface
BD Kiestra™ InoqulA User's Manual 2.2.2.1 BarcodA user interface After a user logs in, the Instrument Status view is displayed by default. Instrument Status view opens a side window that displays notifications. A badge on the icon indicates the number of notifications. - Page 15 2 - Introduction Stacker Details view The following information is displayed and may be edited in the Stacker Details view: Details - stacker name, stacker height, and status Media Protocol assigned to the stacker Incubation Type assigned to the stacker Destacker Details view The following information is displayed and may be edited in the Destacker Details view: Destacker Availability - used to enable or disable a destacker...
- Page 16 BD Kiestra™ InoqulA User's Manual Inventory view A colored notification indicator appears on the affected pane if user intervention is required. Worklist view A logged in user can view a detailed list of requested plates. Utilities view The following options are available in the Utilities view: Stop BarcodA enables users to stop the module before cleaning or before turning off the main power.
-
Page 17: Inoqula User Interface
2 - Introduction Backup and Restore Database enables users to specify the time of the daily database backup. Printer Alignment enables users to align the print on plate barcode labels. 2.2.2.2 InoqulA user interface After a user logs in, the Status tab is displayed by default. Instrument Status view opens a side window that displays notifications. - Page 18 BD Kiestra™ InoqulA User's Manual opens the user login menu. starts normal operation. pauses normal operation. 7. Status view 8. Inventory view 9. SA Mode view 10. Utilities view 11. Schematic of specimen racks 12. Schematic of the bead dispenser 13.
- Page 19 2 - Introduction Slide Rack Details view The Slide Rack Details display indicates the status of each slide position. Inventory view A colored notification indicator appears on the affected pane if user intervention is required.
- Page 20 BD Kiestra™ InoqulA User's Manual Utilities view The following options are available in the Utilities view: Stop InoqulA enables users to stop the module to replenish consumables, before cleaning, or before turning off the main power. Lock SA Guards locks and unlocks the shifter cover, printer cover, and bead waste drawer.
- Page 21 Slide Processing Module enables users to perform SPM cleaning and maintenance. NOTE At the BD-validated SPM slide dispense volume, temperature, and time set points, the slide temperature is approximately 45 °C when dry. If changes are made to the SPM set points, the laboratory must measure the slide temperature and re-validate the slide drying process.
- Page 22 BD Kiestra™ InoqulA User's Manual...
-
Page 23: Configuration
Configuration The initial configuration is performed by BD associates during the installation of the module. NOTE Contact BD if changes to the initial configuration are required. Users may perform configuration tasks described in the following sections: 3.1 BarcodA configuration 3.2 InoqulA configuration 3.6 Scheduling database backup... -
Page 24: Configuring Destackers
BD Kiestra™ InoqulA User's Manual All users have permission to change language settings. See 3.3 Language settings. Advanced users can change User Configuration. Select User Configuration to display configurable settings. Select to view additional options. The following settings can be configured in both the BarcodA and InoqulA user interfaces. -
Page 25: Configuring Stackers
3 - Configuration Number of plates If a small number of additional plates are needed to complete processing after the initial stack is depleted: 1. Determine the number of plates needed. 2. Open the destacker door. 3. Insert up to three plates. 4. -
Page 26: Inoqula Configuration
BD Kiestra™ InoqulA User's Manual Media Protocol 1. Select 2. Select the desired media protocol. 3. Select Save to accept the setting or select Cancel to restore the previous setting. Incubation Type 1. Select 2. Select the desired incubation type. - Page 27 3 - Configuration Advanced users can change User Configuration. Select User Configuration to display configurable settings. Select to view additional options. 3.2.2 Desktop printer settings 3.2.3 Validation settings 3.2.4 SPM settings...
-
Page 28: Configuring Specimen Tubes
Configuration menu. 3.2.2 Desktop printer settings Initial desktop printer configuration is performed by BD personnel during installation. Only advanced users can change the configuration after installation. Always consult BD before altering the desktop printer configuration. Advanced users can change basic printer settings from the InoqulA User Configuration display. -
Page 29: Setting Print Darkness
3 - Configuration 3.2.2.1 Setting print darkness 1. From the InoqulA User Configuration menu, select Print darkness. 2. Select to display the Print darkness slider. 3. Drag the slider until the desired darkness value is displayed. 4. Select Save to accept the setting or select Undo to return to the previous value. 3.2.2.2 Setting print speed 1. -
Page 30: Setting The Label Top Offset
Initial InoqulA configuration is performed by BD personnel during installation. Advanced users can change validation settings from the InoqulA User Configuration display. NOTE Consult BD before changing any of the following options from the initial settings. 3.2.3.1 Aspirate volume validation 3.2.3.2 Broth volume dispense validation 3.2.3.3 Plate dispense volume validation... -
Page 31: Aspirate Volume Validation
3 - Configuration 3.2.3.1 Aspirate volume validation 1. From the InoqulA User Configuration menu, select Should the aspirate customer volumes be validated?. 2. Select to display the aspirate volume toggle. 3. Move the toggle to select Yes or No. 4. If you select No, then the following notification is displayed: Select OK to proceed with the change or select Cancel to abort. -
Page 32: Plate Dispense Volume Validation
BD Kiestra™ InoqulA User's Manual 4. If you select No, then the following notification is displayed: Select OK to proceed with the change or select Cancel to abort. 5. Select Save to accept the setting or select Undo to return to the previous value. -
Page 33: Spm Settings
Initial InoqulA configuration is performed by BD personnel during installation. Advanced users can change SPM settings from the InoqulA User Configuration display. NOTE Consult BD before changing any of the following configuration options from the initial settings. 3.2.4.1 Setting the slide drying time 3.2.4.2 Using slide drying time for validated volumes... -
Page 34: Stop Processing For Spm High Temperature
BD Kiestra™ InoqulA User's Manual 4. If you select No, then the following notification is displayed: Select OK to proceed with the change or select Cancel to abort. 5. Select Save to accept the setting or select Undo to return to the previous value. -
Page 35: Setting The Slide Dispense Bottom Offset
3 - Configuration 3.2.4.5 Setting the slide dispense bottom offset 1. From the InoqulA User Configuration menu, select Slide Dispense Bottom Offset. 2. Select to display the Slide Dispense Bottom Offset field. 3. Select the field to display the on-screen keyboard. 4. -
Page 36: Setting Inactivity Logout Time
BD Kiestra™ InoqulA User's Manual Setting inactivity logout time Inactivity logout time can be configured in both the BarcodA and InoqulA user interfaces. 1. From the User Configuration menu, select Time before logout due to inactivity (in min). 2. Select to display the Time before logout due to inactivity (in min) field. -
Page 37: Scheduling Database Backup
3 - Configuration Scheduling database backup Advanced users may specify the time of the daily database backup. This action can be performed in both the BarcodA and InoqulA user interfaces. 1. From the Utilities view, select Backup and Restore Database. 2. -
Page 38: Setting Warning Alarm Duration
BD Kiestra™ InoqulA User's Manual 3. Select Yes to enable audible warning alarms or select No to disable audible warning alarms. 4. Select Save to accept the setting or select Undo to return to the previous value. Setting warning alarm duration If audible warning alarms are enabled, the alarm duration can be configured in both the BarcodA and InoqulA user interfaces. - Page 39 3 - Configuration USB-HID (CNC2) 3. Scan the barcode on the cradle. The scanner will then pair with the cradle to establish the Bluetooth connection. Once connected, the blue LED on the cradle will light continuously. 4. Scan the following barcode to configure the scanner for InoqulA applications. InoqulA Configuration (DIAU) 5.
- Page 40 BD Kiestra™ InoqulA User's Manual Enable Hand Free Scanning (S7, S1) NOTE Hand-free mode may quickly drain battery life. Disable this mode whenever possible. 7. Scan one of the following barcodes to select keyboard configurations for the indicated language: English (KE)
-
Page 41: Operation
SA module workstation on the right inside panel. BD recommends that the module remain powered on at all times except during certain maintenance procedures. 1. Verify that the blue air pressure switch is set to ON in the vertical position. - Page 42 BD Kiestra™ InoqulA User's Manual If the BarcodA touchscreen does not power up, reset by pressing the power button on the PC located inside the BarcodA printer drawer. See 5.10 Replacing the BarcodA printer ribbon and labels for instructions to open the printer drawer.
-
Page 43: Login
Select the user name to display the role of the active user. User names, passwords, and user rights are configured in BD Synapsys™ Informatics. Refer to the BD Synapsys™ Informatics instructions for use for details on setting up user accounts. Starting normal operation Select in the bottom left of the Status view. -
Page 44: Responding To Notifications
BD Kiestra™ InoqulA User's Manual Responding to notifications Depending on configuration settings, a buzzer may sound when system alerts occur. Visual indicators are displayed in the user interface. Informative notifications are displayed with a blue indicator. When user intervention is soon expected, a non-blocking notification with orange indicator is displayed. -
Page 45: Pausing Operation
4 - Operation 4. Select Acknowledge to clear an alert from the list. 5. Select to scroll through the list of alerts. Pausing operation Safety covers are locked when the module is in operation. To open a cover, select When paused, any actions in progress are finalized. The robotic arms are sent to the home positions and then disabled. -
Page 46: Selecting A Media Template
Obtain a sufficient number of plates from the laboratory’s storage location. Allow any plates that are stored refrigerated to come to room temperature before use. Once removed from their storage location, BD recommends maintaining plates with the lids upright so that moisture does not form on the lids. -
Page 47: Beads
4 - Operation 5. Close the hood. 6. From the InoqulA Inventory view, select Tips. 7. From the Tip Details view, select Refill at the position(s) where a rack was loaded. 4.7.4 Beads When not in use, a spare bead dispenser should be autoclaved and ready to replace the empty bead dispenser. -
Page 48: Loading The Spm Slide Rack
BD Kiestra™ InoqulA User's Manual 7. Place emptied or new bead disposal containers into the drawer. NOTE Remove the caps from the bead disposal containers when placing into the drawer. Place the cap in the space next to each container. -
Page 49: Loading The Sa Slide Dispenser
NOTE Allow any plates that are stored refrigerated to come to room temperature before use. Once removed from their storage location, BD recommends maintaining plates with the lids upright so that moisture does not form on the lids. 3. On the BarcodA Inventory view, verify the ribbon and label inventory. -
Page 50: Printing Broth Tube Labels
BD Kiestra™ InoqulA User's Manual e. Verify the bead waste capacity. f. Verify the Slide Processing Module printer ink level. 6. Replace the desktop printer label and ribbon rolls if necessary. See 5.12 Replacing the InoqulA printer ribbon and labels. 7. Fill the pipette tip racks if necessary. -
Page 51: Placing Broth Tubes In Racks
4 - Operation 4.8.2 Placing broth tubes in racks 1. Place the broth tube barcode label lengthwise so that when holding the tube in a vertical position, the barcode lines are horizontal. 2. Place labeled broth tubes in the appropriate rack for the tubes' diameter. Do not place broth tubes with different diameters or different heights in the same rack. -
Page 52: Relabeling Broth Tubes
BD Kiestra™ InoqulA User's Manual 4.8.4 Relabeling broth tubes 1. From the InoqulA Utilities view, select Relabel Broth Tubes. 2. Scan or enter the broth tube barcodes to create a batch. NOTE If a scanned barcode does not correspond to a broth tube, e.g. plate or slide barcode, then an Invalid broth tube notification appears in the batch list. - Page 53 ® BD Vacutainer 16x100 mm with recapping cap BD BBL™ broth tube BD ESwab™/Copan ESwab™ BD Phoenix™ AST Broth BD Phoenix™ AST-S Broth BD MAX™ Sample Buffer Tube Axon Lab Staphylococci Enrichment Broth Base bioMérieux broth tube CEB 35x70 mm, 60 mL Falcon 15 mL centrifuge tube...
- Page 54 BD Kiestra™ InoqulA User's Manual A (minimum B (maximum distance, distance, Rack bottom of cap bottom of cap Container Type Type to top of to bottom of barcode, in barcode, in Milian 16x110 mm, 11 mL Sarstedt 16x97 mm, 10 mL Sarstedt 16x100 mm, 10 mL, conical Sarstedt 16.5x101 mm, 13 mL...
-
Page 55: Loading Specimen Container Racks
4 - Operation 2. Ensure that all specimen container barcode labels are oriented vertically and do not cover the cap or the bottom portion of the container. 3. Place the labeled specimen containers in the appropriate rack for the containers’ dimensions. -
Page 56: Processing Stat Racks
BD Kiestra™ InoqulA User's Manual 4.8.8 Processing Stat racks A specimen container rack may be loaded and assigned Stat priority either before starting or during FA processing. NOTE Only one rack at a time can be configured as Stat. Before starting FA processing 1. -
Page 57: Unloading Stackers
3. When the rack door indicator light is blinking, open the selected door and remove the rack. 4.8.12 Unloading the SPM slide rack NOTE BD recommends that you do not unload the slide rack if Slides still drying is displayed in the System Alerts view. 1. Select ; or from the Utilities view, select Stop InoqulA. -
Page 58: Semi-Automated Specimen Processing
NOTE Allow any plates that are stored refrigerated to come to room temperature before use. Once removed from their storage location, BD recommends maintaining plates with the lids upright so that moisture does not form on the lids. 3. On the BarcodA Inventory view, verify the ribbon and label inventory. - Page 59 4 - Operation 1. Log in on the InoqulA user interface. 2. Select the SA Mode view. 3. Select 4. Scan the specimen barcodes or enter specimen IDs using the on-screen keyboard. NOTE Using a hand scanner is the preferred method of entering specimen IDs.
-
Page 60: Deleting A Specimen During Batch Creation
BD Kiestra™ InoqulA User's Manual Unique barcode numbers are generated for each container needed for each specimen. All specimen information is displayed in a worklist: 4.9.1.1 Deleting a specimen during batch creation While creating a batch, a scanned specimen may be deleted. -
Page 61: Starting Semi-Automated Processing
4 - Operation 2. Select Add Media Protocol. 3. Select the desired media protocol, then select OK. Only one media protocol can be added at a time. Delete a media protocol from a specimen 1. Select the media protocol to be deleted from the worklist. 2. - Page 62 BD Kiestra™ InoqulA User's Manual 3. Check the status of each plate. Pending indicates that no plates are en route to the inoculation position. Getting ready indicates that a plate is en route to the inoculation position. Ready indicates that the plate is ready for inoculation.
-
Page 63: Rejecting A Plate During Inoculation
4 - Operation 7. Apply specimen to the slide. Allow the specimen material on the slide to dry, and then process in accordance with laboratory procedures. WARNING THE SLIDE HEATER MAY BE HOT. 8. If a broth tube is required, the desktop printer prints a barcode label. Apply the label to the broth tube. -
Page 64: Reprinting Labels
BD Kiestra™ InoqulA User's Manual 3. Set aside enough specimen material to inoculate the recreated analysis on the new plate, then continue processing the rest of the specimens from the batch. 4. When the rest of the batch is complete, the new plate will be transported to the inoculation position. -
Page 65: Shutdown
4 - Operation SA module 1. Store or discard specimen containers according to the laboratory standard operating procedures. 2. Incubate or process broth tubes according to the laboratory standard operating procedures. 3. Process slides according to the laboratory standard operating procedures. 4. - Page 66 BD Kiestra™ InoqulA User's Manual...
-
Page 67: Routine Cleaning And Maintenance
Routine cleaning and maintenance It is recommended that InoqulA components be cleaned according to the procedures described in this manual. InoqulA requires little user maintenance to provide reliable performance. WARNING ALL PATIENT SPECIMENS AND MICROBIAL CULTURES ARE POTENTIALLY INFECTIOUS AND SHOULD BE TREATED WITH UNIVERSAL PRECAUTIONS. REFER TO THE CDC MANUAL BIOSAFETY IN MICROBIOLOGICAL AND BIOMEDICAL LABORATORIES, 6TH EDITION, 2020, AS WELL AS OTHER RECOMMENDED LITERATURE. -
Page 68: Frequency Of Routine Cleaning
Each laboratory must assess the cleaning needs of their individual module and develop cleaning protocols/cleaning schedules that ensure appropriate cleanliness. Cleaners and disinfectants BD recommends the use of a single agent that combines functions to facilitate fast and effective cleaning and disinfection. Any exceptions to that recommendation are specified in this protocol. -
Page 69: Dry Cleaning
5 - Routine cleaning and maintenance Combined dry and wet cleaning/disinfection. The proper sequence when dry cleaning prior to wet cleaning/disinfection is: 1. Dry-clean using a vacuum cleaner with a HEPA filter and/or a brush to remove dust and any particulate matter. 2. - Page 70 BD Kiestra™ InoqulA User's Manual 5.6 Cleaning table for details on the recommended cleaning methods and cleaning frequency. Touchscreen 1. Clean with a microfiber wipe, moistened with water if needed. 2. If microbial contamination occurs or is suspected on the monitor surface, disinfect with the recommended cleaning/disinfecting agent sprayed on a microfiber wipe.
- Page 71 5 - Routine cleaning and maintenance Suction cups CAUTION Do not remove suction cups. Clean with the recommended cleaner/disinfectant. Use a microfiber wipe moistened with water to remove cleaning agent residue. Dry with a dry microfiber wipe. Bead dispenser Empty the bead dispenser and discard the beads. Disinfect the used bead dispenser utilizing one of the following protocols.
- Page 72 BD Kiestra™ InoqulA User's Manual 4. Select Initialize. 5. Select Move Spatula. 6. Remove the rack spatula cover and inspect for glass debris that may be present inside the spatula. 7. If glass debris is visible, vacuum inside the rack spatula.
-
Page 73: Cleaning Table
5 - Routine cleaning and maintenance Cleaning table Cleaning method Cleaning frequency Location followed Daily Weekly Monthly Quarterly by wet BarcodA – cover BarcodA – metal Brush, guide and recess microfiber underneath, wipe suction cup area FA – drip trays FA –... -
Page 74: Incidental Cleaning
BD Kiestra™ InoqulA User's Manual Cleaning method Cleaning frequency Location followed Daily Weekly Monthly Quarterly by wet Stackers / destackers Lifting and rotating cylinders Scanners / Microfiber scanner wipe windows Suction cups Incidental cleaning In the event of a spill, wipe up the spill with a microfiber wipe soaked with a cleaner/disinfectant. -
Page 75: Decontamination
5 - Routine cleaning and maintenance Decontamination Decontaminate after spills, splashes, or obvious contamination, and before transporting the equipment out of the laboratory. WARNING CONSIDER ALL ORGANISMS AS POTENTIALLY INFECTIOUS AND HANDLE ACCORDING TO STANDARD MICROBIOLOGICAL PRACTICES, SPECIAL PRACTICES, AND SAFETY EQUIPMENT RECOMMENDED FOR BIOSAFETY LEVEL 2 (BSL-2) CONTAINMENT.* BSL-2 PRACTICES INCLUDE, BUT ARE NOT LIMITED TO THE FOLLOWING: WEAR GLOVES AND LAB COAT WHEN HANDLING POTENTIALLY... -
Page 76: Preventive Maintenance
Once every six months, preventive maintenance is required to be performed by BD authorized personnel. If a service contract is in place, BD will contact your laboratory when preventive maintenance is due. If there is no service contract, contact BD to schedule preventive maintenance. - Page 77 5 - Routine cleaning and maintenance 6. Turn the purple handle counter-clockwise to unlatch the print head. 7. Remove the used ribbon roll. Retain the old, empty ribbon core. 8. Refer to the ribbon routes diagram affixed to the rear panel of the printer. 9.
- Page 78 BD Kiestra™ InoqulA User's Manual 16. Push the new label roll onto the holder with the label side facing outward. NOTE Push the label roll onto the holder by the core. Avoid pushing the label stock as this may cause misalignment of the roll.
- Page 79 5 - Routine cleaning and maintenance 24. Continue to pull the free end of the backing paper behind the bottom post and insert the end into a notch on the rewind holder. 25. Rotate the holder counter-clockwise enough to securely wrap the backing paper onto the holder.
-
Page 80: Barcoda Printer Alignment
BD Kiestra™ InoqulA User's Manual 5.11 BarcodA printer alignment 1. From the BarcodA Utilities view, select Printer Alignment. 2. Follow the displayed instructions. 3. Select Print Label to generate a test print. 4. Inspect the test print labels for proper alignment. -
Page 81: Replacing The Inoqula Printer Ribbon And Labels
5 - Routine cleaning and maintenance 5.12 Replacing the InoqulA printer ribbon and labels 1. Ensure that the BCC is closed. 2. From the InoqulA Instrument Status view, select the printer icon. 3. Select Replace on the Ribbon pane and on the Labels pane. 4. -
Page 82: Purging The Spm Print Head
BD Kiestra™ InoqulA User's Manual 11. Place the new ribbon roll on the bottom holder (push the spring to the right). Place the shiny, working side of the material face down. The roll runs from the bottom to top. 12. Use the old, empty ribbon core to rewind the used ribbon from the new roll. Attach the adhesive strip to the core. -
Page 83: Replacing The Slide Processing Module Ink Cartridge
5 - Routine cleaning and maintenance 6. After the Purging indicator clears, select Purge Printhead to repeat. 7. On the Functions tab, select Print Slide. 8. Evaluate the test slide print. If the barcode is clearly printed and can be read properly, then select Initialize and begin or resume processing. - Page 84 BD Kiestra™ InoqulA User's Manual 3. On the Functions tab, select Unlock. 4. Grasp the SPM drawer handle and pull the drawer slowly toward you. 5. Lift the blue latch securing the ink cartridge and remove the cartridge. 6. Fold a microfiber wipe and moisten with deionized water. Alternatively, purchased clean room wet wipes may be used.
- Page 85 5 - Routine cleaning and maintenance 14. On the Functions tab, select Print Slide. 15. Evaluate the test slide print. If the barcode is clearly printed and can be read properly, then select Initialize and begin or resume processing. 16. If the test print is unsatisfactory, refer to 5.14 Replacing the Slide Processing Module cartridge.
- Page 86 BD Kiestra™ InoqulA User's Manual...
-
Page 87: Troubleshooting
5. Repeat steps 2–4 to resolve each remaining error condition. NOTE Report the complete error code and location to BD Service if assistance is needed to resolve an error. 6. If an error condition persists after starting the module, the alert will reappear in the System Alerts view. -
Page 88: Stacker Errors
BD Kiestra™ InoqulA User's Manual Stacker errors If a stacker error occurs during processing, either of the following messages may be displayed: Plate (#) did not properly stack at stacker (#) A plate is detected at stacker (#) To resolve the error: 1. -
Page 89: Barcoda Error Messages
6 - Troubleshooting BarcodA error messages Error Code Error Message Error Resolution Discard any plates on belt(s). 2000 Emergency stop pressed Reset the emergency stop button and clear the notification. Ensure the hood is closed. 2001 Hardware power on failure Select Run System Test. -
Page 90: Inoqula Error Messages
BD Kiestra™ InoqulA User's Manual Error Code Error Message Error Resolution 2200, 2210, 2220, 2230, 2240, 2250, 2260, 2270, Destacker (#) door open Ensure the door is closed. 2280, 2290, during initialization 2300, 2310, 2320, 2330, 2340, 2350 2201, 2211,... - Page 91 6 - Troubleshooting Error Error Message Error Resolution Code Ensure there are no tubes in the gripper, shaker, or anywhere on deck. 3002 Left gantry hardware failure Ensure there are no plates in the spreader and discard any plates on belt(s). Select Run System Test.
- Page 92 BD Kiestra™ InoqulA User's Manual Error Error Message Error Resolution Code Cap not detected by the right 3105 gripper on tube in the shaker Cap not detected by the right 3106 gripper on tube in the clamp No tube to pick up by the right...
- Page 93 6 - Troubleshooting Error Error Message Error Resolution Code Ensure there are no tubes in the gripper, shaker, or anywhere on deck. 3300 Shifter initialization failure Ensure there are no plates in the spreader and discard any plates on belt(s). Select Run System Test.
- Page 94 BD Kiestra™ InoqulA User's Manual Error Error Message Error Resolution Code 3500 System initialization failure Ensure there are no tubes in the gripper, shaker, or anywhere on deck. 3501 General failure Ensure there are no plates in the spreader and Unexpected loss of external discard any plates on belt(s).
- Page 95 6 - Troubleshooting Error Error Message Error Resolution Code Remove rack from instrument. Ensure there are no tubes in the gripper, 3513 Tube rack no longer detected shaker, or anywhere on deck. Ensure there are no plates in the spreader and discard any plates on belt(s).
- Page 96 BD Kiestra™ InoqulA User's Manual Error Error Message Error Resolution Code Ensure there are no tubes in the gripper, shaker, or anywhere on deck. 3700 Shaker initialization failure Ensure there are no plates in the spreader and discard any plates on belt(s).
- Page 97 6 - Troubleshooting Error Error Message Error Resolution Code Ensure there are no tubes in the gripper, shaker, or anywhere on deck. Inoculation indicator light 3913 Ensure there are no plates in the spreader and hardware failure discard any plates on belt(s). Select Run System Test.
- Page 98 BD Kiestra™ InoqulA User's Manual...
-
Page 99: Supporting Applications
There may be a need to create test specimens on InoqulA. The Specimen Creator feature in BD Synapsys™ Informatics is a tool to create a batch of specimens with the same specimen type, culture protocol, and media protocol. Specimen Creator enables users to process specimens if the records do not exist in the LIS (e.g., specimens for validation testing), or if LIS... -
Page 100: Spreading Patterns
BD Kiestra™ InoqulA User's Manual c. To remove an added test, select next to the test in the Selected Tests list. 3. Select Create to create the defined number of specimens or select Clear All to reset the Specimen Creator page. -
Page 101: Specimen Application Methods
7 - Supporting applications Urine specimens The two zigzag patterns are appropriate for the quantitation of urine specimens. Zigzag pattern 4 is used for single compartment plates. Zigzag pattern 6 is used for bi-plates. 7.2.3 Specimen application methods Liquid specimens and enrichment broths Liquid specimens such as urine and thin body fluids can be processed using the FA mode when suitable containers are used. -
Page 102: Primary Patterns
BD Kiestra™ InoqulA User's Manual Other specimen types Sputum, tissue, feces, and aspirates can only be processed using the SA mode. Use a transfer swab, pipette, or other transfer device to inoculate the agar surface on the indicator light. The inoculated specimen should cover an area about 1 cm in diameter. - Page 103 7 - Supporting applications Plate options Intended for use only with single compartment plates; bi-plates should never be used with this pattern. 7.2.4.2 Zigzag pattern 6 Pattern 6 will produce satisfactory results for specimens with low to moderate microbial load and for specimens with high microbial load when selective media is used.
-
Page 104: Quadrant Pattern 18
BD Kiestra™ InoqulA User's Manual 7.2.4.3 Quadrant pattern 18 This is an alternative to the manual 4-Quadrant streaking pattern, intended for presumably sterile specimens or specimens with expected low microbial load. Description Starting at the bottom of the first quadrant on the left side, the bead moves in a clockwise direction and sequentially streaks the entire agar surface. -
Page 105: Quadrant Pattern 20
7 - Supporting applications Plate options Intended for use only with single compartment plates; bi-plates should never be used with this pattern. 7.2.4.5 Quadrant pattern 20 This is an alternative to the manual 4-Quadrant streaking pattern, intended for specimens with high microbial load. -
Page 106: Secondary Patterns
BD Kiestra™ InoqulA User's Manual 7.2.5 Secondary patterns 7.2.5.1 Pattern 1: Lawn pattern 7.2.5.2 Pattern 5: zigzag 3,5 - 1 InocStreak s200 7.2.5.3 Pattern 7: zigzag 3,5 - s200 7.2.5.4 Pattern 8: 3,5 - 1 s200 more growth 7.2.5.5 Pattern 13: Defect media pattern 7.2.5.6 Pattern 2: 4-Quadrant uniform s200 7.2.5.7 Pattern 3: 4-Quadrant s200... -
Page 107: Pattern 5: Zigzag 3,5 - 1 Inocstreak S200
7 - Supporting applications Plate options Intended for use only with single compartment plates; bi-plates should never be used with this pattern. 7.2.5.2 Pattern 5: zigzag 3,5 - 1 InocStreak s200 This pattern is typically used for urine samples, but can be used for any fluid. Description Starts on the left side, makes a few streaks left and right, then zigzags with 3.5 mm separation, and ends with 1 mm separation. -
Page 108: Pattern 8: 3,5 - 1 S200 More Growth
BD Kiestra™ InoqulA User's Manual Description Starts at the top the bead moves in a zigzag manner from top to bottom and sequentially streaks the entire agar surface. Duration of spreading 15 seconds Plate options Intended for use only with single compartment plates; bi-plates should never be used with this pattern. -
Page 109: Pattern 13: Defect Media Pattern
7 - Supporting applications Plate options Intended for use only with single compartment plates; bi-plates should never be used with this pattern. 7.2.5.5 Pattern 13: Defect media pattern This pattern is used in the SA mode process when the user has marked a plate as ‘defect’. Defect can imply that the plate is contaminated. -
Page 110: Pattern 2: 4-Quadrant Uniform S200
BD Kiestra™ InoqulA User's Manual Pattern for bi-plates 7.2.5.6 Pattern 2: 4-Quadrant uniform s200 This is an alternative to the manual 4-Quadrant streaking pattern. Description Starting at the bottom, the bead makes a 4 quadrant pattern: 1st quadrant - 2 mm separation;... -
Page 111: Pattern 3: 4-Quadrant S200
7 - Supporting applications 7.2.5.7 Pattern 3: 4-Quadrant s200 This is an alternative to the manual 4-Quadrant streaking pattern. This pattern is identical to pattern 2 but can only be inoculated on the left side of the plate. Description Starting at the bottom, the bead makes a 4 quadrant pattern: 1st quadrant - 2 mm separation; 2nd quadrant - 2 mm separation;... -
Page 112: Pattern 10: Zigzag 5 Mm + 2,5 - 1 S200
BD Kiestra™ InoqulA User's Manual Plate options Intended for use only with single compartment plates; bi-plates should never be used with this pattern. 7.2.5.9 Pattern 10: zigzag 5 mm + 2,5 - 1 s200 This pattern can be used when a specimen is smeared onto the plate in a heavy concentration. -
Page 113: Pattern 11: Zigzag 2,5 Mm - 1 Inoc S200
, Bourbeau P. (2015). Evaluation of Two Different Streaking Patterns Produced by the BD Kiestra™ InoqulA™ Instrument in Comparison to Manual Streaking of Selenite-F Broths. 1. Lab. Limbach, Heidelberg, Germany, 2. BD Diagnostics, Sparks, MD, USA. Poster # 2980 ASM. - Page 114 Participants to the Italian BD Kiestra Workshop Tour. (2013) Multicenter evaluation of the rolling-bead automated Inoculation Technology (BD Kiestra InoqulA BT™) for isolation of bacterial cultures. 1. BD Italia, Milano, Italy 2. University of Siena, Siena, Italy 3. Microbiology Laboratory, Humanitas Research Hospital, Rozzano, Italy 4.
- Page 115 Contacts Becton, Dickinson and Company BD Kiestra B.V. 7 Loveton Circle Marconilaan 6 Sparks, Maryland 21152 USA 9207 JC Drachten, The Netherlands Voice: 1-800-638-8663 Voice: +31 (0)512 540 623 Mail: Technical.Services@bd.com Mail: Lab_Automation_phone_support@bd.com bd.com 2100 Derry Road West Akasaka DS Building...
- Page 116 BD Kiestra™ InoqulA User's Manual...
- Page 117 BD Kiestra™ InoqulA resulting from the insertion or removal of cables that connect a module to systems other than those approved or supplied by BD or the failure of the owner to maintain reasonable care and precautions in the operation and maintenance of the module will void this warranty and terminate the obligations of the manufacturer as stated herein.
- Page 118 BD Kiestra™ InoqulA User's Manual...
- Page 119 Environments which exceed these limits could adversely affect the performance of the instrument components. The module requires a network connection with the System Control Unit (SCU). The module is to be installed and moved by BD representatives only. WARNING THE MODULE MUST BE ELECTRICALLY CONNECTED TO EARTH-GROUND AT ALL TIMES.
- Page 120 Voltage fluctuations ± 10% of the nominal voltage Constant capacity, free of moisture and oil, minimum of class 4 ( ISO 8573-1) CAUTION Only use the BD supplied power cord to connect the module. Module Operating Requirements Audible Noise < 67 dB...
- Page 121 10 - Installation requirements 10.2 Accessories specifications Handheld barcode scanner Specifications Memory 1 MB SDRAM, 1 MB Flash ROM Communication Bluetooth Version 2.1, SPP/HID, output power class 2 Current consumption 15 mA (stand by), max 330 mA Battery Lithium ion 3.7 V 1,100 mAh Light source aiming laser diode, illumination LEDs Operating conditions...
- Page 122 BD Kiestra™ InoqulA User's Manual...
- Page 123 11 - Ordering information Ordering information Below is a list of consumables, customer replacement, and spare parts for use with the modules. For product availability, consult the BD product catalog (online) or contact your local distributor or BD representative. Catalog number...
- Page 124 BD Kiestra™ InoqulA User's Manual Catalog number Container 221020 BD BBL™ Selenite-F Broth 221199 BD BBL™ Thioglycollate Medium without Indicator 220245 BD ESwab™ collection kit 246012 BD Phoenix™ AST-S Broth 246013 BD Phoenix™ AST Broth 364951 364979 ® BD Vacutainer tube 364980 366408 364955 ® BD Vacutainer C&S Boric Acid tube...
- Page 125 11 - Ordering information Catalog number Container ® Sarstedt™ replacement caps for BD Vacutainer 13x75mm tubes 65.647 B602-10 Starplex™ Scientific LeakBuster™ Specimen Container B902-10 128B Sterilin™ Universal Container 128BBAC/P ® Vacutest Kima 6 mL Tube 14934 ® Vacutest Kima 9 mL Tube...
- Page 126 BD Kiestra™ InoqulA User's Manual...
- Page 127 A module attached to the InoqulA that stores and sorts plated media for specimen inoculation and applies barcode labels to plates for specimen traceability. BD Kiestra™ InoqulA BD Kiestra™ in vitro diagnostic module used to automate specimen processing according to user-defined procedures and protocols. BD Synapsys™ Informatics Solution...
- Page 128 BD Kiestra™ InoqulA User's Manual Instructions for use Refers to product instructions in printable form (e.g., user's manual PDF) or digital (e.g., online help). Light Emitting Diode. An electric light used in modern light fixtures because of its longevity and efficiency.
- Page 129 12 - Glossary Total Lab Automation Uninterruptible Power Supply Universal Serial Bus Work Cell Automation...
- Page 130 BD Kiestra™ InoqulA User's Manual...
- Page 131 Index Index Accessories Beads Cleaning cleaners and disinfectants cleaning table decontamination disinfection dry cleaning end of run frequency incidental methods 68-69 Configuration BarcodA destackers stackers barcode scanners clock display InoqulA 26, 29-30 desktop printer settings specimen tubes...
- Page 132 BD Kiestra™ InoqulA User's Manual SPM settings 33-35 validation settings 30-32 language settings logout time Consumables Contacts Conventions Database schedule backup Depiction of patient information Emergency stop FA specimen processing loading broth tube racks loading specimen racks unloading specimen racks...
- Page 133 13 - Index quadrant pattern 19 quadrant pattern 2 quadrant pattern 20 quadrant pattern 3 secondary patterns specimen application methods zigzag pattern 10 zigzag pattern 11 zigzag pattern 4 zigzag pattern 5 zigzag pattern 6 zigzag pattern 7 zigzag pattern 8 zigzag pattern 9 Installation requirements Labels...
- Page 134 BD Kiestra™ InoqulA User's Manual SPM print head 82-83 Module specifications environmental requirements module operating requirements physical dimensions storage conditions utility requirements Ordering information Pause Pipette tips Responding to notifications SA specimen processing defining a specimen batch rejecting a plate...
- Page 135 13 - Index Symbols glossary Troubleshooting BarcodA error messages bead dispenser errors InoqulA error messages responding to errors stacker errors User interface Warranty...
- Page 136 BD Kiestra™ InoqulA User's Manual...
Need help?
Do you have a question about the Kiestra InoqulA and is the answer not in the manual?
Questions and answers