
Subscribe to Our Youtube Channel
Related Manuals for Zodiac YACHTLINE 490


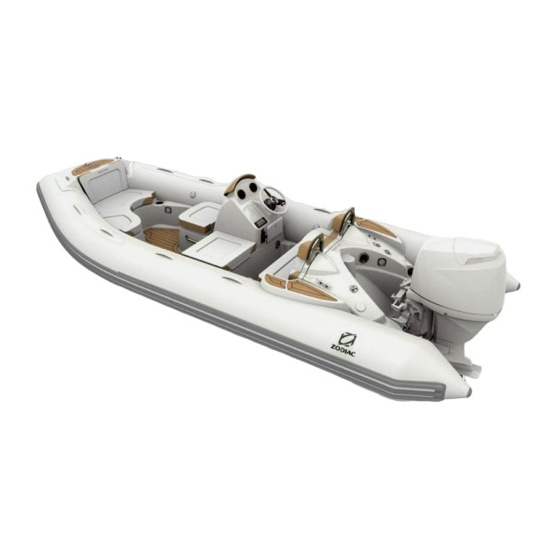
Summary of Contents for Zodiac YACHTLINE 490
- Page 1 Manuel du Propriétaire Owner's Manual -Manuale del Proprietario Eignerhandbuch- Manual del propietario Tome 2 - Volume 2- Teil 2 - Tomo 2 Edition 1...
-
Page 2: Table Of Contents
VOLUME 2 DESCRIPTION - BUOYANCY CHAMBER PROPULSION SYSTEM FITTING AND CIRCUITS FIRE SAFETY STICKERS CONTENTS PAGE I - GENERAL DESCRIPTION I-1-Technical characteristics ------------------------------------------------- 3 - 4 I-2-Inventory ----------------------------------------------------------------------- 5 - 6 I-3-Location of parts ----------------------------------------------------- 7 - 9 I-4-Handling-------------------------------------------------------------------- 10 - 13 ... -
Page 3: I-1-Technical Characteristics
DESCRIPTION - TECHNICAL CHARACTERISTICS I-1-TECHNICAL CHARACTERISTICS Dimensions 4.90 16‘ 1“ (ft) 2.98 9‘ 9“ (ft) 2.05 6‘ 9 “ (ft) 1.05 3‘ 5“ (ft) 1‘ 8“ (ft) Design category (Directive 94/25/EC) Load (ISO) (ABYC) 2083 Compartment (*): value may change. Engine Minimum recommended power... - Page 4 DESCRIPTION - TECHNICAL CHARACTERISTICS Dimension tolerance: +/- 4% NOTE The maximum payload has been calculated according to ISO 6185 standards. We recommend that you exercise caution when the boat is at maximum capacity. The weights indicated do not include any accessories The recommended power corresponds to optimum operation of the boat's capabilities for an average load NOTE...
-
Page 5: I-2-Inventory
DESCRIPTION - INVENTORY I-2-INVENTORY HULL • Polyester hull • Non-slip counter-molded deck • Added transom and "flap" hull shape • Console with storage • 1 Bow ring • 1 Anchor locker + locker in front of console + front port locker •... - Page 6 DESCRIPTION - INVENTORY STANDARD EQUIPMENT • 1 Fixed tank (85 litres + fuel gauge transmitter + water/fuel separator) with vent and anti- overflow device • Navigation lights and deck light • 1 battery tray • 1 battery isolation switch • Pre-fitted electric equipment to add extra accessories (*) •...
- Page 7 DESCRIPTION – LOCATION OF ITEMS I -3- LOCATION OF ITEMS 6 / 43...
- Page 8 DESCRIPTION – LOCATION OF ITEMS 7 / 43...
- Page 9 DESCRIPTION – LOCATION OF ITEMS ITEM DESCRIPTION REF. Front polyester step Cushion in front of console Console Seat + beat back Deck seals Engine panel Buoyancy chamber Cushion on console side Forwards port cushion Locker cushion Filler cap with integrated vent Fuel retention container Fuel retention container drain hole Tank maintenance access hatch...
-
Page 10: I-4-Handling
DESCRIPTION - HANDLING I-4-Handling I-4-1-Transportation The trailer installation recommendations are specified in VOLUME I of the owner's manual. I-4-2-Storage THE BOAT MUST REST ON THE BOW LINE. THE POSITION OF THE STORAGE CRADLES IS SHOWN BELOW. WARNING 9 / 43... - Page 11 10 / 43...
- Page 12 DESCRIPTION - HANDLING I-4-3-Lifting/Davit installation I-4-3-1-Description of essential functional items Aft lifting rings Bow lifting eye 11 / 43...
- Page 13 DESCRIPTION - HANDLING I -4-3-2-Lifting THE 3 POINT LIFTING SLING IS AVAILABLE AS AN OPTION; YOU MUST ONLY USE AN ZODIAC SLING FOR LIFTING. WARNING These values are an example 1.372 1.489 490 YL 8’ 2“ 3’ 28“ 4’ 5“...
- Page 14 BUOYANCY CHAMBER – INSTALLING THE BUOYANCY CHAMBER ON THE HULL II-1-FITTING THE BUOYANCY CHAMBER ON THE HULL IF THE BUOYANCY CHAMBER WAS STORED AT A TEMPERATURE BELOW 0°C / 32°F, LEAVE IT AT 20°C / 68°F FOR 12 HOURS BEFORE UNFOLDING.
- Page 15 BUOYANCY CHAMBER – FIXING THE PROTECTIVE FLAP II-2- ATTACHING THE PROTECTIVE FLAP Install the internal rubber guard Fix the internal protective flap After fixing the internal protective flap on the hull, pull the buoyancy chamber gently towards the forward section in order to pass the external protective flap over the forward nose (do not attach it at this point).
- Page 16 BUOYANCY CHAMBER – INFLATION SYSTEM II -3-INFLATION SYSTEM THE INFLATION PUMP a. adaptor b. tube nozzle c. tube base d. inflation port "EASY - PUSH" VALVES To change position in inflating position in deflating position Push The membrane is closed, the The membrane is open, the plunger is up plunger is down...
- Page 17 BUOYANCY CHAMBER - PRESSURE INFLATING THE BUOYANCY CHAMBER • Place the adapter corresponding to the diameter of the semi built-in valve at the inflation pump hose nozzle. Inflate the buoyancy chamber, balancing the pressure between the different compartments until the partitions (a) are no longer visible (pressure = 240 mb) Never put a compartment under pressure while the others are still fully...
-
Page 18: Buoyancy Chamber
BUOYANCY CHAMBER - PRESSURE CORRECT PRESSURE The correct pressure for the buoyancy chamber is 240 mb/ 3.4 PSI. The ambient temperature of the air or the Ambient temperature Buoyancy chamber internal pressure water proportionally influences the +1°C +4 mb / 0.06 PSI internal pressure of the buoyancy -1°C -4 mb / 0.06 PSI... - Page 19 BUOYANCY CHAMBER - PRESSURE CASES OF OVERPRESSURE EASY - PUSH VALVE: Release air by pressing the valve plunger 18 / 43...
-
Page 20: Propulsion System
PROPULSION SYSTEM III - Propulsion system Comply with ZODIAC's recommendations and with the engine manufacturer's recommendations. To get the best out of your boat, please consult your dealer. 19 / 43... -
Page 21: Iv-1-Fuel Installation
INSTALLATION AND CIRCUIT - FUEL IV-1-FUEL INSTALLATION IV-1-1-Description of essential functional items "Overflow" outlet "Overflow" outlet Fuel circuit shut-off valve Tank maintenance hatch Fuel retention container drain hole Fuel retention container Filler cap with integrated vent Fuel tank Fuel hose 10 Water/fuel separator filter 20 / 43... - Page 22 INSTALLATION AND CIRCUIT - FUEL IV-1-2 Fuel tank The tank is located under the steering console: Opening/closing valve Filling hole Vent Gauge transmitter 21 / 43...
- Page 23 INSTALLATION AND CIRCUIT - TANK AND ACCESSORIES IV-1-3-Fuel/water separator filter In order to protect the engine, a water / fuel separating filter is NOTE: placed on the engine’s fuel supply circuit The water/fuel separator filter is located in the aft locker, on the starboard partition: Filter head, secured to boat Replaceable filter cartridge Metal bowl...
- Page 24 INSTALLATION AND CIRCUIT - TANK AND ACCESSORIES IV-1-2-Use of essential functional items IV-1-2-1- Using the fuel circuit closing valves IN THE EVENT OF A PETROL LEAK OR A FIRE, THE PETROL CIRCUIT CLOSING VALVE LOCATED ON THE TANK ENABLES THE TANK TO BE CUT OFF FROM THE WARNING PETROL CIRCUIT AND MUST REMAIN CLOSED.
- Page 25 Slightly unscrew the drain cap (do not remove it), and drain the water. Screw the drain cap back on if only petrol remains in the bowl. IV-1-3-1-1-Changing the filter’s cartridge Follow ZODIAC’s recommendations and the filter manufacturer's recommendations. IV-1-4-Recommendations HAVING A FULL TANK AVOIDS CONDENSATION APPEARING ON EACH OUTLET.
-
Page 26: Iv-2-Electricity
Battery Engine control box contactor 3A Fuse IT IS VITAL TO HAVE A GAUGE DIAL. IF YOUR BOAT DOES NOT HAVE ONE, CONTACT YOUR ZODIAC DEALER. WARNING The probe supplied is to American standard: Impedance (tank empty position) 30 Ohms... - Page 27 INSTALLATION AND CIRCUIT - ELECTRICITY IV-2-1-2 Bilge pump wiring diagram Bilge pump switch Release Bilge pump Waterproof fuse holder + 3A fuse Circuit breaker Battery Towards accessory wiring bundle 26 / 43...
- Page 28 INSTALLATION AND CIRCUIT - ELECTRICITY IV-2-1-3-Switches Bilge pump switch Navigation light switch Deck lighting switch Switch location IV-2-1-4-Fuses Fuse holder Deck lighting fuse Navigation lights Cigar lighter fuse Waterproof fuse holder + 3A fuse for the bilge pump and a waterproof fuse holder + 30A general fuse on the circuit breaker in the aft locker.
- Page 29 INSTALLATION AND CIRCUIT - ELECTRICITY IV -2-1-5-Electrical diagram 28 / 43...
- Page 30 INSTALLATION AND CIRCUIT - ELECTRICITY IV-2-2-Use IV-2-2-1- Circuit breaker When your boat is not in use, NOTE: put the circuit breaker into the OFF position. SWITCH OFF THE ENGINE BEFORE PUTTING THE CIRCUIT BREAKER INTO THE OFF POSITION. WARNING 29 / 43...
- Page 31 TIGHTEN AND MAINTAIN THE TERMINAL LUGS BY GREASING THEM REGULARLY WITH VASELINE. If you do not plan to use your ZODIAC® tender for a month or more, remove the battery and store it in a cool, dark and dry place.
-
Page 32: Iv-3-Connecting Options
INSTALLATION AND CIRCUIT – CONNECTION OF OPTIONS IV-3-CONNECTING OPTIONS IV-3-1-Precautions The boat is supplied as standard with a bilge pump, navigation lights and a deck light and cigar lighter connector. However, 4 locations remain available on the fuse box (under the console) for the connecting of additional accessories under certain conditions: ... - Page 33 INSTALLATION AND CIRCUIT – CONNECTION OF OPTIONS Example 1 You want to add: A 72W VHF, A 36W GPS, A 60W radio, A 72W cigar lighter, A 20W clock. Miscellaneous Bilge fan lighting Miscellaneous Radio 20W (clock) electronic equipment Depth sounder Shower pump ...
- Page 34 INSTALLATION AND CIRCUIT – CONNECTION OF OPTIONS Example 3 You want to add: A 60W GPS, A 60W radio, A 120W audio warning. Miscellaneous Bilge fan lighting Miscellaneous Radio electronic equipment Depth sounder Shower pump Max. power 120W (> 72W) Searchlight Alarm system Refrigerator...
- Page 35 INSTALLATION AND CIRCUIT – CONNECTION OF OPTIONS IV -3-3-Connecting accessories on the console Depending on the level of equipment of your tender, ZODIAC recommends placing it in the following manner (see templates supplied with the boats) which optimises the space available. 34 / 43...
-
Page 36: Iv-4-Draining
INSTALLATION AND CIRCUIT - DRAINING IV-4-DRAINING IV-4-1-Description of essential functional items Bilge pump deck bailer + plugs Bilge pump switch Scupper 35 / 43... - Page 37 INSTALLATION AND CIRCUIT - DRAINING IV-4-2-Use IV-4-2-1-Bilge pump The bilge pump is not wired to the battery switch and operates independently; the switch is always connected. Automatic operation (fixed position); in this position the bilge pump works automatically. The pilot light is on. The indicator will not run down your battery, even when at anchor for several months.
- Page 38 INSTALLATION AND CIRCUIT - DRAINING IV-4-2-2-Anchoring AT A TEMPORARY MOORING OR IN OTHER SITUATIONS WHERE THE BOAT IS UNLIKELY TO TAKE IN LARGE AMOUNTS OF WATER (HEAVY RAIN, BREAKING WAVES), PLACE THE SELF-BAILER SLEEVES IN LOWERED OR RAISED POSITION. IF THE BOAT TAKES ON A CONSIDERABLE QUANTITY OF WATER FROM THE OUTSIDE (HEAVY RAIN, WAKE, ETC.), THE BOAT MAY BE SUBMERGED (EFFECT).
-
Page 39: Iv-5-Anchoring/Mooring
INSTALLATION AND CIRCUIT - ANCHORING/MOORING IV-5-ANCHORING / MOORING IV-5-1-Description of essential functional items Bow ring Forward cleat mooring rings Aft bollards Fairleads 38 / 43... - Page 40 INSTALLATION AND CIRCUIT - ANCHORING/MOORING (1), NCHORING SE THE BOW RING LOCATED AT THE FORWARD END OORING N AN UNWATCHED MOORING THE BOW FAIRLEAD AND THE AFT CLEATS MUST BE USED TOWING ON A TRAILER OR CRADLE SE THE BOW RING AND THE MOORING RINGS ON THE OUTSIDE OF THE TRANSOM...
-
Page 41: Fire
INSTALLATION AND CIRCUIT - FIRE V--Fire Fire extinguisher bracket WE RECOMMEND YOU KEEP AN EXTINGUISHER ON BOARD, AND COMPLY WITH THE LAWS APPLICABLE IN YOUR COUNTRY. WARNING AN EXTINGUISHER BRACKET IS FITTED UNDER THE PASSENGER SEAT. 40 / 43... - Page 42 SAFETY ADHESIVE LABELS - POSITION VI-SAFETY STICKERS VI-Position of stickers 41 / 43...
-
Page 43: V-2-Description Of Labels
SAFETY ADHESIVE LABELS - DESCRIPTION V-2-Description of labels 42 / 43... - Page 44 POSITION OF SAFETY LABELS 43 / 43...
Need help?
Do you have a question about the YACHTLINE 490 and is the answer not in the manual?
Questions and answers