
Subscribe to Our Youtube Channel
Related Manuals for Zodiac MEDLINE 9


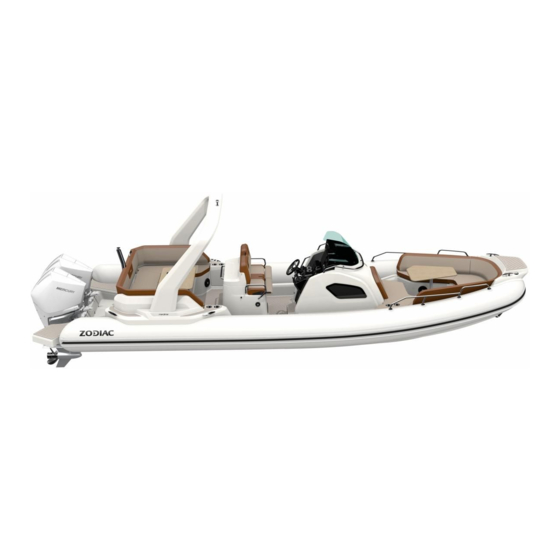
Summary of Contents for Zodiac MEDLINE 9
- Page 1 Volume 2 MEDLINE 9 613 087 A CAREFULLY READ THIS MANUAL BEFORE PUTTING YOUR ZODIAC INTO SERVICE.
-
Page 2: Table Of Contents
Volume 2 DESCRIPTION - BUOYANCY TUBE PROPULSION SYSTEM INSTALLATION AND CIRCUITS CONTENTS DESCRIPTION ..........................4 TECHNICAL SPECIFICATIONS ....................4 INVENTORY AND LOCATION ....................8 LOCATION OF ACCESSORIES ....................12 HANDLING ..........................13 I-4-1 Transport ........................... 13 I-4-2 Storage ..........................14 I-4-3 Lifting .......................... - Page 3 V-2-2 Location of items ......................36 V-2-3 Circuit-breaker ....................... 36 V-2-4 Coupler operation ......................37 V-2-5 Battery (not supplied) ....................40 V-2-6 Navigation lights ......................41 V-2-7 Wiring an accessory ....................... 41 V-2-8 Wiring options ....................... 42 WATER ........................... 45 V-3-1 Location of items ......................
-
Page 4: Idescription
DESCRIPTION - Technical characteristics DESCRIPTION I-1 TECHNICAL SPECIFICATIONS Dimensions Dimension tolerance +/- 3% 8.90 29’ 2” 1’ 12” Buoyancy tube diameter 8.22 8.53 Without the buoyancy tube 26’ 97” 27’ 99” 3.06 2.27 10’ 04” 7‘ 45” 2.03 2.19 6’ 66” 7‘... - Page 5 Do not exceed the maximum number of people recommended. No matter how many people are on board, the total weight of passengers and equipment must never exceed the maximum recommended load. Always use the designated seats or seating areas. MEDLINE 9.0 engine Page 5 / 65 Issue 2...
- Page 6 SINGLE ENGINE TWIN-ENGINE Shaft length Minimum 2 x 175 recommended 2 x 131 power Maximum 2 x 250 The recommended power recommended 2 x 186 corresponds to optimal use of power the boat's capacities for an 2 x 350 Maximum allowed average load.
- Page 7 DESCRIPTION - Technical characteristics NOTE: The maximum authorized power, when greater than the maximum recommended power, must be used with extreme caution. It is intended for experienced users, using their boat under very specific conditions (transport of heavy loads, etc.). See the "Sailing advice" chapter in Volume 1 of the manual. WARNING! When loading the boat, never exceed the maximum recommended load.
-
Page 8: Inventory And Location
DESCRIPTION - INVENTORY and Location I-2 INVENTORY AND LOCATION Page 8 / 65 Issue 2... - Page 9 DESCRIPTION - INVENTORY and Location Ref. DESCRIPTION Polyester hull with counter-moulded deck Aft platform White navigation light Bolster assembly Equipped console Bow roller assembly Boarding ladder Electric bilge pump Battery (box) Inside the rear locker Water/fuel separator filter Battery switch Aft lockers Cup holder Picnic table...
- Page 10 DESCRIPTION - INVENTORY and Location Page 10 / 65 Issue 2...
- Page 11 DESCRIPTION - INVENTORY and Location REF. DESCRIPTION Cabin handrail Semi-circular handrail Console seat and bow sitting area Bolster seat handrail 12V plug and USB plug Cup holder Ventilation Foot braces Stainless steel closing pin Steering wheel, hydraulic steering Bilge pump/navigation light switch Console cabin access hatch Sink Bolster access hatch...
-
Page 12: Location Of Accessories
Polyester roll bar Bimini with frame Bimini without frame Aft sun lounger Ski mast Cabin berth Synthetic teak deck Fusion audio system, radio, mp3, aerial, 2 speakers Other options available. See your ZODIAC dealer Page 12 / 65 Issue 2... -
Page 13: Handling
DESCRIPTION - Handling I-4 HANDLING I-4-1 Transport Trailer installation recommendations are specified in VOLUME I of the owner's manual. Use a trailer adapted to your boat. The boat’s hull is compatible with standard road gauge. It is designed to be transported inflated. The weight in transport conditions for a trailer includes: Unladen weight of the boat: 1,855 kg... -
Page 14: I-4-2 Storage
DESCRIPTION - Handling I-4-2 Storage WARNING! The boat must rest on the bow line. See diagram below. Page 14 / 65 Issue 2... - Page 15 DESCRIPTION - Handling Page 15 / 65 Issue 2...
-
Page 16: I-4-3 Lifting
DESCRIPTION - Handling I-4-3 Lifting WARNING The boat has no lifting fittings. Hoisting requires passing suitable lifting straps under the hull. A mm * Estimate of the centre of gravity with the heaviest engine, options excluded. Single-engine (approx. 2,400 kg) A = 3.20 m Twin-engine (approx. -
Page 17: Buoyancy Tube
BUOYANCY TUBE – Installing the buoyancy tube on the hull BUOYANCY TUBE II-1 BUOYANCY TUBE MAINTENANCE Your boat’s buoyancy tube is made of NEOPRENE CSM-CR 1670 Decitex fabric, 1500 g/m². The maintenance recommendations are specified in VOLUME I of the owner's manual. II-2 INSTALLING THE BUOYANCY TUBE ON THE HULL If the buoyancy tube has been stored at a temperature below 0°C, leave it for 12 hours at room temperature (20°C) before unfolding it. -
Page 18: Fixing The Protective Flap
BUOYANCY TUBE - INFLATING THE BUOYANCY TUBE II-3 FIXING THE PROTECTIVE FLAP Fastening with inserts: Place the buoyancy tube and make fast the outer flap (buoyancy tube deflated) using the stainless steel bars and the screws supplied in the buoyancy tube kit. To ensure that the assembly is mechanically secure, apply medium strength threadlocker to the screws. -
Page 19: Inflating The Buoyancy Tube
BUOYANCY TUBE - INFLATING THE BUOYANCY TUBE II-4 INFLATING THE BUOYANCY TUBE INFLATOR a. tube end b. adaptor c. tube base d. inflation valve NOTE: An electrical (12 V) high output inflation pump is available as an option (contact your dealer). "EASY - PUSH"... - Page 20 BUOYANCY TUBE - INFLATING THE BUOYANCY TUBE PRESSURE GAUGE WARNING! Do not use a compressor or compressed air cylinder. INFLATION 1/ Place all valves in inflation position. 2/ Fit the adaptor that matches the diameter of the "easy- push" valve to the inflation tube tip. 3/ Attach the hose connector to the inflation pump inflation valve.
-
Page 21: Pressure
BUOYANCY TUBE - PRESSURE b: 220 mb c:240 mb b: 220 mb b: 220 mb c:240 mb b: 220 mb NOTE: A slight loss of air is normal before the cap is screwed on. Only the plugs provide final airtightness. II-5 PRESSURE The buoyancy tube has 5 compartments. - Page 22 BUOYANCY TUBE - PRESSURE RISK OF OVERPRESSURE Example: Your boat is inflated to its recommended pressure (240 mb/3.4 PSI) at the beginning or end of the day (low outside temperature = 10°C). Later in the day, your boat is left in the sun on the beach or on the deck of a boat (temperature = 50°C).
-
Page 23: Propulsion System
PROPULSION SYSTEM III PROPULSION SYSTEM Comply with ZODIAC's recommendations and the engine manufacturer's recommendations regarding engine fitting. For optimal use of your boat, please consult your dealer. The engine bolts must be fitted through the transom using a screw hole sealing procedure (e.g.: using Sikaflex sealant). -
Page 24: How To Drive Your Boat
HOW TO DRIVE YOUR BOAT IV HOW TO DRIVE YOUR BOAT Before starting, refer to the Owner's Manual Volume I. NOTE: Check that the buoyancy tube is correctly inflated. Battery switch set to “ON” Fuel valve to "ON". Slide on and connect the stop switch Throttle lever on neutral. -
Page 25: Installation And Circuits
V INSTALLATION AND CIRCUITS V-1 FUEL WARNING! Do not use e10, E85 type biofuels, etc. V-1-1 Location of items Ref. DESCRIPTION Fuel tank Fuel circuit valve Tank filling connection access hatch and vent Fill port with cap and anti-backflow system Water/fuel separator filter (in locker) Tank vent Page 25 / 65... -
Page 26: V-1-2 Tank
INSTALLATION AND CIRCUIT: FUEL V-1-2 Tank Ref. DESCRIPTION Tank*, given capacity 400 litres Vent outlet Tank filler inlet Gauge transmitter Intake pipe with fuel shut-off valve It may not be possible to use the full nominal capacity of the tank depending on the trim and the load. A 20% reserve is recommended. -
Page 27: Water/Fuel Separator Filter
INSTALLATION AND CIRCUIT: FUEL WARNING! It is vital to have a gauge dial. It is supplied with the engine. If your boat does not have one, contact your dealer. The probe supplied is to American standard: Impedance (tank empty position) 30 Ohms Impedance (tank full position) 240 Ohms All the dials on the market are compatible, with a few very rare exceptions. -
Page 28: Using The Fuel Circuit Cut-Off Valves
Contact the dealer network in order to purchase a replacement cartridge. CHANGING THE FILTER CARTRIDGE Follow ZODIAC's recommendations and those of the filter manufacturer. Follow the manual or the engine manufacturer’s instructions. Place a draining funnel under the cartridge to be replaced. -
Page 29: Recommendations
V-1-5 Recommendations WARNING: In the event of a petrol leak or a fire, the petrol circuit closing valve located on the tank enables the tank to be cut off from the petrol circuit and must remain closed. Ensuring that the fuel tank is full before each outing prevents condensation from forming. -
Page 30: Electrical
INSTALLATION AND CIRCUIT: ELECTRICAL V-2 ELECTRICAL V-2-1 Cable routing Top view with deck removed Duct 1 Ø100 Duct 2 Ø100 Sheath 1: Used to route the (X) engine wiring harness. Sheath 2: free Page 30 / 65 Issue 2... -
Page 31: General Wiring Diagram
INSTALLATION AND CIRCUIT V-2-2 General wiring diagram Page 31 / 65 Issue 2... - Page 32 INSTALLATION AND CIRCUIT Page 32 / 65 Issue 2...
- Page 33 Red / green light Navigation light switch Bilge pump switch Bilge fan switch Courtesy light switch Windlass lowering switch Windlass raising switch Cabin courtesy light switch Zodiac Connected Boat (option) Navigation GPS (option) Fuel gauge dial Page 33 / 65 Issue 2...
-
Page 34: V-2-1 "Comfort" Fuse Box
INSTALLATION AND CIRCUIT: ELECTRICAL V-2-1 "COMFORT” Fuse box Page 34 / 65 Issue 2... -
Page 35: Equip Nav" Fuse Box
INSTALLATION AND CIRCUIT V-2-1 "EQUIP NAV” fuse box Page 35 / 65 Issue 2... -
Page 36: V-2-2 Location Of Items
INSTALLATION AND CIRCUIT V-2-2 Location of items Ref. DESCRIPTION Circuit breaker and fuse box access hatch Circuit-breaker Battery box Fuse box V-2-3 Circuit-breaker When you are no longer using your boat, set the circuit-breaker to the OFF position. WARNING Cut the engine before setting the circuit-breaker to the "OFF" position. -
Page 37: V-2-4 Coupler Operation
INSTALLATION AND CIRCUIT V-2-4 Coupler operation V-2-4-1 Single-engine operation used Engine A starts with used battery 1 ENGINE BATTERY 1 disconnected (not powered) In single engine configuration, the second coupler is not used. V-2-4-2 Twin-engine operation When operating in twin-engine configuration, the couplers can be switched between positions (1, 2 and both) without stopping the engine(s). - Page 38 INSTALLATION AND CIRCUIT Engine A starts with battery 2. Engine B starts with battery 2. Engine A starts with battery 1. Engine B starts with battery 1. Page 38 / 65 Issue 2...
- Page 39 INSTALLATION AND CIRCUIT Engine A starts with batteries 1 and 2. Engine B starts with batteries 1 and 2. With twin engines, a second battery is required. A load insulator is often built into the engine’s design. It job is to recharge the batteries while the engine is running.
-
Page 40: Battery (Not Supplied)
INSTALLATION AND CIRCUIT V-2-5 Battery (not supplied) Comply with ZODIAC's recommendations and with the recommendations of the battery manufacturer for standard maintenance. MAINTAIN YOUR BATTERY: Keep the battery clean and dry in order to avoid premature wear. Tighten and maintain the terminal lugs by greasing them regularly. -
Page 41: Navigation Lights
V-2-6 Navigation lights Press this button to switch on the navigation lights. There are 3 positions. Off White light position (at anchor) White light, red light, and green light position. V-2-7 Wiring an accessory 1/ Choose a free fuse location.. 2/ Connect the power supply of your accessory to the terminal corresponding to this slot using a 6 mm female tab or eyelet type terminal. -
Page 42: Wiring Options
INSTALLATION AND CIRCUIT V-2-8 Wiring options A bilge pump is fitted as standard to the boat. However, it is also possible to add extra accessories under certain conditions: The accessories you want to add must be connected to the console. ... - Page 43 INSTALLATION AND CIRCUIT Example 1 You want to add: A 72 W VHF, A 36 W GPS, A 180 W radio, Courtesy lights LED 10 W Shower pump 48W Windscreen wipers Cigarette lighter (standard) Radio 180 W Miscellaneous lighting 10 W Depth sounder Horn Miscellaneous electronic...
- Page 44 INSTALLATION AND CIRCUIT Example 3 You want to add: A 60 W GPS, A 200 W radio, A 120 W horn. Windscreen wipers Cigarette lighter (standard) Radio 200 W Miscellaneous lighting Depth sounder Horn Miscellaneous electronic 60 W 200 W equipment Searchlight Shower pump...
-
Page 45: Water
INSTALLATION AND CIRCUIT V-3 WATER V-3-1 Location of items Ref. DESCRIPTION 55-litre freshwater tank Water pump Water pump control switch Chrome-plated hand shower Tank vent Fill cap Tank access hatch Bolster sink tap V-3-1 Using the hand shower and bolster tap Fill the freshwater tank with freshwater through the fill cap (6) located under the port aft cushion (7). -
Page 46: Toilet
INSTALLATION AND CIRCUIT V-4 TOILET V-4-1 Location of items Ref. DESCRIPTION Toilet access Black water tank Black water tank vent + Odour filter Flush switch Black water drain switch Black water tank drain valve Black water pump Black water tank drain cap V-4-2 Using the Toilet Make sure that the water pump control button (the bulkhead of the technical room) is ON,... -
Page 47: Draining Black Water
INSTALLATION AND CIRCUIT V-4-3 Draining black water V-4-3-1 Draining at sea Open the large black water drain valve (7), located in the utility cabinet behind the toilet, by turning the handle a quarter turn, Press the switch (6) located on the utility cabinet panel. Hold down until the tank is empty, Remember to close the valve (7) once the tank is empty. -
Page 48: Draining Systems
INSTALLATION AND CIRCUIT V-5 DRAINING SYSTEMS V-5-1 Description of operational components Ref. DESCRIPTION Engine recess drain Hull scupper Bilge pump outlet Bilge pump High flow rate self-bailer with non-return valve Drain pipes Scuppers The boat is self-draining, with a rainwater drainage system: three scuppers on the deck, one at the front of the console and one at the front and rear of the bolster. -
Page 49: Bilge Pump
Stop -2 Automatic- 1 Forced -3 ZODIAC recommends the use of a tarpaulin or mooring cover in order to prevent water ingress in the event of rain. Ensure that the system is in working order (unblocked pipes, plugs out, bilge pump switch on automatic mode, battery charged). -
Page 50: V-5-3 Hull Scupper
INSTALLATION AND CIRCUIT V-5-3 Hull scupper Out of the water (on trailer, cradle, etc.) Open position, drain plug removed. In the water Closed position, drain plug fitted. (Make sure drain plug properly closed/tightened) Page 50 / 65 Issue 2... -
Page 51: Steering
INSTALLATION AND CIRCUIT V-6 STEERING Comply with the steering manufacturer's recommendations (installation, use and maintenance). For optimal use of your boat, please consult your dealer. Page 51 / 65 Issue 2... -
Page 52: Fire
INSTALLATION AND CIRCUIT V-7 FIRE WARNING We recommend you keep an extinguisher on board, and comply with the laws applicable in your country. Do not place flammable material close to or above cooking equipment. The boat is supplied without a fire extinguisher; complying with the national regulations of the country in which your boat is registered is your responsibility. -
Page 53: Anchoring/Mooring
INSTALLATION AND CIRCUIT V-8 ANCHORING/MOORING Ref. DESCRIPTION Aft bollards Polyester bow roller + navigation lights Electric windlass Bow chain plate Forward cleats WARNING For permanent mooring, use the bow chain plate. Choose your anchor chain according to the length and weight of your boat (Consult your Dealer). -
Page 54: Boarding
INSTALLATION AND CIRCUIT V-9 BOARDING DANGER! Check that the engine is switched off before anyone climbs back on board using the rear ladder. WARNING When the boat is used solo, if the ladder cannot be deployed from the water, the ladder should be permanently deployed. Page 54 / 65 Issue 2... -
Page 55: Labelling
LABELLING VI LABELLING VI-1 POSITION OF LABELS Page 55 / 65 Issue 2... -
Page 56: Description Of Labels
LABELLING VI-2 DESCRIPTION OF LABELS Page 56 / 65 Issue 2... -
Page 57: Installation
INSTALLATION VII INSTALLATION VII-1 Installing elements that come non-mounted For transport reasons, the wings and aft platforms are not mounted on the boat. To install them easily, follow the instructions below: VII-1-1 WINGS Unpack the wings, being careful not to scratch them or damage the EVA deck. Locate the port and starboard sides. -
Page 58: Vii-1-2 Aft Platforms
INSTALLATION Apply SIKAFLEX on the deck and around the fixing points, Mount the wings on the deck using the holes (1) and brackets (2) on the deck, Tighten the wings using the fasteners supplied. VII-1-2 Aft platforms Unpack the aft platforms, being careful not to scratch or damage them, Clean the support surfaces in red, Apply SIKAFLEX on the deck and around the fixing points, Bolt the platforms using the fasteners supplied,... - Page 59 INSTALLATION Assemble the struts (1) to the platform attachment points (2) with the clevises and fasteners provided, Place the clevises (3) on the transom and mark the position of the holes, Remove the clevises and drill the four holes with a Ø4.5 drill mm bit, Clean the surfaces around the holes and apply SIKAFLEX, Tighten the two clevises with the Ø4.8 screws supplied.
-
Page 60: Vii-2 Installing Optional Elements
INSTALLATION VII-2 Installing optional elements VII-2-1 POLYESTER ROLL BAR WARNING The wings must first be secured in order to be able to install the roll bar. Make sure you install it in the right direction. To install the roll bar, remove the EVA pads from the wings and clean the surfaces, Page 60 / 65 Issue 2... - Page 61 INSTALLATION Apply SIKA on the feet of the roll bar. Leave 10 to 15mm clearance around the edges of the feet so the SIKA doesn’t squeeze out when you tighten it down. 10 mm mini Place the roll bar the wings and align the holes. Bolt on with M10 bolts.
-
Page 62: Use
VIII USE VIII-1 Aft sun lounger 1 – Table in initial position, 2 – Raise the port and starboard seat cushions in the aft seating area, 3 – Extend the starboard arms, 4 – Fold back the mobile leaf for a better view of the locking rings on the base, Page 62 / 65 Issue 2... - Page 63 5 – Unlock the 2 locking rings, 6 – Push down on the table to lower the telescopic base until the arms fit into the starboard notches, 7 – Lock the 2 locking rings, 8 – Extend the port arms, Page 63 / 65 Issue 2...
- Page 64 Also ensure that the subsequent installation of consoles and other structural elements not initially supplied with the boat is performed in accordance with the installation recommendations provided by the manufacturer and ZODIAC's recommendations. Page 64 / 65 Issue 2...
- Page 65 IX 2 chemin de la Val Priout 31450 AYGUESVIVES FRANCE MEDLINE 9 Page 65 / 65 Issue 2...
Need help?
Do you have a question about the MEDLINE 9 and is the answer not in the manual?
Questions and answers