
Related Manuals for Torklift F1008-30


Summary of Contents for Torklift F1008-30
- Page 1 IMPORTANT OWNER-OPERATOR INSTALLATION INSTRUCTIONS F1008-30 Version Number: 5, Date: 3/15/2018 By: CW TECH SUPPORT (800) 246-8132...
-
Page 2: Weight Distribution
Hitch Weight Capacity Weight Carry 20,000 lbs maximum pull weight 2,500 lbs maximum tongue weight Weight Distribution 30,000 lbs maximum pull weight 3,000 lbs maximum tongue weight. Warning Do not exceed the factory weight ratings of your vehicle... - Page 3 Warnings Truck Bed and Camper Protection Torklift does not recommend installing your camper on top of a plastic bed liner (or other compressible material such as foam). These materials can act as a spring, causing increased vertical truck camper movement independent of the vehicle.
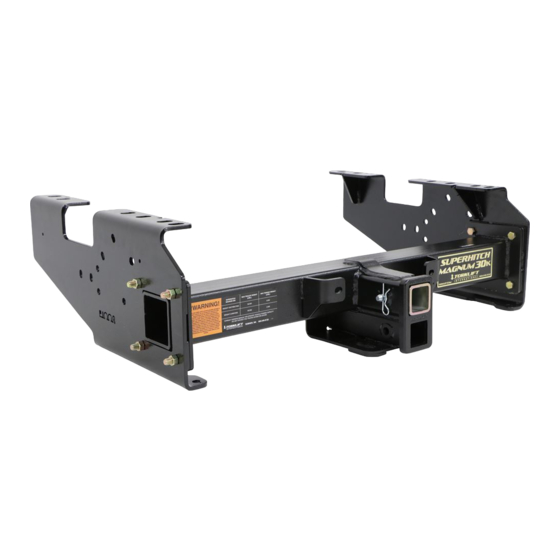
- Page 4 Item Image Item Description Item # F1008- Driver Side Plate 30-W1-D F1008- Passenger Side Plate 30-W1-P SH-4.00- Cross Tube 41.25-A1 Support Strap SH-SS-P3 Hitch Pin and Clip 3703 3/8-16 x 1 1/2’’ Gr 5 - 6031 Hex Head Cap Screw 3/8’’...
- Page 5 ½’’-13 x – Gr 8 - Hex 1751 Head Nut 1/2-13 x 2” Grade 8 3659 Hex Bolt 2” x 2” Plate Washer 11403 SH-RA- Adapter Sleeve S1-Zinc 5/8” – USS Flat Washer 6089 Zip Ties 9408...
-
Page 6: Installation Notes
Installation Notes: Step 1: Begin by placing the transmission in "Park" and/or chocking the tires. Remove the spare tire. Remove the Vibration Damper from the Driver’s Side of the factory hitch. Then, carefully disconnect the wiring harness from the bumper. Remove the wire harness from the side plates. Step 2: Take the bumper off by removing the two bumper support bolts on each side of the receiver as shown in Figure 2.1. - Page 7 Bumper Nut Bumper Nut Figure 2.2 (Driver Side) Step 3: Remove the 6 hitch mounting bolts on each side of the vehicle. The two rearmost bolts on each side must be removed from the top. Keep the factory hardware to use during installation. It is best to support the hitch during this process for your safety.
- Page 8 Figure 3.1 Figure 3.2 (Driver Side)
- Page 9 Step 4: The Side Plates will install with the Flanges pointed inwards toward the center of the truck. Loosely reinstall the factory hardware with supplied 5/8” USS Flat Washers through the top holes in the Side Plates and into the factory plate nuts as shown in Figure 4.1.
- Page 10 Step 5: Place the Cross tube in the square holes and secure to the side plates using 1/2-13 x 2 Bolts making sure that the threads are facing towards the outside of the vehicle. It will be necessary to use a hammer or mallet to seat the bolts into the holes.
- Page 11 Step 6: Remove the two bumper bracket bolts on both sides of the vehicle as shown in figure 6.1. Bumper Bracket Bolts Figure 6.1 Step 7: Replace the Bumper Bracket Bolts with two 1/2-13 x 2” Grade 8 Bolts with 1/2”...
- Page 12 Figure 7.1...
- Page 13 Step 8: Assemble the Side Strap and Hardware as shown in Figure 8.1. 1/2” Lock 1/2-13 Hex 1/2” Washer Washer 1/2-13 Hex 1/2” Washer 1/2” Lock Support Strap Washer 2” x 2” Plate Washer Figure 8.1 Torque hardware to 75ft-lbs.
- Page 14 Step 9: Slide the Bumper back into place and replace the back nuts on the bumper studs as shown in Figure 3.2. Torque the nuts to 50 foot-pounds. Slide the bumper support plate so that it can be bolted to the hitch. Secure the bumper support bracket to the hitch using one 3/8”-16x1-1/2 Grade 5 hex Bolt, two 3/8”...
- Page 15 Vibration Damper Mount Holes (Driver’s side) Figure 10.1 The installation is now complete.
- Page 16 YOUR TOWING EQUIPMENT HITCH BALLS Select by gross trailer weight rating, mounting platform thickness, hole size and coupler socket size. Platform must be at least 3/8 inch thick. Hole must not exceed threaded shank diameter by more than 1/16 inch. Use lock washer. Tighten per instructions.
- Page 17 Rubber Bumpers on the front lower portion of the camper, installing Rubber Bumpers (Torklift has Rubber Bumpers available Part A7001) or using a block of wood such as a 2 x 4 in the bed, will prevent the camper from damaging the front bulk head of the truck bed. Minor movement (or settling) can occur in some incidental harsh driving conditions (on or off road).
- Page 18 They are designed for each make and model to fit tight to the frame so as not to compromise ground clearance. Torklift tie downs are not universal ‘one size fits all’ therefore all the problems with correct fit for each particular application have been eliminated.
- Page 19 Some states do not allow the exclusion or limitation of incidental or consequential damages, so the above limitation or exclusion may not apply to you. Any damage to Torklift products as a result of misuse, abuse, neglect, accident, improper installation or any use violation of instructions furnished by Torklift or WHEN USED IN ANY COMMERCIAL APPLICATION WILL VOID THE WARRANTY.
- Page 20 International gift. To Fax: Send copies of the questionnaire, warranty card and receipt to 253-854-8003 To E-mail: Send copies of the questionnaire, warranty card and receipt to warranty@torklift.com To Mail: Send to Torklift International 322 Railroad Ave North, Kent, WA 98032...
- Page 22 OFFICIAL WARRANTY REGISTATION CARD 322 Railroad Ave North, Kent, Wa 98032 Please fill out this form completely and return to Torklift within 30 days of purchase accompanied by a copy of your original receipt...
Need help?
Do you have a question about the F1008-30 and is the answer not in the manual?
Questions and answers