
Subscribe to Our Youtube Channel
Related Manuals for Yamato AW-WPS


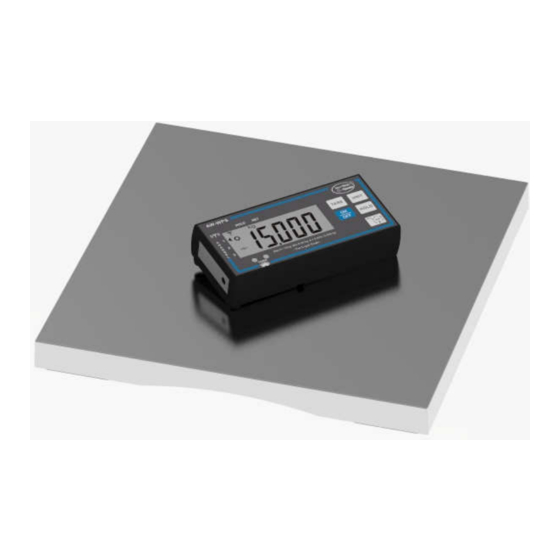
Summary of Contents for Yamato AW-WPS
- Page 1 Digital Portion Scale AW-WPS SERVICE MANUAL PLEASE TAKE THE TIME TO READ THESE INSTRUCTIONS BEFORE STARTING TO USE THE SCALES...
-
Page 2: Table Of Contents
TABLE OF CONTENTS TABLE OF CONTENTS ................1 SPECIFICATIONS ................... 2 OVERLAY ....................2 KEY FUNCTION ..................3 PREPARING SCALE FOR WEIGHING ..........4 CHANGING THE WIRELESS DISPLAY’S CHANNEL ......4 SELECTING THE SCALE PLATFORM’S CHANNEL ......5 USING THE TARE FUNCTION .............. 6 SETTING MODE .................. -
Page 3: Specifications
SPECIFICATIONS Model AW-WPS 0-10 lb x 0.05 oz/10-30 lb x 0.1 oz Capacity 0-5 kg x 0.002 kg(2 g)/5-15 kg x 0.005 kg (5 g) 30 lb x 1/8 oz lb:oz(decimals) Weight Unit lb:oz(fractions)/kg LCD Readout 1” LCD readout Dimensions 14”... -
Page 4: Key Function
KEY FUNCTION Press to turn the scale ON or OFF. Press to ‘Tare’ (zero) the weight of any item while weighing. Press to ‘Hold’ the weight on the screen. Press to switch between lb:oz and kg units of measurement. Press to reset the scale to zero(TARE function)if the scale does not show zero automatically. -
Page 5: Preparing Scale For Weighing
PREPARING SCALE FOR WEIGHING Before Weighing 1. Please select the scale’s channel to match the wireless display. (The scale’s channel indicator is located on the scale’s base; please remove the rubber stopper to access the channel indicator.)For example: If the wireless display is using Channel-1, select Channel-1 for the scale.(Please see Page 6 for instructions for selecting platform channels.) 2. -
Page 6: Selecting The Scale Platform's Channel
Press the button to select the wireless display channel. Channel numbers (1, 2, 3) are shown on the left hand side of the display. When a channel is selected,a triange icon points to the selected channel. For example- If Channel-1 is selected, the triange icon points to ‘1’. -
Page 7: Using The Tare Function
To select the scale platform’s channel, first turn off the scale base and wireless display units. Then use the dip switch, which is located on the bottom of the scale under the rubber stopper. The dip switch has four pins marked ‘1, 2, 3, 4’... -
Page 8: Setting Mode
The Tare Function allows the user to zero the scale to cancel out the weight of a container, thus giving the weight of the item being weighed. Press the ON/OFF button to turn on the scale. Place the containter on the scale platform. Press the ‘TARE’... -
Page 9: Setting Function Description
Please press and hold ON/OFF key and press TARE key 3 times at same time. The display shows SETUP and then followed y UNIT appears. Press to move right or down as shown in setup flowchart. SETTING FUNCTION DESCRIPTION... -
Page 10: Calibration Procedure
Function Description Default kg, lb (Units): lb , kg (Graduations): Setting division, max 3000d capacity and graduation 1500d / 2000d / 2500d / 3000d / 6000d (Auto off Time): 120 sec/ 180 sec/ 240 sec/ 300 sec/ OFF (Hold range): 2d/ 5d/ 10d/ 15d (Gravity): on , off (Touch less feature): on , off To confirm the settings and end the... - Page 11 In weighing mode press the UNIT key and keep it pressed until “CAL” followed by the weight value of the required adjustment weight in displayed. “LOAD” is displayed alternatively. (You can press UNIT key to change lb or kg.) Carefully place the required adjustment weight in the center of the weighing plate then press TARE key, adjustment is started.
-
Page 12: Power Sources
You may stand the scale platform on a table. Adjust the angle of the wireless display for easy viewing. Table top display: Wall display: The wireless display may be mounted to a wall. Use the mounting material included. 1. Screw the screws to the wall as shown. 2. -
Page 13: Control Panel
displays on the LCD, please use the included Taylor adapters or replace the batteries. Insert an adapter into the bottom of the wireless display and the scale base. Indicator - AC Jack Connector Weighing Platform-AC Jack Connector This scale’s weighing platform and wireless dislay require separate electric power. -
Page 14: Lcd Format
When control panel switch damaged. Using multi-meter to measure voltage of control panel. Reconnect control panel. Make sure that control panel is connected to the correct housing. If problem persists, replace a new control panel. LCD FORMAT... -
Page 15: Parts & Assembly Drawing
When power on, the scale shows non-complete segments. Please check the LCD pin (please refer to above LCD format). Check whether LCD pins are soldered properly or not. PARTS & ASSEMBLY DRAWING... -
Page 16: Trouble Shooting
TROUBLE SHOOTING... -
Page 17: Error Messages
ERROR MESSAGES... - Page 18 Message Description Low battery indicator for wireless display: This warning indicates the batteries for the wireless display are low. Please replace all the batteries or use the AC adapter for operation. Low battery indicator for scale base: This warning indicates the batteries for the scale base are low.
Need help?
Do you have a question about the AW-WPS and is the answer not in the manual?
Questions and answers