
Subscribe to Our Youtube Channel
Related Manuals for Yamato AW-300P


Summary of Contents for Yamato AW-300P
- Page 1 Digital Portion Scale AW-300P SERVICE MANUAL PLEASE TAKE THE TIME TO READ THESE INSTRUCTIONS BEFORE STARTING TO USE THE SCALES...
-
Page 2: Table Of Contents
TABLE OF CONTENTS TABLE OF CONTENTS ..............1 SPECIFICATIONS ................2 OVERLAY ..................2 KET FUNCTIONS ................3 USING SCALE ................. 4 USING TARE FUNCTION..............4 USING HOLD FUNCTION ............... 5 SETTING MODE ................6 SETTING FUNCTION DESCRIPTION ..........6 CALIBRATION PROCEDURE ............ -
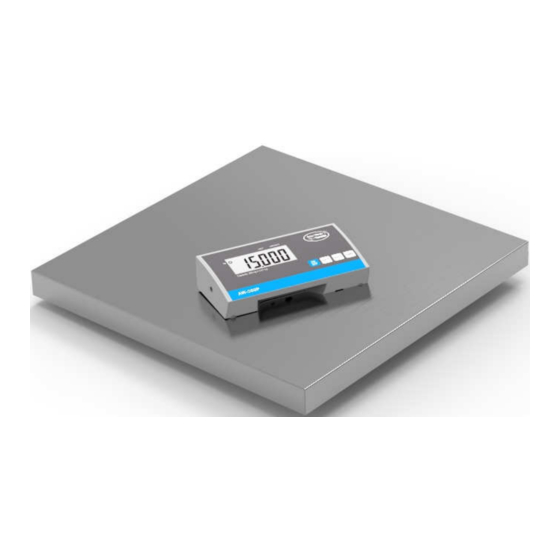
Page 3: Specifications
SPECIFICATIONS Model AW-300P Capacity 300 kg x 0.1 kg / 660 lb x 0.2 lb Weight Unit kg / lb LCD Readout 1.0” LCD display with 5 1/2 digits Assembled size: 210×110×45 mm Dimensions Platform size: 550×550x65 mm Buttons ON/OFF, UNIT, HOLD, TARE... -
Page 4: Ket Functions
KET FUNCTIONS Description Turn ON/OFF the scale To hold weighing result on the display / determine stable weighing value To select the weighing unit. (kg/lb) Tare weight during weighing process. The ‘Hold’ weighing function is active. Stored ‘Tare’ value. Stable symbol Minor weight value Indicates scale is at center of zero Low battery indication... -
Page 5: Using Scale
USING SCALE WEIGHING Switch on the scale using key. The diagnostic scale self-check is performed and the software version is displayed. The scale is ready for weighing when the “ 0.0 kg ” displays on the screen. Person stands on the middle of the scale for weighing. Wait until the scale stabilizes and stable sign (ο) shows on the screen Direction: If a weight is over the scale capacity, the display will show the „Err”... -
Page 6: Using Hold Function
USING HOLD FUNCTION AW-300P is provided with the integrated hold function (determination of average value). It’s weighing accurately although they are not still on the scale plate. Once the HOLD key is pressed, the weight reading will remain on the display, so the reading can easily be read. -
Page 7: Setting Mode
SETTING MODE With the weighing scale switched on, long press TARE 3seconds, to enter into the setting mode. The display will shows SETUP and then followed by UNIT appears. A selection is made by pressing the TARE key means: →, and the HOLD key means:↓... -
Page 8: Calibration Procedure
CALIBRATION PROCEDURE In weighing mode press the UNIT key and keep it pressed until “CAL” followed by the weight value of the required adjustment weight in displayed. “LOAD” is displayed alternatively. Carefully place the required adjustment weight in the centre of the weighing plate press TARE key, adjustment is started. -
Page 9: Control Panel
CONTROL PANEL When control panel switch damaged. Using multi-meter to measure voltage of control panel. Reconnect control panel. Make sure that control panel is connected to the correct housing. If problem persists, replace a new control panel. -
Page 10: Lcd Format
LCD FORMAT When power on, the scale shows non-complete segments. Please check the LCD pin (please refer to above LCD format). Check whether LCD pins are soldered properly or not. -
Page 11: Part List & Assembly Drawing
PART LIST & ASSEMBLY DRAWING Indicator part list... - Page 12 Deck part list...
-
Page 13: Trouble Shooting
TROUBLE SHOOTING... -
Page 14: Instruction For Charge And Connect
INSTRUCTION FOR CHARGE AND CONNECT prompt displays on the LCD, please charge the scale with AW-300P exclusive adaptor or replace the batteries. Locate adaptor plug-in at the back side of indicator. CAUTION: Always connect the AC adaptor with the indicator before connecting to the mains power supply. -
Page 15: Instructions For Replacing Batteries
INSTRUCTIONS FOR REPLACING BATTERIES... -
Page 16: Parameters Of Rs232 Interface
Parameters of RS232 interface Set parameters of the scale interface on the connected device. It is not possible to change the scale parameters. Baud rate: 9600 bps Parity check: None Data length: 8 bits Stop bit: 1 bit Handshake: RTS/CTS Data code: ASCII PS2 Pin out... -
Page 17: Connecting With Pc
Connecting with PC 1. Start Hyper Terminal Start Hyper Terminal program from clicking Start Menu → Programs → Accessories → Communication → Hyper Terminal. 2. New Connection Description Give new connection a name then click OK. 3. Select Your COM Port Click Connect to select your COM port. -
Page 18: Error Message
ERROR MESSAGE...
Need help?
Do you have a question about the AW-300P and is the answer not in the manual?
Questions and answers