Cisco 7920 Phone Manual
Wireless ip phone for callmanager 4.0 and later
Hide thumbs
Also See for 7920:
- Administration manual (238 pages) ,
- User manual (144 pages) ,
- Phone manual (94 pages)
Table of Contents
Advertisement
Quick Links
Phone Guide
Cisco Wireless
IP Phone 7920 for
Cisco CallManager 4.0
and Later
INCLUDING LICENSE AND WARRANTY
Corporate Headquarters
Cisco Systems, Inc.
170 West Tasman Drive
San Jose, CA 95134-1706 USA
http://www.cisco.com
Tel: 408 526-4000
800 553-NETS (6387)
Fax: 408 526-4100
Customer Order Number: DOC-7816888=
Text Part Number: 78-16888-01
Advertisement
Table of Contents

Related Manuals for Cisco 7920


Summary of Contents for Cisco 7920
- Page 1 Phone Guide Cisco Wireless IP Phone 7920 for Cisco CallManager 4.0 and Later INCLUDING LICENSE AND WARRANTY Corporate Headquarters Cisco Systems, Inc. 170 West Tasman Drive San Jose, CA 95134-1706 USA http://www.cisco.com Tel: 408 526-4000 800 553-NETS (6387) Fax: 408 526-4100...
- Page 2 CCSP, the Cisco Square Bridge logo, Cisco Unity, Follow Me Browsing, FormShare, and StackWise are trademarks of Cisco Systems, Inc.; Changing the Way We Work, Live, Play, and Learn, and iQuick Study are service marks of Cisco Systems, Inc.; and Aironet, ASIST, BPX, Catalyst,...
- Page 3 Copyright © 2005 Cisco Systems, Inc. All rights and hold until phone powers on. reserved. Cisco, Cisco IOS, Cisco Systems, and the Cisco call, press Resume. Dial a number—Press numbers on the keypad Systems logo are registered trademarks of Cisco Systems, Inc.
- Page 4 Shortcut Keys Softkey Definitions Setting Up Speed Dial Numbers Access Speed Dial setup—Choose Menu > Lock keypad—Press and hold (# key). CallBack—Receive notification when a busy Directory > Phone Book. Scroll to and select indicates the keypad is locked. extension becomes available. Speed Dial.
-
Page 5: Table Of Contents
C H A P T E R IP Phone 7920 Powering On the Phone Main Screen and Display Indicators Shortcut Keys for Phone Functions Using the Phone Menus Setting Passwords Entering and Editing Text Cisco Wireless IP Phone 7920 for Cisco CallManager... - Page 6 Basic Call Handling C H A P T E R Placing Calls Answering and Ending Calls Muting Calls Adjusting the Speaker Volume Placing Calls on Hold Transferring Calls Making Conference Calls Starting a Standard Conference Call Starting or Joining a Meet-Me Conference Call Forwarding Your Calls to Another Number Advanced Call Handling...
- Page 7 C H A P T E R Phone Status Change Phone Settings Changing Ring Tone Settings Changing Phone Display Settings Changing Phone Access Settings Viewing Phone Status Viewing the Network Configuration Cisco One-Year Limited Hardware Warranty Terms Cisco Wireless IP Phone 7920 for Cisco CallManager...
- Page 8 viii 78-16888-01...
-
Page 9: Getting Started
C H A P T E R Getting Started Before getting started with your Cisco Wireless IP Phone 7920, make sure that the following items are in the box and inform your system administrator or supplier if any items are missing: Cisco Wireless IP Phone 7920 •... -
Page 10: How To Use This Guide
Turn on or turn off your phone section on page 18. Start with the “Overview of the Use your phone Cisco Wireless IP Phone 7920” section on page 15. See the “Setting LEAP Password” Set LEAP password section on page 24. - Page 11 See the “Subscribing to IP Phone Subscribe to phone applications and Services” section on page 77. services See the “Accessories for the Cisco Get information about phone Wireless IP Phone 7920” section accessories on page 10. Cisco Wireless IP Phone 7920 for Cisco CallManager...
-
Page 12: Document Conventions
Document Conventions To simplify the instructions for using phone features and for changing phone settings, this guide uses the following navigational conventions and terms. Action Keys Navigation Instructions in This Guide Using When you must press the softkey for a softkeys menu, feature, or action label, this with labels... -
Page 13: Safety And Performance Information
Getting Started Safety and Performance Information Before installing and using your phone Cisco Wireless IP Phone 7920, read the following safety notices. Warning This warning symbol means danger. You are in a situation that could cause bodily injury. Before you work on any equipment,... - Page 14 Warning Do not use the Cisco Wireless IP Phone 7920 in hazardous environments such as areas where high levels of explosive gas may be present. Check with the site safety engineer before using any...
-
Page 15: Battery Safety Notices
Getting Started Battery Safety Notices These battery safety notices apply to the batteries that are approved by the Cisco Wireless IP Phone 7920 manufacturer. Warning There is the danger of explosion if the battery is replaced incorrectly. Replace the battery only with the same or equivalent type recommended by the manufacturer. - Page 16 To avoid risk of fire, burns, or damage to Caution your battery pack, do not allow a metal object to touch the battery contacts. Handle a damaged or leaking battery with Caution extreme care. If you come in contact with the electrolyte, wash the exposed area with soap and water.
- Page 17 Japan—CP-PWR-7920-JP To see translations of the warnings that appear in this publication, refer to the Regulatory Compliance and Safety Information for the Cisco Wireless IP Phone 7920 document that accompanied this product. Cisco Wireless IP Phone 7920 for Cisco CallManager...
-
Page 18: Accessories For The Cisco Wireless Ip Phone 7920
Power supplies for various regions • Desktop charger • Standard wired earphone • Carrying cases • For a complete list of accessories, refer to the Cisco Wireless IP Phone 7920 Accessory Guide that is included in the phone box. 78-16888-01... -
Page 19: Installing Or Removing The Phone Battery
Installing or Removing the Phone Battery You must install and charge the battery before you can use the Cisco Wireless IP Phone 7920. To install or remove the battery, follow these steps. 1. To install the battery, insert the battery catches... - Page 20 Figure 1-1 Installing or Removing the Battery Locking catch—Press to release the battery. Battery catches—Insert these into the slots near the bottom of the phone at battery installation. Metal contacts—Match the contacts on the battery to the contacts on the phone. 78-16888-01...
-
Page 21: Charging The Phone Battery
Getting Started Charging the Phone Battery A rechargeable battery powers the Cisco Wireless IP Phone 7920. To charge the battery, follow these steps: Procedure 1. Connect the cable from the power supply to the connector in the phone. 2. Connect the power supply to an AC wall outlet as shown in Figure 1-2. - Page 22 Figure 1-2 Charging the Phone Battery Tips The phone detects when the battery power level • is low and displays the warning message, “Battery Low” with the warning tone specified in your active user profile. The standard battery provides up to 3.5 hours of •...
-
Page 23: Overview Of The Cisco Wireless Ip Phone 7920
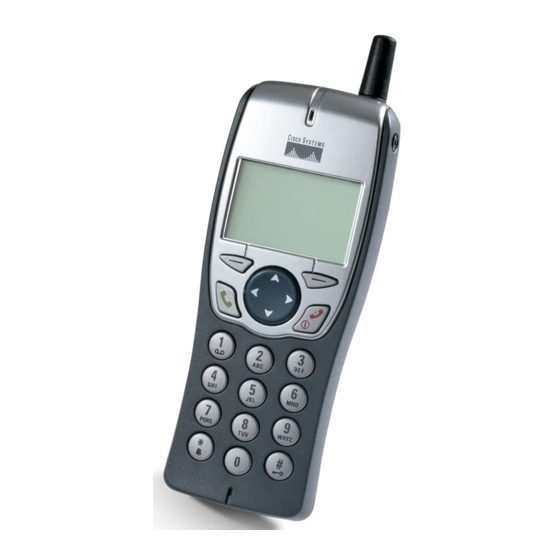
Access to web-based services such as weather, • stock reports, and a phone directory. Figure 2-1 shows the Cisco Wireless IP Phone 7920, and the table that follows describes the functions of the keys on the phone. Cisco Wireless IP Phone 7920 for Cisco CallManager... - Page 24 Figure 2-1 Cisco IP Phone 7905 Function keys PQRS WXYZ 7920 78-16888-01...
- Page 25 Overview of the Cisco Wireless IP Phone 7920 Left and right softkeys—Activates the item in the label above the softkey. Answer/Send key—Answers a call or dials a number. Number keys (0-9)—Use these to enter numbers and characters. Number keys (2-9)—Use these to activate speed-dial hot keys.
-
Page 26: Powering On The Phone
Powering On the Phone To power on the phone, press and hold the (green) key until the phone powers on. The phone goes through the following startup process: 1. The phone connects to a wireless access point and begins authentication. You might need to use a username and password to access the wireless network. -
Page 27: Main Screen And Display Indicators
Overview of the Cisco Wireless IP Phone 7920 Main Screen and Display Indicators Figure 2-2 shows the indicators that display in the main screen in standby mode. Figure 2-2 Main Screen in Standby Mode Battery icon—Shows level of charge in battery Vibration icon—Indicates vibration mode... -
Page 28: Shortcut Keys For Phone Functions
Shortcut Keys for Phone Functions The phone keypad provides these shortcuts to frequently used functions. Shortcut Function How to Use This Shortcut Locks or Press and hold the key. unlocks the icon displays at the phone top of the Main screen. keypad Press and hold the key to... - Page 29 Overview of the Cisco Wireless IP Phone 7920 Shortcut Function How to Use This Shortcut Accesses During a call, press the the speaker arrow on the navigation key volume to access the volume adjustment adjustment screen. Increase the volume by pressing...
-
Page 30: Using The Phone Menus
Speed Dial Features, page 53. Messages Playing Voice Messages, page 63. Call History Viewing and Placing Calls from the Call History Menu, page 64. Profiles Using and Changing Profiles, page 67. Services Using Cisco IP Phone Services, page 75. 78-16888-01... -
Page 31: Setting Passwords
Overview of the Cisco Wireless IP Phone 7920 Menu Section in Phone Guide Phone Settings Customizing Phone Settings and Viewing Phone Status, page 79. Network Config Viewing the Network Configuration, page 85 Setting Passwords When powering on your phone for the first time, you might need to set your username and password to access the wireless network. - Page 32 Ask your system administrator for the Note username format and password information for your system. 7. Press Edit and enter your username or password. For assistance, see the “Entering and Editing Text” section on page 25. You can use up to 32 alphanumeric Note characters for the LEAP password.
-
Page 33: Entering And Editing Text
Overview of the Cisco Wireless IP Phone 7920 Entering and Editing Text You can enter characters, numbers, and special characters for passwords and phone book entries. When you press a numeric key on the keypad, a text bubble shows all the characters that this key controls. - Page 34 If you want to... Then... Press . Doing so displays the Enter special characters and symbol screen, as shown in symbols Figure 2-3. Use , or to select the desired symbol . Press Use to insert the symbol into your text.
-
Page 35: Basic Call Handling
There is no dial tone. Note Before or after dialing the number, Place the call on a secondary line press to change to another line and press to make the call. Cisco Wireless IP Phone 7920 for Cisco CallManager... - Page 36 If you want to... Then... Press Hold to hold the active call, Place a call when another call is then press to switch to active New Call and press it. Dial, redial, or speed dial a number. Press to switch to Redial, then Redial the last dialed number press Redial to make the call.
- Page 37 For help with subscribing to the PAB or Fast Dial service, see the “Subscribing to IP Phone Services” section on page 77. Cisco Wireless IP Phone 7920 for Cisco CallManager...
- Page 38 If you want to... Then... Call the number and press Receive notification when a CallBack while listening to the busy or ringing busy tone or ring sound. Hang up. extension becomes When the extension becomes available available, your phone provides an audio and visual alert.
- Page 39 Tips If you make a mistake while entering a phone • number, press Clear to erase one or more digits. To redial the last number, you can also press • two times. Cisco Wireless IP Phone 7920 for Cisco CallManager...
-
Page 40: Answering And Ending Calls
Answering and Ending Calls If you want to... Then... Press and release (green key) to Answer a call connect to the incoming call. Press (red key) to silence the Silence the ring for an incoming ringing. The call continues silently, call then forwards to the no answer target, such as voice messaging or... -
Page 41: Muting Calls
Mute feature. If you want to... Then... During a call, press MuteOn. The Mute the call label changes to MuteOff. Press MuteOff. The label changes Cancel the mute to MuteOn. Cisco Wireless IP Phone 7920 for Cisco CallManager... -
Page 42: Adjusting The Speaker Volume
Adjusting the Speaker Volume If you want to... Then... Press to adjust the speaker Change the volume during a volume for a call on line 1. Press call twice to adjust the volume for a call on line 2. Press until you see Volume Change the volume for your... -
Page 43: Placing Calls On Hold
Hold. From your other desk phone and phone with the shared line, press your wireless Resume to connect to the call. phone Figure 3-2 Choosing Between Two Connected Calls Cisco Wireless IP Phone 7920 for Cisco CallManager... -
Page 44: Transferring Calls
Transferring Calls Transfer redirects a connected call. The target is the number to which you want to transfer the call. If you want to... Then... Press to switch to Trnsfer, press Transfer a call without talking to it, and enter the target phone the transfer number. -
Page 45: Making Conference Calls
Your system administrator must configure this special feature for you. See “Starting or Joining a Meet-Me Conference Call” section on page 40 for more information. Cisco Wireless IP Phone 7920 for Cisco CallManager... -
Page 46: Starting A Standard Conference Call
Starting a Standard Conference Call If you want to... Then... Call the first participant. To add Start a conference call by calling another party to the call, press participants Confrn (press to find softkey) and enter the next participant’s phone number. After the call connects and you have spoken to the participant, press Confrn again to add the... - Page 47 The system supports from three to sixteen participants in a standard conference call, but the number of parties that you can add is set by your system administrator. Cisco Wireless IP Phone 7920 for Cisco CallManager...
-
Page 48: Starting Or Joining A Meet-Me Conference Call
Starting or Joining a Meet-Me Conference Call Meet-Me conferencing allows participants to join a conference by calling the conference number directly, rather than waiting for the conference initiator to call them. If you want to... Then... Press to switch to MeetMe. Start a Meet-Me conference Press MeetMe and dial the... -
Page 49: Forwarding Your Calls To Another Number
Forwarding Your Calls to Another Number You can use Call Forward All to redirect your incoming calls from your Cisco IP Phone to another number. Enter the Call Forward All target number exactly as you would dial it from your desk phone. - Page 50 You can cancel call forwarding from your phone, • even if you set it on your Cisco CallManager User Options web page. For more information, see the “Logging In to the User Options Web Pages” section on page 76.
-
Page 51: Advanced Call Handling
Park and press it. The system stores the call. The phone screen displays the special call park number at which the call is stored. Make a note of the call park number. Cisco Wireless IP Phone 7920 for Cisco CallManager... -
Page 52: Picking Up A Redirected Call On Your Phone
Enter the call park number from Retrieve a parked call any phone in the Cisco CallManager system to connect to the call. You have a limited amount of time to retrieve the parked call before it reverts to ringing at its original destination. -
Page 53: Using A Shared Line
Typically, a shared line has two main uses: One person applies a shared line to multiple • phones—For example, your shared line, 23456, applies to your wireless IP phone and to your Cisco Wireless IP Phone 7920 for Cisco CallManager... -
Page 54: Maximum Supported Calls On A Shared Line
The maximum number of calls that a shared line supports can vary by phone model. For example, your Cisco Wireless IP Phone 7920 supports a maximum of two calls on a shared line while your co-worker’s Cisco IP Phone 7960 can support four calls on the same line. -
Page 55: Sharing Call Information And Barging
Look at the phone screen to see if See if a co-worker has an active call “In Use Remote” appears on the on the shared line status line and the calling party ID appears next to the line number. Cisco Wireless IP Phone 7920 for Cisco CallManager... - Page 56 Barge shared-line user hears a tone and “To Barge” displays on the screen. You can only join a call that a Cisco IP Phone (with Barge enabled) initiates. Select an “in-use-remote” call on Add yourself to a call on a shared your screen and press cBarge.
-
Page 57: Preventing Others From Viewing Or Joining A Shared-Line Call
If you have Privacy enabled on a shared line and • make a call, “ in use remote” does not display on other phones that share the line; there is no indication when the line is in use. Cisco Wireless IP Phone 7920 for Cisco CallManager... -
Page 58: Tracing Suspicious Calls
If all other phones that share the same line have • Privacy enabled, you can still make new calls using the shared line. However, you cannot join any in-progress calls using the shared line. Tracing Suspicious Calls If you are receiving suspicious or malicious calls, your system administrator can add the Malicious Call Identification (MCID) feature to your phone. - Page 59 (which is provided by your system administrator) followed by the phone number. Hear the special call waiting tone Receive a priority (precedence) call and note the special icon displayed for the incoming call. Cisco Wireless IP Phone 7920 for Cisco CallManager...
- Page 60 If you want to... Then... Higher priority calls display at the View the priority level of a call top of your call list. These icons indicate the priority: (no icon) Normal call Priority call Medium priority (immediate) call High priority (flash) call Highest priority (flash override) call When you hear the special call...
-
Page 61: Using The Phone Book And Speed Dial Features
• Configuring Speed-Dial Hot Keys, page 58 • Your Cisco Wireless IP Phone 7920 includes a local phone book. Use the Phone Book feature to view phone book entries, to add or edit phone book entries, and to set up speed-dial numbers. You can access entries in your phone book by pressing the PhBook softkey. -
Page 62: Using The Phone Book
Using the Phone Book If you want to... Then... Press PhBook. The phone displays Browse the phone book to see a list of entry names. entries If there are no phone book entries, “Empty” displays. Scroll to the desired phone book View an entry in the Phone Book entry and press Detail. -
Page 63: Adding Or Changing Entries In The Phone Book
You can add the information as shown in Figure 5-1. Your system administrator can add a list of Note phone book entries or speed-dial entries to your phone by using the 7920 Configuration Utility. Cisco Wireless IP Phone 7920 for Cisco CallManager... - Page 64 Figure 5-1 Phone Book Entry Contact person’s name Office phone number entry Home phone number entry Cellular phone number entry E-mail address entry If you want to... Then... Press Menu and select Directory > Browse the phone book entries Phone Book, then select Names to see the entries.
- Page 65 Edit the item by following instructions in “Entering and Editing Text” section on page 25. When you have finished, press OK, then press Save. Press Back to return to the Directory menu. Cisco Wireless IP Phone 7920 for Cisco CallManager...
-
Page 66: Configuring Speed-Dial Hot Keys
• a corporate directory listing” section on page 29. Configuring Speed-Dial Hot Keys On the Cisco Wireless IP Phone 7920 keypad, the numeric keys (2-9) are hot keys that access speed-dial numbers. You can assign phone numbers to eight speed-dial hot keys. The number 1 key is reserved for accessing the voice messaging system. - Page 67 Scroll to the desired Speed Dial View the phone number assigned to <number> and press Detail. See the speed-dial hot Figure 5-2. Figure 5-2 Speed Dial Menu Cisco Wireless IP Phone 7920 for Cisco CallManager...
- Page 68 If you want to... Then... Scroll to an available speed-dial Assign a phone number to a hot key and press Detail. speed-dial hot key Press Edit to enter the information. See the “Entering and Editing Text” section on page 25. Press OK to save the speed-dial number, then Back to exit the menu.
- Page 69 You must enter the external phone number • exactly as you would dial it, including a pre-fix, such as 9, and the area code, if required. Cisco Wireless IP Phone 7920 for Cisco CallManager...
- Page 70 78-16888-01...
-
Page 71: Using Voice Messaging And Call History
C H A P T E R Using Voice Messaging and Call History Logs The Cisco Wireless IP Phone 7920 main menu provides access to the voice messaging service and to call history logs. Playing Voice Messages When the phone displays, “You have voice mail,” you... -
Page 72: Viewing And Placing Calls From The Call History Menu
If you want to... Then... Press Menu, then press to select Access and play your voice Messages. Select Voice Mail Box. messages Enter your password and follow the voice instructions to listen to your messages. While in standby mode, press and Access your voice messages using release... - Page 73 Erase Call History. Press OK to erase the entire call history. Or press Cancel to return to the Call History menu. After pressing OK, all call Note history logs are empty. Cisco Wireless IP Phone 7920 for Cisco CallManager...
- Page 74 78-16888-01...
-
Page 75: Using And Changing Profiles
C H A P T E R Using and Changing Profiles The Cisco Wireless IP Phone 7920 provides these profile types: User Profiles, page 67 • Network Profiles, page 72 • When you access the Profiles menu, you might see “Not Available”... -
Page 76: Options For User Profile Settings
Meeting profile, the ring volume is decreased to the lowest level or you can choose the Silent profile and turn off the ringer. The following table lists the default settings for the user profiles. Profiles Type of Settings Normal Silent Meeting Outdoors Speaker... -
Page 77: Configuring User Profiles
If you want to... Then... Press Menu, then press View the active User Profile switch to Profiles and press Select. Scroll to User Profiles and press Select. The activated profile has a next to it. Cisco Wireless IP Phone 7920 for Cisco CallManager... - Page 78 If you want to... Then... Scroll to a different profile and Choose a different profile press Select to access the settings for that profile. Select Activate to change the profile. The appears next to the new profile. Press Back to return to the menu. Choose Menu >...
- Page 79 Scroll to Warning Style and select it. Scroll to one of the following: Off—Sends no warning messages. Tone—Makes a sound with warning messages. Vibration—Vibrates with warning messages. Press Select to change the warning style. Cisco Wireless IP Phone 7920 for Cisco CallManager...
-
Page 80: Network Profiles
Choosing a Network Profile Your Cisco Wireless IP Phone 7920 can have up to four network profiles. You can set your phone to automatically scan the profiles and select the network profile with the correct SSID for a specific WLAN. - Page 81 Scroll to a different profile and Choose a different profile press Select to access the settings for that profile. Select Apply Change to select the new profile. appears next to the active profile. Cisco Wireless IP Phone 7920 for Cisco CallManager...
- Page 82 Tips You can enter or change your LEAP username • and password by choosing Network Profiles > “your active profile” > 802.11b Configuration> LEAP. See the “Setting Passwords” section on page 23. Do not make changes to settings in to your •...
-
Page 83: Using Cisco Ip Phone Services
C H A P T E R Using Cisco IP Phone Services Because your Cisco Wireless IP Phone 7920 is a network device, it can share information with other network devices in your company, including your computer. You can establish phone services, and control settings and features from your computer using the Cisco CallManager User Options web pages. -
Page 84: Logging In To The User Options Web Pages
2. Open a web browser on your computer and enter the URL (provided by your administrator). 3. Enter your user ID and password, then click Log On. The Cisco CallManager User Options Menu displays. 4. From the “Select a device or device profile to configure:” drop-down list, choose IP Phone 7920. -
Page 85: Subscribing To Ip Phone Services
PIN), then click Subscribe. Choose Configure your Cisco IP Change or end subscriptions Phone Services. Click a service in the “Your Subscribed Services” panel. Click Update after making changes, or click Unsubscribe. Cisco Wireless IP Phone 7920 for Cisco CallManager... -
Page 86: Accessing Ip Phone Services
Your system administrator sets up this option. For more information about the phone services to • which you can subscribe, refer to Customizing Your Cisco IP Phone on the Web at the following URL: http://www.cisco.com/univercd/cc/td/doc/ product/voice/c_ipphon/index.htm 78-16888-01... -
Page 87: Customizing Phone Settings And Viewing
See the following sections for this information: Viewing Phone Status, page 84 • Viewing the Network Configuration, page 85 • Cisco Wireless IP Phone 7920 for Cisco CallManager... -
Page 88: Change Phone Settings
Change Phone Settings You can choose between several phone setting options for your Cisco Wireless IP Phone 7920 by using the Phone Settings menu. If the Phone Settings menu options do not appear, your system administrator has restricted local configuration for the phone. -
Page 89: Changing Phone Display Settings
Change the language that then scroll to and select the displays on the desired language. A displays phone screen next to the selected language. The screen immediately Note changes to the selected language. Cisco Wireless IP Phone 7920 for Cisco CallManager... -
Page 90: Changing Phone Access Settings
If you want to... Then... Scroll to and select Greeting Change the start-up message on the Message, then press Edit. Enter a phone screen message up to 15 characters in length. See the “Entering and Editing Text” section on page 25. Press OK to save the change, then Back to return to the Phone Settings. - Page 91 If you change the Phone Lock password and • forget it, you must contact your system administrator to have the phone unlocked and reset. All your personal settings and your Phone Book entries will be deleted. Cisco Wireless IP Phone 7920 for Cisco CallManager...
-
Page 92: Viewing Phone Status
Viewing Phone Status For troubleshooting purposes, you might need to view the software, firmware, and hardware releases on your phone that are described in the table below. If you want to... Then... Press Menu and press View the Phone Status Options switch to the Phone Settings menu. -
Page 93: Viewing The Network Configuration
• Hostname for phone • Primary gateway • Primary TFTP server • Cisco CallManager • servers (1-5) Choose Menu > Network View the MAC address for the phone Config > MAC Address. Cisco Wireless IP Phone 7920 for Cisco CallManager... - Page 94 • Cipher used • Tips Your system administrator can disable access to • configurable menus on the Cisco Wireless IP Phone 7920. Your system administrator has information about • the network configuration settings that might display in this menu. The Site Survey feature is a utility for checking •...
-
Page 95: Cisco One-Year Limited Hardware Warranty Terms
Click the Information Packet Number field, and make sure that the part number 78-5235-03A0 is highlighted. b. Select the language in which you would like to read the document. Cisco Wireless IP Phone 7920 for Cisco CallManager... - Page 96 Click Go. The Cisco Limited Warranty and Software License page from the Information Packet appears. d. Read the document online, or click the PDF icon to download and print the document in Adobe Portable Document Format (PDF). You must have Adobe Acrobat Note Reader to view and print PDF files.
- Page 97 Cisco One-Year Limited Hardware Warranty Terms You can also contact the Cisco service and support website for assistance: http://www.cisco.com/public/Support_root.shtml. Duration of Hardware Warranty One (1) Year Replacement, Repair, or Refund Policy for Hardware Cisco or its service center will use commercially...
- Page 98 To Receive a Return Materials Authorization (RMA) Number Contact the company from whom you purchased the product. If you purchased the product directly from Cisco, contact your Cisco Sales and Service Representative. Complete the information below, and keep it for reference.
Need help?
Do you have a question about the 7920 and is the answer not in the manual?
Questions and answers