Table of Contents
Advertisement
Advertisement
Table of Contents

Subscribe to Our Youtube Channel
Related Manuals for EDAN C3A


Summary of Contents for EDAN C3A
- Page 1 三...
- Page 2 This manual will help you understand the operation and maintenance of the product better. It is reminded that the product shall be used strictly complying with this manual. User's operation failing to comply with this manual may result in malfunction or accident for which EDAN INSTRUMENTS, INC. (hereinafter called EDAN) cannot be held liable.
- Page 3 A CAUTIONlabel advises against actions or situations that could damage equipment, produce inaccurate data, or invalidate a procedure. NOTE A NOTE provides useful information regarding a function or a procedure. - II -...
-
Page 4: Table Of Contents
Table of Contents Chapter 1 Safety Guide ......................1 1.1 Intended Use/Indications for Use ......................1 1.2 Safety Precautions ..........................1 1.3 Definitions and Symbols ........................4 Chapter 2 Introduction ......................8 2.1 System Connection ..........................8 2.1.1 Computer Requirements ...................... 9 2.1.2 Monitor Requirements ...................... - Page 5 5.3.11 Follow-up Management ....................40 5.3.12 Bar Code Scanner Function .................... 41 5.3.13 Patient Info. Input Items Customization................. 42 5.3.14 Worklist ..........................42 5.4 Examining............................43 5.4.1 Examination Prompts ......................43 5.4.2 Capturing Images ........................ 43 5.4.3 Taking Video ........................45 5.4.4 Viewing in FullScreen Mode ....................
- Page 6 5.12.1 User Management Setup ....................77 5.12.1.1 Setting Hospital Information .................. 77 5.12.1.2 Adding a User ......................78 5.12.1.3 Modifying User Information ................... 78 5.12.1.4 Deleting a User ....................... 79 5.12.2 General Setup ........................79 5.12.2.1 Changing Date Format ..................79 5.12.2.2 Setting Follow-up Period ..................
- Page 7 Appendix 4 EMC Information ................... 101 A4.1 Electromagnetic Emissions ......................101 A4.2 Electromagnetic Immunity ......................102 A4.3 Electromagnetic Immunity ......................104 A4.4 Recommended Separation Distances .................... 107 Appendix 5 Abbreviation ....................109 - VI -...
-
Page 8: Chapter 1 Safety Guide
1.1 Intended Use/Indications for Use The C3A, C6A and C6A HD video colposcope is intended for gynecological examination. It provides magnified visualization of the vagina, cervix and external genitalia, which can help diagnose abnormalities and select areas for biopsy. It is intended to be used only by trained and qualified personnel in hospitals, clinics and private offices, and not intended for home use or to touch the patient. - Page 9 C3A, C6A, C6A HD Video Colposcope User Manual Safety Guide WARNING Accessory equipment connected to the device must be certified according to the respective IEC/EN standards (e.g. IEC/EN 60950 for data processing equipment and IEC/EN 60601-1 for medical equipment). Furthermore all configurations shall comply with the valid version of the system standard IEC/EN 60601-1.
- Page 10 C3A, C6A, C6A HD Video Colposcope User Manual Safety Guide WARNING 18 No part of the device is intended to be maintained by the user. Unauthorized servicemen shall not open the enclosure. Otherwise, safety hazards may happen. 19 The camera light source is very bright. When the camera is on, do not stare at the light source or aim the light source at the patient's eyes.
-
Page 11: Definitions And Symbols
C3A, C6A, C6A HD Video Colposcope User Manual Safety Guide Patient environment means any volume in which intentional or unintentional contact can occur between the patient and parts of the system or between patient and other persons touching parts of the system (reference IEC 60601-1). - Page 12 C3A, C6A, C6A HD Video Colposcope User Manual Safety Guide Power supply Monitor Signal input/output CLASS II equipment Consulting instructions Consult instruction for use on this website Foot switch Part Number SERIAL NUMBER General symbol for recovery/recyclable Date of manufacture...
- Page 13 C3A, C6A, C6A HD Video Colposcope User Manual Safety Guide Disposal method Caution: Federal (U.S.) law restricts this device to sale by or on the order of a physician. Water ingress protection degree of the foot switch, IPX8 protected against the effects of continuous immersion in...
- Page 14 Switch on/Switch off ON/OFF NOTE: The user manual is printed in black and white. The symbol marked with an asterisk* is only applicable to C3A and C6A. The 9 symbol applies to paper user manual. The 10 symbol applies to electronic user manual.
-
Page 15: Chapter 2 Introduction
To ensure proper running of the system, make sure that the computer and printer you use meet the requirements described in the following sections. For any risks due to improper use of the computer or printer, EDAN should not be held liable. - 8 -... -
Page 16: Computer Requirements
C3A, C6A, C6A HDVideoColposcope User Manual Introduction 2.1.1 Computer Requirements The video colposcope software should be installed in a computer that meets the following specifications. C3A, C6A: Dual-core, ≥2.1GHz ≥2GB Memory ≥500GB Hard disk Over1366*768 Resolution C6A HD: Dual-core, ≥2.3 GHz ≥4 GB... -
Page 17: Camera
C3A, C6A, C6A HDVideoColposcope User Manual Introduction 2.2 Camera NOTE: The magnification of C3 by default is 1~28 X and can be set to 1~40X; the magnification of C6 is 1~36X and can be set to 1~50X; the magnification of C6 HD is 1~50X and can be set to 1~60X. - Page 18 C3A, C6A, C6A HDVideoColposcope User Manual Introduction Operation: Press this key, the camera is switched on, and the indicator on its left lights up in green. Press it again, the camera is switched off, and the indicator on its left goes off.
-
Page 19: Vertical Stand
C3A, C6A, C6A HDVideoColposcope User Manual Introduction The first level will be activated first. The second and third levels make compensation on the basis of the first level and therefore better facilitate visualization of vessels. Press the WHITE key to exit green filter. -
Page 20: Swing Arm Stand
C3A, C6A, C6A HDVideoColposcope User Manual Introduction Figure 2-4 Vertical stand (with star-shaped chassis) Figure 2-5 Vertical stand (with T-shaped chassis) Vertical angle Horizontal angle Stand post adjustment knob adjustment knob Height adjustment Camera holder Lifting post knob Chassis Casters 2.4 Swing Arm Stand... - Page 21 C3A, C6A, C6A HDVideoColposcope User Manual Introduction Figure 2-6 Swing arm stand (with the monitor supporter part and keyboard tray part) - 14 -...
- Page 22 C3A, C6A, C6A HDVideoColposcope User Manual Introduction If the laptop tray part is configured, the swing arm stand appears as follows: Figure 2-7 Swing arm stand (with the laptop tray part) Vertical angle Camera holder Holder post adjustment knob Horizontal angle...
-
Page 23: Trolley
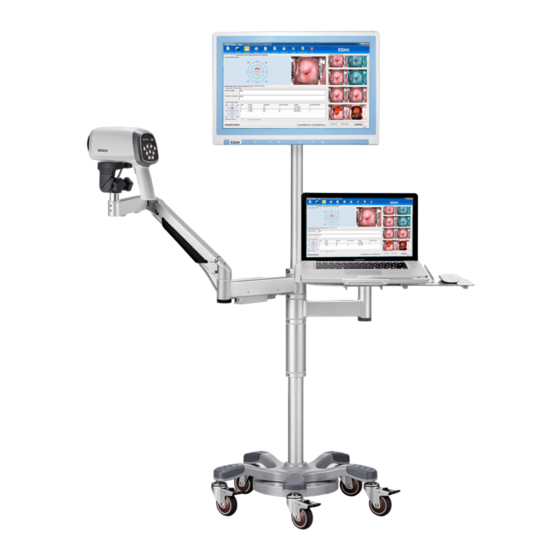
C3A, C6A, C6A HDVideoColposcope User Manual Introduction 2.5 MT-806 Trolley The MT-806 trolley is optional. Figure 2-8 MT-806 trolley Monitor supporter Upper tray Mouse tray Upper stand post Lower stand post Lower tray Casters Trolley handle Upper drawer Lower drawer The monitor or all-in-one PC can be installed on the monitor supporter. -
Page 24: Fixed Video Capture Box
Introduction 2.6 Fixed Video Capture Box The fixed video capture box is only configured to C3A and C6A. The fixed video capture box applies only to the vertical stand and is installed under the chassis of the vertical stand. The following figure shows its appearance and external interfaces. -
Page 25: Foot Switch
A power adapter is provided. There are two models: FW7556M/12and ME20A1202F01. Do not use other models of power adapter. For any malfunction or accident due to improper use of the power adapter, EDAN should not be held liable. - 18 -... -
Page 26: Chapter 3 Basic Operations
C3A, C6A, C6A HDVideoColposcope User ManualBasic Operations Chapter 3 Basic Operations 3.1 Opening and Checking the Package Visually examine the package prior to unpacking. If any signs of mishandling or damage are detected, contact the carrier to claim for damage. -
Page 27: Adjusting The Stand Height
C3A, C6A, C6A HDVideoColposcope User ManualBasic Operations 3.2.2 Adjusting the Stand Height To get a clear image, you may need to adjust the stand height. Perform the following steps: 1. Step down the caster pedals to stop the stand from moving around. -
Page 28: Adjusting The Swing Arm Stand
C3A, C6A, C6A HDVideoColposcope User ManualBasic Operations Horizontal angle adjustment knob Vertical angle adjustment knob Figure 3-3 CAUTION Do not exert pressure downward more than 15 kg on the camera or it may hurt you or damage the device. 3.3 Adjusting the Swing Arm Stand 3.3.1 Placing/Moving the Stand... -
Page 29: Adjusting The Camera Stand Height
C3A, C6A, C6A HDVideoColposcope User ManualBasic Operations 3.3.2 Adjusting the Camera Stand Height You can adjust the camera stand height by adjusting the swing arm. Follow the instructions: To decrease the height: Hold the swing arm with your hand and press it down to the desired height, then release your hand. -
Page 30: Adjusting The Camera Angle
C3A, C6A, C6A HDVideoColposcope User ManualBasic Operations If the swing arm continues to fall after you release your hand, it indicates that the locking force of the gas spring is too small. You can use a 4 mm socket head wrench to rotate the adjustment hole of the gas spring to the "+"... -
Page 31: Adjusting The Position Of Keyboard Tray Or Laptop Tray
C3A, C6A, C6A HDVideoColposcope User ManualBasic Operations 3.3.4 Adjusting the Position of Keyboard Tray or Laptop Tray If the keyboard tray or laptop tray is configured, you can adjust its position on the horizontal direction. Either of the following methods can be used: ... -
Page 32: Connecting The Power Adapter
C3A, C6A, C6A HDVideoColposcope User ManualBasic Operations CAUTION When tilting the monitor, be careful not to jam your hands between the monitor supporter and the monitor. 3.5 Connecting the Power Adapter Make sure that the AC power supply complies with the following specifications:... -
Page 33: Chapter 4 Software Installation
C3A, C6A, C6A HDVideoColposcope User ManualSoftware Installation Chapter 4 Software Installation NOTE: The video colposcope software applies to operating system Windows 7, Windows 8, Windows 8.1 and Windows 10. Before software installation, ensure that all the equipment forming the system has ... - Page 34 C3A, C6A, C6A HDVideoColposcope User ManualSoftware Installation Figure 4-3 It takes some time for the software installation preparation. Please wait. When the installation is ready, the following interface is displayed. ClickNext. Figure 4-4 - 27 -...
- Page 35 C3A, C6A, C6A HDVideoColposcope User ManualSoftware Installation 4. The following prompt is displayed. Click Next after you check the items. Figure 4-5 5. Click Browse to select the installation path. The default path D:\Cx\Cx_Workstation is recommended. Then, click Next. Figure 4-6 NOTE: If disk D does not exist in the system, the default path is invalid.
- Page 36 C3A, C6A, C6A HDVideoColposcope User ManualSoftware Installation 6. ClickBrowse to select the database installation path. Do not select C:\Program Files. The default path D:\Cx\Cx_Database is recommended. Then, click Next. Figure 4-7 7. ClickNext to continue installation. Do not close the black command prompt windows.
- Page 37 C3A, C6A, C6A HDVideoColposcope User ManualSoftware Installation Figure 4-9 Figure 4-10 For operating system Windows 7, Windows 8, Windows 8.1 or Windows 10, a prompt will be displayed, asking you whether to install the software driver. Choose to install the driver, as shown in the following figure (Windows 8 is used as an example).
- Page 38 C3A, C6A, C6A HDVideoColposcope User ManualSoftware Installation Figure 4-11 NOTE: If the driver is not installed, when you try to access the Examine interface or to set the capture card on the Setup interface, a system prompt will be displayed, indicating that initializing video module failed.
-
Page 39: Chapter 5 Application Of The Video Colposcope Software
C3A, C6A, C6A HDVideoColposcope User ManualApplication of the Video Colposcope Software Chapter 5 Application Video Colposcope Software NOTE: During normal running of the system, do not remove the USB connection between the computer and the video capture box. 5.1 Starting up the Software Double-click the software icon on the desktop. -
Page 40: Main Interface
C3A, C6A, C6A HDVideoColposcope User ManualApplication of the Video Colposcope Software 5.2 Main Interface After login, the main interface is displayed. Figure 5-2 Item Name Description It shows the software system name, doctor login and current patient Title bar information. - Page 41 C3A, C6A, C6A HDVideoColposcope User ManualApplication of the Video Colposcope Software On the Patient Info.tab, input the patient information, e.g. name, age, and reason. Figure 5-3 If Yes is selected for Menopause, Menopause Age instead of LMP is displayed and must be specified.
- Page 42 C3A, C6A, C6A HDVideoColposcope User ManualApplication of the Video Colposcope Software down a term. Figure 5-6 - 35 -...
-
Page 43: Viewing Today's Exam Schedule
C3A, C6A, C6A HDVideoColposcope User ManualApplication of the Video Colposcope Software Figure 5-7 NOTE: Certain terms provided by the system cannot be modified or deleted. When you double-click such a term to select it, the Save and Delete buttons are unavailable. -
Page 44: Browsing Examination Record
C3A, C6A, C6A HDVideoColposcope User ManualApplication of the Video Colposcope Software Figure 5-8 Select a patient in the list and right-click it, you can choose to browse her examination record, modify her information or delete her information. 5.3.3 Browsing Examination Record Select a patient in the list, right-click it and choose Browse Examination Record. -
Page 45: Deleting Patient Information
C3A, C6A, C6A HDVideoColposcope User ManualApplication of the Video Colposcope Software the appointment. 2. App. Time and Physician are available for modification only when the patient is unexamined and not the current patient. 5.3.5 Deleting Patient Information Select a patient in the list, right-click it and choose Delete Patient Information. A prompt is issued. -
Page 46: Making An Appointment
C3A, C6A, C6A HDVideoColposcope User ManualApplication of the Video Colposcope Software shows today's exam schedule again. Or you can click Start, this patient is added to today's exam schedule and the system enters the Examine interface. You can click Clear to delete the inputted information. -
Page 47: Searching For An Appointment
C3A, C6A, C6A HDVideoColposcope User ManualApplication of the Video Colposcope Software NOTE: Every login user can view all the appointment information. 5.3.8 Searching for an Appointment To quickly search for an appointment, perform the following procedures: In the Appointment Searcharea, select a condition, then input the keyword. If the condition is Name or Patient No., the system supports fuzzy search, andyou can search by inputting only part... -
Page 48: Bar Code Scanner Function
C3A, C6A, C6A HDVideoColposcope User ManualApplication of the Video Colposcope Software Figure 5-13 Click theFollow-uptag, the follow-up patients to be processed in or before the specified follow-up period will be displayed. The list shows the patients by follow-up date in ascending order, and the Follow-up tag shows the total number of records. -
Page 49: Patient Info. Input Items Customization
C3A, C6A, C6A HDVideoColposcope User ManualApplication of the Video Colposcope Software Appointment interface with the scanner, and the patient’s information, including patient number, patient name, birthday and age, will be entered automatically.The rest information can be entered manually. Click “Add Patient” (Patient interface) or “Save” (Appointment interface) after entering information. -
Page 50: Examining
C3A, C6A, C6A HDVideoColposcope User ManualApplication of the Video Colposcope Software 5.4 Examining Once a patient is selected on the Patient Info.interface, click Starton the interface or the Examinebutton in the tool bar.The system enters the Examine interface, with the patient's key information displayed on the lower left.On this interface, you can capture images,... - Page 51 C3A, C6A, C6A HDVideoColposcope User ManualApplication of the Video Colposcope Software only effective to the current operation. After the restart of the software, the setup will resume to the setup in Setup, see section 5.12.2.16Enabling Auto Capture), and the tag turns to .
-
Page 52: Taking Video
C3A, C6A, C6A HDVideoColposcope User ManualApplication of the Video Colposcope Software Figure 5-17 The coordinate helps to locate the center of an image, facilitating image capturing. Pull the trigger again, the coordinate disappears. If the camera handle trigger is set to capture image, you can pull this trigger to capture the current image. -
Page 53: Making Comparison
C3A, C6A, C6A HDVideoColposcope User ManualApplication of the Video Colposcope Software 5.4.5 Making Comparison During examination, you can bring out an existing case for comparison or reference. Click the Comparison tag . The Comparison Analysis page is displayed, with the current patient's information and image displayed on the upper left. -
Page 54: Analyzing
C3A, C6A, C6A HDVideoColposcope User ManualApplication of the Video Colposcope Software Figure 5-19 5.4.6 Analyzing Click the Analysis tag to switch to the Analysis interface. For specific operations on the Analysis interface, see section5.5Analyzing. 5.4.7 Comparing Images Click the Compare button under the Current Patient Image area, the Current Patient Image Comparison page is displayed. - Page 55 C3A, C6A, C6A HDVideoColposcope User ManualApplication of the Video Colposcope Software Saveto save them. A maximum of 20 notes can be added to an image, with each note containing no more than 30 characters. Term area Figure 5-20 The system allows quickly adding notes. Click a term in the term area, then click on the image at the desired position, the term note is added to the image.
-
Page 56: Measuringan Image
C3A, C6A, C6A HDVideoColposcope User ManualApplication of the Video Colposcope Software 4) Deleting an Image Click the Delete button underneath the image to delete it. A prompt is issued. Click Yes to confirm the deletion, or click No to cancel it. -
Page 57: Import Image
C3A, C6A, C6A HDVideoColposcope User ManualApplication of the Video Colposcope Software Select Manual and draw a line on the image with your mouse. Input the length (mm) of the line and click OK. If you input 0 or any other invalid value, the following prompt will be issued: The input value is invalid, please input again. -
Page 58: Analyzing
C3A, C6A, C6A HDVideoColposcope User ManualApplication of the Video Colposcope Software page will be displayed. Select an image and import it. After importing is succeeded, the image will be displayed in current patient image list. 5.5 Analyzing Click theAnalysisbutton in the tool bar to open the Analysis interface, or you can... - Page 59 C3A, C6A, C6A HDVideoColposcope User ManualApplication of the Video Colposcope Software Figure 5-24 Figure 5-25 - 52 -...
- Page 60 C3A, C6A, C6A HDVideoColposcope User ManualApplication of the Video Colposcope Software You can compare 2-6 images at the same time. If more than 6 images are selected, the first 6 images are compared by default, and the button is available at the upper right corner of each image.
-
Page 61: Making Comparison With An Existing Case
C3A, C6A, C6A HDVideoColposcope User ManualApplication of the Video Colposcope Software 5.5.2 Making Comparison with an Existing Case Click the Comparison Analysis button at the lower left corner of the Analysis interface. The Comparison Analysis page is displayed. For specific operations on this page, see section 5.4.5Making Comparison. -
Page 62: Inputting Examination Result
C3A, C6A, C6A HDVideoColposcope User ManualApplication of the Video Colposcope Software the corresponding labeling step. When the evaluation is completed, the Evaluation Result sub-tab is displayed. It shows preliminary diagnosis and treatment suggestion. If the treatment suggestion is biopsy, information (including the grade, quadrant, clock direction and offset) about the recommended biopsy regions will be given in the list under Biopsy Region. - Page 63 C3A, C6A, C6A HDVideoColposcope User ManualApplication of the Video Colposcope Software Figure 5-29 Colposcopy examination Click , the Select Term page is displayed. Figure 5-30 Selection of termsforcolposcopic findings (cervix) - 56 -...
- Page 64 C3A, C6A, C6A HDVideoColposcope User ManualApplication of the Video Colposcope Software Figure 5-31 Selection of terms for colposcopic findings (vagina) Figure 5-32 Selection of terms for colposcopic findings (vulvar) Terms of colposcopic findings are listed on the left and classified into four categories: Normal, Abnormal, Suspicious For Invasion and Miscellaneous Finding.
-
Page 65: Inputting Biopsy Result
C3A, C6A, C6A HDVideoColposcope User ManualApplication of the Video Colposcope Software selected terms are added to the Colposcopic Findings field. The current patient image is shown on the upper right of the page. If multiple images are available, you can click next to the Image Remark field to view the previous or next image. -
Page 66: Performing Rci Evaluation
C3A, C6A, C6A HDVideoColposcope User ManualApplication of the Video Colposcope Software Biopsy Region, you can click on the biopsy image to add a point to indicate an immediate biopsy region, which is marked as XN(N is the Item number). Information (including the quadrant, clock direction, and offset) about the biopsy region is automatically shown in the list on the right. - Page 67 C3A, C6A, C6A HDVideoColposcope User ManualApplication of the Video Colposcope Software 2. The RCI evaluation is not available in the United States. On the RCI Evaluationtab, you can perform RCI (Reid Colposcopic Index) evaluation. Figure 5-35 RCI evaluation is performed based on four aspects: colour, margin, vessel, and Iodine staining.
- Page 68 C3A, C6A, C6A HDVideoColposcope User ManualApplication of the Video Colposcope Software Figure 5-36 When you select a term and click OK, this term and its score are added to the corresponding fields on the RCI Evaluation tab. If multiple terms are selected for one aspect, the score of this aspect is the largest value among the scores of the selected terms.
-
Page 69: Performing Swede Evaluation
C3A, C6A, C6A HDVideoColposcope User ManualApplication of the Video Colposcope Software 5.5.7 Performing Swede Evaluation NOTE: 1. The Swede Evaluation tab is available only when Swede evaluation is enabled (see section5.12.2.14Enabling Swede Evaluation). 2. The Swede evaluation is not available in the United States. -
Page 70: Examination Report
C3A, C6A, C6A HDVideoColposcope User ManualApplication of the Video Colposcope Software 5.6 Examination Report 5.6.1 Printing the Examination Report Select a patient and then click theReportbutton in the tool bar to open the Report interface. Figure 5-38 The examination report is shown in detail in the middle of the interface. The captured images are shown on the right. -
Page 71: Changing Print Settings
C3A, C6A, C6A HDVideoColposcope User ManualApplication of the Video Colposcope Software Once you switch the print template, the principle no longer works. If you want to have an image shown on the report, drag it from the Current Patient Image list to the Image area of the report. -
Page 72: Selecting A Print Template
C3A, C6A, C6A HDVideoColposcope User ManualApplication of the Video Colposcope Software Select a print template, a printer and the size of printing paper (A4 or B5), specify the number of copies,and click OK to save the settings. Under Print Template, if you select a template other than Custom,the default print settings are used and print itemsare unavailable for selection. -
Page 73: Sending The Report To Pacs
C3A, C6A, C6A HDVideoColposcope User ManualApplication of the Video Colposcope Software 5.6.5 Sending the Report to PACS You can send the examination report to the PACS (Picture Archiving and Communication System) server. On the Report interface, click theToPACStag on the left to send the report to PACS. -
Page 74: Operation Record
C3A, C6A, C6A HDVideoColposcope User ManualApplication of the Video Colposcope Software Figure 5-40 NOTE: The Report Module needs to be set in Setup, for details please refer to 5.12.2.20Module Customization. Operation Record You can record the operation process and print the operation report. -
Page 75: Printing The Operation Report
C3A, C6A, C6A HDVideoColposcope User ManualApplication of the Video Colposcope Software 5.8.1 Printing the Operation Report The operation report is shown in detail in the middle of the interface. The captured images are shown on the right. If you want to have an image shown on the report, drag it from the Current Patient Image list to the Image area of the report. -
Page 76: Changing Print Settings
C3A, C6A, C6A HDVideoColposcope User ManualApplication of the Video Colposcope Software NOTE: 1. Only when you select a specific date as the follow-up date, A.M. and P.M. are available for selection. 2. The operation report will not show the post-operation pathology. -
Page 77: Marking Attention Labels
C3A, C6A, C6A HDVideoColposcope User ManualApplication of the Video Colposcope Software Figure 5-43 On this interface, all the cases of the examined patients are listed.Click one of the cases, the images contained in this case are shown on the right of the interface. - Page 78 C3A, C6A, C6A HDVideoColposcope User ManualApplication of the Video Colposcope Software Figure 5-44 Figure 5-44 Choose Clear Attention or click the cell again, the attention label will be cleared. Choose Setup, the following page is displayed. Figure 5-45 There are five attention labels in total. You can customize the name or color for each label, or change the default label, then click Save.
-
Page 79: Searching For A History Case
C3A, C6A, C6A HDVideoColposcope User ManualApplication of the Video Colposcope Software NOTE: This operation can be performed only by users having the permission of modifying history case. A chief physician having this permission can mark attention labels for cases examined by other physicians, while other types of users having this permission can only mark attention labels for cases examined by themselves. -
Page 80: Modifying Operation Record
C3A, C6A, C6A HDVideoColposcope User ManualApplication of the Video Colposcope Software issued. Click OK to confirm the modification, or click Cancel to cancel it. NOTE: This operation can be performed only by users having the permission of modifying history case. A chief physician having this permission can modify the examination records of patients examined by other physicians, while other types of users having this permission can only modify the examination records of patients examined by themselves. -
Page 81: Deleting Patient Information
C3A, C6A, C6A HDVideoColposcope User ManualApplication of the Video Colposcope Software pathology result. 5.9.10 Deleting Patient Information Select a case in the list, right-click it and choose Delete Patient Information. A prompt is issued. Click OK to confirm the deletion, or click Cancel to cancel it. - Page 82 C3A, C6A, C6A HDVideoColposcope User ManualApplication of the Video Colposcope Software Figure 5-46 Select a statistics item, input the condition, then click Statistics. The result is shown on the right, including: Name Description Patient List It lists all the cases that meet the condition.
-
Page 83: Exporting Patient List
C3A, C6A, C6A HDVideoColposcope User ManualApplication of the Video Colposcope Software Histogram Figure 5-48 Pie Chart Figure 5-49 5.10.2 Exporting Patient List The patient list can be exported into an Excel file. After performing statistics, click theExportRecord button. Select a directory, input the file name and then click Save.TheExcel file is saved in the target directory. -
Page 84: Exporting Chart
C3A, C6A, C6A HDVideoColposcope User ManualApplication of the Video Colposcope Software 2. You should install the Microsoft Office software in the system to open the exported file. A maximum of 60000 records can be exported. 5.10.3 Exporting Chart The data comparison list and chart can be exported into an Excel file. -
Page 85: Adding A User
C3A, C6A, C6A HDVideoColposcope User ManualApplication of the Video Colposcope Software 1) Click the Setupbutton to open the Setup interface. 2) On the User Management tab, input the hospital name, its second name, address and telephone number in the Hospital Info.area. Click the button to import animage of the hospital logo. -
Page 86: Deleting A User
C3A, C6A, C6A HDVideoColposcope User ManualApplication of the Video Colposcope Software 3) Click Modify. 4) Click OK. 5) Exit the system and restart the software immediately. 5.12.1.4 Deleting a User 1) Click the Setupbutton to open the Setup interface. 2) On the User Management tab, select a user intheUserList. -
Page 87: Setting The Foot Switch
C3A, C6A, C6A HDVideoColposcope User ManualApplication of the Video Colposcope Software 5.12.2.3 Setting the Foot Switch The foot switch can be used to capture images only (the default function) or to freeze and capture images. 1) Click the Setupbutton to open the Setupinterface. -
Page 88: Customizing The Database Header
C3A, C6A, C6A HDVideoColposcope User ManualApplication of the Video Colposcope Software 5.12.2.6 Customizing the Database Header The header of the case list on the Database interface can be customized. 1) Click the Setupbutton to open the Setupinterface. 2) On the General Setup tab, click the Database Header User-define button. On the displayed page, select headers as desired, or move headers using the Up or Down button. -
Page 89: Enabling Automatic Running On Startup
C3A, C6A, C6A HDVideoColposcope User ManualApplication of the Video Colposcope Software 5.12.2.9 Enabling Automatic Running on Startup For operation convenience, you can set the software to run automatically once the host starts up. 1) Click the Setupbutton to open the Setupinterface. -
Page 90: Switching Positions Of R-Way Evaluation And Rci Evaluation
C3A, C6A, C6A HDVideoColposcope User ManualApplication of the Video Colposcope Software 5.12.2.12 Switching Positions of R-way Evaluation and RCI Evaluation You can switch the position of the R-way Evaluation tab with that of the RCI Evaluation tab on the Analysis interface. -
Page 91: Enabling Auto Capture
C3A, C6A, C6A HDVideoColposcope User ManualApplication of the Video Colposcope Software 2) On the General Setuptab,selectImage Capture Prompts in the Image Capture Setup area. 3) Click OK. 4) Exit the system and restart the software immediately. NOTE: Image Capture Prompts is selected by default. You can deselect it to disable examination prompts. -
Page 92: Module Customization
C3A, C6A, C6A HDVideoColposcope User ManualApplication of the Video Colposcope Software 2) Click the Scanner Setup at the lower right corner of window. 3) Select Enable and choose Unicode mode or UTF-8 mode. 4) Set the Start Address and End Address of the patient number, first name, second name and birthday according to Unicode rule or UTF-8 rule and click Save. -
Page 93: Restoring Database
C3A, C6A, C6A HDVideoColposcope User ManualApplication of the Video Colposcope Software 5.12.3.2 Restoring Database 1) Click the Setupbutton to open the Setupinterface. 2) On the Database tab, select the rebuild path. 3) Click Start Restoring. 4) Click OKafter restoring is completed. -
Page 94: Network Setup
C3A, C6A, C6A HDVideoColposcope User ManualApplication of the Video Colposcope Software 5.12.4 Network Setup 5.12.4.1 Enabling DICOM DICOM is short for Digital Imaging and Communications in Medicine. 1) Click the Setupbutton to open the Setupinterface. 2) On the Network Setup tab, select Enable DICOM. -
Page 95: Exit
C3A, C6A, C6A HDVideoColposcope User ManualApplication of the Video Colposcope Software 4) Click Test. 5) If sending the test email succeeded, click Save. If sending the test email failed, change the email setting and test again. 6) After successful setting, click Exit. -
Page 96: Chapter 6 Maintenance And Cleaning
C3A, C6A, C6A HDVideoColposcope User Manual Maintenance and Cleaning Chapter 6 Maintenance and Cleaning 6.1 Inspection (1) Visual Inspection Prior to using the system every time, do the following inspections: 1) Check the system and accessories to see if there is any visible evidence of damage that may affect the patient's or operator's safety. -
Page 97: Cleaning
C3A, C6A, C6A HDVideoColposcope User Manual Maintenance and Cleaning 6.3 Cleaning WARNING Make sure that the power is off and the power cords are disconnected prior to cleaning or disinfectingthedevice. The device should be kept clean from dust, medical solution and reagent. Clean the device when necessary. - Page 98 C3A, C6A, C6A HDVideoColposcope User Manual Maintenance and Cleaning disinfection is not recommended unless this is necessary according to your hospital regulation. The recommended disinfectants are: Ethanol (75%) Isopropanol (70%) Clean the device prior to disinfection. Disinfecting the device: 1.
-
Page 99: Chapter 7 Warranty And Service
EDAN will, at its discretion, repair or replace the defective part(s) free of charge. EDAN will not provide a substitute product for use when the defective product is being repaired. -
Page 100: Appendix 1 Product Specifications
C3A, C6A, C6A HDVideoColposcope User Manual Product Specifications Appendix 1 Product Specifications A1.1 Environmental Specifications Temperature: +5 º C ~ + 40 º C ( +41 º F ~ +104 º F) Relative Humidity: 25% RH ~80% RH (non-condensing) Working... -
Page 101: A1.3 Performance Specifications
Product Specifications CISPR 11Group 1 Class A A1.3 Performance Specifications C3A, C6A: Essential Performance Magnification: 1 ~ 40X (C3A); 1 ~ 50X (C6A) Operation distance: 200 mm-300mm ≥1600 lx (C3A) Illumination: ≥2500 lx (C6A) 3X: ≥φ100 mm (275 mm) OR ≥20.5°... - Page 102 C3A, C6A, C6A HDVideoColposcope User Manual Product Specifications ≥900 TVL System resolution: ≥14lp/mm Space resolution: ≤3% Image geometric distortion: Camera light source: White loop group LED light White balance: Auto, Manual White light (3 levels) Imaging mode: Electronic green filter (3 levels) ≥...
-
Page 103: Appendix 2 Troubleshooting
C3A, C6A, C6A HDVideoColposcope User Manual Troubleshooting Appendix 2 Troubleshooting A2.1 No Access to Video Colposcope Software and Error Reporting Phenomenon Possible Cause Solution Start too many tasks when starting the device or start the Restart the software. software before the database is running. - Page 104 C3A, C6A, C6A HDVideoColposcope User Manual Troubleshooting operating system is used, open the X64 folder, right-click installUSBCard.batand choose Run as administrator. C6A HD: Open the software installation package and find hd, double-click and run DRIVER.QP0204_YS.exe. Insufficient disk The disk space is Release some disk space.
-
Page 105: A2.3Trouble With Image Display
C3A, C6A, C6A HDVideoColposcope User Manual Troubleshooting A2.3Trouble with Image Display Phenomenon Possible Cause Solution The USB&DC cable is Replace the cable. damaged. The USB&DC cable is Fasten the cable. loose. The DC cable of the Fasten the cable. power adapter is loose. -
Page 106: A2.4 Trouble With The Camera
C3A, C6A, C6A HDVideoColposcope User Manual Troubleshooting The video capture cardis Replace the video capture card. faulty. The USB interface of the Replace the USB interface. computer is faulty. The graphics card drive Reinstall the graphics card drive. breaks down. -
Page 107: Appendix 3Ordering Information
C3A, C6A, C6A HDVideoColposcope User Manual Ordering Information Appendix 3Ordering Information CAUTION Please use the parts/accessories provided or recommended by EDAN. The parts provided by EDAN are as follows: Parts Part Number Foot Switch 21.10.027168 Power Adapter (FW7556M/12) 21.21.064212 Power Adaptor (ME20A1202F01) 01.21.064361... -
Page 108: Appendix 4 Emc Information
C3A, C6A, C6A HDVideoColposcope User Manual EMC Information Appendix 4 EMC Information A4.1 Electromagnetic Emissions Guidance and manufacture’s declaration – electromagnetic emission The Video Colposcopeis intended for use in the electromagnetic environment specified below. The customer or the user of the Video Colposcope should assure that it is used in such an environment. -
Page 109: A4.2 Electromagnetic Immunity
C3A, C6A, C6A HDVideoColposcope User Manual EMC Information A4.2 Electromagnetic Immunity Guidance and manufacture’s declaration – electromagnetic immunity TheVideoColposcopeis intended for use in the electromagnetic environment specified below. The customer or the user oftheVideoColposcope should assure that it is used in such an environment. - Page 110 0 % UT; 250/300 0 % UT; 250/300 supply. cycle cycle NOTE:1. U is the a.c. mains voltage prior to application of the test level. NOTE: The video colposcopes above include C3A, C6A, C6A HD(configured with SMD light source). - 103 -...
-
Page 111: A4.3 Electromagnetic Immunity
C3A, C6A, C6A HDVideoColposcope User Manual EMC Information A4.3 Electromagnetic Immunity Guidance and manufacture’s declaration – electromagnetic immunity The Video Colposcopeis intended for use in the electromagnetic environment specified below. The customer or the user oftheVideoColposcope should assure that it is used in such an environment. - Page 112 C3A, C6A, C6A HDVideoColposcope User Manual EMC Information manufacturer). Where P is the maximum output power rating of the transmitter in watts (W) according to the transmitter manufacturer recommended separation distance in meters (m). Field strengths from fixed transmitters, as determined by an...
- Page 113 C3A, C6A, C6A HDVideoColposcope User Manual EMC Information NOTE: The video colposcopes above include C3A, C6A, C6A HD(configured with SMD light source). - 106 -...
-
Page 114: A4.4 Recommended Separation Distances
NOTE 1: At 80 MHz and 800 MHz, the separation distance for the higher frequency range applies. NOTE 2: These guidelines may not apply in all situations. Electromagnetic propagation is affected by absorption and reflection from structures, objects and people. NOTE: The video colposcopes above include C3A, C6A and C6A HD. - 107 -... - Page 115 C3A, C6A, C6A HDVideoColposcope User Manual EMC Information Table-Test specifications for ENCLOSURE PORT IMMUNITY to RF wireless communications equipment IMMUNIT Test Maximu Brand Modulation Distanc Y TEST Frequenc Service (MHz) e (m) LEVEL y (MHz) Power(W) (V/m) Pulse 380-390 TETRA 400...
-
Page 116: Appendix 5 Abbreviation
C3A, C6A, C6A HDVideo Colposcope User ManualAbbreviation Appendix 5 Abbreviation The abbreviations and their full names are listed below: Abbreviation Full Name Application Entity Auto Focus Atypical Glandular Cells AGC-FN Atypical Glandular Cells Favoring Neoplasia AGC-NOS Atypical Glandular Cells Not Specified... - Page 117 C3A, C6A, C6A HDVideo Colposcope User ManualAbbreviation SMTP Simple Message Transfer Protocol Security Socket Layer Sexually Transmitted Infections Thin Prep Cytologic Test Transformation Zone VAIN Vaginal Intraepithelial Neoplasia Vulvar Intraepithelial Neoplasia - 110 -...
Need help?
Do you have a question about the C3A and is the answer not in the manual?
Questions and answers