Table of Contents
Advertisement
Quick Links
Advertisement
Table of Contents

Related Manuals for Lifecanvas Technologies SmartBatch+

Summary of Contents for Lifecanvas Technologies SmartBatch+
- Page 1 SmartBatch+ User’s Manual v1.11...
-
Page 2: Table Of Contents
Contents Components & Accessories Equipment Ratings Installation User Interface Graphing & History Operation Clearing Mode Labeling Mode Switching Between Modes Device Washing Temperature Calibration Replacing Electrodes Replacing Fuse Troubleshooting Warranty www.lifecanvastech.com info@lifecanvastech.com... -
Page 3: Components & Accessories
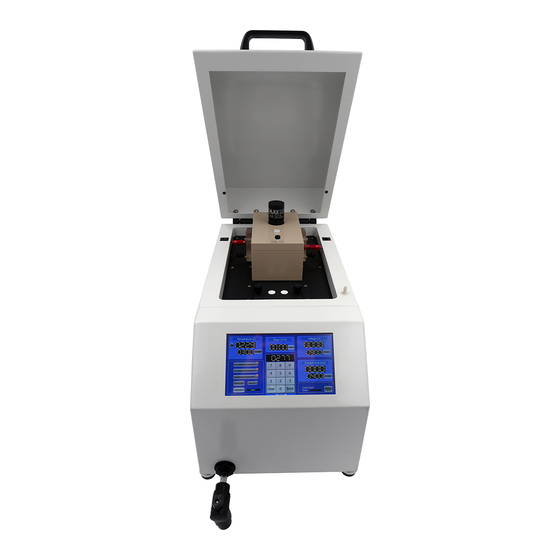
Components & Accessories The SmartBatch+ is a single device that electrophoretically delipidates and immunolabels biological samples. During processing the samples are loaded into the Sample Chamber, where an electric field is formed between the Electrodes to drive charged molecules into the samples. For each operation, unique buffers are poured into the Sample Chamber (and drained out using the Drain Valve). - Page 4 SmartBatch+ comes with the following accessories: ● 1 x Clearing Cup (A) ● 1 x Single Sample Staining Cup (B) ● 1 x Medium Staining Cup (C) ● Power cord (D) ● 1 x Batch Staining Cup (E) ● 2 x Incubation Jar (F) ●...
-
Page 5: Equipment Ratings
Equipment Ratings General Data: Temperature Control 20-50°C Electrophoresis Voltage 0-90 VDC Electrophoresis Current Limit 0-1500 mA Sample Specimen Size 30mm x 30mm x 20mm Sample Specimen Capacity Up to 12 mouse brains or 4 rat brains Ambient Conditions: Operating Temperature Range 18-26°C Relative Humidity 80% Max... -
Page 6: Installation
● Only use buffers, sample cups, and parameter ranges provided by LifeCanvas Technologies. See product warranty for further information. ● Use the volumes recommended by LifeCanvas Technologies. ● Do not leave the instrument in humid or wet conditions, as doing so could cause an electrical short. - Page 7 1. Carefully remove the device from the box, using one hand to grab the front of the device and another hand to grab the back. 2. Remove the foam side panels and place the device down on a stable, level surface with at least one foot of space (~30cm) on each side to allow for proper airflow.
- Page 8 6. Remove the paper towels from the chamber and dispose of them. These are only here to soak up any remaining liquid during shipping. 7. Pour ~400 mL distilled water directly into the Chamber. www.lifecanvastech.com info@lifecanvastech.com...
- Page 9 8. Ensure that there is water in the device and do not run the pump dry. Press “Auxiliary Power” on the touchscreen. This will turn on the liquid pump, sample cup mixing, and sample cup rotation. Upon startup the Chamber Hex Piece will rotate faster than normal for 5 seconds to allow you to visually verify that the Hex Piece is indeed rotating.
-
Page 10: User Interface
User Interface The screen displays set values and present readings for various parameters of device functionality. From this screen, the user can view and has control of: Voltage, Current Limit, Timer Settings, and Temperature. The user can change between preset values for clearing and labeling by pressing the “Preset”... - Page 11 This is the Current panel. The top number indicates the current that is currently passing through the chamber. The bottom number is the Current Limit. During operation the device will apply the Set Voltage unless the current exceeds the Current Limit. If that is the case the Voltage will decrease such that the Current Limit is not exceeded.
-
Page 12: Graphing & History
The “History” button will bring up a graph showing the values from the current experiment. The “Mode” button will allow the user to toggle between Run Mode and Calibration Mode. This is used to calibrate the temperature sensors. See the Temperature Calibration section for more information. -
Page 13: Operation
Operation Clearing Mode For more detailed information regarding sample preparation, please refer to the Full Active Pipeline Protocol. This will show the basic information on running the system to delipidate samples. 1. Insert SHIELD fixed samples in the Mesh Bags, taking note of which sample is in which bag. -
Page 14: Labeling Mode
23. Remove Sample Ring from the Clearing Cup and wash samples with PBSN (PBS with 0.02% sodium azide) in the Incubation Jar. Carefully rinse the Clearing Cup with distilled water and store it in its storage solution. It is important to keep the membrane hydrated at all times. -
Page 15: Switching Between Modes
15. Always wash the device after use before turning off the power to prevent detergent buildup. Switching Between Modes It is simple to switch between labeling and clearing modes. 1. Remove any Sample Cups and samples from the system. 2. Wash the device. 3. -
Page 16: Replacing Electrodes
6. Type the measured temperature into the keypad. 7. Press the “Set” button in the Temperature panel. This will set the current temperature to the value you are measuring. 8. Press the “Mode” button again to re-enter calibration mode. 9. Press the “Cal Stats” button. 10. -
Page 17: Troubleshooting
Troubleshooting Errors during device operation are displayed in the Faults Panel in the lower right corner of the screen. The table below shows the possible faults: Error Observation Function Close Case Lid and press Electrophoresis Power turns “Reset Faults” button to Case Lid is open. -
Page 18: Warranty
We warrant the product you have purchased for one calendar year after the date of delivery. In the case of any manufacturer-originated malfunctions that arise during this period of time, LifeCanvas Technologies will be responsible for repair or replacement of failed parts. However, this warranty is guaranteed when only LifeCanvas consumables (buffers, sample holders, and...
Need help?
Do you have a question about the SmartBatch+ and is the answer not in the manual?
Questions and answers