
Related Manuals for TechnipFMC Smith Meter


Summary of Contents for TechnipFMC Smith Meter
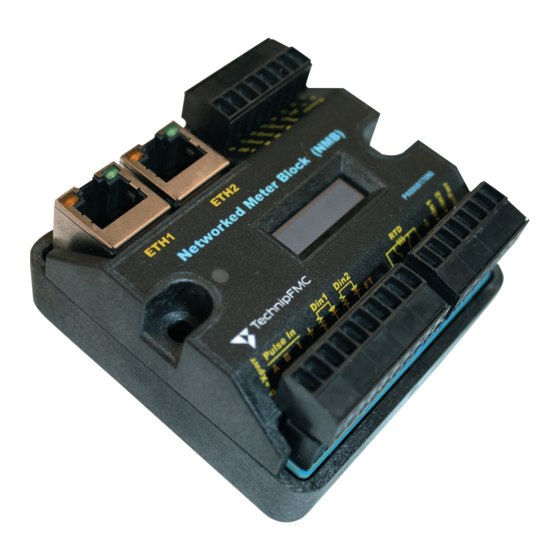
- Page 1 Smith Meter ® Networked Meter Block Installation, Operation, & Maintenance Manual Bulletin MNET001 Issue/Rev. 0.0 (7/21) July 2021...
- Page 2 Important All information and technical specifications in this document have been carefully checked and compiled by the author; however, we cannot completely exclude the possibility of errors. TechnipFMC is always grateful to be informed of any errors; contact us at TechnipFMC.com.
-
Page 3: Table Of Contents
Network Meter Block Installation, Operation, & Maintenance Manual Contents 1 Introduction ........... 1 1.1 Product Description . - Page 4 Network Meter Block Installation, Operation, & Maintenance Manual 3.2.2 North American Installations ............12 3.2.3 ATEX and IECEx Zone 1 Installations .
- Page 5 Network Meter Block Installation, Operation, & Maintenance Manual 4.3.7.3 Configuring MQTT Server Settings ..........33 4.3.7.4 Adding an Instrument Tag .
-
Page 6: Introduction
Network Meter Block Installation, Operation, & Maintenance Manual 1 Introduction This manual provides guidance for the installation, operation, and maintenance of the Smith Meter Networked Meter Block (NMB). When installed following the guidelines contained in this manual, the NMB should provide many years of safe, accurate, and reliable use. -
Page 7: Included Equipment
Prior to installation, the unit should be stored in its original packing case and protected from adverse weather conditions and abuse. If the NMB is damaged or parts are missing, a written report must be submitted to: TechnipFMC c/o Inside Sales Department, Measurement & Production Solutions PO Box 10428 Erie, PA 16514 1.4 Storage Instructions... -
Page 8: Warnings And Precautions
Network Meter Block Installation, Operation, & Maintenance Manual • Ensure the conduit port on the back of the instrument housing is closed with the factory-provided ¾-inch NPT plug. • Retain the factory-provided vapor desiccant sack, which should be secured with double-sided tape inside the housing. -
Page 9: Electrostatic Discharge Precautions
Network Meter Block Installation, Operation, & Maintenance Manual 1.5.3 Electrostatic Discharge Precautions Electronic components are susceptible to damage by static discharge. To minimize the risk of damage, the following precautions should be followed: • Before touching a circuit board with hands or tools, personnel and tools should be grounded using a wrist strap. -
Page 10: Pre-Installation Considerations
Network Meter Block Installation, Operation, & Maintenance Manual 2 Pre-Installation Considerations 2.1 Electrical Installation Considerations In addition to the following installation recommendations, all previous warnings and cautions should be reviewed before installation. The following recommendations are based on our knowledge of electrical codes. Your local electrical codes should be reviewed to ensure that these recommendations follow the local code. -
Page 11: Division 2/Zone 2 Hazardous Area Considerations
Network Meter Block Installation, Operation, & Maintenance Manual 2.1.1.1 Division 2/Zone 2 Hazardous Area Considerations If the user-supplied power supply will be mounted in a control cabinet located in a Division 2/Zone 2 hazardous area, it must be certified for use in that area. The complete system requires certification, including but not limited to the evaluation of the NMB, power supply, connectors, fuses, internal wiring, and routing that is required to complete the control cabinet or panel. -
Page 12: Real-Time Clock Synchronization
Network Meter Block Installation, Operation, & Maintenance Manual 2.2 Real-Time Clock Synchronization Three Network Time Protocol (NTP) servers are configured to synchronize the NMB’s clock with Coordinated Universal Time (UTC) the first time a connection is made between the servers and the NMB. Users cannot manually set or change the clock, nor select a time zone;... -
Page 13: Installation
The following sections provide guidelines on installing your NMB when purchased as a standalone unit (without a Smith Meter Turbine or PD meter). Standalone NMBs can be panel mounted on a DIN rail or, when purchased with an explosion-proof instrument housing, directly mounted to a meter. -
Page 14: Installing The Nmb With An Instrument Housing
Network Meter Block Installation, Operation, & Maintenance Manual The DIN rail mounting kit includes: Figure 1: NMB with DIN Rail Mounting Kit • One DIN rail mounting bracket • Two M3 x .5 mm x 30 mm stainless steel screws •... -
Page 15: Installing The Nmb Or Nmt On A Turbine Meter
All Smith Meter turbine meters with pickup coils are supplied with a 1-inch NPT pickup boss. The NMB’s instrument housing may be directly mounted to the 1-inch NPT boss using a male/female (M/F) conduit union. -
Page 16: Connecting To A Prime 4 Or Genesis Pd Meter
Network Meter Block Installation, Operation, & Maintenance Manual 3.1.4 Connecting to a PRIME 4 or Genesis PD Meter The NMB is designed to easily connect with Smith Meter electronic PD meters, such as the PRIME 4 or Genesis PD meter. -
Page 17: Electrical Installation
Network Meter Block Installation, Operation, & Maintenance Manual Figure 5: Genesis Meter with NMB Enclosure 3.2 Electrical Installation 3.2.1 Evaluation Standards Used The following electrical standards were used in the evaluation of the NMB: • General: IEC 60079-0 7 Edition, EN 60079-0:2018, UL 60079-0 7 Edition, CAN/CSA C22.2 No. -
Page 18: Atex And Iecex Zone 2 Installations
Network Meter Block Installation, Operation, & Maintenance Manual • For wiring systems using conduit, an Ex d certified sealing device must be used immediately at the entrance of the enclosure. Any unused entry must be suitably blocked with an Ex d IIB IP66 certified plug for ATEX and IECEx applications. -
Page 19: Typical Wiring Diagrams
Network Meter Block Installation, Operation, & Maintenance Manual 3.2.5 Typical Wiring Diagrams All of the terminals on the NMB are labeled to ease the process of landing the wiring connections. The following figures provide details for connecting external devices to the NMB. Callouts on the left side of the connector in each image are the NMB internals;... - Page 20 Network Meter Block Installation, Operation, & Maintenance Manual Figure 8: Analog Input Wiring (Four-Wire Platinum RTDs and Two 4-20 mA Inputs Figure 9: Meter Pulse Inputs from a PA-6 Transmitter (NMB Models Only) Installation...
- Page 21 Network Meter Block Installation, Operation, & Maintenance Manual Figure 10: Meter Pulse Inputs from a PRIME 4 PD Meter Pulser Figure 11: Meter Pulse Inputs from a Genesis PD Meter’s HRE Board (Configured with an RTD) Installation...
-
Page 22: Finishing And Testing The Installation
Network Meter Block Installation, Operation, & Maintenance Manual Figure 12: Wiring the NMT Directly to Pickup Coils in Sentry, Guardsman, and MV Turbine Meters The NMT contains a preamplifier not found in the NMB for low-voltage inputs. If pulse transmission to a SCADA system or flow computer is required for the application, the addition of a PA-6 is recommended. -
Page 23: Network Connection
Network Meter Block Installation, Operation, & Maintenance Manual 3.3.2 Network Connection To connect your NMB to your Ethernet network, connect a Category (CAT) 5 Figure 14: Network Input or 6 Ethernet cable from either Ethernet port on your NMB to a suitable hub, network switch, router, or directly to a personal computer (PC). -
Page 24: Monitoring And Configuring The Nmb
Network Meter Block Installation, Operation, & Maintenance Manual 4 Monitoring and Configuring the NMB Once the NMB is installed and configured, it operates independently and should not need attention unless an alarm event is detected or the meter is serviced. 4.1 Remotely Accessing the NMB Several methods are available for accessing data from the NMB, as follows: •... -
Page 25: Launching The Nmb Dashboard
The NMB uses functions that can be configured for unmanned, automated interaction with a Programmable Logic Controller (PLC) firmware system or SCADA software system—such as TechnipFMC’s UCOS software—to control digital output. Likewise, input functions can be configured to be triggered via digital input (see Section 4.3.3.3: Configuring Basic Inputs and... -
Page 26: Digital Inputs
Network Meter Block Installation, Operation, & Maintenance Manual • Low flow alarm • High flow alarm • Active turbine alarm (available when using the NMB-TMD firmware) • Active general alarm • Previous general alarm • Alarm for wrong setup (available when using the NMB-TMD firmware) •... -
Page 27: Configuring Your Nmb
Using TLS to validate a secure connection between the NMB and an MQTT server (for instructions see Section 4.3.7.3: Configuring MQTT Server Settings) Due to inherent vulnerabilities of potential malicious code in web browsers, TechnipFMC is not responsible for erroneous information displayed in the NMB’s web interface. •... -
Page 28: Navigating The Configuration Area
Network Meter Block Installation, Operation, & Maintenance Manual 4.3.2 Navigating the Configuration Area The NMB’s configuration parameters and details are organized into tabs across the top and a menu pane on the left. When you click a tab and then select a menu option, the fields shown in the pane on the right change accordingly. -
Page 29: Calibrating Analog Inputs
Network Meter Block Installation, Operation, & Maintenance Manual 4.3.3.2 Calibrating Analog Inputs You can reduce inherent errors in the transducer from communicated values for analog channels. To calibrate a new device (such as a pressure transmitter) or recalibrate existing devices attached to your NMB, complete the following steps: The NMB’s analog inputs are configured at the factory, but you can perform your own calibration on site. -
Page 30: Configuring Basic Inputs And Outputs
Network Meter Block Installation, Operation, & Maintenance Manual 4.3.3.3 Configuring Basic Inputs and Outputs The Basic I/O tab’s Configure pane enables you to configure your NMB’s inputs and outputs, adjust analog filtering, and specify MQTT message frame rates. The NMB is functional with the system default values, except when you are using dual pulse or dual turbine meter pickup transducers. - Page 31 Network Meter Block Installation, Operation, & Maintenance Manual • Pulse Output to Samplers—The NMB is used to control a sampler and is connected to the sampler grab input. A pulse is generated on this output each time a sample is required. •...
-
Page 32: Configuring Meter Settings
Network Meter Block Installation, Operation, & Maintenance Manual • Alarm Acknowledgment—Causes alarms to be acknowledged when the signal on this input is asserted (on). 6. To save your changes, click the Apply button. 4.3.4 Configuring Meter Settings The Meter tab enables you to configure basic information about the meter connected to the NMB. When this information is configured, rate and volume details are displayed in the dashboard when flow is present. - Page 33 Network Meter Block Installation, Operation, & Maintenance Manual d. In the Minimum Flow Rate field, type the minimum flow rate for the meter in use. Note that this also specifies the minimum rate at which meter signature calculation should be done. e.
-
Page 34: Meter Linearization
Network Meter Block Installation, Operation, & Maintenance Manual 4.3.4.3 Meter Linearization You can enable the system to determine and apply the meter’s flow rate-specific correction based on meter proving data. To do so, complete the following steps: 1. Select the Meter tab > Configure menu. 2. -
Page 35: Enabling Turbine Meter Diagnostics
Network Meter Block Installation, Operation, & Maintenance Manual 4.3.5.2 Enabling Turbine Meter Diagnostics Enabling turbine meter diagnostics in the NMB involves three basic steps: • Defining flow zones in terms of flow rates • Specifying known diagnostic signature characteristics or enabling the Turbine Meter Diagnostic feature to calculate it for you •... -
Page 36: Re-Characterizing A Turbine Meter's Signature
Network Meter Block Installation, Operation, & Maintenance Manual until flow is within the turbine meter’s tolerance limits for 30 seconds plus this defined sensitivity time. e. In the Averaged Seconds field, type the number of seconds during which the NMB should average pulse timing data to smooth transient conditions and avoid nuisance alarms. -
Page 37: Viewing Recent Alarms
Network Meter Block Installation, Operation, & Maintenance Manual 2. In the Communication Message #1 field, type a message to display of up to 21 characters (including spaces). 3. In the Communication Message #2 field, type a second message or the second line of two-line message, up to 21 characters. -
Page 38: Configuring Npt Server Settings
Network Meter Block Installation, Operation, & Maintenance Manual • AutoIP—Uses a link-local addressing technique to determine the IP address to use on the Ethernet 3. If you selected Static as your preferred IP address method, complete the following steps: a. In the IP Address field, type the IP address you want to use for your NMB. b. -
Page 39: Adding An Instrument Tag
Network Meter Block Installation, Operation, & Maintenance Manual 8. In the Keep Alive Interval field, type the number of seconds the connection between the NMB and the message broker can be idle before verifying the integrity of the connection. This field defaults to 300 seconds (5 minutes). -
Page 40: Backing Up Your Configuration Settings
Network Meter Block Installation, Operation, & Maintenance Manual 3. Click the Reboot button. 4. When prompted, click OK. 4.3.10 Backing Up Your Configuration Settings You can save your configuration settings for future reference, as a backup, or as a template or clone. To do so, complete the following steps: 1. -
Page 41: Changing Your Nmb's Login Credentials
Network Meter Block Installation, Operation, & Maintenance Manual 1. In the NMB’s dashboard, click . The Login pane opens. 2. Enter your login credentials and then click Login. The configuration area opens. 3. Select System Configure > Utilities and then click the Launch button. Launching the Bootloader ceases the NMB’s monitoring functionality and de-energizes all outputs. -
Page 42: Viewing Security Certificates
2. Select System Configure > Firmware Update. 3. Click the Choose File button and then select the new firmware image file (*.app) provided by TechnipFMC on your local machine. Only valid, digitally signed application images from TechnipFMC may be installed. -
Page 43: Re-Launching The Nmb Firmware And Exiting The Bootloader
Network Meter Block Installation, Operation, & Maintenance Manual 5. When the upload status indicates that the transfer was successful, exit the Bootloader area and re- launch the NMB firmware. It is important to properly exit the Bootloader and re-launch the NMB or TMD firmware so that the NMB can return to operating normally. -
Page 44: Alarm Severity
Network Meter Block Installation, Operation, & Maintenance Manual Table 3: List of Alarms Location in Web Alarm Name Meaning Interface All Meters Pulse Security The NMB detects missing pulses in the meter’s pulse sequence Dashboard and Alarm when Pulse Input Mode is set to Dual. The NMB identifies an error Meter >... -
Page 45: Resetting All Latched Alarms At Once
Network Meter Block Installation, Operation, & Maintenance Manual 4.5.2.1 Resetting All Latched Alarms at Once The NMB-TMD firmware provides an option to reset all latched alarms at the same time. To do so, complete the following steps: 1. Log into the configuration area. 2. -
Page 46: Maintenance
• A new CR1220 coin cell battery The battery must be manufactured by Panasonic, Maxell, Varta, or Renata, or supplied directly from TechnipFMC (part number P8000017080). To maintain Ex certifications, substitutions are not allowed. • A P1 Phillips head screwdriver To replace the NMB’s battery, complete the following steps (see photo in... - Page 47 Network Meter Block Installation, Operation, & Maintenance Manual 8. Securely reattach the back cover of the NMB with the three screws. 9. Re-mount the NMB back to its original position and restore the removed cables to the same positions. 10. Restore power to the NMB. The time will automatically be set from the NTP servers (see Section 2.2: Real-Time Clock Synchronization).
-
Page 48: Troubleshooting
Network Meter Block Installation, Operation, & Maintenance Manual 6 Troubleshooting If you have issues with a lost password, need to reset certificates, force a network configuration, or erase the application, you can use the DIP switches located on the back side of the NMB, next to the battery board. -
Page 49: Appendix A: Data Reference For Restful And Mqtt Schemas
Network Meter Block Installation, Operation, & Maintenance Manual Appendix A: Data Reference for RESTful and MQTT Schemas The following files are available in the RESTful interface to access data from the NMB over the network. Data can be requested in either JSON or XML format. Note that the same JSON data structures used for access via HTTP also are used for the MQTT topics for consistency. -
Page 50: Xml-Formatted Data Structures
Network Meter Block Installation, Operation, & Maintenance Manual A.3 XML-Formatted Data Structures • https://<ip-addr>/global_discover/discover/xml • https://<ip-addr>/global_discover/hw-info/xml • https://<ip-addr>/global_pv/io/xml • https://<ip-addr>/global_pv/io-status/xml • https://<ip-addr>/global_pv/io-rawpulse/xml • https://<ip-addr>/global_pv/meter/xml • https://<ip-addr>/global_pv/diag/xml • https://<ip-addr>/global_param/io-config/xml • https://<ip-addr>/global_param/io-cal/xml • https://<ip-addr>/global_param/io-mode/xml • https://<ip-addr>/global_param/meter-config/xml • https://<ip-addr>/global_param/diag/xml Appendix A: Data Reference for RESTful and MQTT Schemas... - Page 51 (i) is the property of TechnipFMC plc, (ii) is disclosed by TechnipFMC only in confidence, and (iii) except as TechnipFMC may otherwise permit in writing, is to be used, disclosed or copied only to the extent necessary for the evaluation and use thereof by the recipient.
Need help?
Do you have a question about the Smith Meter and is the answer not in the manual?
Questions and answers