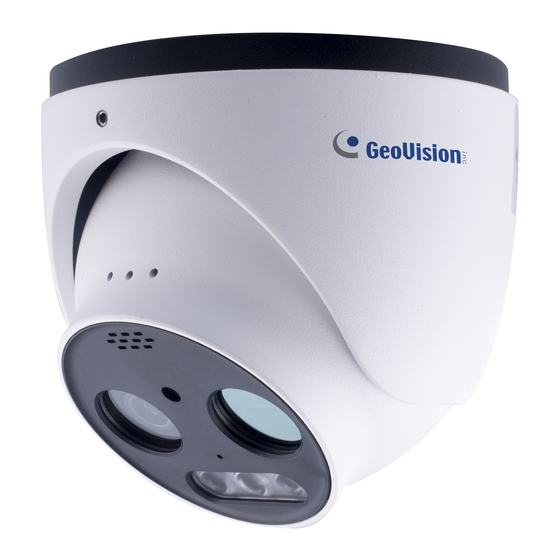
GeoVision GV-TMEB5800 User Manual
Gv-ip thermal camera
Hide thumbs
Also See for GV-TMEB5800:
- Quick start manual (16 pages) ,
- User manual (86 pages) ,
- Quick start manual (35 pages)

Related Manuals for GeoVision GV-TMEB5800


Summary of Contents for GeoVision GV-TMEB5800
- Page 1 GV-IP Thermal Camera User's Manual Before attempting to connect or operate this product, please read these instructions carefully and save this manual for future use. TMEB-UA-A...
- Page 2 GeoVision. Every effort has been made to ensure that the information in this manual is accurate. GeoVision, Inc. makes no expressed or implied warranty of any kind and assumes no responsibility for errors or omissions. No liability is assumed for incidental or consequential damages arising from the use of the information or products contained herein.
-
Page 3: Table Of Contents
Contents Notes on Safety ....................... iii Installation Requirements for Video Content Analysis ......... 1 Chapter 1 Introduction ................... 3 Chapter 2 Network Connection ................4 2.1 LAN ........................4 2.1.1 Access through GV-IP Device Utility............4 2.1.2 Directly Access through IE ................. 7 2.2 WAN ........................ - Page 4 5.4.4 Region Entrance..................44 5.4.5 Region Exiting ...................44 5.4.6 Target Counting ..................44 5.4.7 Face Detection ..................47 5.5 Network Configuration ..................49 5.5.1 TCP/IP ......................49 5.5.2 Port ......................50 5.5.3 Server Configuration .................51 5.5.4 Onivf......................52 5.5.5 DDNS ......................52 5.5.6 SNMP ......................54 5.5.7 802.1x .......................55 5.5.8 RTSP ......................55 5.5.9 UPNP ......................56 5.5.10 Email .......................57...
-
Page 5: Notes On Safety
Notes on Safety ⚫ This product is intended to be supplied by a Listed Power Unit, marked with 'Limited Power Source', 'LPS' on unit, output rated minimum 12V/2 A or POE 48V/ 350mA or AC24V (depending on models), no more than 2000m altitude of operation and Tma=60 Deg.C. - Page 6 Disclaimer ⚫ With regard to the product with internet access, the use of product shall be wholly at your own risks. Our company shall be irresponsible for abnormal operation, privacy leakage or other damages resulting from cyber attack, hacker attack, virus inspection, or other internet security risks;...
- Page 7 ⚫ Check the log. If you want to know whether your device has been accessed by unauthorized users or not, you can check the log. The system log will show you which IP addresses were used to log in your system and what was accessed.
- Page 8 Regulatory Information FCC Information Please take attention that changes or modification not expressly approved by the party responsible for compliance could void the user’s authority to operate the equipment. FCC compliance This equipment has been tested and found to comply with the limits for a Class B digital device, pursuant to Part 15 of the FCC Rules.
- Page 9 RoHS The products have been designed and manufactured in accordance with Directive EU RoHS Directive 2011/65/EU and its amendment Directive EU 2015/863 on the restriction of the use of certain hazardous substances in electrical and electronic equipment. 2012/19/EU (WEEE directive): The Directive on waste electrical and electronic equipment (WEEE Directive).
-
Page 10: Installation Requirements For Video Content Analysis
Installation Requirements for Video Content Analysis Thermal Detection ⚫ Human Installation Height: 3 ~ 6 m (9.8 ~ 19.7 ft) Video Content Analysis Range: 24 m (78.7 ft) or less Camera View: no requirements Angle of Depression: 30 ~ 45 recommended °... - Page 11 ⚫ Requirements 1. The best angle of depression for the camera is at about 45°. 2. Auto-focusing function should not be enabled for intrusion detection. 3. Avoid the scenes with many trees or the scenes with various light changes (like many flashing headlights).
-
Page 12: Chapter 1 Introduction
Chapter 1 Introduction Main Features Thermal: ⚫ Resolution: 256 × 192 ⚫ Temperature range: -20°C ~ 150 °C (-4 °F ~ 302 °F) ⚫ Multi-palette: white hot, black hot, iron oxide red, etc. ⚫ Sound and light warning, temperature exception alarm, fire detection Optical:... -
Page 13: Chapter 2 Network Connection
Chapter 2 Network Connection Available web browser: IE (plug-in required)/ Firefox/Edge/Safari/Google Chrome It is recommended to use the latest version of these web browsers. The menu display and operation of the camera may be slightly different by using the browser with plug-in or without plug-in. - Page 14 3. Find the camera with its Mac Address, and click on its IP address. 4. For the first-time users, you are requested to set up a password. 5. Type a new password and click OK. 6. Click on its IP address again and select Webpage to open its Web interface. 7.
- Page 15 IMPORTANT: 1. By default, the Administrator’s username is admin and cannot be modified. 2. The camera has two sets of passwords: one is for Web interface and the other is for the third-party platform connection via ONVIF, e.g. GV-VMS. GV-IP Device Utility is used to set the ONVIF password.
-
Page 16: Directly Access Through Ie
2.1.2 Directly Access through IE The default network settings are as shown below: IP address: 192.168.0.10 Subnet Mask: 255.255.248.0 Gateway: 192.168.0.1 HTTP: 80 Data port: 9008 Use the above default settings when logging in the camera for the first time. Directly connect the camera to the computer through network cable. - Page 17 1. Manually set the IP address of the PC and the network segment should be as the same as the default settings of the camera. Open the network and share center. Click “Local Area Connection” to pop up the following window. Select “Properties”...
-
Page 18: Wan
2.2 WAN ➢ Access through the router or virtual server 1. Make sure the camera is connected to the local network and then log in the camera via LAN and go to Config→Network→Port menu to set the port number. Port Setup 2. - Page 19 3. Go to the router’s management interface through IE browser to forward the IP address and port of the camera in the “Virtual Server”. Router Setup 4. Open the IE browser and enter its WAN IP and http port to access. (for example, if the http port is changed to 81, please enter “192.198.1.201:81”...
- Page 20 ➢ Access through static IP Network connection The setup steps are as follow: 1. Go to Config→Network→Port menu to set the port number. 2. Go to Config →Network→TCP/IP menu to set the IP address. Check “Use the following IP address” and then enter the static IP address and other parameters. 3.
-
Page 21: Chapter 3 Live View
Chapter 3 Live View After logging in, the following window will be shown. IMPORTANT: It is required to use IE or Edge IE mode to access thermal images. Icon Description Icon Description Visible light image and Fire detection indicator thermal image display Visible light image display Temperature indicator Thermal image display... - Page 22 Plug-in free live view: When the main stream is set over 1080P, only the sub stream or the third stream tab can be displayed on the interface by default. Icon Description Icon Description Original size Auto (fill the window) Fit correct scale Full screen In full screen mode, double click on the mouse to exit or press the ESC key on the keyboard.
-
Page 23: Chapter 4 Fire Detection And Temp Measurement
Chapter 4 Fire Detection and Temp Measurement 4.1 Fire Detection Fire Detection: Alarms will be triggered when the camera detects the fire source. Click Config→Fire Detection to enter the following interface. 1. Click “Enable” and set the alarm holding time. 2. -
Page 24: Temperature Measurement
3. Click “Save” button to save the settings. 4. Set the schedule of the fire detection. The setup steps of the schedule are the same as the schedule recording setup. (See Schedule Recording). 4.2 Temperature Measurement Temperature Measurement: When detecting the temperature of the pre-defined point/line/area exceeds the temperature threshold value, alarms will be triggered. - Page 25 Area setting: Click the “Draw Area” button and then click around the area where you want to set as the alarm area in the image on the left side (the alarm area should be a closed area). Click the “Stop Draw” button to stop drawing. Click the “Clear” button to delete the alarm area. Click the “Save”...
- Page 26 Set the alarm rule, alarm temperature and alarm output. For example, select Alarm Rule as Above (Average Temperature), set the alarm temperature to 100°C and check alarm output. Then alarms will be triggered when the average temperature of the target is higher than 100°C 5.
-
Page 27: Chapter 5 Other Configurations
Chapter 5 Other Configurations In the Webcam client, choose “Config” to go to the configuration interface. Note: Wherever applicable, click the “Save” button to save the settings. 5.1 System Configuration 5.1.1 Basic Information In the “Basic Information” interface, the system information of the device is listed. 5.1.2 Date and Time Go to Config→System→Date and Time. -
Page 28: Local Config
Click the “Date and Time” tab to set the time mode. 5.1.3 Local Config Go to Config→System→Local Config to set up the storage path of captured pictures and recorded videos on the local PC. There is also an option to enable or disable the bitrate display in the recorded files. -
Page 29: Storage
5.1.4 Storage Go to Config→System→Storage to go to the interface as shown below. ⚫ SD Card Management Click the “Format” button to format the SD card. All data will be cleared by clicking this button. Click the “Eject” button to stop writing data to SD card. Then the SD card can be ejected safely. - Page 30 Set schedule recording. Check “Enable Schedule Record” and set the schedule. Weekly schedule Set the alarm time from Monday to Sunday for a single week. Each day is divided in one hour increments. Green means scheduled. Blank means unscheduled. “Add”: Add the schedule for a special day. Drag the mouse to set the time on the timeline. “Erase”: Delete the schedule.
-
Page 31: Image Configuration
Set the format, resolution and quality of the image saved on the SD card and the snapshot interval and quantity and the timing snapshot here. Snapshot Quantity: The number you set here is the maximum quantity of snapshots. The actual quantity of snapshots may be less than this number. Supposing the occurrence time of an alarm event is less than the time of capturing pictures, the actual quantity of snapshots is less than the set quantity of snapshots. - Page 32 Brightness: Set the brightness level of the camera’s image. Contrast: Set the color difference between the brightest and darkest parts. Hue: Set the total color degree of the image. Saturation: Set the degree of color purity. The purer the color, the brighter the image is. WDR: WDR can adjust the camera to provide a better image when there are both very bright and very dark areas simultaneously in the field of the view by lowering the brightness of the bright area and increasing the brightness of the dark area.
- Page 33 Backlight Compensation (BLC): ⚫ Off: disables the backlight compensation function. It is the default mode. ⚫ HLC: lowers the brightness of the entire image by suppressing the brightness of the image’s bright area and reducing the size of the halo area. ⚫...
- Page 34 Schedule Settings of Image Parameters: Click the “Profile Management” tab as shown below. Set full time schedule for common, day, night mode and specified time schedule for day and night. Choose “Schedule” in the drop-down box of schedule as shown below. Drag “...
-
Page 35: Video / Audio Configuration
5.2.2 Video / Audio Configuration Go to Image→Video / Audio interface as shown below. In this interface, set the resolution, frame rate, bitrate type, video quality and so on subject to the actual network condition. Four video streams can be adjustable. Resolution: The size of image. -
Page 36: Osd Configuration
Profile: For H.264. Baseline, main and high profiles are selectable. Send Snapshot: Set the snapshot stream. Video encode slice split: If this function is enabled, smooth image can be gotten even though using the low-performance PC. Watermark: When playing back the local recorded video in the search interface, the watermark can be displayed. -
Page 37: Video Mask
Set time stamp, device name, OSD content and picture overlap here. After enabling the corresponding display and entering the content, drag them to change their position. Then click the “Save” button to save the settings. Picture Overlay Settings: Check “OSD Content1”, choose “Picture Overlay” and click “Browse” to select the overlap picture. -
Page 38: Roi Configuration
5.2.5 ROI Configuration Go to Image→ROI Config interface as shown below. An area in the image can be set as a region of interest. This area will have a higher bitrate than the rest of the image, resulting in better image quality for the identified area. 1. -
Page 39: Alarm Configuration
5.3 Alarm Configuration 5.3.1 Motion Detection Go to Alarm→Motion Detection to set motion detection alarm. 1. Check “Enable” check box to activate motion-based alarms. If unchecked, the camera will not send out any signals to trigger motion-based recording to the NVR or CMS, even if there is motion in the video. -
Page 40: Other Alarms
2. Set motion detection area and sensitivity. Click the “Area and Sensitivity” tab to go to the interface as shown below. Move the “Sensitivity” scroll bar to set the sensitivity. Higher sensitivity value means that motion will be triggered more easily. Select “Add”... - Page 41 ⚫ SD Card Error When there are some errors in writing SD card, the corresponding alarms will be triggered. 1. Go to Config→Alarm→Anomaly→SD Card Error as shown below. 2. Click “Enable” and set the alarm holding time. 3. Set alarm trigger options. Trigger alarm out, Email and FTP. The setup steps are the same as motion detection.
-
Page 42: Alarm In
Cable Disconnection 1. Go to Config→Alarm→Anomaly→Cable Disconnected as shown below. 2. Click “Enable” and set the alarm holding time. 3. Trigger alarm out. When the camera is disconnected, the system will trigger the alarm out. 5.3.3 Alarm In To set sensor alarm (alarm in): Go to Config→Alarm→Alarm In interface as shown below. -
Page 43: Alarm Out
5.3.4 Alarm Out This function is only available for some models. Go to Config→Alarm→Alarm Out. Alarm Out ID: Some models may support two alarm output interfaces. The alarm out can be set respectively by selecting alarm out ID. Alarm Out Mode: Alarm linkage, manual operation, day/night switch linkage and timing are optional. -
Page 44: Alarm Server
Timing: Select the alarm type. Then click “Add” and drag the mouse on the timeline to set the schedule of alarm out; click “Erase” and drag the mouse on the timeline to erase the set time schedule. After this schedule is saved, the alarm out will be triggered in the specified time. 5.3.5 Alarm Server Go to Alarm→Alarm Server interface as shown below. - Page 45 1. Select the warning voice. If you want to customize the voice content, you can choose “Customize”. Click “Browse” to choose the audio file you want to upload and then enter the audio name. Finally, click “Upload” to upload the audio file. Note that the format of the audio file must meet the requirement (see Tips), or it will not be uploaded.
-
Page 46: Light Alarm
5.3.7 Light Alarm Go to Alarm→Light Alarm interface as shown below. Set the flashing time and frequency of the light. Flashing time: the flashing time ranges from 1 second to 60 seconds. Flashing Frequency: three options- low, middle and high. 5.4 Event Configuration For more accuracy, here are some recommendations for installation. - Page 47 1. Enable the applicable detection that’s desired. Scene Change Detection: Alarms will be triggered if the scene of the monitor video has changed. Video Blur Detection: Alarms will be triggered if the video becomes blurry. Video Cast Detection: Alarms will be triggered if the video becomes obscured. 2.
- Page 48 The sensitivity value of Scene Change Detection: The higher the value is, the more sensitive the system responds to the amplitude of the scene change. The sensitivity value of Video Blur Detection: The higher the value is, the more sensitive the system responds to the blurriness of the image.
-
Page 49: Line Crossing
5.4.2 Line Crossing Line Crossing: Alarms will be triggered if the target crosses the pre-defined alarm lines. Go to Config→Event→Line Crossing interface as shown below. 1. Enable line crossing detection and select the snapshot type and the detection target. Save Original Picture to SD Card: If it is enabled, the detected pictures will be captured and saved to the SD card when the targets cross the alarm line. - Page 50 2. Set the alarm holding time. 3. Set alarm trigger options. The setup steps are the same as fire detection. Please refer to FireDetection chapter for details. 4. Click “Save” button to save the settings. 5. Set area and sensitivity of the line crossing alarm. Click the “Area and Sensitivity” tab to go to the interface as shown below.
-
Page 51: Region Intrusion
3. Cameras should be mounted at a height of 2.8 meters or above. 4. Keep the mounting angle of the camera at about 45°. 5. The detected objects should not be less than 1% of the entire image and the largest sizes of the detected objects should not be more than 1/8 of the entire image. - Page 52 4. Click the “Save” button to save the settings. 5. Set the alarm area of the intrusion detection. Click the “Area” tab to go to the interface as shown below. Set the alarm area number on the right side. Up to 4 alarm areas can be added. Click the “Draw Area”...
-
Page 53: Region Entrance
5.4.4 Region Entrance Region Entrance: Alarms will be triggered if the target enters the pre-defined areas. Go to Config→Event→Region Entrance interface. The setup steps of the region entrance are the same as Intrusion setup (See Region Intrusion for details). 5.4.5 Region Exiting Region Exiting: Alarms will be triggered if the target exits from the pre-defined areas. - Page 54 Staying Threshold: When the targets (human/vehicle) staying in the specified area exceed the threshold, alarms will be triggered. Counting Reset: The current number of the target counting can be reset. You can choose to reset the counting daily, weekly or monthly. Click “Reset” to manually reset the current number of crossing line people/motor vehicle/non-motor vehicle counting.
- Page 55 6. View the statistical information in the live view interface. 7. View the statistical information of target counting by line crossing. Click “Statistics” to enter the following interface. Select the report type. Daily report, weekly report, monthly report and annual report are selectable.
-
Page 56: Face Detection
5.4.7 Face Detection Face detection function is to detect the face appearing in the surveillance scene. Alarms will be triggered when a face is detected. The setting steps are as follows: 1. Go to Config→Event→Face Detection as shown below. Enable the face detection function. Save Source Information: if checked, the whole picture will be saved to the SD card when detecting a face. - Page 57 4. Set the alarm detection area. Click “Draw Area” and drag the border lines of the rectangle to modify its size. Move the rectangle to change its position. Click “Stop Draw” to stop drawing the area. Click “Clear” to clear the area. Then set the detectable face size by defining the maximum value and the minimum value (The default size range of a single face image occupies from 3% to 50% of the entire image).
-
Page 58: Network Configuration
6. Set the schedule of the face detection. The setup steps of the schedule are the same as schedule recording setup (See Schedule Recording). ※ Configuration requirements of camera and surrounding area 1. Cameras must be installed in the area with stable and adequate light sources. 2. -
Page 59: Port
Use PPPoE: Click the “PPPoE Config” tab to go to the interface as shown below. Enable PPPoE and then enter the user name and password from your ISP. Either method of network connection can be used. If PPPoE is used to connect internet, the camera will get a dynamic WAN IP address. -
Page 60: Server Configuration
HTTP Port: The default HTTP port is 80. It can be changed to any port which is not occupied. HTTPS Port: The default HTTPs port is 443. It can be changed to any port which is not occupied. Data Port: The default data port is 9008. Please change it as necessary. RTSP Port: The default port is 554. -
Page 61: Onivf
5.5.4 Onivf The camera can be searched and connected to the third-party platform via ONVIF/RTSP protocol. If “Activate Onvif User” is enabled in the device activation interface, the ONVIF user can be activated simultanously. When you connect the camera through the ONVIF protocol in the third-party platform, you can use this onvif user to connect. - Page 62 2. Apply for a domain name. Take www.dvrdyndns.com for example. Enterwww.dvrdydns.com in the IE address bar to visit its website. Then Click the “Registration” button. Create domain name. After the domain name is successfully applied for, the domain name will be listed as below. 3.
-
Page 63: Snmp
5.5.6 SNMP To get camera status, parameters and alarm information and remotely manage the camera, the SNMP function can be used. Before using SNMP, please install an SNMP management tool and set the parameters of the SNMP, such as SNMP port, trap address. 1. -
Page 64: 802.1X
5.5.7 802.1x If it is enabled, the camera’s data can be protected. When the camera is connected to the network protected by the IEE802.1x, user authentication is needed. To use this function, the camera shall be connected to a switch supporting 802.1x protocol. The switch can be reckoned as an authentication system to identify the device in a local network. -
Page 65: Upnp
Multicast Address Main stream: The address format is “rtsp://IP address: rtsp port/profile1?transportmode=mcast”. Sub stream: The address format is “rtsp://IP address: rtsp port/profile2?transportmode=mcast”. Third stream: The address format is “rtsp://IP address: rtsp port/profile3?transportmode=mcast”. Thermal stream: The address format is “rtsp://IP address: rtsp port/profile4?transportmode=mcast”. Audio: Having entered the main/sub stream in a VLC player, the video and audio will play automatically. -
Page 66: Email
5.5.10 Email If you need to trigger Email when an alarm happens or IP address is changed, please set the Email here first. Go to Config→Network →Email. Sender Address: sender’s e-mail address. User name and password: sender’s user name and password (you don’t have to enter the username and password if “Anonymous Login”... -
Page 67: Ftp
5.5.11 FTP After an FTP server is set up, captured pictures from events will be uploaded to the FTP server. 1. Go to Config→Network →FTP. 2. Click “Add” to add the information of the FTP. After that, click “Save” to save the settings. Server Name: The name of the FTP server. - Page 68 Rule of FTP storage path: /device MAC address/event type/date/time/ For example: a face detection alarm occurs FTP file path:\00-18-ae-a8-da-2a\VFD\2021-01-09\14\ Event name table: File Name Event Type IP address change MOTION Motion Detection SENSOR Sensor Alarm TRIPWIRE Line Crossing Detection PERIMETER Region Intrusion Detection Object Left/Missing...
-
Page 69: Https
For example: MOTION_2021-03-16-16-20-07-529_032.jpg Txt file naming rule: Event type_Year(4digits)-Month(2digits)-Day(2 digits)-Hour(2 digits)-Minute(2 digits)-Second(2 digits)-Millisecond(3 digits)_index(3digits).txt TXT file content: device name: xxx mac: device MAC address Event Type time: For example: device name: IPC mac: 00-18-ae-a8-da-2a MOTION time: 2021-03-16 12:20:07 Correspondence between txt file and jpeg file: the index of the txt file and jpeg file will be named as the same when the event is triggered each time. -
Page 70: Qos
Click “Create a private certificate” to enter the following creation interface. Click the “Create” button to create a private certificate. Enter the country (only two letters available), domain (camera’s IP address/domain), validity date, password, province/state, region and so on. Then click “OK” to save the settings. * Click “Create a certificate request”... -
Page 71: Security Configuration
5.6 Security Configuration 5.6.1 User Configuration Go to Config→Security→User interface as shown below. Add user: 1. Click the “Add” button to pop up the following textbox. 2. Enter user name in “User Name” textbox. 3. Enter the password in the “Password” and “Confirm Password” textbox. Please set the password according to the requirement of the password security level (Go to Config→Security→Security Management→Password Security interface to set the security level). - Page 72 Modify user: 1. Select a user to modify password in the user configuration list box. 2. The “Edit user” dialog box pops up by clicking the “Modify” button. Admin can modify its password and change the user type and permission of other users here. Other users only can modify their password in this interface.
-
Page 73: Online User
5.6.2 Online User Go to Config→Security→Online User to view the user who is viewing the live video. An administrator user can kick out all the other users (including other administrators). 5.6.3 Block and Allow Lists Go to Config→Security→Block and Allow Lists as shown below. The setup steps are as follows: Check the “Enable address filtering”... -
Page 74: Security Management
5.6.4 Security Management Go to Config→Security→Security Management as shown below. In order to prevent against malicious password unlocking, “locking once illegal login” function can be enabled here. If this function is enabled, login failure after trying six times will make the login interface locked. -
Page 75: Maintenance Configuration
HTTP Authentication: Basic or Token is selectable. 5.7 Maintenance Configuration 5.7.1 Backup and Restore Go to Config→Maintenance→Backup & Restore. Import & Export Settings ⚫ Configuration settings of the camera can be exported form a camera into another camera. 1. Click “Browse” to select the save path for import or export information on the PC. 2. -
Page 76: Reboot
Default Settings ⚫ Click the “Load Default” button to restore all system settings to factory default, except the Image settings (see 5.2 Image Configuration for details) you want to keep. 5.7.2 Reboot Go to Config→Maintenance→Reboot. Click the “Reboot” button to reboot the device. Timed Reboot Setting: If necessary, the camera can be set up to reboot on a time interval. -
Page 77: Operation Log
5.7.4 Operation Log To query and export log: 1. Go to Config→Maintenance→Operation Log. 2. Select the main type, sub type, start and end time. 3. Click “Search” to view the operation log. 4. Click “Export” to export the operation log. -
Page 78: Chapter 6 Search
Chapter 6 Search 6.1 Image Search Click Search to go to the interface as shown below. Images that are saved on the SD card or saved locally to the PC can be found here. ⚫ Local Image Search 1. Choose “Picture” > “Local”. 2. - Page 79 ⚫ SD Card Image Search 1. Choose “Picture” > “SD Card”. 2. Set time: Select date and choose the start and end time. 3. Choose the alarm events at the bottom of the interface. 4. Click to search the images. 5.
-
Page 80: Video Search
6.2 Video Search 6.2.1 Local Video Search Click Search to go to the interface as shown below. Videos were recorded locally to the PC can be played in this interface. 1. Choose “Record” > “Local”. 2. Set search time: Select the date and choose the start and end time. 3. -
Page 81: Sd Card Video Search
Icon Description Icon Description Watermark Speed up display Enable / disable audio; drag the slider to adjust the volume after enabling audio. Note: When using the plug-in free browser, the local videos cannot be searched. 6.2.2 SD Card Video Search Click Search to go to the interface as shown below. - Page 82 6. Double click on a file name in the list to start playback. Note: cannot be displayed when videos are played via the plug-in free browser. The time table can be shown in 24H/12H/2H/1H format by clicking the corresponding buttons. Video clip and downloading 1.
-
Page 83: Integration With Gv-Vms
Integration with GV-VMS For how to connect to GV-VMS, see GV-TMBE5800 Quick Start Guide. Note: It is only supported by GV-VMS V17.4.5 / V18.3.1 with patch files or later versions. -
Page 84: Appendix
Appendix Appendix 1 Troubleshooting How to find the password? Click “Forget Password” and then answer the security questions to reset the password. Fail to connect devices through IE browser. Network is not well connected. Check the connection and make sure it is connected well. IP address is not available. -
Page 85: Appendix 2 Common Material Emissivity
Other plug-ins or anti-virus blocks ActiveX. Please uninstall or close them. No sound can be heard. Audio input device is not connected. Please connect and try again. B. Audio function is not enabled at the corresponding channel. Please enable this function. Appendix 2 Common Material Emissivity Material Emissivity... - Page 86 The material emissivity is also affected by the surface of the material. Material Surface Emissivity Rough 0.95 Slightly Rough Slightly Smooth Smooth...
Need help?
Do you have a question about the GV-TMEB5800 and is the answer not in the manual?
Questions and answers