LXE MX3Plus User Manual
Microsoft windows ce 5.0 equipped
Hide thumbs
Also See for MX3Plus:
- Reference manual (296 pages) ,
- Programming manual (380 pages) ,
- Reference manual (50 pages)

Related Manuals for LXE MX3Plus


Summary of Contents for LXE MX3Plus
- Page 1 MX3Plus User’s Guide ® ® (Microsoft Windows CE 5.0 Equipped) Copyright © September 2008 by LXE Inc. All Rights Reserved E-EQ-MX3PLUSOGWW-B...
- Page 2 Java® and Java-based trademarks and logos are trademarks or registered trademarks of Sun Microsystems, Inc. in the U.S. or other countries, and are used under license. The Bluetooth® word mark and logos are owned by the Bluetooth SIG, Inc. and any use of such marks by LXE, Inc. is under license.
-
Page 3: Revision Notice
Appendix B Regulatory Notices and Safety Information Note: A complete revision history is included in Appendix B, “Regulatory Notices and Safety Information”. Revision Notice MX3Plus User’s Guide Explanation Updated approvals for 802.11 a/b/g radio. Removed Summit Declaration of Compliance for consistency. -
Page 5: Table Of Contents
Optional Devices... 12 Attach Handstrap (Optional)...12 Attach the Stylus Clip (Optional) ...12 Attach to Hip-Flip (Optional) ...13 Connect External Power Supply to MX3Plus or Cradle (Optional)...14 Connect MX3Plus Audio Jack (Optional)...15 Connect Remote Antenna (Optional) ...15 Power Button... 16 Restart Sequence...16 Tapping the Touchscreen with a Stylus... - Page 6 Endcaps and COM Ports ... 37 Endcap Combinations...38 Tethered Scanners...38 USB Port...38 IR Port...39 The Keypad... 40 Key Functions...40 Field Exit Key Function (IBM 5250/TN5250 Only)...41 Caps Key and CapsLock Mode ...41 Keypress Sequences...41 MX3Plus User’s Guide OMPUTER Table of Contents E-EQ-MX3PLUSOGWW-B...
- Page 7 Battery Chargers... 44 LXE Multi-Charger Plus...44 External Power Supply (Optional) ...44 Storage Cradles ... 45 Status LED...45 Desktop Cradle for MX3Plus ...46 Connectors...46 Vehicle Mount Cradle for MX3Plus...47 Connectors...47 ActiveSync with a Cradle ...47 Tethered Scanner and a Cradle ...48 The Passive Vehicle Cradle ...48...
- Page 8 Illustrations Figure 1 CDRH / IEC 825 Caution Label Location – MX3Plus, Back...5 Figure 2 Caution Label – Laser Scanner...5 Figure 3 Vent Aperture in Battery Well – Do Not Cover ...6 Figure 4 Front ...7 Figure 5 Back...7 Figure 6 Endcaps...8 Figure 8 Battery Contacts in Battery Compartment ...11...
-
Page 9: Introduction
Overview The LXE® MX3Plus is a rugged, portable, hand-held Microsoft® Windows® CE 5.0 equipped mobile computer capable of wireless data communications. The mobile device can transmit information using wireless LAN radios with internal antennas or an external remote mount antenna. It can store information for later transmission through an RS-232, InfraRed, or USB port. -
Page 10: Identifying The Mx3Plus Computer
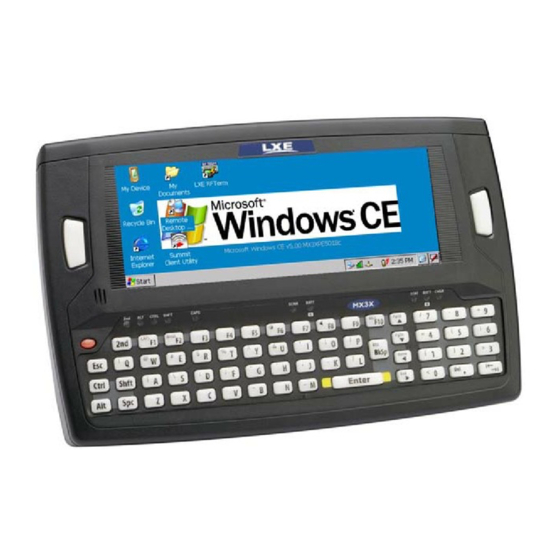
Identifying the MX3Plus Computer MX3Plus The MX3Plus is identified by the “MX3Plus” logo located at the bottom right of the keypad. The MX3Plus is covered in this document and the MX3Plus Reference Guide. MX3X, MX3P The MX3X and MX3P are identified by the “MX3X” logo located above the keypad. -
Page 11: Related Manuals
MX3Plus The MX3Plus Reference Guide contains MX3Plus technical information and instruction. An abbreviated user’s guide (LXEbook – MX3Plus User’s Guide) is available for download to the MX3Plus device from the LXE Manuals CD or the LXE ServicePass website. Cradle Please refer to the MX3 Cradle Reference Guide for technical information relating to the MX3Plus-compatible Desk Top and Vehicle Mount cradles. -
Page 12: Document Conventions
Note: Environmental Specifications for the MX3 Cradles are contained in the MX3 Cradle Reference Guide. MX3Plus User’s Guide All caps are used to represent disk directories, file names, and application names. Rather than use the phrase “choose the Save command from the File menu”, this guide uses the convention “choose File | Save”. -
Page 13: Warnings And Labels
• Do not stare directly into the laser beam. • Do not remove the laser caution labels from the MX3Plus. • Do not connect the laser barcode window to any other device. The laser barcode window is certified for use with the MX3Plus only. -
Page 14: Battery Well Vent Aperture
Figure 3 Vent Aperture in Battery Well – Do Not Cover If the vent hole is covered by an object, e.g. a tracking label, other than an approved LXE main battery, the touch screen may be damaged. If damage occurs to the touch screen, please contact your LXE representative for the process to follow when returning the device to LXE for repair. -
Page 15: Components
Cradle Input Contacts E-EQ-MX3PLUSOGWW-B SCNR CHGR MX3Plus Figure 4 Front Shift LED Caps LED Scanner LED Backup Battery LED Status LED Main Battery LED Charger LED Scan or Enter (programmable) Figure 5 Back Main Battery Stylus Back Cover MX3Plus User’s Guide... -
Page 16: Endcap Options
USB Host USB Host Scanner Scanner Serial COM3 Serial COM3 USB Host USB Host MX3Plus User’s Guide Figure 6 Endcaps 3 Right Port 4 Audio Jack or External Antenna Connector Right Port (3) See (4) Serial COM1 Audio Jack USB Client... -
Page 17: Mx3Plus Without Touchscreen
MX3Plus without Touchscreen MX3Plus without Touchscreen If an MX3Plus is not equipped with a touchscreen of if your system administrator has disabled the touchscreen, please see the Keypad Shortcuts section, later in this manual, for helpful keypress sequences. Your system administrator may need to use LXEConnect to configure the MX3Plus. Complete details on using LXEConnect to configure the MX3Plus are in the MX3Plus Reference Guide. -
Page 18: About Lithium-Ion Batteries
Note: Until the main battery and backup battery are completely depleted, the mobile device is always drawing power from the batteries (On). MX3Plus User’s Guide About Lithium-Ion Batteries E-EQ-MX3PLUSOGWW-B... -
Page 19: Insert Main Battery
New batteries must be charged prior to first use. This process takes up to four hours in an LXE Multi-Charger Plus and eight hours with an external power source connected to the power jack on the endcap of the mobile device. -
Page 20: Optional Devices
1. Place the MX3Plus, with the screen facing down, on a flat stable surface. 2. Attach the handstrap to the MX3Plus with the screws and washers provided. 3. Test the strap's connection making sure the MX3Plus is securely connected to each end of the strap connectors. -
Page 21: Attach To Hip-Flip (Optional)
#1 flat head screwdriver is not supplied by LXE. A waist belt accessory can be ordered from LXE. Once the MX3Plus is attached to the hip-flip and the hip-flip securely fastened to the user by a belt around their waist, the MX3Plus can be operated at a convenient height, leaving the user's hands free. -
Page 22: Connect External Power Supply To Mx3Plus Or Cradle (Optional)
MX3 cradle (the passive cradle does not have a power jack). Insert the barrel connector into the power jack on the MX3Plus endcap and push in firmly. The CHGR LED above the keypad illuminates when the computer is receiving external power through the power jack. -
Page 23: Connect Mx3Plus Audio Jack (Optional)
An adapter cable (LXE Part No. 9000A076CBLHEADSET1) can be attached to the audio port. The adapter cable has a 2.5mm plug on one end to attach to the MX3Plus and a quick disconnect connector on the other end to connect to a variety of LXE voice recognition headsets. -
Page 24: Power Button
When the Windows desktop is displayed or an application begins, the power up (or reboot) sequence is complete. Please refer to the section titled Power Modes in the MX3Plus Reference Guide for a list of the kinds of activities (Primary Events) that will return the device from Suspend Mode. -
Page 25: Tapping The Touchscreen With A Stylus
Place the cursor in a text box prior to typing in data or retrieving data using the integrated barcode scanner or an input/output device connected to the serial port. An extra or replacement stylus can be ordered from LXE. See the section titled Accessories for the stylus part number. -
Page 26: Entering The Multi Applock Activation Key
Entering the Multi AppLock Activation Key The touch screen must be enabled. See the MX3Plus Reference Guide for AppLock Note: instruction. AppLock may be installed and running on the mobile device. AppLock restricts access to programs and the Windows CE Control Panel. Please contact your system administrator for instruction. -
Page 27: Touchscreen
To begin, tap the Recalibrate button on the screen with the stylus. Follow the instructions on the screen and press the Enter key to save the new calibration settings or press Esc to cancel or quit. E-EQ-MX3PLUSOGWW-B Figure 17 Touchscreen Recalibration MX3Plus User’s Guide... -
Page 28: Set The Display Contrast
Display contrast adjustment is not necessary and the contrast adjustment key has no effect on the MX3Plus. Set the Display Backlight Timer Refer to the section titled Power Modes in the MX3Plus Reference Guide for information Note: relating to the power states of the mobile device. -
Page 29: Set The Power Schemes Timers
Set the Power Schemes Timers Note: Refer to the section titled Power Modes in the MX3Plus Reference Guide for information relating to the power states of the mobile device. Select Start | Settings | Control Panel | Power | Schemes tab. Change the parameter values and tap OK to save the changes. -
Page 30: Set The Audio Speaker Volume
The volume is increased or decreased one step each time the volume key is pressed. The device has an internal speaker and a jack for an external headset. Operational beeps are emitted from the speaker. Refer to the MX3Plus Reference Guide. Using the Keypad Note: Volume &... -
Page 31: Enter Data
Input Panel icon. Use the input panel to enter information in any program. E-EQ-MX3PLUSOGWW-B key LED illuminates. By then pressing the key LED turns off when key sequence key LED will flash at those times). MX3Plus User’s Guide... -
Page 32: Integrated Laser Scanner Data Entry
Try scanning test symbols of the same code type at different distances and angles. • Is the scan aperture unscratched and unsoiled? See the Integrated Scanner Programming Guide for Windows Devices for parameter barcodes, default scanning ranges, barcode reading instruction and troubleshooting. MX3Plus User’s Guide scanner. Incorrect Scan Figure 18 Scan Beam SHFT... -
Page 33: Using A Headset And Voice For Data Entry
The headset consists of an earpiece, a microphone and an attached cable. The headset attaches to an audio cable which attaches to the MX3Plus. The audio jack is located on the MX3Plus endcap. 9000A076CBLHEADSET1 Insert the 2.5mm barrel end of the connector into the audio jack on the endcap and push the... -
Page 34: Entering Data
Some endcap configurations contain a single serial port or dual serial ports. These ports are labeled RS-232 and are configured either as COM1 or COM3. Tethered scanners connect to RS- 232 labeled ports on the endcap and, for the MX3Plus only, can connect to the RS-232 port on a powered cradle. -
Page 35: Bluetooth Devices
MX3Plus Bluetooth scan range, the Bluetooth connection between the linked device and the MX3Plus is lost. There may be audible or visual signals as paired devices disconnect from the MX3Plus. The Bluetooth remote device should be as close as possible, in direct line of sight, with the MX3Plus during the pairing process. -
Page 36: Getting Help
LXE ServicePass website. Contact your LXE representative to obtain the LXE Manuals CD. You can also get help from LXE by calling the telephone numbers listed on the LXE Manuals CD, in the file titled Contacting LXE. This information is also available on the LXE website. - Page 37 Battery Charger/Analyzer, US V1.01 Battery Charger/Analyzer, WW Battery, Li-Ion E-EQ-MX3PLUSOGWW-B MX3RA497HANDSTRAP MX3RA401HOLSTER 9000A408HIPFLIP 9200L67 9200L57 9000A409CASE 9000A411SCNRSTRAP 8010A001BRKT 8100A401HLSTRHOOD 9000A410SHOULDERSTRP MX3XA410VOICECASE 9000A076CBLHEADSET1 HX1A501SNGBHEADSET HX1A502DUALBHEADSET HX1A503BTHHEADSET HX1A504AHSBLOCKFOAM HX1A505DUALYOKE HX1A506SINGLEYOKE HX1A508WINDSCREEN10 HX1A509WINDSCREEN50 HX1A510FOAMEAR10 HX1A511FOAMEAR50 9000A507STYLUS Call LXE MX3RA351RS232CVR MX3XA503PROTFILMCOLR 9000A377CHGR5US 9000A377CHGR5WW MX3A378BATT MX3Plus User’s Guide...
- Page 38 MX3XA070CBLD9RS232AS cable. Tethered Scanners Scanner, Powerscan SR, 8’ Cbl, WW Scanner, Powerscan SR, 12’ Cbl, US Scanner, Powerscan LR, 8’ Cbl, WW Scanner, Powerscan LR, 12’ Cbl, US Power Adapter Required. MX3Plus User’s Guide Getting Help 9000A279ANTREMOTE8 9000A278ANTREMOTE6 9000A280ANTREMOTE6RT 9000A281ANTREMOT15RT 9000A054CBL6D9D9...
- Page 39 Please refer to the tethered scanner manufacturer’s user guide for instruction. Bluetooth Mobile Barcode Readers and Accessories LXE Bluetooth module with laser ring scanner, battery, two hand/wrist straps (large and small) LXE Bluetooth module with 1D/2D imager ring scanner, battery,...
- Page 40 Universal Desktop Power Supply 90-264VAC, 9VDC, 2A, EPS 9-60VDC Forklift Power Supply (For Use with Forklift Cradles) Power Cable: Connects DC Power Supply to Forklift Cradle Forklift Rugged Scanner Holder with RAM mount (all metal with cloth padding) MX3Plus User’s Guide Getting Help 8500A051CBL9DA9F 8800A001CRADLERCMI 8800A002CRADLECMI...
-
Page 41: The Mx3Plus Hand Held Computer
The MX3Plus Hand Held Computer Touchscreen Display The Touchscreen Display is an LCD unit capable of supporting VGA graphics modes. Display size is 640 x 240 pixels. The touchscreen allows signature capture and touch input. A pen stylus is included. The touchscreen responds to an actuation force (touch) of 4 oz. of pressure (or greater). -
Page 42: Touchscreen Calibration
To start, tap Recalibrate. Follow the instructions on the screen and press the Enter key to save the new calibration settings or press <Esc> to cancel or quit. See the MX3Plus Reference Guide for complete instructions. Cleaning the Glass Display/Scanner Aperture Note: These instructions are for components made of glass. -
Page 43: Scan Buttons
OK to save the changes. The default setting for the right button on an MX3Plus is Enter. The default setting for the left button is Scan. When the device does not have an integrated scanner, both buttons default to Enter keys and the Scan selection is greyed out. -
Page 44: Field Exit Key Function (Ibm 5250/Tn5250 Only)
Pressing the trigger on the tethered scanner has no effect on the device’s Scan buttons. Refer to the MX3Plus Reference Guide before programming the Scan / Enter buttons. Note: The Reference Guide also contains instructions for the Key Map Utility for the keypad. -
Page 45: Endcaps And Com Ports
COM 2 can only be accessed when a tethered scanner is connected to the RS-232 port on the cradle, and the MX3Plus is in the cradle. The cradle does not need to be powered by an alternate AC or DC power source. Tethered scanners receive power from the mobile device's main battery. -
Page 46: Endcap Combinations
Tethered scanners read barcode scans only when the trigger on the tethered scanner is pressed. The tethered scanner requires power on pin 9 of the mobile device’s serial port. To set the MX3Plus to use a tethered scanner, select Start | Settings | Control Panel | Scanner | COM1 (or 2 or 3). -
Page 47: Ir Port
115k baud. When sending data through the IR port to another MX3Plus's IR port, make sure both units are in close proximity to each other. The IR operating envelope has a distance range of 2 cm (.79 inches) to 1 meter (3.2 feet) with a viewing angle of 30 degrees. -
Page 48: The Keypad
The Keypad The QWERTY keypad is phosphorescent. A phosphorescent keypad does not use a keypad backlight but glows in dim/dark areas after exposure to a light source. The keypad is installed and configured by LXE. CTRL CAPS Ctrl Shft ASCII, TN5250 and TN3270 keymaps (keypress sequences) are located in Appendix A - Key Maps. -
Page 49: Field Exit Key Function (Ibm 5250/Tn5250 Only)
CapsLock AND Shift keypress – result is a lowercase letter. Keypress Sequences See Appendix A for all key press sequences. Custom Key Maps The System Administrator can create custom key maps. Details are in the MX3Plus Reference Guide. E-EQ-MX3PLUSOGWW-B >+ <F1>. -
Page 50: Led Functions
Main Battery. When illuminated, main battery capacity is low. BATT Charger. When on, the mobile device is receiving external power either from the DC power jack or the MX3Plus is seated in a powered cradle. CHGR MX3Plus User’s Guide SHFT... -
Page 51: Batteries
The main battery has a rugged plastic enclosure that is designed to withstand the ordinary rigors of an industrial environment. Exercise care when transporting the main battery making sure it does not come in contact with excessive heat or any power source other than an LXE MultiCharger or the mobile device. -
Page 52: Battery Chargers
For optimum battery life, the correct MX3 Multi-Charger Plus must be used to charger the MX3Plus battery. This battery charger is identified by the text LXE PN: 157360-0126 on the label. This label is located on the back of the MX3 Multi-Charger. -
Page 53: Storage Cradles
MX3Plus and, in turn, the operating system recharges the main battery. The MX3Plus can be either on or in Suspend mode while in the cradle. The MX3Plus can be inserted and removed from the cradle with one hand. -
Page 54: Desktop Cradle For Mx3Plus
A powered cradle supports RS-232 and IR communications. The RS-232 connector is located in the back center of the cradle. When the MX3Plus is properly docked, the bi-directional half-duplex transceivers in the MX3Plus and cradle are aligned through their IR windows. -
Page 55: Vehicle Mount Cradle For Mx3Plus
The MX3Plus is removed from the cradle by pressing the release mechanisms and pulling the MX3Plus up and away from the cradle. -
Page 56: Tethered Scanner And A Cradle
The passive vehicle cradle does not have LEDs or indicators. The passive vehicle cradle does not require an external power source. The mobile device in the passive cradle requires a power source, either from the main battery or from power applied via the power jack on the endcap. MX3Plus User’s Guide Storage Cradles E-EQ-MX3PLUSOGWW-B... -
Page 57: Appendixa Key Maps
Virtual (or Soft) Keypad used with the stylus. Key Map 101-Key Equivalencies Note: This key mapping is used on mobile devices that are NOT running an LXE Terminal Emulator. When using a sequence of keys that includes the 2 Note: When the computer boots, the default condition of NumLock is On and the default condition of Caps (or CapsLock) is Off. - Page 58 Up Arrow Down Arrow Right Arrow Left Arrow Insert Delete Home Page Up Page Down ScrollLock MX3Plus User’s Guide Press These Keys and Then Shift Ctrl CapsLock Key Maps Press this key Up Arrow Down Arrow Right Arrow Left Arrow...
- Page 59 Key Maps To get this key E-EQ-MX3PLUSOGWW-B Press These Keys and Then Shift Ctrl CapsLock Press this key MX3Plus User’s Guide...
- Page 60 To get this key < > : (colon) ; (semicolon) _ (underscore) , (comma) ‘ (apostrophe) ~ (tilde) MX3Plus User’s Guide Press These Keys and Then Shift Ctrl CapsLock Key Maps Press this key E-EQ-MX3PLUSOGWW-B...
-
Page 61: 3270 Key Sequences
SysReq...System ... Ctrl + S Please refer to the RFTerm Reference Guide® for further information about Terminal Emulation- specific key functions on the mobile device. E-EQ-MX3PLUSOGWW-B Press These Keys and Then Shift Ctrl CapsLock Press this key MX3Plus User’s Guide... - Page 62 Key Maps MX3Plus User’s Guide E-EQ-MX3PLUSOGWW-B...
-
Page 63: Appendixb Regulatory Notices And Safety Information
Operation of this equipment in a residential area is likely to cause harmful interference in which case the user will be required to correct the interference at his own expense. Warning: Changes or modifications to this device not expressly approved by LXE, Inc., could void the user’s authority to operate this equipment. - Page 64 A label on the exterior of the device should resemble one of the labels shown below (the label contains the LXE part number of the installed radio card). The labels shown below and affixed to the device, identify where the device may be used and where its use is restricted. Use of a device is prohibited in countries not listed below or otherwise identified by the label.
-
Page 65: Approvals
EN 300 28 II PCMCIA Adapter Card IC-RSS 139 IC-RSS 102 4831 (LXE Model No.) FCC Part 15 FCC Bulletin OET-65 LXE 5GHz CF with Type II EN 300 28 PCMCIA Adapter Card EN 301 893 IC-RSS 139 IC-RSS 102 E-EQ-MX3PLUSOGWW-B Safety Standards UL 60950;... - Page 66 Regulatory Notices and Safety Information A/C Power Supply Safety Statement – MX3Plus Output Rated 12 VDC, 1 A. The LXE-approved AC Power Adapter is only intended for use in a 25ºC (77ºF) maximum ambient temperature environment. Optional A/C Power Supply: Outside North America, this unit is intended for use with an IEC certified ITE power supply with output rated as stated at the top of this page.
-
Page 67: Laser Light Safety Statement
Este producto usa luz de láser. Las etiquetas se proveen en la máquina exploradora. Por favor, lea detenidamente la explicación para las precauciones. (ES) Waarschuwing: Dit product gebruikt laserlicht. Een van de volgende labels is op de scanner aangebracht. Lees a.u.b. de waarschuwing onder Oppassen. (NL) E-EQ-MX3PLUSOGWW-B MX3Plus User’s Guide... - Page 68 Laser Light Safety Statement Aþaðýdaki etiketlerden bir tanesi tarayýcýnýn üstünde saðlanýr. Lütfen Dikkat ifadesini okuyun. (TR) (KR) (CN) Labels - MX3Plus Hand Held Computer MX3Plus User’s Guide Regulatory Notices and Safety Information (JP) Legend: Chinese-CN; Danish-DK; Dutch-NL; English-US; Finnish- FI; French-FR; German-DE; Greek-GR; Italian-IT;...
-
Page 69: Revision History
Regulatory Notices and Safety Information Revision History Revision A, Initial Release: May 2008 Revision B: September 2008 Section Appendix B Regulatory Notices and Safety Information E-EQ-MX3PLUSOGWW-B Explanation Updated approvals for 802.11 a/b/g radio. Removed Summit Declaration of Compliance for consistency. MX3Plus User’s Guide... - Page 70 Index MX3Plus User’s Guide E-EQ-MX3PLUSOGWW-B...
-
Page 71: Index
External Power Supplies, MX3X ...14 External Speakers ...15 Features ...1, 3 Field Exit key function ...36, 41 Function 2nd Key...40 Alt Key...40 Caps Mode ...41 Ctrl Key...40 Enter Key ...40 Field Exit Key ...36, 41 Scan Key ...40 Shft Key ...41 MX3Plus User’s Guide... - Page 72 SCNR function...42 SHFT function ...42 STAT function ...42 Li-Ion battery life...10 Lithium-Ion (Li-ion) ...43 Location, Components...7, 8 MX3Plus User’s Guide Manuals ...3, 28 Microphone adjustment ...25 Mode Key Functions ...41 Mode timing, cumulative effect...21 New Battery...9 Operating Temperature...4 Pen Stylus ...17, 33...
- Page 73 USB-C and USB-H ports and tethered scanners...26 User Idle Timer...21 Vehicle cradle RS-232 connection...47 Vehicle mount cradle Components ...47 Power connection...47 Vent aperture in battery well ...6 View Display ...33 Volume adjust audio volume ...22 Warnings and Labels Laser Scanner...5 MX3Plus User’s Guide...
- Page 74 Index MX3Plus User’s Guide E-EQ-MX3PLUSOGWW-B...
Need help?
Do you have a question about the MX3Plus and is the answer not in the manual?
Questions and answers