LXE MX3-CE Reference Manual
Hide thumbs
Also See for MX3-CE:
- Reference manual (240 pages) ,
- User manual (64 pages) ,
- Reference manual (166 pages)
Table of Contents
Advertisement
Quick Links
Download this manual
See also:
User Manual
Revision A contains system configuration instruction for MX3-CE's shipped in 2001/2002.
This software is obsolete. Refer to the current release of the MX3-CE Reference Guide.
Please contact your LXE customer support representative for assistance.
MX3-CE Reference Guide
An EMS Technologies Company
Copyright © July 2001, October 2002 by LXE Inc.
All Rights Reserved
MX3CEA137REFGD
E-EQ-MX3CERG-A-ARC
This document has been changed from it's original paper published
format to conform with LXE Electronic Document Publishing
Standards. The technical content has not been changed.
Advertisement
Chapters
Table of Contents
Troubleshooting

Related Manuals for LXE MX3-CE


Summary of Contents for LXE MX3-CE
- Page 1 Revision A contains system configuration instruction for MX3-CE's shipped in 2001/2002. This software is obsolete. Refer to the current release of the MX3-CE Reference Guide. Please contact your LXE customer support representative for assistance. MX3-CE Reference Guide An EMS Technologies Company Copyright ©...
- Page 2 Regulatory Notices Notice: LXE Inc. reserves the right to make improvements or changes in the products described in this manual at any time without notice. While reasonable efforts have been made in the preparation of this document to assure its accuracy, LXE assumes no liability resulting from any errors or omissions in this document, or from the use of the information contained herein.
-
Page 3: Table Of Contents
Set The Display Contrast ....................1-13 Set the Display Backlight Timer..................1-14 Set the Display Blanking Timer..................1-14 Set the MX3-CE Power Off Timer ..................1-15 Set The Audio Speaker Volume ..................1-16 Endcaps ........................ 1-17 COM Port Switching ......................1-18 PCMCIA Cards...................... - Page 4 Table of Contents Off Mode ..........................1-28 Contacting LXE ....................1-29 Manuals and Accessories ................... 1-29 Manuals..........................1-29 Accessories ......................... 1-29 HAPTER HYSICAL ESCRIPTION AND AYOUT Hardware Configuration ..................2-1 System Hardware ........................2-1 Central Processing Unit ......................2-1 AT Compatible Core Logic ....................2-1 System Memory........................
- Page 5 Test Utility ..........................4-6 Windows Explorer ........................ 4-6 Taskbar ..........................4-7 Control Panel Options ................... 4-8 Communication........................4-9 Date/Time ........................... 4-10 Dialing ..........................4-11 Display..........................4-12 Input Panel .......................... 4-13 Keyboard..........................4-14 Mouse ..........................4-14 Network ..........................4-15 E-EQ-MX3CERG-A-ARC MX3-CE Reference Guide...
- Page 6 Regional Settings ........................ 4-19 Scanner ..........................4-20 Stylus ..........................4-22 System..........................4-23 Volume and Sound ......................4-24 Wireless – Lucent Radio Only.................... 4-25 Backup MX3-CE Files ..................4-27 Prerequisites........................4-27 Configure the MX3-CE ...................... 4-28 Connect ..........................4-29 Explore..........................4-29 Disconnect .......................... 4-30 Troubleshooting........................
- Page 7 Set Default Parameter ......................6-58 Time-out Between Same Symbol ..................6-58 Transmit “No Read” Message .................... 6-59 Trigger Mode ........................6-60 UPC/EAN ........................... 6-62 Scan Angle (Laser Clipping) ....................6-78 Serial Interface ........................6-79 ASCII Character Equivalents................6-86 E-EQ-MX3CERG-A-ARC MX3-CE Reference Guide...
- Page 8 Key Map 101-Key Equivalencies ..................A-1 PPENDIX ECHNICAL PECIFICATIONS Physical Specifications ..................B-1 Environmental Specifications................B-2 MX3-CE and Endcaps ......................B-2 Display Specifications ..................B-3 Power Supplies ........................B-3 Radio Specifications..................... B-4 Proxim PCMCIA 2.4 GHz Type II ..................B-4 Lucent PCMCIA 2.4 GHz Type II..................B-4...
- Page 9 Version Control API ....................C-8 OAL Version.........................C-8 Bootloader Version .......................C-8 Loaded Version Numbers .....................C-9 Loaded S Numbers........................C-9 Hardware Port Access API ................... C-9 FPGA Register Access......................C-9 GPIO Pin Access ........................C-10 Reflash the MX3-CE .................... C-11 NDEX E-EQ-MX3CERG-A-ARC MX3-CE Reference Guide...
- Page 10 Figure 1-5 Main Battery............................1-7 Figure 1-6 Battery Compartment........................1-8 Figure 1-7 Main Battery............................1-8 Figure 1-8 MX3-CE With Handstrap Installed ....................1-9 Figure 1-9 US AC/DC 12V Power Supply and Cigarette Lighter Adapter .............1-11 Figure 1-10 International AC/DC 12V Power Supply..................1-11 Figure 1-11 Connect External Power Supply ....................1-11 Figure 1-12 Connect Audio Jack........................1-12...
- Page 11 Figure 4-23 Encryption Tab Display.......................4-26 Figure 4-24 Advanced Tab Display .........................4-26 Figure 4-25 Admin Tab Display ........................4-26 Figure 4-26 Pinout – Serial Cable for Synchronization...................4-33 Figure 4-27 USB / Serial Pinout ........................4-33 Figure A-1 QWERTY Keypad.........................A-1 E-EQ-MX3CERG-A-ARC MX3-CE Reference Guide...
- Page 12 Table of Contents MX3-CE Reference Guide E-EQ-MX3CERG-A-ARC...
- Page 13 Set The Display Contrast ....................1-13 Set the Display Backlight Timer..................1-14 Set the Display Blanking Timer..................1-14 Set the MX3-CE Power Off Timer ..................1-15 Set The Audio Speaker Volume ..................1-16 Using the Keypad ......................1-16 Using the Touch Screen ....................1-16 Endcaps ........................
- Page 14 Figure 1-5 Main Battery............................1-7 Figure 1-6 Battery Compartment........................1-8 Figure 1-7 Main Battery............................1-8 Figure 1-8 MX3-CE With Handstrap Installed ....................1-9 Figure 1-9 US AC/DC 12V Power Supply and Cigarette Lighter Adapter .............1-11 Figure 1-10 International AC/DC 12V Power Supply..................1-11 Figure 1-11 Connect External Power Supply ....................1-11 Figure 1-12 Connect Audio Jack........................1-12...
-
Page 15: Chapter 1 Introduction
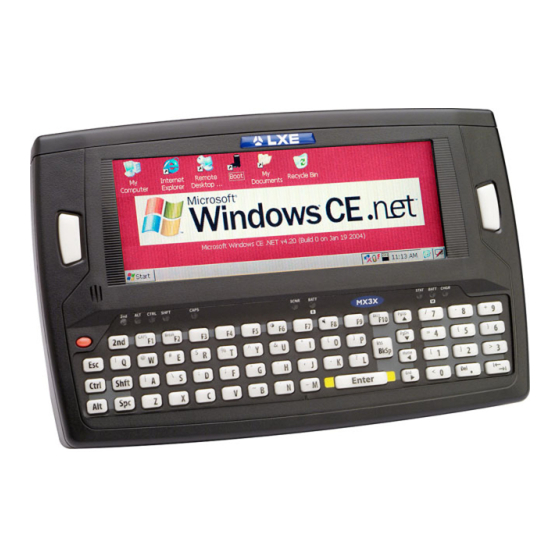
The MX3-CE can transmit information using a 2.4 GHz radio (with an internally mounted antenna) and it can store information for later transmission through an RS-232 or InfraRed or USB port. The MX3-CE can be scaled from a limited function batch computer to an integrated RF scanning computer. -
Page 16: Components
On/Off Button Status LED Main Battery LED Alt LED Charger LED Ctrl LED Scan or Enter Figure 1-2 MX3-CE Endcap DC Power Jack Com 1 (Serial or USB) Port Com 3 (Serial or Scanner) Port Audio Jack MX3-CE Reference Guide E-EQ-MX3CERG-A-ARC... -
Page 17: When To Use This Guide
Use this reference guide as you would any other source book -- reading portions to learn about the MX3-CE, and then referring to it when you need more information about a particular subject. This guide takes you through all aspects of installation and configuration for the LXE MX3-CE. -
Page 18: Document Conventions
Keyword that indicates a potentially hazardous situation which, if not avoided, could result in death or serious injury. DANGER Keyword that indicates a imminent hazardous situation which, if not avoided, will result in death or serious injury. MX3-CE Reference Guide E-EQ-MX3CERG-A-ARC... -
Page 19: Getting Started
MX3-CE, and components from electrostatic discharge. Figure 1-4 Hardware Configuration Use this guide as you would any other source book -- reading portions to learn about the MX3-CE, and then referring to it when you need more information about a particular subject. This guide takes you through an introduction to and operation of the LXE MX3-CE. -
Page 20: Tapping With A Stylus
Place the cursor in a text box prior to typing in data or retrieving data using the integrated barcode scanner or an input/output device connected to the serial port. An extra or replacement stylus may be ordered from LXE. See "Contacting LXE" for telephone numbers and the section titled "Accessories" for the stylus part number. -
Page 21: Insert Main Battery
Getting Started Insert Main Battery As soon as the battery is inserted into the MX3-CE, the unit is automatically powered on (or returns from the Critical Suspend or Suspend state). Note: New batteries must be charged prior to first use. This process takes up to four hours in an LXE Multi-Charger and eight hours with an external power source attached to the MX3-CE. -
Page 22: Figure 1-6 Battery Compartment
Getting Started Figure 1-6 Battery Compartment The MX3-CE Battery Compartment is located at the bottom of the back of the computer. The arrows in the figure above point to the battery contacts in the computer. Figure 1-7 Main Battery Place the battery in the compartment, making sure the side of the battery with six contacts matches up with the battery contacts in the computer battery compartment. -
Page 23: Attach Handstrap (Optional)
Place the MX3-CE, with the screen facing down, on a flat stable surface. Attach the handstrap to the MX3-CE with the screws and washers provided. Test the strap's connection making sure the MX3-CE is securely connected to each end of the strap connectors. -
Page 24: Attach To Hip-Flip (Optional)
Waist belt and #1 flat head screwdriver are not supplied by LXE. Once the MX3-CE is attached to the hip-flip and the hip-flip securely fastened to the user by a belt around their waist, the MX3-CE can be operated at a convenient height, leaving the user's hands free. -
Page 25: Connect External Power Supply (Optional)
Figure 1-9 US AC/DC 12V Power Supply and Cigarette Lighter Adapter Figure 1-10 International AC/DC 12V Power Supply The MX3-CE DC power jack is located on the endcap. The cradle power jack is located on the back of the cradle. -
Page 26: Connect Audio Jack (Optional)
When the WinCE desktop is displayed or an application begins, the power up (or reboot) sequence is complete. Troubleshooting The MX3-CE will not turn off – force a Reboot by holding the Power key down for 15 seconds and the MX3-CE will reboot. MX3-CE Reference Guide... -
Page 27: Touch Screen Calibration
1-13 Touch Screen Calibration If the MX3-CE is not responding properly to pen touch taps, you may need to recalibrate your screen. Recalibration involves tapping the center of a target. If you miss the center, keep the stylus on the screen, slide it over the target's center, and then lift the stylus. -
Page 28: Set The Display Backlight Timer
OK to save the changes. The first option should be set when the MX3-CE will be running on battery power only. The second option should be set when the MX3-CE will be running on external power (e.g. AC adapter, cigarette adapter, powered cradle). -
Page 29: Set The Mx3-Ce Power Off Timer
OK to save the changes. The first option should be set when the MX3-CE will be running on battery power only. The second option should be set when the MX3-CE will be running on external power (e.g. AC adapter, cigarette adapter, powered cradle). -
Page 30: Set The Audio Speaker Volume
The audio volume can be adjusted to a comfortable level for the operator. The volume is increased or decreased one step each time the volume key is pressed. The MX3-CE has an internal speaker and a jack for an external headset. -
Page 31: Endcaps
“Scanner Warnings and Labels” for important laser safety information before using the scanner. The MX3-CE supports three COM port options. Two external serial ports are dependent on the end cap chosen. A third serial port is used to support an infrared transceiver (barcode reader). An additional endcap configuration supports serial and USB "slave"... -
Page 32: Com Port Switching
Com 3 Port Audio Jack The COM 2 port is always the IR port on the back of the MX3-CE, regardless of the type of endcap installed. On the Standard Range Scanner / Serial Port endcap COM 3 is the Integrated Scanner port. -
Page 33: Figure 1-19 Scanner Port And Programmable Button Screen
To assign baud rate, parity, stop bits and data bits to Com 1, Com 2 or Com3, select Start / Settings / Control Panel / Scanner / COM .. tab. Figure 1-20 Assign COM Port Parameters E-EQ-MX3CERG-A-ARC MX3-CE Reference Guide... -
Page 34: Pcmcia Cards
Make sure the proper software is pre-loaded and PC cards are properly configured. There is one PC card slot (Slot 0) and one Compact Flash card slot (Slot 1) in the MX3-CE. Slot 0 powers a radio PC card, PC SRAM card, ATA Flash card or a linear Flash card. The slots hold only one card at a time. - Page 35 Use caution not to pull or snag the antenna connector on the Radio card, if installed. If you anticipate keeping the PC card out of the MX3-CE for a long period of time place it in an enclosed storage container. Store in an area that is protected from dirt, moisture, and electrostatic contact.
-
Page 36: Pcmcia Radio Card
MX3-CE unit. If you anticipate keeping the radio card out of the MX3-CE for a long period of time place it in an enclosed storage container. Store in an area that is protected from dirt, moisture, and electrostatic contact. -
Page 37: Data Entry
The keypad is used to manually input data that is not collected otherwise. Almost any function that a full sized computer keyboard can provide is duplicated on the MX3-CE keypad but it may take a few more keystrokes to accomplish a keyed task. -
Page 38: Scanner Entry
LED turns red when the laser beam is on. Following a good read, the LED turns green, indicating a successful scan. Beeps may be heard after a good read, depending on the application running on the MX3-CE. The laser and SCNR LED automatically turn off after a successful or unsuccessful read. The scanner is ready to scan again when the Scan key is pressed. -
Page 39: Power Modes
Power Modes 1-25 Power Modes Figure 1-22 Power Modes – On, Suspend, Critical Suspend and Off E-EQ-MX3CERG-A-ARC MX3-CE Reference Guide... -
Page 40: On Mode
Main Battery is hot-swapped, the display is turned Off then transitions to On The MX3-CE After a new MX3-CE has been received, a charged Main Battery inserted, and the Power button tapped, the MX3-CE is always On until both batteries are drained completely of power. -
Page 41: Suspend Mode
The Suspend mode is entered when the unit is inactive for a predetermined period of time or the operator taps the Power button. MX3-CE Suspend timers are set using Start / Settings / Control Panel / Power Properties / Power Off. -
Page 42: Critical Suspend Mode
CPU clock is stopped, and power is removed from the PCMCIA card. When the MX3-CE is in the Critical Suspend state (the Main Battery is in place and the unit is being powered by the Backup Battery), the display turns off, the BATT M LED begins to flash red, all peripherals are shut down, the CPU clock is stopped, and power is removed from the PCMCIA card. -
Page 43: Contacting Lxe
LXE website. Contact your LXE representative to obtain the LXE Manuals CD (Product No. 9000A426LXEMANUALS). You can also get help from LXE by calling the telephone numbers listed on the LXE Manuals CD, in the file titled "Contacting LXE". This information is also available on the LXE website www.lxe.com. - Page 44 Power Adapter, Bare Wire 12 VDC 1300A053CBL12ML3 Power Adapter, 24-72 VDC, 20 Watts 1300A301PS24WW Power Adapter, 110-240 VAC 1300A303PSACWW Cables for Cradle and MX3-CE Serial Ports Cable, PC, DA-9F to DA-9F, 6 ft. 9000A054CBL6D9D9 USB Slave to DA-9 Interface Cable 9000A067CBL52USB Power Adapter Required.
-
Page 45: Chapter 2 Physical Description And Layout
Shft Key Function......................... 2-9 Spc Key Function........................2-9 Mode Key Functions......................2-9 Caps Key and CapsLock Mode ..................2-9 Keypress Sequences......................2-9 LED Functions........................2-10 Display ........................2-11 Display and Display Backlight Timer................. 2-11 Touchscreen ........................2-12 E-EQ-MX3CERG-A-ARC MX3-CE Reference Guide... - Page 46 Figure 2-6 Left and Right Scan Button Programming..................2-7 Figure 2-7 The QWERTY Keypad ........................2-8 Figure 2-8 Function LEDs..........................2-10 Figure 2-9 MX3-CE Display...........................2-11 Figure 2-10 Speaker Location .........................2-12 Figure 2-11 Infrared Port - COM2 Port ......................2-13 Figure 2-12 Desktop Cradle ..........................2-14 Figure 2-13 Vehicle Mounted Cradle......................2-14...
-
Page 47: Hardware Configuration
One Digitizer Input port (Touch screen). • Two serial ports in four configurations (see Chapter 1 "Introduction" section titled "Endcaps."). Note: As the MX3-CE does not have PC Card Management software installed, LXE recommends purchasing pre-formatted cards. E-EQ-MX3CERG-A-ARC MX3-CE Reference Guide... -
Page 48: System Memory
Flash populated. The Flash is configured as the primary boot device and contains the Windows CE image, boot loader, OAL, applications, utilities and device drivers. The computer has one Type II CFh+ slot. The MX3-CE supports and auto detects up to 256MB of Type I compact flash memory. -
Page 49: Audio Interface
Type III cards only. Slot 0 accepts PCMCIA 2.4GHz radio cards or SRAM/Flash memory cards. Slot 1 The MX3-CE has one internal compact Flash card port that supports Type I and II CF+ cards. The slot is accessible when the endcap has been removed. -
Page 50: Physical Controls
MX3-CE. The power button is located above the ESC key on the keypad. When a battery is inserted in the MX3-CE for the first time, the unit automatically powers on -- the Power button does not need to be pressed. -
Page 51: Endcaps
DC Power Jack Audio Jack The default COM 2 port is always the IR port on the back of the MX3-CE, regardless of the type of endcap installed on the unit. On the Standard Range Scanner / Serial Port endcap COM 3 is the Integrated Scanner port. -
Page 52: Figure 2-3 Rs-232 Pinouts
Tethered scanners read barcode scans only when the trigger on the tethered scanner is pressed. To set the MX3-CE to use a tethered scanner, select Start / Settings / Control Panel / Scanner. Upon selecting "External Scanner", +5V power is automatically assigned to the port with the tethered scanner connection. -
Page 53: Scan Buttons
Green - good scan. • Unlit - scanner is inactive. The MX3-CE Scan buttons have no effect on tethered barcode scanners (connected to a serial port). Tethered scanners read barcode scans only when the trigger on the tethered scanner is pressed. -
Page 54: Keypad
Touch Screen and Keypad Shortcuts Use keyboard shortcuts instead of the stylus when the MX3-CE is running WinCE. Press Tab and an Arrow key to select a file. Press Shift and an Arrow key to select several files. Once you've selected a file, press Alt-Enter to open its Properties dialog. -
Page 55: Ctrl Key Function
Caps key sequence first. To cancel a CapsLock function press the Caps key sequence again. When the CapsLock mode is active, the Caps LED illuminates. The CapsLock key sequence is 2 + F1. Keypress Sequences See Appendix A for key maps for all keypads. E-EQ-MX3CERG-A-ARC MX3-CE Reference Guide... -
Page 56: Led Functions
Steady Red – low battery. • Blinking Red – power fail. CHGR Charger. When on, the MX3-CE is receiving external power either from the DC power jack or the MX3-CE is seated in a powered cradle. • Red - Main Battery is charging. -
Page 57: Display
Display Figure 2-9 MX3-CE Display The MX3-CE display is a transflective monochrome VGA LCD unit capable of supporting gray scales. The display window is 640 pixels (horizontal) x 240 pixels (vertical). The choice between font sizes is made in the Control Panel option "Display / Appearance". Font size selection may be overridden by a user supplied application. -
Page 58: Touchscreen
Figure 2-10 Speaker Location The MX3-CE Speaker has a loudness of at least 90 dB at 10 cm measured from the front of the unit. The Speaker volume is adjustable via the keypad or the Control Panel or by an application through the use of an API call. -
Page 59: Infrared (Ir) Port
The MX3-CE uses IrDA protocol to send data in both directions, but not simultaneously. When sending data through the IR port, make sure the IR port on the first MX3-CE and the IR port on the second MX3-CE are in close proximity to each other. IrDA is not required and not used by terminal emulation programs. -
Page 60: Storage Cradles
Storage Cradles Storage Cradles There are two types of cradles for LXE's LXtrEme MX3-CE mobile computer: a desk top cradle for tabletop charging / communication applications and a vehicle mount cradle for vehicle mounted charging / communication applications. See the "LXtrEme MX3 Cradle Reference Guide."... - Page 61 Low Battery Warning ..................... 3-3 Critical Suspend State................... 3-3 Backup Battery....................... 3-3 Maintenance.......................... 3-3 Battery Charger ...................... 3-4 Illustrations Figure 3-1 Main Battery Pack ...........................3-1 Figure 3-2 LXE Multi-Charger .........................3-4 Figure 3-3 Insert Main Battery in Charger ......................3-4 E-EQ-MX3CERG-A-ARC MX3-CE Reference Guide...
- Page 62 3-ii Table of Contents MX3-CE Reference Guide E-EQ-MX3CERG-A-ARC...
-
Page 63: Chapter 3 Power Supply
Backup Battery inside the MX3-CE that is recharged only by the Main Battery Pack. The MX3-CE maintains the date and time for a minimum of four days using a Main Battery that has reached the Low Warning point and a fully charged Backup Battery. The MX3-CE retains data, during a Main Battery hot swap, for at least 5 minutes. -
Page 64: Battery Maintenance Publication
The main battery pack has a rugged plastic enclosure that is designed to withstand the ordinary rigors of an industrial environment. Exercise care when transporting the battery pack making sure it does not come in contact with excessive heat or any power source other than the LXE Multi- Charger or the MX3-CE unit. -
Page 65: Low Battery Warning
Suspend state. To resume operation tap the Power key. If the Off Timer expires the MX3-CE will turn itself off and all unsaved information is lost. Insert a fully charged main battery and press the Power button to turn the MX3-CE back on. -
Page 66: Battery Charger
When the backup battery is fully discharged, the MX3-CE will automatically stop the discharge process and begin to recharge the backup battery. DO NOT REMOVE THE MAIN BATTERY PACK from the MX3-CE until the backup battery is completely discharged -- in approximately 1 hour and recharged in approximately 2.5 hours. - Page 67 Device Name ........................4-9 PC Connection........................4-9 Date/Time ........................... 4-10 Dialing ..........................4-11 Display..........................4-12 Background ........................4-12 Appearance........................4-12 Backlight .......................... 4-12 Blanking ........................... 4-13 Input Panel .......................... 4-13 Keyboard..........................4-14 Mouse ..........................4-14 Network ..........................4-15 E-EQ-MX3CERG-A-ARC MX3-CE Reference Guide...
- Page 68 Volume ..........................4-24 Sounds ..........................4-24 Wireless – Lucent Radio Only.................... 4-25 Default Profile for Access Points – Lucent Radio............4-26 Backup MX3-CE Files ..................4-27 Prerequisites........................4-27 Serial Port Transfer ......................4-27 USB Port Transfer ......................4-27 Configure the MX3-CE ...................... 4-28 Serial Connection ......................
- Page 69 PEVENT.CPL ........................4-34 PREGEDIT.EXE......................4-34 REGDUMP.EXE......................4-34 SCRIBBLE.EXE ......................4-34 TEMPTEST.EXE......................4-35 UTILITY.EXE........................4-35 WARMBOOT.EXE ......................4-35 WAVPLAY.EXE ......................4-35 MX3-CE Command-line Utilities..................4-35 COLDBOOT.EXE......................4-35 FTP.EXE .......................... 4-35 PING.EXE........................4-35 RADIOTEST.EXE ......................4-35 SLEEP.EXE ........................4-36 TIMEST.EXE........................4-36 VER.EXE ......................... 4-36 WHOAMI.EXE........................
- Page 70 Figure 4-22 Basic Tab Display.........................4-26 Figure 4-23 Encryption Tab Display.......................4-26 Figure 4-24 Advanced Tab Display .........................4-26 Figure 4-25 Admin Tab Display ........................4-26 Figure 4-26 Pinout – Serial Cable for Synchronization...................4-33 Figure 4-27 USB / Serial Pinout ........................4-33 MX3-CE Reference Guide E-EQ-MX3CERG-A-ARC...
-
Page 71: Chapter 4 System Configuration
This section lists the contents of the subdirectories and the general function of the files. Files installed in each MX3-CE are specific to the intended function of the MX3-CE – a MX3-CE with a standard Windows CE 3.0 load will have a different file structure than that of an MX3-CE being used by Windows CE software developers. -
Page 72: Software Load
Radio Drivers • Only one radio is installed in the MX3-CE at any one time. All 2.4GHz PC radio card drivers are installed on the MX3-CE. The 2.4GHz type of PC radio card resident on the MX3-CE determines the type of radio driver running on the MX3-... -
Page 73: Desktop
For general use instruction, please refer to commercially available WinCE user's guides or the WinCE on-line Help application installed with the MX3-CE. The MX3-CE Desktop appearance is similar to that of a desktop PC running Windows 95, 98, NT or 2000. -
Page 74: Start Menu Program Options
This program is similar to the Microsoft Windows program REGEDIT. LXE cautions the user to edit parameters in the Registry with care, making sure a backup copy is first saved before any changes are made. Contact LXE Customer Support before making changes to the Pocket Registry parameters. -
Page 75: Communications
Terminal This option requires a radio card. Use this option to connect the MX3-CE to an online service or intranet that requires TTY or VT-100 terminal emulation. Use this option only when communicating with services that require terminal emulation. -
Page 76: Command Prompt
MX3-CE. Microsoft Word templates (.DOT files) are converted to PocketWord templates (.PWT). Click the "?" button to access PocketWord Help. When ActiveSync transfers .pwd files to the desktop from the MX3-CE, the file is converted to .doc files by ActiveSync. Inbox This option requires a connection to a mail server. -
Page 77: Taskbar
There are a few changes in the WinCE version of Taskbar as it relates to the general desktop PC Windows Taskbar options. Figure 4-2 Taskbar Properties Select the Start Menu tab and tap the Clear button to remove the contents of the Document folder. E-EQ-MX3CERG-A-ARC MX3-CE Reference Guide... -
Page 78: Control Panel Options
Set network driver properties and network access properties. Owner Set MX3-CE owner details. Password Set MX3-CE access password properties. Enable or disable the hardware event(s) that can wake the MX3-CE Primary Events from suspend mode. Set Power Off, Backlight, Blanking properties. Review battery status Power and perform backup battery charging/discharging. -
Page 79: Communication
Adjust the settings and click the OK box to save the changes. The changes take effect immediately. PC Connection Please refer to the "Backup MX3-CE Files" section later in this chapter for parameter setting recommendations. Figure 4-4 Communication / PC Connection Tab... -
Page 80: Date/Time
Figure 4-5 Date/Time Properties There is no change from general desktop PC Date/Time Properties options. Adjust the settings and click the OK box or the Apply button to save the changes. The changes take effect immediately. MX3-CE Reference Guide E-EQ-MX3CERG-A-ARC... -
Page 81: Dialing
Disable Dialing Patterns Blank Note: Dialing requires an external modem connection. Modems are not available from LXE nor supported by LXE. Figure 4-6 Dialing Properties There is no change from general desktop PC Dialing Properties options. Adjust the settings and click the OK box to save the changes. -
Page 82: Display
OK box to save the changes. The changes take effect immediately. Backlight Figure 4-7 Display Properties / Backlight Tab Adjust the settings and click the OK box to save the changes. The changes take effect immediately. This option is also available in Power. MX3-CE Reference Guide E-EQ-MX3CERG-A-ARC... -
Page 83: Input Panel
OK box to save the changes. There is no change from general desktop PC (with touch panel) Input Panel Properties options. Adjust the settings and click the OK box to save the changes. The changes take effect immediately. E-EQ-MX3CERG-A-ARC MX3-CE Reference Guide... -
Page 84: Keyboard
Access: Start / Settings / Control Panel / Mouse Icon There is no change from general desktop PC Mouse / Double Click option. Follow the instructions on the screen and click the OK box to save the changes. The changes take effect immediately. MX3-CE Reference Guide E-EQ-MX3CERG-A-ARC... -
Page 85: Network
After changing radio card adapter parameters, and when prompted, the radio card must be removed from the MX3-CE slot, pause for three seconds and reinsert the radio card in the MX3-CE. The new radio parameters will then be in effect. -
Page 86: Owner
There is no change from general desktop PC Password Properties options. Enter the password, then type it again to confirm it and click the OK box to save the changes. The password is immediately in effect. MX3-CE Reference Guide E-EQ-MX3CERG-A-ARC... -
Page 87: Power
OK box to save the changes. The changes take effect immediately. Backlight These options are the same as those accessible through Display Properties. Adjust the settings and click the OK box to save the changes. The changes take effect immediately. E-EQ-MX3CERG-A-ARC MX3-CE Reference Guide... -
Page 88: Primary Events
This option presents the Voltage and Status of the Main and Backup batteries. The option to charge and discharge the backup battery is available on this Power Properties / Charge tab. Once the backup battery is completely discharged, the MX3-CE automatically begins the Recharge process. -
Page 89: Regional Settings
OK box to save the changes. The changes take effect immediately. Factory Default Settings Regional Setting English (United States) Number 999,999,999.00 pos / -999,999,999.99 neg Currency $999,999,999.99 pos / ($999,999,999.99) neg Time h:mm:ss tt (tt=AM or PM) Date M/d/yy short / dddd,MMMM,dd,yyyy long E-EQ-MX3CERG-A-ARC MX3-CE Reference Guide... -
Page 90: Scanner
Adjust the settings and click the OK box to save the changes. The changes take effect immediately. Upon selecting "External Scanner", +5V power is automatically assigned to the COM port. The Scan buttons have no effect on tethered external scanners connected to a serial port. MX3-CE Reference Guide E-EQ-MX3CERG-A-ARC... -
Page 91: Com Ports
Adjust the settings and click the OK box to save the changes. The changes take effect immediately. The COM 1 display contains the same parameters as the COM 2 and COM 3 Tab. Adjust the settings and click the OK box to save the changes. The changes take effect immediately. E-EQ-MX3CERG-A-ARC MX3-CE Reference Guide... -
Page 92: Stylus
There is no change from general desktop PC Mouse / Double Tap Properties display. Follow the instructions on the screen and click the OK box to save the changes. The changes take effect immediately. Calibration Figure 4-16 Stylus Properties / Recalibration Start Figure 4-17 Stylus Properties / Recalibration MX3-CE Reference Guide E-EQ-MX3CERG-A-ARC... -
Page 93: System
Figure 4-19 System Properties / Memory Tab There is no change from general desktop PC System Properties / Memory options. Adjust the settings and click the OK box to save the changes. The changes take effect immediately. E-EQ-MX3CERG-A-ARC MX3-CE Reference Guide... -
Page 94: Volume And Sound
Figure 4-20 Volume and Sounds Properties / Volume Tab Sounds There is no change from general desktop PC Volume and Sound Properties / Sounds options. Adjust the settings and click the OK box to save the changes. The changes take effect immediately. MX3-CE Reference Guide E-EQ-MX3CERG-A-ARC... -
Page 95: Figure 4-21 Add/Edit Configuration Profile
Select the Profile, adjust the settings on the following screens and click the OK box to save the changes. Please refer to Chapter 5 "RF Network Configuration" for information relating to specific parameters for the Lucent or Proxim radio card in the MX3-CE. E-EQ-MX3CERG-A-ARC MX3-CE Reference Guide... -
Page 96: Figure 4-22 Basic Tab Display
4-26 Control Panel Options Default Profile for Access Points – Lucent Radio Figure 4-22 Basic Tab Display Figure 4-23 Encryption Tab Display Figure 4-24 Advanced Tab Figure 4-25 Admin Tab Display Display MX3-CE Reference Guide E-EQ-MX3CERG-A-ARC... -
Page 97: Backup Mx3-Ce Files
Backup MX3-CE Files 4-27 Backup MX3-CE Files Use the following to backup data files from the MX3-CE to a desktop or laptop PC using the appropriate cables and Microsoft's ActiveSync (NOT included in LXE file load). Prerequisites Serial Port Transfer •... -
Page 98: Configure The Mx3-Ce
Serial 1 @ 57600 This will set up the MX3-CE to use COM 1. If the MX3-CE has a dual-serial port endcap, the Serial 3 @ 57600 can also be selected. Click OK and ensure the check box for "Allow connection with desktop computer when device is attached"... -
Page 99: Connect
From the ActiveSync dialog, click on the Explore button, which allows you to explore the MX3- CE from the PC side, with some limitations. You can copy files to or from the MX3-CE by drag- and-drop. You will not be allowed to delete files or copy files out of the \Windows directory on the MX3-CE. -
Page 100: Disconnect
Click the status bar icon in the lower right hand corner of the status bar. Then click the Disconnect button. USB Connection • Disconnect the USB cable from the MX3-CE. It is necessary to wait 15-30 seconds before reconnecting the cable, so that the computer will timeout and disconnect. It will beep when this happens. IRDA Connection •... -
Page 101: Troubleshooting
15-30 seconds have expired. Reconnect. The LXE-supplied version of ActiveSync will identify the device during the initial setup detection (New Hardware Found) as “LXE MX3-CE”, but other versions of ActiveSync will only identify it as a Microsoft ActiveSync device. -
Page 102: Create A Communication Option
4-32 Backup MX3-CE Files Create a Communication Option On the MX3-CE, select Start / Programs / Communication / Remote Networking. A window is displayed showing the existing connections. Assuming the one you want does not exist, double-click Make New Connection. -
Page 103: Figure 4-27 Usb / Serial Pinout
Backup MX3-CE Files 4-33 Technical Specifications – Connection Cable The exact serial cable is crucial. Many commercial null modem cables will not work. LXE recommends the following cables: Serial cable: 9000A054CBL6D9D9 Pinout: DB9 female DB9 female no connection Figure 4-26 Pinout – Serial Cable for Synchronization... -
Page 104: Mx3-Ce Utilities
4-34 MX3-CE Utilities MX3-CE Utilities The following files are pre-loaded by LXE. Not all of these utilities may be present on your unit. Graphic Utilities ABOUT.CPL Control panel which gives all available version information for system. If driver information and software version numbers are updated in the registry, these are also displayed. -
Page 105: Mx3-Ce Command-Line Utilities
WinSock connection to a desktop PC for logging. There are workarounds in this utility to be sure the backlight and display power up and blank according to the LXE power management standard. The desktop utility Socket Monitor.exe must be running on the host to receive the results of this testing. -
Page 106: Sleep.exe
If not connected to the network, it will display the loopback IP (127.0.0.1). If connected via ActiveSync, it will display the ActiveSync IP (192.168.55.100). If connected to the network, it will display a valid local IP address. MX3-CE Reference Guide E-EQ-MX3CERG-A-ARC... -
Page 107: Host Pc Command-Line Utilities
Syntax is: pmd dirname. PPUT.EXE Desktop PC RAPI command line utility - copies a file from the host PC to the ActiveSync-attached MX3-CE. Syntax is: pput PCfile MX3file; if MX3file is left off, the same name will be used for both. PRD.EXE Desktop PC RAPI command line utility - removes a directory from the ActiveSync-attached MX3- CE. -
Page 108: Miscellaneous
4-38 MX3-CE Utilities Miscellaneous BOOT.LNK Shortcut to warmboot.exe, placed on desktop for convenience in doing a warm boot. CONNECT.LNK Shortcut to repllog.exe, placed on desktop for convenience in using ActiveSync. LXELOGO.BMP Desktop graphic of LXE logo. MX3-CE Reference Guide E-EQ-MX3CERG-A-ARC... -
Page 109: Hapter 5 Rf Network Configuration
Configuration ........................5-3 Network Domain ........................ 5-3 Set Security ID ........................5-3 Site Survey Tools........................5-3 Master Search ........................5-3 Advanced ..........................5-4 Inactivity Seconds ......................5-4 Inactivity Minutes....................... 5-4 Roam Config ........................5-4 About ............................ 5-4 E-EQ-MX3CERG-A-ARC MX3-CE Reference Guide... - Page 110 5-ii Table of Contents MX3-CE Reference Guide E-EQ-MX3CERG-A-ARC...
-
Page 111: Introduction
Access Points with lower-case names you will need to change your Access Point WaveLAN_Network_Name parameter to UPPERCASE characters for proper operation. Or, place double quotes around the WaveLAN_Network_Name to allow proper operation with upper and lower case letters e.g. "NameofUnit". E-EQ-MX3CERG-A-ARC MX3-CE Reference Guide... -
Page 112: Mac Address
Used when troubleshooting slow performance of the wireless network that could be related to in- band interference. Valid: On, Off Default: Card Power Management Configures whether the WaveLAN radio card will perform power management. Valid: On, Off Default: MX3-CE Reference Guide E-EQ-MX3CERG-A-ARC... -
Page 113: Enable Encryption
Using the options on the list screen, link quality testing can be performed. Select a master and click the Directed Link button. Select Done to exit Master Search tool. E-EQ-MX3CERG-A-ARC MX3-CE Reference Guide... -
Page 114: Advanced
0. Valid: 0 through 20 minutes Default: Roam Config Sets the roaming speed. Valid: Slow, Normal or Fast Default: Normal About Displays radio card software version number, ROM version and contact information for Proxim Inc. MX3-CE Reference Guide E-EQ-MX3CERG-A-ARC... -
Page 115: Hapter 6 Se923 Scanner
Code 39 ............................6-10 Code 93 ............................6-11 Discrete 2 of 5..........................6-11 EAN-13 ............................6-11 EAN-8 ............................6-12 Interleaved 2 of 5 ........................6-12 ISBT 128.............................6-12 MSI Plessey ..........................6-13 UCC/EAN-128..........................6-13 UPC-A............................6-13 UPC-E ............................6-14 UPC-E1 ............................6-14 Scanner Parameters .................... 6-15 Bi-Directional Redundancy ....................6-15 E-EQ-MX3CERG-A-ARC MX3-CE Reference Guide... - Page 116 Transmit AIM Code ID Character ....................6-37 Discrete 2 of 5........................6-39 Set Lengths for Discrete 2 of 5..................6-39 One Discrete Length (Parameter L1)..................6-40 Two Discrete Lengths (Parameter L2) ..................6-40 Length Within Range........................6-41 Any Length ..........................6-41 MX3-CE Reference Guide E-EQ-MX3CERG-A-ARC...
- Page 117 Transmit UPC-A Check Digit.....................6-65 Transmit UPC-E Check Digit .....................6-65 Transmit UPC-E1 Check Digit ....................6-66 Conversions ........................6-67 Convert UPC-E to UPC-A ......................6-67 Convert UPC-E1 to UPC-A ......................6-67 Convert EAN-8 to EAN-13 Type ....................6-68 Preambles ......................... 6-69 UPC-A Preamble ........................6-69 E-EQ-MX3CERG-A-ARC MX3-CE Reference Guide...
- Page 118 Host Character Time-out ....................6-81 Host Serial Response Time-out..................6-82 Intercharacter Delay......................6-82 Parity ..........................6-83 Software Handshaking ..................... 6-84 Disable ACK/NAK Handshaking....................6-84 Enable ACK/NAK Handshaking ....................6-84 Stop Bit Select ........................6-85 ASCII Character Equivalents................6-86 Keypad Number Symbols..................6-90 MX3-CE Reference Guide E-EQ-MX3CERG-A-ARC...
-
Page 119: Introduction
Read all cautions, warnings and labels before using the scanner endcaps. The MX3-CE Barcode Scanner is used to collect barcoded data from any nearby compatible barcode label. The directions in this chapter are directed toward the LXE scanner model SE-923 parameter setup. -
Page 120: Factors That May Impact Scanner Performance
Code 39. The use of Code 128 or other more complex symbologies will almost always result in a reduction in maximum read distance. LXE will not support scanner maximum distances when symbologies other than Code 39 are used. -
Page 121: Scan Indicator
Aim the Scanner aperture toward the barcode. Press the Scan button. Align the red beam so that the barcode is centered within the beam. The laser beam must cross the entire barcode. Move the MX3-CE towards or away from the barcode so that the barcode takes up approximately two-thirds the width of the beam. -
Page 122: Pre-Configured Default Values
Suffix 1 Suffix 2 Transmit Code ID Character None Discrete 2 of 5 Discrete 2 of 5 Disable Set Length(s) for D 2 of 5 Event Reporting Boot Up Event Disable Decode Event Disable Parameter Event Disable MX3-CE Reference Guide E-EQ-MX3CERG-A-ARC... - Page 123 EAN-8 Zero Extend Disable Transmit UPC-A Check Digit Enable Transmit UPC-E Check Digit Enable Transmit UPC-E1 Check Digit Enable UPC/EAN Coupon Code Disable UPC/EAN Security Level UPC-A Enable UPC-A Preamble System Character UPC-E Enable UPC-E Preamble System Character E-EQ-MX3CERG-A-ARC MX3-CE Reference Guide...
-
Page 124: Pre-Configured Default Values
System Character Scan Angle Normal Width Serial Interface Baud Rate 9600 Decode Data Packet Format Unpacketed Host Character Timeout 200 msec Host Serial Response Timeout 2 sec Intercharacter Delay Parity None Software Handshaking Enable Stop Bit MX3-CE Reference Guide E-EQ-MX3CERG-A-ARC... -
Page 125: Decode Zone
When the SCNR LED turns green, the parameter has been decoded. Note: Whether there are beeps in conjunction with scan and decode functions is dependent on the application currently running in the MX3-CE. Note: Decrease decode time by disabling unused barcode types. (See “Configure the Decoder for Barcode Types”.) The scanning system can store several different barcode... -
Page 126: Frequently Used Barcodes
Cancel barcode to correct parameter barcode scanning errors. Cancel will undo one previous scan. Note: Cancel will not undo a Set Default scan. Set All Defaults Cancel See “Pre-Configured Default Values” in the “Quick Start” section for an alphabetical listing of all default values. MX3-CE Reference Guide E-EQ-MX3CERG-A-ARC... -
Page 127: Configure The Decoder For Barcode Types
UPC/EAN parameters -- such as UPC-A Preamble, UPC/EAN Security Level, etc. Note: Increase decode time by disabling unused barcode types Bookland EAN Enable Bookland EAN Disable Bookland EAN Codabar Enable Codabar Disable Codabar E-EQ-MX3CERG-A-ARC MX3-CE Reference Guide... -
Page 128: Code 128 - Uss-128
6-10 System Setup Code 128 - USS-128 Enable USS-128 Disable USS-128 Code 39 Enable Code 39 Disable Code 39 Enable Code 39 Full AS Disable Code 39 Full AS MX3-CE Reference Guide E-EQ-MX3CERG-A-ARC... -
Page 129: Code 93
System Setup 6-11 Code 93 Enable Code 93 Disable Code 93 Discrete 2 of 5 Enable Discrete 2 of 5 Disable Discrete 2 of 5 EAN-13 Enable EAN-13 Disable EAN-13 E-EQ-MX3CERG-A-ARC MX3-CE Reference Guide... -
Page 130: Interleaved 2 Of 5
6-12 System Setup EAN-8 Enable EAN-8 Disable EAN-8 Interleaved 2 of 5 Enable Interleaved 2 of Disable Interleaved 2 of ISBT 128 Enable ISBT 128 Disable ISBT 128 MX3-CE Reference Guide E-EQ-MX3CERG-A-ARC... -
Page 131: Msi Plessey
System Setup 6-13 MSI Plessey Enable MSI Plessey Disable MSI Plessey UCC/EAN-128 Enable UCC/EAN-128 Disable UCC/EAN-128 UPC-A Enable UPC-A Disable UPC-A E-EQ-MX3CERG-A-ARC MX3-CE Reference Guide... -
Page 132: Upc-E
6-14 System Setup UPC-E Enable UPC-E Disable UPC-E UPC-E1 Enable UPC-E1 Disable UPC-E1 MX3-CE Reference Guide E-EQ-MX3CERG-A-ARC... -
Page 133: Scanner Parameters
The default for Security Level parameter is Level 1. Select an option by scanning either of the barcodes shown below. If you wish to change your selection, scan Cancel. Enable Bi-Directional Re Enable Disable Bi-Directional R Disable Cancel E-EQ-MX3CERG-A-ARC MX3-CE Reference Guide... -
Page 134: Codabar
When enabled, the start and stop characters are stripped from the barcode and a space is inserted after the 1 , and 10 characters of a 14 character Codabar symbol. Set this parameter by scanning either of the barcodes shown below. Enable CLSI Editing Enable Disable CLSI Editing Disable MX3-CE Reference Guide E-EQ-MX3CERG-A-ARC... -
Page 135: Notis Editing
The length of a code refers to the number of characters, including check digits, the code contains. It also includes any start or stop characters. See the table titled “ASCII Character Equivalents” at the end of this chapter. E-EQ-MX3CERG-A-ARC MX3-CE Reference Guide... -
Page 136: One Discrete Length (Parameter L1)
Codabar - Two Discrete Lengths Next, scan four numeric barcodes that correspond to the desired value. Single digit numbers must have a leading zero. If you wish to change your number selection, scan Cancel on the “Keypad Number Symbols” page. MX3-CE Reference Guide E-EQ-MX3CERG-A-ARC... -
Page 137: Length Within Range
Symbols” at the end of this chapter. Single digit numbers must have a leading zero. If you wish to change your number selection, scan Cancel on the “Keypad Number Symbols” page. Any Length This option decodes Codabar barcodes containing any number of characters. To set any length, scan this barcode: Codabar - Any Length E-EQ-MX3CERG-A-ARC MX3-CE Reference Guide... -
Page 138: Code 128
FNC1 character, and replaces other FNC1 characters with the ASCII 29 GS control character. When AIM symbology identifiers are transmitted, the modifier character indicates the position of the leading FNC1 character according to AIM guidelines. For example, ]cl indicates a UCC/EAN- 128 symbol with a leading FNC1 character. MX3-CE Reference Guide E-EQ-MX3CERG-A-ARC... - Page 139 Examples: FNC1 FNC1 ABCD E are read as ABCD FNC1 FNC1 E are read as ABCD FNC1FNC1 FNC1 ABCD E are read as ABCD FNC1 ABCD E is read as ABCD ABCDE is read as ABCDE E-EQ-MX3CERG-A-ARC MX3-CE Reference Guide...
-
Page 140: Lengths For Code 128
Set this parameter by scanning either of the barcodes shown below. Enable ISBT 128 Enable Disable ISBT 128 Disable Lengths for Code 128 No length setting is required for Code 128. The default setting is Any Length. MX3-CE Reference Guide E-EQ-MX3CERG-A-ARC... -
Page 141: Code 39
Only those Code 39 symbols which include a modulo 43 check digit are decoded when this parameter is enabled. Set this parameter by scanning either of the barcodes shown below. Enable Enable Code 39 Check Disable Code 39 Check Disable E-EQ-MX3CERG-A-ARC MX3-CE Reference Guide... -
Page 142: Code 32 Prefix
When parameter “Code 32 Prefix” is to be enabled, this convert code 39 parameter must also be enabled. Set this parameter by scanning either of the barcodes shown below. Convert Code 39 to Cod Enable Do Not Convert Code 39 Disable MX3-CE Reference Guide E-EQ-MX3CERG-A-ARC... -
Page 143: Code 39
See the table titled “ASCII Character Equivalents” at the end of this chapter. Set this parameter by scanning either of the barcodes shown below. Enable Enable Code 39 Full AS Disable Disable Code 39 Full AS E-EQ-MX3CERG-A-ARC MX3-CE Reference Guide... -
Page 144: Set Lengths For Code 39
Code 39 - One Discrete Length Next, scan two numeric barcodes that correspond to the desired value. Single digit numbers must have a leading zero. If you wish to change your number selection, scan Cancel on the “Keypad Number Symbols” page. MX3-CE Reference Guide E-EQ-MX3CERG-A-ARC... -
Page 145: Two Discrete Lengths (Parameter L2)
Code 39 - Length within Range Next, scan numeric barcodes that correspond to the desired value. Single digit numbers must have a leading zero. If you wish to change your number selection, scan Cancel on the “Keypad Number Symbols” page. E-EQ-MX3CERG-A-ARC MX3-CE Reference Guide... -
Page 146: Any Length
When Trioptic Code 39 is enabled, set the “Code 39 Full ASCII” parameter to disabled. Both parameters should not be enabled simultaneously. Set this parameter by scanning either of the barcodes shown below. Enable Trioptic Code 39 Enable Disable Trioptic Code 39 Disable MX3-CE Reference Guide E-EQ-MX3CERG-A-ARC... -
Page 147: Code 93
The length of a code refers to the number of characters, including check digits, the code contains. See the table titled “ASCII Character Equivalents” at the end of this chapter. E-EQ-MX3CERG-A-ARC MX3-CE Reference Guide... -
Page 148: One Discrete Length (Parameter L1)
Code 93 - Two Discrete Length Next, scan four numeric barcodes that correspond to the desired value. Single digit numbers must have a leading zero. If you wish to change your number selection, scan Cancel on the “Keypad Number Symbols” page. MX3-CE Reference Guide E-EQ-MX3CERG-A-ARC... -
Page 149: Length Within Range
If you wish to change your number selection, scan Cancel on the “Keypad Number Symbols” page. Any Length This option decodes Code 93 barcodes containing any number of characters. To set any length, scan this barcode: Code 93 - Any Length E-EQ-MX3CERG-A-ARC MX3-CE Reference Guide... -
Page 150: Data Options
Next, scan four numeric barcodes that correspond to the computer keycode using the “Keypad Number Symbols” at the end of this chapter. If you wish to change your selection, scan Cancel on the “Keypad Number Symbols” page. MX3-CE Reference Guide E-EQ-MX3CERG-A-ARC... - Page 151 Next, scan four numeric barcodes that correspond to the computer keycode using the “Keypad Number Symbols” at the end of this chapter. If you wish to change your numeric selection, scan Cancel on the “Keypad Number Symbols” page. E-EQ-MX3CERG-A-ARC MX3-CE Reference Guide...
-
Page 152: Suffix 1
Set this parameter by scanning one of the following barcodes. Data As Is Data As Is [Data] [Suffix 1] <Data><Suffix 1> <Data><Suffix 2> [Data] [Suffix 2] <Data><Suffix 1><Suffix 2 [Data] [Suffix 1] [Suffix 2] <Prefix><Data> [Prefix] [Data] <Prefix><Data><Suffix 1> [Prefix] [Data] [Suffix 1] MX3-CE Reference Guide E-EQ-MX3CERG-A-ARC... - Page 153 Scanner Parameters 6-35 <Prefix><Data><Suffix 2> [Prefix] [Data] [Suffix 2] <Prefix><Data><Suffix 1>< [Prefix] [Data] [Suffix 1] [Suffix Now you are ready to scan one of the “Prefix/Suffix Values” barcodes. E-EQ-MX3CERG-A-ARC MX3-CE Reference Guide...
-
Page 154: Transmit Code Id Character
UPC-A, UPC-E, UPC-E1, EAN-8, EAN-13 Code 39, Code 32 Codabar Code 128, ISBT 128 Code 93 Interleaved 2 of 5 Discrete 2 of 5 or Discrete 2 of 5 IATA MSI Plessey UCC/EAN-128 Bookland EAN Trioptic Code 39 Coupon Code MX3-CE Reference Guide E-EQ-MX3CERG-A-ARC... -
Page 155: Transmit Aim Code Id Character
Function code 1 in second symbol character position. Example: A Code (EAN) 128 barcode with Function 1 character in the FNC1 first position, Aim Id is transmitted as ]ClAimId I 2 of 5 No check digit processing. Reader has validated check digit. E-EQ-MX3CERG-A-ARC MX3-CE Reference Guide... - Page 156 ]EO (UPC chars) (terminator) ]E2 (supplemental) (terminator) In the SE 1223, however, the format is changed to: ]EO (UPC chars) ]E2 (supplemental) Therefore, a UPC with two supplemental characters, 01234567890510, is transmitted to the host as a 21- character string, ]E00012345678905]E110. MX3-CE Reference Guide E-EQ-MX3CERG-A-ARC...
-
Page 157: Discrete 2 Of 5
The length of a code refers to the number of characters, including check digits, the code contains. See the table titled “ASCII Character Equivalents” at the end of this chapter. E-EQ-MX3CERG-A-ARC MX3-CE Reference Guide... -
Page 158: One Discrete Length (Parameter L1)
D 2 of 5 - Two Discrete Lengths Next, scan four numeric barcodes that correspond to the desired value. Single digit numbers must have a leading zero. If you wish to change your number selection, scan Cancel on the “Keypad Number Symbols” page. MX3-CE Reference Guide E-EQ-MX3CERG-A-ARC... -
Page 159: Length Within Range
This option decodes D 2 of 5 barcodes containing any number of characters. Note: Selecting this option may lead to misdecodes for D 2 of 5 codes. To set any length, scan this barcode: D 2 of 5 - Any Length E-EQ-MX3CERG-A-ARC MX3-CE Reference Guide... -
Page 160: Event Reporting
Scanner Parameters Event Reporting Note: These events have have no effect on the MX3-CE. Event requests from the host are ignored by the MX3-CE OS. The host can request the decoder to furnish certain information (events) relative to the decoder’s behavior. -
Page 161: Bootup Event
When disabled, no notification is sent. Events: Parameter entry error Parameter stored Defaults set (and parameter event is enabled by default) Number expected Set this parameter by scanning one of the following barcodes. Enable Enable Disable Disable E-EQ-MX3CERG-A-ARC MX3-CE Reference Guide... -
Page 162: Interleaved 2 Of 5
When enabled, this parameter checks the integrity of an I 2 of 5 symbol to ensure it complies with a specified algorithm, either USS (Uniform Symbology Specification) or OPCC (Optical Product Code Council). Set this parameter by scanning one of the barcodes shown below. Disable Disable USS Check Digit OPCC Check Digit OPCC MX3-CE Reference Guide E-EQ-MX3CERG-A-ARC... -
Page 163: Convert I 2 Of 5 To Ean-13
When enabled, the parameter converts a 14 character I 2 of 5 barcode into EAN-13 and transmits it to the host as EAN-13. Set this parameter by scanning either of the barcodes shown below. Convert I 2 of 5 to EAN- Enable Do Not Convert I 2 of 5 Disable E-EQ-MX3CERG-A-ARC MX3-CE Reference Guide... -
Page 164: Set Lengths For I 2 Of 5
I 2 of 5 - One Discrete Length Next, scan two numeric barcodes that correspond to the desired value. Single digit numbers must have a leading zero. If you wish to change your number selection, scan Cancel on the “Keypad Number Symbols” page. MX3-CE Reference Guide E-EQ-MX3CERG-A-ARC... -
Page 165: Two Discrete Lengths (Parameter L2)
This option decodes I 2 of 5 barcodes containing any number of characters. Note: Selecting this option may lead to misdecodes for I 2 of 5 codes. To set any length, scan this barcode: I 2 of 5 - Any Length E-EQ-MX3CERG-A-ARC MX3-CE Reference Guide... -
Page 166: Transmit I 2 Of 5 Check Digit
Parameter setting for “I 2 of 5 Check Digit Verification” has no effect on this parameter value. Set this parameter by scanning either of the barcodes shown below. Transmit I 2 of 5 Check Enable Do Not Transmit I 2 of 5 Disable MX3-CE Reference Guide E-EQ-MX3CERG-A-ARC... -
Page 167: Laser On Time
Next, scan two numeric barcodes that correspond to the desired on time using the “Keypad Number Symbols” at the end of this chapter. Times less than 1.0 second must have a leading zero. If you wish to change your number selection, scan Cancel on the “Keypad Number Symbols” page. E-EQ-MX3CERG-A-ARC MX3-CE Reference Guide... -
Page 168: Linear Code Type Security Level
Length of 8 or less I 2 of 5 Length of 8 or less Linear Security Level 1 Level 2 All code types (except Code 128) must be successfully read twice before being decoded. Linear Security Level 2 MX3-CE Reference Guide E-EQ-MX3CERG-A-ARC... -
Page 169: Msi Plessey
All other code types (except Code 128) must be successfully read twice before being decoded. Linear Security Level 3 Level 4 All code types (except Code 128) must be successfully read three times before being decoded. Linear Security Level 4 Cancel E-EQ-MX3CERG-A-ARC MX3-CE Reference Guide... -
Page 170: Msi Plessey
Either of the two following algorithms may be selected. Set this parameter by scanning either of the barcodes shown below. MOD 10/MOD 11 Mod 10/Mod 11 MOD 10/MOD 10 Mod 10/Mod 10 MX3-CE Reference Guide E-EQ-MX3CERG-A-ARC... -
Page 171: Msi Plessey Check Digits
The length of a code refers to the number of characters, including check digits, the code contains. See the table titled “ASCII Character Equivalents” at the end of this chapter. E-EQ-MX3CERG-A-ARC MX3-CE Reference Guide... -
Page 172: One Discrete Length (Parameter L1)
MSI Plessey - Two Discrete Lengths Next, scan four numeric barcodes that correspond to the desired value. Single digit numbers must have a leading zero. If you wish to change your number selection, scan Cancel on the “Keypad Number Symbols” page. MX3-CE Reference Guide E-EQ-MX3CERG-A-ARC... -
Page 173: Length Within Range
Parameter Default Value: Disable When enabled, the check digit is transmitted with the data. Set this parameter by scanning either of the barcodes shown below. Transmit MSI Plessey C Enable Do Not Transmit MSI Pl Disable E-EQ-MX3CERG-A-ARC MX3-CE Reference Guide... -
Page 174: Parameter Scanning
When enabled, scanners can be configured using the barcodes in this chapter. Select a mode by scanning either of the barcodes shown below. Enable Parameter Scan Enable Disable Parameter Scan Disable MX3-CE Reference Guide E-EQ-MX3CERG-A-ARC... -
Page 175: Power Mode
Scanner Parameters 6-57 Power Mode Note: The MX3-CE is designed to be operated in Low Power Mode. LXE recommends leaving this value unchanged. Parameter Default Value: Low Power A parameter setting of Continuous On means the laser scanner will not power down until the MX3- CE enters Suspend. -
Page 176: Set Default Parameter
Important When all parameters are reset to the default values, you must again set the Laser On Time parameter to 1.5 sec to match the default MX3-CE Max On Timer default value of 1.5 sec. Time-out Between Same Symbol Parameter Default Value: 1.0 Second... -
Page 177: Transmit "No Read" Message
When disabled, and a symbol does not decode, nothing is sent to the host. Select an option by scanning either of the barcodes shown below. If you wish to change your selection, scan Cancel. Enable No Read Enable Disable No Read Disable Cancel E-EQ-MX3CERG-A-ARC MX3-CE Reference Guide... -
Page 178: Trigger Mode
6-60 Scanner Parameters Trigger Mode Note: The MX3-CE is designed to be operated in Level Trigger Mode. LXE recommends leaving this value unchanged. Parameter Default Value: Level Use this parameter to determine when the laser is activated and decoding begins, how long the laser remains on and what determines the cessation of the laser scan and decode process. - Page 179 Scanner Parameters 6-61 Host Signal comes from a host command. Any actual SCAN button press will be interpreted by the scanner engine as a Level triggering option. Host Cancel E-EQ-MX3CERG-A-ARC MX3-CE Reference Guide...
-
Page 180: Upc/Ean
Select an option by scanning either of the barcodes shown below. Enable UPC-A Enable Disable UPC-A Disable UPC-E Parameter Default Value: Enable Select an option by scanning either of the barcodes shown below. Enable UPC-E Enable Disable UPC-E Disable MX3-CE Reference Guide E-EQ-MX3CERG-A-ARC... - Page 181 Select an option by scanning either of the barcodes shown below. Enable UPC-E1 Enable Disable UPC-E1 Disable EAN-8 Parameter Default Value: Enable Select an option by scanning either of the barcodes shown below. Enable EAN-8 Enable Disable EAN-8 Disable E-EQ-MX3CERG-A-ARC MX3-CE Reference Guide...
-
Page 182: Bookland Ean
Select an option by scanning either of the barcodes shown below. Enable EAN-13 Enable Disable EAN-13 Disable Bookland EAN Parameter Default Value: Disable Select an option by scanning either of the barcodes shown below. Enable Bookland EAN Enable Disable Bookland EAN Disable MX3-CE Reference Guide E-EQ-MX3CERG-A-ARC... -
Page 183: Check Digits
This parameter determines whether the symbol will be transmitted with or without the UPC-E check digit. Select an option by scanning either of the barcodes shown below. Enable Transmit UPC-E Check Do Not Transmit UPC-E Disable E-EQ-MX3CERG-A-ARC MX3-CE Reference Guide... -
Page 184: Transmit Upc-E1 Check Digit
This parameter determines whether the symbol will be transmitted with or without the UPC-E1 check digit. Select an option by scanning either of the barcodes shown below. Transmit UPC-E1 Chec Enable Do Not Transmit UPC-E Disable MX3-CE Reference Guide E-EQ-MX3CERG-A-ARC... -
Page 185: Conversions
A programming selections (e.g. Preamble, Check Digit, etc.). When disabled, UPC-E1 (zero suppressed) decoded data is transmitted without conversion. Select an option by scanning either of the barcodes shown below. Convert UPC-E1 to UPC Enable Do Not Convert UPC-E1 Disable E-EQ-MX3CERG-A-ARC MX3-CE Reference Guide... -
Page 186: Convert Ean-8 To Ean-13 Type
EAN-13 barcode or an EAN-8 barcode. When “EAN-8 Zero Extend” is disabled, this parameter’s conversion setting is ignored. Select an option by scanning either of the barcodes shown below. EAN-13 Type Is EAN-13 EAN-8 Type Is EAN-8 MX3-CE Reference Guide E-EQ-MX3CERG-A-ARC... -
Page 187: Preambles
System Character and Country Code [country code] [schar] [data] Select an option by scanning one of the barcodes shown below. No Preamble No Preamble System Character System Character System Character & Co System Character and Country Code (“0” for USA) E-EQ-MX3CERG-A-ARC MX3-CE Reference Guide... -
Page 188: Upc-E Preamble
System Character and Country Code [country code] [schar] [data] Select an option by scanning one of the barcodes shown below. No Preamble No Preamble System Character System Character System Character & Co System Character and Country Code (“0” for USA) MX3-CE Reference Guide E-EQ-MX3CERG-A-ARC... -
Page 189: Upc-E1 Preamble
System Character and Country Code [country code] [schar] [data] Select an option by scanning one of the barcodes shown below. No Preamble No Preamble System Character System Character System Character & Co System Character and Country Code (“0” for USA) E-EQ-MX3CERG-A-ARC MX3-CE Reference Guide... -
Page 190: Supplementals
Ignore UPC/EAN with Supple Autodiscriminate When this option is selected you must assign a UPC/EAN value to the “Decode UPC/EAN Supplemental Supplementals Redundancy” parameter. A value of 5 or more is recommended. Autodiscriminate UPC/EAN w MX3-CE Reference Guide E-EQ-MX3CERG-A-ARC... -
Page 191: Decode Upc/Ean Supplemental Redundancy
Next, scan two numeric barcodes that correspond to the desired value using the “Keypad Number Symbols” at the end of this chapter. Single digit numbers must have a leading zero. If you wish to change your selection, scan Cancel on the “Keypad Number Symbols” page. E-EQ-MX3CERG-A-ARC MX3-CE Reference Guide... -
Page 192: Ean-8 Zero Extend
When disabled, EAN-8 symbols are transmitted as is and parameter “Convert EAN-8 to EAN-13 Type” setting is ignored. Select an option by scanning either of the barcodes shown below. Enable EAN Zero Exten Enable Disable EAN Zero Exten Disable MX3-CE Reference Guide E-EQ-MX3CERG-A-ARC... -
Page 193: Upc/Ean Security Level
1, 2, 7 and 8. UPC/EAN Security Leve Level 2 Select this security level upon experiencing Mis-decodes not 1,2,7,8 mis-decodes of poorly printed barcodes and the mis-decodes are not limited to characters 1,2,7 and 8. UPC/EAN Security Leve E-EQ-MX3CERG-A-ARC MX3-CE Reference Guide... - Page 194 This level significantly impairs the decoding ability of the scanner. If this level of security is necessary, you should try to improve the quality of your barcodes. UPC/EAN Security Leve Cancel MX3-CE Reference Guide E-EQ-MX3CERG-A-ARC...
-
Page 195: Upc/Ean Coupon Code
Supplementals” parameter is enabled, the following barcodes are decoded: • UPC-A • UPC-A with 2 supplemental characters • UPC-A with 5 supplemental characters • UPC-A/EAN128 Select an option by scanning either of the barcodes shown below. Enable Enable UPC/EAN Coup Disable Disable UPC/EAN Coup E-EQ-MX3CERG-A-ARC MX3-CE Reference Guide... -
Page 196: Scan Angle (Laser Clipping)
Choose one of the options below to adjust the visible scan width for the scan beam. Select an option by scanning either of the barcodes shown below. No Clipping Scan Angle No Clipping Scan Angle Min Clipping Minimum Clipping Scan Angle Med Clipping Medium Clipping Scan Angle Max Clipping Maximum Clipping MX3-CE Reference Guide E-EQ-MX3CERG-A-ARC... -
Page 197: Serial Interface
Stop Bit Select Parameter Note: LXE recommends keeping the Baud Rate Parameter at 9600 bps at all times for the MX3-CE. If the baud rate is changed, be sure to change the baud rate in the Control Panel option "Scanner". Baud Rate... - Page 198 6-80 Scanner Parameters Baud Rate 2400 2400 bps Baud Rate 4800 4800 bps Baud Rate 9600 9600 bps Baud Rate 19200 19,200 bps MX3-CE Reference Guide E-EQ-MX3CERG-A-ARC...
-
Page 199: Decode Data Packet Format
300 msec is selected by scanning the “3” and the “0” numeric barcodes. A value of 30 msec is selected by scanning the “0” and the “3” barcodes. If you wish to change your selection, scan Cancel on the “Keypad Number Symbols” page. E-EQ-MX3CERG-A-ARC MX3-CE Reference Guide... -
Page 200: Host Serial Response Time-Out
25 msec is selected by scanning the “2” and the “5” numeric barcodes. A value of 6 msec is selected by scanning the “0” and the “6” barcodes. If you wish to change your selection, scan Cancel on the “Keypad Number Symbols” page. MX3-CE Reference Guide E-EQ-MX3CERG-A-ARC... -
Page 201: Parity
1 bits is contained in the coded character. Mark Mark Parity The parity bit is always 1. Space Space Parity The parity bit is always 0. None None No parity is required. E-EQ-MX3CERG-A-ARC MX3-CE Reference Guide... -
Page 202: Software Handshaking
The scanner waits up to the programmable Host Serial Response Time-out to receive an ACK or NAK. If the scanner does not get a response in this time, it resends its data up to two times before discarding the data and declaring a transmit error. Enable ACK/NAK MX3-CE Reference Guide E-EQ-MX3CERG-A-ARC... -
Page 203: Stop Bit Select
Set the number of stop bits to match host device requirements. Set this parameter by scanning one of the following barcodes. 1 Stop Bit One Stop Bit 2 Stop Bits Two Stop Bits E-EQ-MX3CERG-A-ARC MX3-CE Reference Guide... -
Page 204: Ascii Character Equivalents
1020 CTRL T 1021 CTRL U 1022 CTRL V 1023 CTRL W 1024 CTRL X 1025 CTRL Y 1026 CTRL Z 1027 CTRL [ 1028 CTRL \ 1029 CTRL ] 1030 CTRL 6 1031 CTRL - MX3-CE Reference Guide E-EQ-MX3CERG-A-ARC... - Page 205 1038 & 1039 ’ 1040 1041 1042 1043 1044 1045 1046 1047 1048 1049 1050 1051 1052 1053 1054 1055 1056 1057 1058 1059 1060 < 1061 1062 > 1063 1064 1065 1066 1067 1068 1069 E-EQ-MX3CERG-A-ARC MX3-CE Reference Guide...
- Page 206 1073 1074 1075 1076 1077 1078 1079 1080 1081 1082 1083 1084 1085 1086 1087 1088 1089 1090 1091 1092 1093 1094 1095 1096 ‘ 1097 1098 1099 1100 1101 1102 1103 1104 1105 1106 1107 MX3-CE Reference Guide E-EQ-MX3CERG-A-ARC...
- Page 207 ASCII Character Equivalents 6-89 Scan Value Hex Value Full ASCII Code 39 Encode Char. Keystroke 1108 1109 1110 1111 1112 1113 1114 1115 1116 1117 1118 1119 1120 1121 1122 1123 1124 1125 1126 1127 Undefined E-EQ-MX3CERG-A-ARC MX3-CE Reference Guide...
-
Page 208: Keypad Number Symbols
The barcode labels shown below represent a numeric keypad, with decimal values 0 through 9. Each label can be scanned individually to enter a numeric value. Use these numeric value symbols to enter numeric input in the course of performing a system configuration. Cancel MX3-CE Reference Guide E-EQ-MX3CERG-A-ARC... - Page 209 Table of Contents PPENDIX Keypad ........................A-1 Key Map 101-Key Equivalencies ..................A-1 Illustrations Figure A-1 QWERTY Keypad.........................A-1 E-EQ-MX3CERG-A-ARC MX3-CE Reference Guide...
- Page 210 A-ii Table of Contents MX3-CE Reference Guide E-EQ-MX3CERG-A-ARC...
-
Page 211: Appendixa Key Maps
Figure A-1 QWERTY Keypad Key Map 101-Key Equivalencies Note: This key mapping is used on hand held computers that are NOT running an LXE Terminal Emulator. When using a sequence of keys that includes the 2 key, press the 2 key first then the rest of the key sequence. - Page 212 Up Arrow Down Arrow Down Arrow Right Arrow Right Arrow Left Arrow Left Arrow Insert BkSp Delete Home Left Arrow Right Arrow Page Up Up Arrow Page Down Down Arrow Right Shift Right Alt Right Ctrl ScrollLock MX3-CE Reference Guide E-EQ-MX3CERG-A-ARC...
- Page 213 Keypad Press These Keys and Then To get this Press this Shift Ctrl CapsLock E-EQ-MX3CERG-A-ARC MX3-CE Reference Guide...
- Page 214 Keypad Press These Keys and Then To get this Press this Shift Ctrl CapsLock < > : (colon) ; (semicolon) _ (underscore) , (comma) MX3-CE Reference Guide E-EQ-MX3CERG-A-ARC...
- Page 215 Keypad Press These Keys and Then To get this Press this Shift Ctrl CapsLock ‘ (apostrophe) ~ (tilde) “ & E-EQ-MX3CERG-A-ARC MX3-CE Reference Guide...
- Page 216 Keypad MX3-CE Reference Guide E-EQ-MX3CERG-A-ARC...
- Page 217 Table of Contents PPENDIX ECHNICAL PECIFICATIONS Physical Specifications ..................B-1 Environmental Specifications................B-2 MX3-CE and Endcaps ......................B-2 Display Specifications ..................B-3 Power Supplies ........................B-3 US AC Wall Adapter......................B-3 International AC Adapter ....................B-3 Radio Specifications..................... B-4 Proxim PCMCIA 2.4 GHz Type II ..................B-4 Lucent PCMCIA 2.4 GHz Type II..................B-4...
- Page 218 B-ii Table of Contents MX3-CE Reference Guide E-EQ-MX3CERG-A-ARC...
-
Page 219: Appendixb Technical Specifications
Connector (COM 1) Provides connection to external devices such as a printer. Endcap – incl Scanner (COM 3), USB USB "slave" requires specific Connector, DA-9 (COM 1) LXE cable for either PC serial or USB port E-EQ-MX3CERG-A-ARC MX3-CE Reference Guide... -
Page 220: Environmental Specifications
5.7V max. Main Battery during normal operation Memory operational for 5 minutes when Main Battery is depleted Environmental Specifications MX3-CE and Endcaps Feature Specification Operating Temperature -4°F to 122°F (20°C to 50°C) Storage Temperature -22°F to 158°F (-30°C to 70°C) -
Page 221: Display Specifications
47 - 63 Hz Input Connector Customer supplied Output Connector Barrel connector, female, 5.5 x 2.5 x 11mm, Center Positive Output Voltage +12VDC, regulated Output Voltage Regulation +/- 5% Output Current 0 Amps min, 1.00 Amps max E-EQ-MX3CERG-A-ARC MX3-CE Reference Guide... -
Page 222: Radio Specifications
RF Power Level: 100 mW nominal (varies by country) Channels 11 US, 13 Europe, 4 France, 1 Japan Operating Temperature see MX3 Environmental Specs Storage Temperature see MX3 Environmental Specs Connectivity: NDIS, TCP/IP, Ethernet Antenna Internal MX3-CE Reference Guide E-EQ-MX3CERG-A-ARC... - Page 223 USB Port (USB Endcaps Only) ....................C-7 Version Control API ....................C-8 OAL Version.........................C-8 Bootloader Version .......................C-8 Loaded Version Numbers .....................C-9 Loaded S Numbers........................C-9 Hardware Port Access API ................... C-9 FPGA Register Access......................C-9 GPIO Pin Access ........................C-10 Reflash the MX3-CE .................... C-11 E-EQ-MX3CERG-A-ARC MX3-CE Reference Guide...
- Page 224 C-ii Table of Contents MX3-CE Reference Guide E-EQ-MX3CERG-A-ARC...
-
Page 225: Appendixc Api Calls
Appendix C API Calls Introduction This appendix documents only the LXE-specific API calls for the MX3-CE. It is intended as an appendix to the standard Microsoft Windows CE API documentation. Details of many of the calls in this appendix to the MX3-CE Reference Guide may be found in Microsoft’s documentation. -
Page 226: Backup Battery Charge/Discharge
See Also: ReadFPGA() and WriteFPGA(). #define FPGA_PWR_CNTL2 #define BIT_COM1RI 0x02 void SetCOM3RI(int onoff) int val; ReadFPGA(FPGA_PWR_CNTL2, &val); if (onoff) val |= BIT_COM1RI; // RI power on else val &= ~BIT_COM1RI; // RI power off WriteFPGA(FPGA_PWR_CNTL2, val); MX3-CE Reference Guide E-EQ-MX3CERG-A-ARC... -
Page 227: Com3 Ring Indicator Power
= 0x0001; vpm.PowerState = VideoPowerOff; // Power off the display ExtEscape(hdc, SETPOWERMANAGEMENT, vpm.Length, (LPCSTR) &vpm, 0, NULL); Sleep(3000); vpm.PowerState = VideoPowerOn; // Power on the display ExtEscape(hdc, SETPOWERMANAGEMENT, vpm.Length, (LPCSTR) &vpm, 0, NULL); ReleaseDC(NULL, hdc); E-EQ-MX3CERG-A-ARC MX3-CE Reference Guide... -
Page 228: Backlight Power On/Off
Warm Boot Warm boot is performed by making a KernelIOCtl call as follows: DWORD rtn; KernelIoControl(IOCTL_HAL_WARMBOOT, NULL, 0, NULL, 0, &rtn); Note that warm boot preserves all RAM memory. MX3-CE Reference Guide E-EQ-MX3CERG-A-ARC... -
Page 229: Scanner Api
The internal scanner is COM3, a tethered scanner connected to the cradle with a docked computer is COM2, a tethered scanner to the right serial port is COM1, and the left serial port (on a dual serial endcap) is COM3. E-EQ-MX3CERG-A-ARC MX3-CE Reference Guide... -
Page 230: Detecting Presence Of Internal Scanner
// we don’t really care what response was static BOOL CheckScanner2(HANDLE port) static unsigned char cmd[] = { 0x04, // length REQUEST_REVISION, // opcode HOST_SOURCE, // source of message STATUS_IS_OK, // initialize status // checksum return ScanCommandSend(port, cmd, sizeof(cmd)); MX3-CE Reference Guide E-EQ-MX3CERG-A-ARC... -
Page 231: Serial Ports Api
Serial Ports API For the most part, all of the standard Win32 API calls for serial ports will work on the MX3-CE serial ports. If the scanner wedge is running, it will lock the ports it is configured to monitor, and will prevent those from being opened, since Windows CE lacks the ability to share serial ports. -
Page 232: Version Control Api
There is an OEM API call to get the current bootloader version information.. #define IOCTL_HAL_GET_BOOTLOADER_VERINFO 0x1012004 OEMVERSIONINFO buf; DWORD len; if(!KernelIoControl(IOCTL_HAL_GET_BOOTLOADER_VERINFO, NULL, 0, &buf, sizeof(buf), &len)) printf(“Kernel IOCTL failed\n”); else printf(L" version %S %S %S", buf.tgtcoreversion, buf.date, buf.time); MX3-CE Reference Guide E-EQ-MX3CERG-A-ARC... -
Page 233: Loaded Version Numbers
The registry key HKLM\Software\LXE\Version contains current version numbers of loaded software, including PCMCIA radio drivers. Loaded S Numbers The registry key HKLM\Software\LXE\Snumber contains current S numbers of loaded software, including PCMCIA radio drivers. Hardware Port Access API FPGA Register Access There is an OEM API call to read FPGA registers. -
Page 234: Gpio Pin Access
(LPVOID)&buf, sizeof(HAL_GPIO_STRUCT), NULL, 0, &len)) printf(“Kernel IOCTL failed\n”); Usage of these is similar to the above routines for the FPGA. Of the 32 bits of the mask and value registers, only 28 are used (corresponding to GPIO:0-27). MX3-CE Reference Guide E-EQ-MX3CERG-A-ARC... -
Page 235: Reflash The Mx3-Ce
Reflash the MX3-CE How To Remove the endcap from the MX3-CE being very careful not to damage the leads to the external power jack, the headphone jack or the antenna. The antenna may be taped to the endcap so great care must be taken when removing the endcap. - Page 236 C-12 Reflash the MX3-CE MX3-CE Reference Guide E-EQ-MX3CERG-A-ARC...
-
Page 237: Index
Battery, charge before using ......1-7 Version Control..........C-8 Battery, How To ..........1-8 API calls ............C-1 BATTTEST.EXE ..........4-34 Appearance ............4-12 Baud Rate ............4-20 Application ............4-24 Bi-Directional Redundancy ......6-15 approved stylus ..........2-12 Blanking..........4-12, 4-17 Area Code ............4-11 Blanking Timer..........1-14 E-EQ-MX3CERG-A-ARC MX3-CE Reference Guide... - Page 238 Length Within Range ........6-27 AIM Code ............6-38 One Discrete Length........6-26 Any Length ............6-41 to Code 32 ............6-24 Length Within Range ........6-41 to Full ASCII..........6-28 One Discrete Length ........6-40 Two Discrete Lengths ........6-27 Two Discrete Lengths ........6-40 MX3-CE Reference Guide E-EQ-MX3CERG-A-ARC...
- Page 239 Touchscreen ........2-12 Prefix, Suffix1 and Suffix2 ......6-32 Display Contrast, How To .......1-13 Scan Angle .............6-78 Display Timer ..........2-11 Distance Between Access Points .......5-2 Scan Data Transmission Format.....6-34 Time-out Between Same Symbol ....6-58 Document Conventions........1-4 E-EQ-MX3CERG-A-ARC MX3-CE Reference Guide...
- Page 240 System............4-23 Length Within Range ........6-47 Taskbar.............4-7 One Discrete Length ........6-46 Volume and Sounds ........4-24 to EAN-13............6-45 Wireless............4-25 Two Discrete Lengths ........6-47 Failure Icons Battery Pack .............3-3 Connect ............4-3 FLASH...............2-2 Explorer, Internet ..........4-3 Flash and Reflash..........C-11 MX3-CE Reference Guide E-EQ-MX3CERG-A-ARC...
- Page 241 Critical Suspend ..........1-28 Left..............4-20 Off..............1-28 Length Power On ............1-26 Code 128 ............6-22 Suspend............1-27 Code 39 ............6-26 Mode Key Functions..........2-9 Code 93 ............6-29 modulo 43 check digit ........6-23 Length Within Range Mouse ............4-8, 4-14 Codabar ............6-19 MSI Plessey .............6-52 E-EQ-MX3CERG-A-ARC MX3-CE Reference Guide...
- Page 242 Parameter Scanning .........6-56 PTREE.EXE ............4-37 Parameters Lucent ..............5-1 NET.CFG Lucent............5-3 Parity..............4-20 Quick Start Instructions ........1-5 Passive Pen ............2-12 Password ......... 4-8, 4-15, 4-16 PC Card............1-20 Storage ............1-21 PC card slots ............1-20 RADIOTEST.EXE ..........4-35 PC Connection ...........4-9 Rate..............4-14 MX3-CE Reference Guide E-EQ-MX3CERG-A-ARC...
- Page 243 Time Out Between Same Symbol ....6-58 SE923 Scanner, Defaults ........6-4 Time Zone............4-10 Security Level TIMEST.EXE..........4-36 Linear Code Type...........6-50 Touch Screen .............1-6 UPC/EAN ............6-75 Touch Screen and Keypad Shortcuts ....1-6 Serial Cable Touch Screen data entry, How To ....1-23 E-EQ-MX3CERG-A-ARC MX3-CE Reference Guide...
- Page 244 Supplementals ..........6-72 Pocket ..............4-6 UPC-A .............6-62 Check Digit ............6-65 Preamble ............6-69 UPC-E..............6-62 Check Digit ............6-65 Zero Extend .............6-74 Preamble ............6-70 Zero Suppressed to UPC-A ............6-67 UPC-E to UPC-A...........6-67 UPC-E1............6-63 UPC-E1 to UPC-A.........6-67 Check Digit ............6-66 Preamble ............6-71 MX3-CE Reference Guide E-EQ-MX3CERG-A-ARC...
Need help?
Do you have a question about the MX3-CE and is the answer not in the manual?
Questions and answers