Advertisement
Quick Links
Scan the QR code to
watch our D25RE2 -
Troubleshooting video.
Proper protection, such as gloves, eye wear, and aprons, are recommended when disassembling a Dosatron.
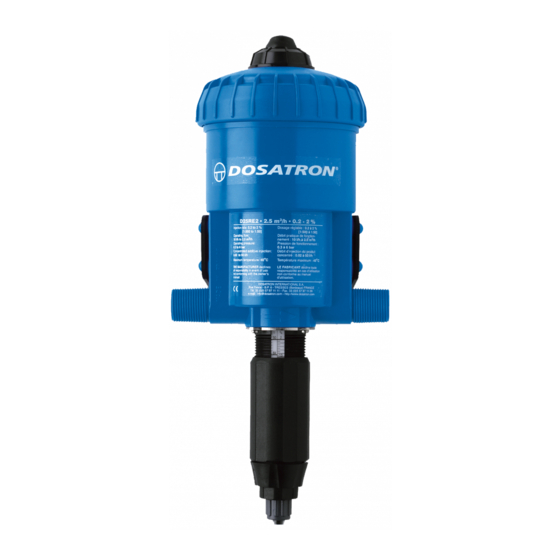
D25RE2 Troubleshooting - Part 1
This D25RE2 Troubleshooting will cover: The Injector is not drawing the concentrate,
but is
clicking.
800-523-8499
www.dosatronusa.com
NOTE: To service your D25RE2 you will need a strap wrench
(Part #: TOOL01) and a small tip Phillips head screwdriver.
Step 1: If your Injector is clicking, but not drawing the concentrate,
it could be as simple as the strainer is plugged with debris. Take
a look at the strainer. If it is clogged, clean it out and re-test your
Dosatron.
Step 2: If there is still no suction, turn the water on. If the unit is
clicking, unscrew and remove the suction hose nut.
Step 3: Then, remove the hose.
Page 1
Strap Wrench
TOOL01
Pick
TOOL02
Plunger Seal
Check Valve Seal
Check Valve Assy.
MPDI122
Actuator Spring
Piston Shell
Push Rod O-ring
J009
J051
M238
P421
J020
Advertisement

Related Manuals for dosatron D25RE2


Summary of Contents for dosatron D25RE2
- Page 1 Push Rod O-ring J020 Troubleshooting video. Proper protection, such as gloves, eye wear, and aprons, are recommended when disassembling a Dosatron. D25RE2 Troubleshooting - Part 1 This D25RE2 Troubleshooting will cover: The Injector is not drawing the concentrate, but is clicking.
- Page 2 800-523-8499 www.dosatronusa.com Proper protection, such as gloves, eye wear, and aprons, are recommended when disassembling a Dosatron. D25RE2 Troubleshooting - Part 1 Step 4: Check to see if you feel suction on your finger. Step 5: If you feel suction, just cut a half inch off the top of the hose and reattach.
- Page 3 800-523-8499 www.dosatronusa.com Proper protection, such as gloves, eye wear, and aprons, are recommended when disassembling a Dosatron. D25RE2 Troubleshooting - Part 1 Step 7: Using a strap wrench (Part #: TOOL01), loosen the lid. Step 8: Unscrew to remove and set the lid aside.
- Page 4 800-523-8499 www.dosatronusa.com Proper protection, such as gloves, eye wear, and aprons, are recommended when disassembling a Dosatron. D25RE2 Troubleshooting - Part 1 Step 10: Take a close look at the plunger seal for nicks, scratches, or wear. If you see damage or don’t remember the last time you changed the seal, just replace it now.
- Page 5 800-523-8499 www.dosatronusa.com Proper protection, such as gloves, eye wear, and aprons, are recommended when disassembling a Dosatron. D25RE2 Troubleshooting - Part 1 Step 13: Carefully, insert the piston into the body.ws Step 14: Replace the lid, hand tight. Your Injector should now be drawing the concentrate.
- Page 6 800-523-8499 www.dosatronusa.com Proper protection, such as gloves, eye wear, and aprons, are recommended when disassembling a Dosatron. D25RE2 Troubleshooting - Part 2 This D25RE2 Troubleshooting will cover: The Injector is pushing water down into your concentrate container, but is clicking.
- Page 7 800-523-8499 www.dosatronusa.com Proper protection, such as gloves, eye wear, and aprons, are recommended when disassembling a Dosatron. D25RE2 Troubleshooting - Part 2 Step 4: Remove the check valve seal. Step 5: Then carefully pry the check valve assembly down and out of the stem. A small flat blade screwdriver or pick (Part #: TOOL02) will make this easier.
- Page 8 800-523-8499 www.dosatronusa.com Proper protection, such as gloves, eye wear, and aprons, are recommended when disassembling a Dosatron. D25RE2 Troubleshooting - Part 2 Step 7: To reassemble, press the new check valve assembly into the stem as far as it will go.
- Page 9 800-523-8499 www.dosatronusa.com Proper protection, such as gloves, eye wear, and aprons, are recommended when disassembling a Dosatron. D25RE2 Troubleshooting - Part 2 Step 10: Thread the suction hose nut onto the hose. Step 11: Slide it onto the barb. Step 12: Hand tighten the nut. This should stop the water from dripping back into the stock tank.
- Page 10 800-523-8499 www.dosatronusa.com Proper protection, such as gloves, eye wear, and aprons, are recommended when disassembling a Dosatron. D25RE2 Troubleshooting - Part 3 This D25RE2 Troubleshooting will cover: The Injector is not clicking. Step 1: If the unit isn’t clicking, use a strap wrench (Part #: TOOL01) to loosen the lid.
- Page 11 800-523-8499 www.dosatronusa.com Proper protection, such as gloves, eye wear, and aprons, are recommended when disassembling a Dosatron. D25RE2 Troubleshooting - Part 3 Step 4: Inspect the white valve support on the top. Step 5: Press the pushrod down. Step 6: Then, check the two actuator springs (Part #: M238) on the bottom.
- Page 12 800-523-8499 www.dosatronusa.com Proper protection, such as gloves, eye wear, and aprons, are recommended when disassembling a Dosatron. D25RE2 Troubleshooting - Part 3 Step 7: You can visually inspect the upper and lower flanges on the piston shell. If they are worn or have deep scratches, the piston shell needs to be replaced.
- Page 13 800-523-8499 www.dosatronusa.com Proper protection, such as gloves, eye wear, and aprons, are recommended when disassembling a Dosatron. D25RE2 Troubleshooting - Part 3 Step 10: Press the pushrod up. Step 11: Then, slide the valve support off the inlet valve and set aside.
- Page 14 800-523-8499 www.dosatronusa.com Proper protection, such as gloves, eye wear, and aprons, are recommended when disassembling a Dosatron. D25RE2 Troubleshooting - Part 3 Step 13: Pull the actuator assembly out and discard the old piston shell. Step 14: Put the new push rod o-ring on top of the push rod and slide it down as far as it will go.
- Page 15 800-523-8499 www.dosatronusa.com Proper protection, such as gloves, eye wear, and aprons, are recommended when disassembling a Dosatron. D25RE2 Troubleshooting - Part 3 Step 16: Now re-install the four screws and hand tighten them in a star pattern. Step 17: Press the white plastic portion of the actuator side to side.
- Page 16 800-523-8499 www.dosatronusa.com Proper protection, such as gloves, eye wear, and aprons, are recommended when disassembling a Dosatron. D25RE2 Troubleshooting - Part 3 Step 19: Next, position the retainer and hand tighten the screw. Step 20: Test the piston, by pressing the pushrod from the top and bottom, it should click each time.
- Page 17 800-523-8499 www.dosatronusa.com Proper protection, such as gloves, eye wear, and aprons, are recommended when disassembling a Dosatron. D25RE2 Troubleshooting - Part 3 Step 22: Hand tighten the lid. The Injector should now be clicking and drawing concentrate. To learn more, scan the QR codes below for more information.
Need help?
Do you have a question about the D25RE2 and is the answer not in the manual?
Questions and answers