Advertisement
Quick Links
Scan the QR code to
watch our D14MZ10 -
Troubleshooting video.
Proper protection, such as gloves, eye wear, and aprons, are recommended when disassembling a Dosatron.
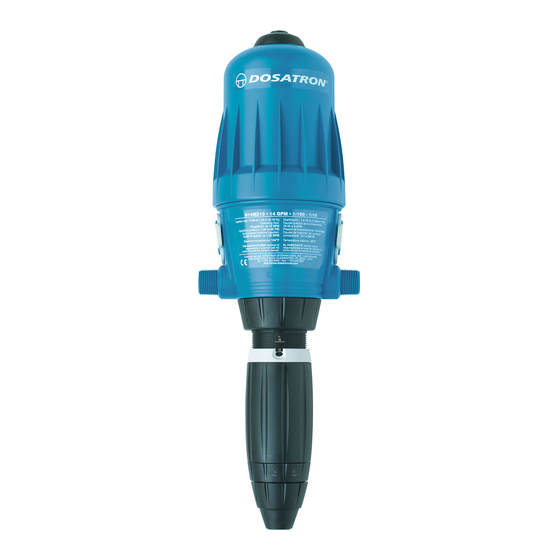
D14MZ10 Troubleshooting - Part 1
This D14MZ10 - 14 GPM Troubleshooting - Part 1 will cover: The Injector is
not drawing the concentrate, but is
800-523-8499
www.dosatronusa.com
clicking.
Step 1: Take a look at the strainer. If it is clogged just clean it out
and retest your Dosatron unit.
NOTE: To service your D14MZ10 you will need a strap wrench
(Part #: TOOL01) and a small flat head screw driver.
Step 2: If there is still no suction, but the Dosatron unit is clicking,
turn the water on. Unscrew and remove the suction hose nut or
clamp and hose.
Step 3: Check to see if you feel suction on your finger.
Page 1
Advertisement

Related Manuals for dosatron D14MZ10


Summary of Contents for dosatron D14MZ10
- Page 1 D14MZ10 - www.dosatronusa.com Troubleshooting video. Proper protection, such as gloves, eye wear, and aprons, are recommended when disassembling a Dosatron. D14MZ10 Troubleshooting - Part 1 This D14MZ10 - 14 GPM Troubleshooting - Part 1 will cover: The Injector is not drawing the concentrate, but is clicking.
- Page 2 800-523-8499 www.dosatronusa.com Proper protection, such as gloves, eye wear, and aprons, are recommended when disassembling a Dosatron. D14MZ10 Troubleshooting - Part 1 Step 4: If you feel suction, just cut an inch or so off the top of the hose and reattach. If the hose is cracked, ridged, or looks really old just replace it.
- Page 3 800-523-8499 www.dosatronusa.com Proper protection, such as gloves, eye wear, and aprons, are recommended when disassembling a Dosatron. D14MZ10 Troubleshooting - Part 1 Step 7: Unscrew the suction hose nut or clamp. Step 8: Remove the suction hose. Set both aside.
- Page 4 800-523-8499 www.dosatronusa.com Proper protection, such as gloves, eye wear, and aprons, are recommended when disassembling a Dosatron. D14MZ10 Troubleshooting - Part 1 Step 10: Pull the injection stem straight out from the body of the injector and set aside. Step 11: Take a close look at the plunger seal for nicks, scratches, or wear.
- Page 5 800-523-8499 www.dosatronusa.com Proper protection, such as gloves, eye wear, and aprons, are recommended when disassembling a Dosatron. D14MZ10 Troubleshooting - Part 1 Step 13: Using a small flat head screwdriver, carefully remove the plunger seal (Part #: JDI123) by rolling it out of the groove.
- Page 6 800-523-8499 www.dosatronusa.com Proper protection, such as gloves, eye wear, and aprons, are recommended when disassembling a Dosatron. D14MZ10 Troubleshooting - Part 1 Step 16: Twist it a quarter turn clockwise to lock. Step 17: To reinstall the injection stem, align the notches in the lower part of the blue body with the teeth on the top of the injection stem assembly.
- Page 7 800-523-8499 www.dosatronusa.com Proper protection, such as gloves, eye wear, and aprons, are recommended when disassembling a Dosatron. D14MZ10 Troubleshooting - Part 1 Step 19: Set the dilution rate to your desired setting. Step 20: After you reinstall the suction hose, your injector should now be drawing the concentrate.
- Page 8 Proper protection, such as gloves, eye wear, and aprons, are recommended when disassembling a Dosatron. D14MZ10 Troubleshooting - Part 2 This D14MZ10 - 14 GPM Troubleshooting Part 2 will cover: If your injector is pushing water down into the concentrate tank but is clicking.
- Page 9 800-523-8499 www.dosatronusa.com Proper protection, such as gloves, eye wear, and aprons, are recommended when disassembling a Dosatron. D14MZ10 Troubleshooting - Part 2 Step 4: To inspect the check valve parts, hold the assembly and twist the white top guide a quarter turn counter clockwise to remove.
- Page 10 800-523-8499 www.dosatronusa.com Proper protection, such as gloves, eye wear, and aprons, are recommended when disassembling a Dosatron. D14MZ10 Troubleshooting - Part 2 Step 7: Insert the cone into the top of the barb. Step 8: Slide the spring over the shaft.
- Page 11 800-523-8499 www.dosatronusa.com Proper protection, such as gloves, eye wear, and aprons, are recommended when disassembling a Dosatron. D14MZ10 Troubleshooting - Part 2 Step 10: Align the guide and twist it a quarter turn clockwise to lock. Step 11: Give it a tug to make sure everything is in position.
- Page 12 800-523-8499 www.dosatronusa.com Proper protection, such as gloves, eye wear, and aprons, are recommended when disassembling a Dosatron. D14MZ10 Troubleshooting - Part 2 Step 13: Reinstall the check valve nut. Step 14: Thread the suction hose nut or clamp onto the hose.
- Page 13 Proper protection, such as gloves, eye wear, and aprons, are recommended when disassembling a Dosatron. D14MZ10 Troubleshooting - Part 3 This D14MZ10 - 14 GPM Troubleshooting Part 3 will cover: The injector is not clicking. Step 1: Turn the water off and press the air bleed button a few times to release the pressure.
- Page 14 800-523-8499 www.dosatronusa.com Proper protection, such as gloves, eye wear, and aprons, are recommended when disassembling a Dosatron. D14MZ10 Troubleshooting - Part 3 Step 4: Grasp the piston and pull it straight out. Set the body aside. Step 5: Visually inspect the upper and lower flanges on the piston shell.
- Page 15 800-523-8499 www.dosatronusa.com Proper protection, such as gloves, eye wear, and aprons, are recommended when disassembling a Dosatron. D14MZ10 Troubleshooting - Part 3 Step 7: To test the lower flange, twist the plunger a quarter turn counter clockwise and remove. Step 8: Insert the piston into the body. It should be a snug fit.
- Page 16 800-523-8499 www.dosatronusa.com Proper protection, such as gloves, eye wear, and aprons, are recommended when disassembling a Dosatron. D14MZ10 Troubleshooting - Part 3 Step 10: Remove by lifting straight up. Step 11: To install the new flange, align the tooth inside the flange with the notch in the piston shell.
- Page 17 800-523-8499 www.dosatronusa.com Proper protection, such as gloves, eye wear, and aprons, are recommended when disassembling a Dosatron. D14MZ10 Troubleshooting - Part 3 Step 13: To replace the lower flange, (Part #: PDI644) grasp and twist it counter clockwise. Step 14: Remove by lifting straight up.
- Page 18 800-523-8499 www.dosatronusa.com Proper protection, such as gloves, eye wear, and aprons, are recommended when disassembling a Dosatron. D14MZ10 Troubleshooting - Part 3 Step 16: Press it down into place. Step 17: Twist clockwise until it locks. Step 18: To reinstall the plunger, align the top with the retainer.
- Page 19 800-523-8499 www.dosatronusa.com Proper protection, such as gloves, eye wear, and aprons, are recommended when disassembling a Dosatron. D14MZ10 Troubleshooting - Part 3 Step 19: Twist it a quarter turn clockwise to lock. Step 20: Place the piston back into the body.
Need help?
Do you have a question about the D14MZ10 and is the answer not in the manual?
Questions and answers