Advertisement
Quick Links
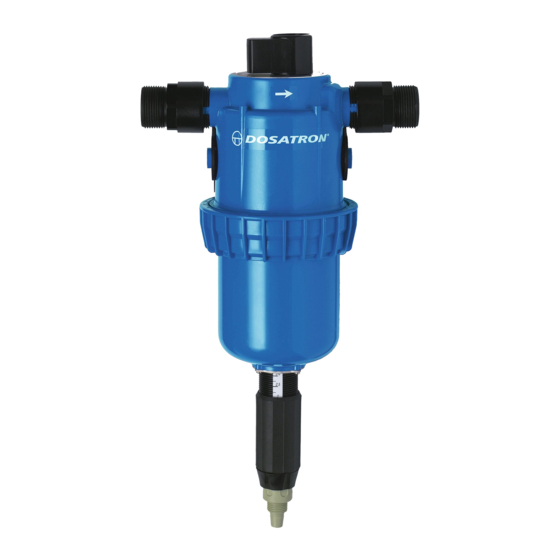
Scan the QR code to
watch our D45RE15 -
Troubleshooting video.
Proper protection, such as gloves, eye wear, and aprons, are recommended when disassembling a Dosatron.
D45RE15 Troubleshooting - Part 1
This D45RE15 Troubleshooting will cover: The injector is clicking, but not drawing
solution or liquid is going down into the stock tank.
800-523-8499
www.dosatronusa.com
NOTE: To service your Dosatron D45RE15, you will need a strap
wrench, a # 1 and 2 phillips head screw driver, a flat blade screw
driver and needle nose pliers.
Step 1: To begin, make sure the strainer is clear of debris. While
the unit is still installed, turn the water on. Unscrew and remove
the suction hose nut and hose.
Step 2: Then, check to see if you feel suction on your finger.
If so, just cut 1/2" off your suction hose and reattach.
Step 3: You should see the liquid begin moving up the suction
hose. If you don't see liquid moving up the hose or you didn't
feel suction on your finger, turn the water off. Open a valve
downstream to release the pressure.
Page 1
TOOL-
Tool Kit
KIT
P170
Check valve spring
J051
Check valve seal
M072
Check valve cone
M221
Actuator Springs (2)
TOOL01
Strap Wrench
Advertisement

Related Manuals for dosatron D45RE15


Summary of Contents for dosatron D45RE15
- Page 1 Strap Wrench www.dosatronusa.com Troubleshooting video. Proper protection, such as gloves, eye wear, and aprons, are recommended when disassembling a Dosatron. D45RE15 Troubleshooting - Part 1 This D45RE15 Troubleshooting will cover: The injector is clicking, but not drawing solution or liquid is going down into the stock tank.
- Page 2 800-523-8499 www.dosatronusa.com Proper protection, such as gloves, eye wear, and aprons, are recommended when disassembling a Dosatron. D45RE15 Troubleshooting - Part 1 Step 4: Unscrew the suction hose nut and remove the suction hose. Set both aside. Step 5: Now, unscrew the four screws around the injection sleeve.
- Page 3 800-523-8499 www.dosatronusa.com Proper protection, such as gloves, eye wear, and aprons, are recommended when disassembling a Dosatron. D45RE15 Troubleshooting - Part 1 Step 7: Grasp the plunger and pull it straight down. Step 8: Take a close look at the plunger seal for knicks, scratches, or ware.
- Page 4 800-523-8499 www.dosatronusa.com Proper protection, such as gloves, eye wear, and aprons, are recommended when disassembling a Dosatron. D45RE15 Troubleshooting - Part 1 Step 10: Install the new seal into the groove onto the plunger. Step 11: To reinstall the injection stem, slide it into the lower housing and align the four screws and the metal retainer into the body.
- Page 5 800-523-8499 www.dosatronusa.com Proper protection, such as gloves, eye wear, and aprons, are recommended when disassembling a Dosatron. D45RE15 Troubleshooting - Part 1 Step 13: Now, thread the suction hose nut onto the hose, slide the hose onto the barb and hand tighten the nut. Slowly, turn the water on and your injector should now be drawing the concentrate.
- Page 6 800-523-8499 www.dosatronusa.com Proper protection, such as gloves, eye wear, and aprons, are recommended when disassembling a Dosatron. D45RE15 Troubleshooting - Part 2 Step 1: If your injector is pushing water down into the concentrate tank, it’s time to investigate the check valve. To do this remove the hose nut and hose and set aside.
- Page 7 800-523-8499 www.dosatronusa.com Proper protection, such as gloves, eye wear, and aprons, are recommended when disassembling a Dosatron. D45RE15 Troubleshooting - Part 2 Step 4: Inspect all the check valve parts. If they are dirty, you may be able to soak, brush off, and reinstall. If you see damage or you don’t remember the last time you changed these parts, now is a...
- Page 8 800-523-8499 www.dosatronusa.com Proper protection, such as gloves, eye wear, and aprons, are recommended when disassembling a Dosatron. D45RE15 Troubleshooting - Part 2 Step 7: Hand tighten. Step 8: Thread the suction hose nut onto the hose. Step 9: Slide it onto the barb and hand tighten the nut. This should stop the water from dripping back into the concentrate tank.
- Page 9 800-523-8499 www.dosatronusa.com Proper protection, such as gloves, eye wear, and aprons, are recommended when disassembling a Dosatron. D45RE15 Troubleshooting - Part 3 This D45RE15 Troubleshooting will cover: The injector isn’t clicking. Step 1: Unscrew and remove the suction hose nut and hose.
- Page 10 800-523-8499 www.dosatronusa.com Proper protection, such as gloves, eye wear, and aprons, are recommended when disassembling a Dosatron. D45RE15 Troubleshooting - Part 3 Step 4: Lift the piston up and out of the lower housing. Set the lower housing aside. Step 5: Inspect the white valve support on the bottom.
- Page 11 800-523-8499 www.dosatronusa.com Proper protection, such as gloves, eye wear, and aprons, are recommended when disassembling a Dosatron. D45RE15 Troubleshooting - Part 3 Step 7: You can check the piston shell two ways. First, by inspecting the upper and lower flanges to see if they are worn or have deep scratches.
- Page 12 800-523-8499 www.dosatronusa.com Proper protection, such as gloves, eye wear, and aprons, are recommended when disassembling a Dosatron. D45RE15 Troubleshooting - Part 3 Step 10: To replace the piston shell, use the # 1 screw driver and remove the valve support screw and plastic retainer.
- Page 13 800-523-8499 www.dosatronusa.com Proper protection, such as gloves, eye wear, and aprons, are recommended when disassembling a Dosatron. D45RE15 Troubleshooting - Part 3 Step 13: Pry the valve support off of the inlet valve with a flat blade screw driver and set aside.
- Page 14 800-523-8499 www.dosatronusa.com Proper protection, such as gloves, eye wear, and aprons, are recommended when disassembling a Dosatron. D45RE15 Troubleshooting - Part 3 Step 16: Using the needle nosed pliers, position the four screws in the center of the new piston shell.
- Page 15 800-523-8499 www.dosatronusa.com Proper protection, such as gloves, eye wear, and aprons, are recommended when disassembling a Dosatron. D45RE15 Troubleshooting - Part 3 Step 19: Press the white plastic portion of the actuator side by side. If there is movement, retighten the screws.
- Page 16 800-523-8499 www.dosatronusa.com Proper protection, such as gloves, eye wear, and aprons, are recommended when disassembling a Dosatron. D45RE15 Troubleshooting - Part 3 Step 22: Then reinstall the four screws in the black plastic retainer and align the pin in the plunger rod as shown.
- Page 17 800-523-8499 www.dosatronusa.com Proper protection, such as gloves, eye wear, and aprons, are recommended when disassembling a Dosatron. D45RE15 Troubleshooting - Part 3 Step 25: To finish up, make sure the push rod is in the down position. Step 26: Carefully slide the piston into the lower housing about half way.
- Page 18 800-523-8499 www.dosatronusa.com Proper protection, such as gloves, eye wear, and aprons, are recommended when disassembling a Dosatron. D45RE15 Troubleshooting - Part 3 Step 28: Thread the suction hose nut onto the hose. Step 29: Slide it onto the barb and hand tighten the nut.
Need help?
Do you have a question about the D45RE15 and is the answer not in the manual?
Questions and answers