
Related Manuals for dosatron D25RE2

Summary of Contents for dosatron D25RE2
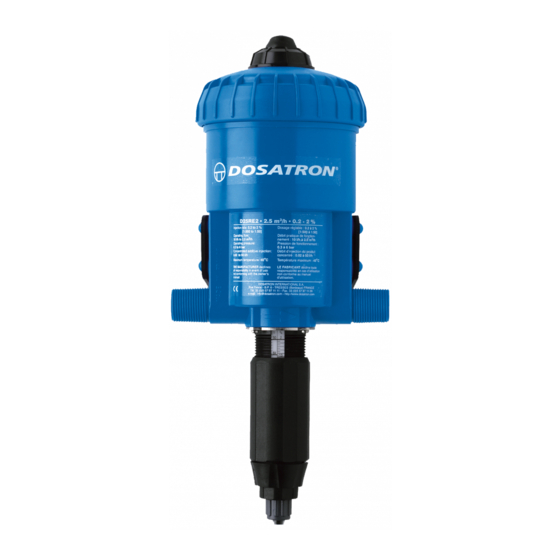
- Page 1 MAINTENANCE MANUAL MAINTENANCE MANUAL D25RE2 0.2 to 2% 1:500 to 1:50 Press Ctrl + L for full screen DOSATRON INTERNATIONAL, INC. • 800-523-8499...
-
Page 2: Standard Installation
STANDARD INSTALLATION Inlet Outlet Optional Union ball accessories check/check 200 mesh /80 valve or micron filter Optional accessories: water •Pressure regulator hammer Concentrate arrestor •Solenoid valves •Water meter •Flow restrictor « click » for next step DOSATRON INTERNATIONAL, INC. • 800-523-8499... - Page 3 CHAPTER 4 PISTON MAINTENANCE • CHAPTER 5 AIR BLEED MAINTENANCE • CHAPTER 6 BY-PASS MAINTENANCE • CHAPTER 7 TROUBLESHOOTING GUIDE Click on a specific chapter Click for next slide « click » for next step DOSATRON INTERNATIONAL, INC. • 800-523-8499...
-
Page 4: Specifications
° – ° Note: Normal safety precautions should be practiced when Note: Normal safety precautions should be practiced when working with chemicals and equipment. working with chemicals and equipment. « click » for next step DOSATRON INTERNATIONAL, INC. • 800-523-8499... - Page 5 CHAPTER 1 CHAPTER 1 REMOVING THE DISPENSER FROM INSTALLATION REMOVING THE DISPENSER FROM INSTALLATION D25RE2 0.2 to 2% 1:500 to 1:50 Return to Main Menu « click » for next slide DOSATRON INTERNATIONAL, INC. • 800-523-8499...
- Page 6 After turning off the water and relieving the pressure on the unit, unscrew the dispenser inlet/outlet couplings and allow it to drain. Unscrew the suction tube nut and remove the hose. « click » for next step DOSATRON INTERNATIONAL, INC. • 800-523-8499...
- Page 7 CHAPTER 2 CHAPTER 2 DISASSEMBLING THE DISPENSER DISASSEMBLING THE DISPENSER D25RE2 0.2 to 2% 1:500 to 1:50 Return to Main Menu « click » for next slide DOSATRON INTERNATIONAL, INC. • 800-523-8499...
- Page 8 DISASSEMBLING THE DISPENSER DISASSEMBLING THE DISPENSER Unscrew and remove the lid. « click » for next step DOSATRON INTERNATIONAL, INC. • 800-523-8499...
- Page 9 DISASSEMBLING THE DISPENSER DISASSEMBLING THE DISPENSER Place the dispenser upside-down on a table and remove the 4 dosing assembly retaining screws. Use a #2 Phillips screwdriver. « click » for next step DOSATRON INTERNATIONAL, INC. • 800-523-8499...
- Page 10 Caution: Stem may be full of Caution undiluted chemical. Be aware of hazardous materials and take the necessary precautions for protection. WATCH OUT FOR SPLASHING! WATCH OUT FOR SPLASHING! « click » for next step DOSATRON INTERNATIONAL, INC. • 800-523-8499...
- Page 11 DISASSEMBLING THE DISPENSER DISASSEMBLING THE DISPENSER Grab the valve support and pull the piston out of the body, at the same time, push the plunger up. « click » for next step DOSATRON INTERNATIONAL, INC. • 800-523-8499...
- Page 12 DISASSEMBLING THE DISPENSER DISASSEMBLING THE DISPENSER Dosing assembly disassembly Dosing assembly disassembly Unscrew and remove the barbed fitting. Unscrew and remove the conical nut. « click » for next step DOSATRON INTERNATIONAL, INC. • 800-523-8499...
- Page 13 DISASSEMBLING THE DISPENSER DISASSEMBLING THE DISPENSER Dosing assembly disassembly Dosing assembly disassembly Remove the anti-friction ring. Unscrew and remove the adjusting nut from the sleeve. « click » for next step DOSATRON INTERNATIONAL, INC. • 800-523-8499...
- Page 14 DISASSEMBLING THE DISPENSER DISASSEMBLING THE DISPENSER Dosing assembly disassembly Dosing assembly disassembly Remove the injection stem from the top of the sleeve. Gently remove the sleeve O-ring. « click » for next step DOSATRON INTERNATIONAL, INC. • 800-523-8499...
- Page 15 Gently push the check valve out of the injection stem with a pencil or similar object. Do not scratch the inside of the injection stem. Gently remove the injection stem O-ring. « click » for next step DOSATRON INTERNATIONAL, INC. • 800-523-8499...
- Page 16 DISASSEMBLING THE DISPENSER CLEANING & MAINTENANCE PROCEDURE CLEANING & MAINTENANCE PROCEDURE When disassembly of the Dosatron unit is complete, soak it in lukewarm soapy water. A soft bristled brush may be used to break up residue. J009 Change seal kit every 12 months.
- Page 17 CHAPTER 3 CHAPTER 3 REASSEMBLING THE DISPENSER REASSEMBLING THE DISPENSER D25RE2 0.2 to 2% 1:500 to 1:50 Return to Main Menu « click » for next slide DOSATRON INTERNATIONAL, INC. • 800-523-8499...
- Page 18 REASSEMBLING THE DISPENSER REASSEMBLING THE DISPENSER Dosing assembly Dosing assembly Replace the O-ring on the dosing stem. « click » for next step DOSATRON INTERNATIONAL, INC. • 800-523-8499...
- Page 19 Dosing assembly Dosing assembly Reinsert the injection stem into the injection sleeve. Make sure that the long groove in the injection stem aligns with the tooth inside the injection sleeve. « click » for next step DOSATRON INTERNATIONAL, INC. • 800-523-8499...
- Page 20 REASSEMBLING THE DISPENSER REASSEMBLING THE DISPENSER Dosing assembly Dosing assembly Replace the sleeve O-ring. « click » for next step DOSATRON INTERNATIONAL, INC. • 800-523-8499...
- Page 21 REASSEMBLING THE DISPENSER REASSEMBLING THE DISPENSER Dosing assembly Dosing assembly Insert the metal retainer. Thread the adjusting nut onto the sleeve until it reaches the top of the scale. « click » for next step DOSATRON INTERNATIONAL, INC. • 800-523-8499...
- Page 22 Dosing assembly Dosing assembly Align teeth on the inside of the anti-friction ring with the 2 grooves in the dosing stem and slide it up to the adjusting nut. « click » for next step DOSATRON INTERNATIONAL, INC. • 800-523-8499...
- Page 23 REASSEMBLING THE DISPENSER REASSEMBLING THE DISPENSER Dosing assembly Dosing assembly Thread the conical nut onto the dosing stem. It should be hand tight. « click » for next step DOSATRON INTERNATIONAL, INC. • 800-523-8499...
- Page 24 REASSEMBLING THE DISPENSER REASSEMBLING THE DISPENSER Dosing assembly Dosing assembly Replace and slide the check valve assembly into the injection stem. The cone should point out. « click » for next step DOSATRON INTERNATIONAL, INC. • 800-523-8499...
- Page 25 Remove, replace and Thread the barbed fitting onto position the check valve seal the injection stem. It should be into the barbed fitting with the hand tight. groove facing up. « click » for next step DOSATRON INTERNATIONAL, INC. • 800-523-8499...
- Page 26 REASSEMBLING THE DISPENSER Insert the piston straight into Remove and replace the plunger the body all the way down. seal by sliding the seal over the end of the plunger. « click » for next step DOSATRON INTERNATIONAL, INC. • 800-523-8499...
- Page 27 REASSEMBLING THE DISPENSER Align the metal retaining plate with the holes in the body and install 4 screws. Carefully align the plunger inside Use #2 Phillips screwdriver. the injection stem assembly. « click » for next step DOSATRON INTERNATIONAL, INC. • 800-523-8499...
- Page 28 REASSEMBLING THE DISPENSER REASSEMBLING THE DISPENSER Reseat or replace the lid O-ring. Screw the lid onto the body of the Replace the O-ring if leaking. dispenser. It should be hand tight. « click » for next step DOSATRON INTERNATIONAL, INC. • 800-523-8499...
- Page 29 REASSEMBLING THE DISPENSER REASSEMBLING THE DISPENSER The dispenser is now reassembled. « click » for next step DOSATRON INTERNATIONAL, INC. • 800-523-8499...
- Page 30 CHAPTER 4 CHAPTER 4 PISTON MAINTENANCE PISTON MAINTENANCE D25RE2 0.2 to 2% 1:500 to 1:50 Return to Main Menu « click » for next slide DOSATRON INTERNATIONAL, INC. • 800-523-8499...
- Page 31 Remove plunger seal prior to doing this Note: Remove plunger seal prior to doing this « click » for next step test so it will not interfere. test so it will not interfere. See page 48. See page 48. DOSATRON INTERNATIONAL, INC. • 800-523-8499...
- Page 32 PISTON MAINTENANCE PISTON MAINTENANCE Piston disassembly Piston disassembly Actuate the piston so the piston valves are in the up position. Unscrew and remove the valve support retaining screw. « click » for next step DOSATRON INTERNATIONAL, INC. • 800-523-8499...
- Page 33 PISTON MAINTENANCE PISTON MAINTENANCE Piston disassembly Piston disassembly Pull the valve support up and slide back to separate it from the valve. « click » for next step DOSATRON INTERNATIONAL, INC. • 800-523-8499...
- Page 34 Piston disassembly Piston disassembly On the top of the piston shell, Pull the actuator assembly unscrew the 4 retaining screws. from under the piston shell. Use #1 Phillips screwdriver. « click » for next step DOSATRON INTERNATIONAL, INC. • 800-523-8499...
- Page 35 PISTON MAINTENANCE PISTON MAINTENANCE Piston disassembly: actuator assembly Piston disassembly: actuator assembly Remove the 2 springs. When changing a broken spring, it is best to replace both springs. « click » for next step DOSATRON INTERNATIONAL, INC. • 800-523-8499...
- Page 36 PISTON MAINTENANCE PISTON MAINTENANCE Piston disassembly: actuator assembly Piston disassembly: actuator assembly Remove the push rod by sliding it straight down. « click » for next step DOSATRON INTERNATIONAL, INC. • 800-523-8499...
- Page 37 Piston disassembly: actuator assembly Remove the plunger. To do this, lift the plunger from the actuator assembly and pull it towards the outside of its housing. This separates the actuator assembly entirely. « click » for next step DOSATRON INTERNATIONAL, INC. • 800-523-8499...
- Page 38 PISTON MAINTENANCE PISTON MAINTENANCE Piston disassembly: actuator assembly Piston disassembly: actuator assembly Carefully remove the inlet valve O-ring, make sure not to damage the valve. « click » for next step DOSATRON INTERNATIONAL, INC. • 800-523-8499...
- Page 39 PISTON MAINTENANCE PISTON MAINTENANCE Piston reassembly Piston reassembly Replace the inlet valve O-ring. « click » for next step DOSATRON INTERNATIONAL, INC. • 800-523-8499...
- Page 40 PISTON MAINTENANCE PISTON MAINTENANCE Piston reassembly Piston reassembly Insert the plunger in the housing of the actuator assembly. « click » for next step DOSATRON INTERNATIONAL, INC. • 800-523-8499...
- Page 41 The ridge of the push rod must be aligned with the corresponding Insert the push rod groove on the actuator with the long end up. assembly. « click » for next step DOSATRON INTERNATIONAL, INC. • 800-523-8499...
- Page 42 PISTON MAINTENANCE PISTON MAINTENANCE Piston reassembly Piston reassembly Install the 2 actuator springs with loop opening downward. « click » for next step DOSATRON INTERNATIONAL, INC. • 800-523-8499...
- Page 43 PISTON MAINTENANCE PISTON MAINTENANCE Piston reassembly Piston reassembly The actuator assembly is now assembled. « click » for next step DOSATRON INTERNATIONAL, INC. • 800-523-8499...
- Page 44 They should not be worn Align the o-ring in the groove on the or scored. If they are scored, the bottom of the piston shell. piston shell should be replaced. « click » for next step DOSATRON INTERNATIONAL, INC. • 800-523-8499...
- Page 45 PISTON MAINTENANCE PISTON MAINTENANCE Piston reassembly Piston reassembly Position the actuator assembly in the piston shell. Align the push rod and valve with the corresponding holes in the piston shell. « click » for next step DOSATRON INTERNATIONAL, INC. • 800-523-8499...
- Page 46 PISTON MAINTENANCE Piston reassembly Piston reassembly Push the actuator assembly into the piston shell and align the screw with the holes. Install the 4 screws. Use #2 Phillips screwdriver. « click » for next step DOSATRON INTERNATIONAL, INC. • 800-523-8499...
- Page 47 Piston reassembly Align the top inlet valve with the center groove of the valve support and push forward until the outlet valves reach their openings in the piston shell. « click » for next step DOSATRON INTERNATIONAL, INC. • 800-523-8499...
- Page 48 PISTON MAINTENANCE PISTON MAINTENANCE Piston reassembly Piston reassembly Position the valve support retainer Replace the plunger seal by and install screw. sliding the seal over the end of the plunger. « click » for next step DOSATRON INTERNATIONAL, INC. • 800-523-8499...
- Page 49 PISTON MAINTENANCE PISTON MAINTENANCE Piston reassembly Piston reassembly The piston is ready to be reinstalled. « click » for next step DOSATRON INTERNATIONAL, INC. • 800-523-8499...
- Page 50 Holding it in up position, push down on the vertical rod and it should click. Push the piston back all the way down and it should click again. Screw the lid back on. « click » for next step DOSATRON INTERNATIONAL, INC. • 800-523-8499...
- Page 51 CHAPTER 5 CHAPTER 5 AIR BLEED MAINTENANCE AIR BLEED MAINTENANCE D25RE2 0.2 to 2% 1:500 to 1:50 Return to Main Menu « click » for next slide DOSATRON INTERNATIONAL, INC. • 800-523-8499...
- Page 52 Air bleed disassembly Air bleed disassembly Using a small flat blade screwdriver, gently pry loose the rubber cap and remove it from the top of the air bleed button. « click » for next step DOSATRON INTERNATIONAL, INC. • 800-523-8499...
- Page 53 AIR BLEED MAINTENANCE Air bleed disassembly Air bleed disassembly Using a small flat blade Remove the ribbed collar screwdriver, gently pry by pulling it straight up. loose the ribbed collar. « click » for next step DOSATRON INTERNATIONAL, INC. • 800-523-8499...
- Page 54 Align a 7/8" socket with the bleed with the plastic nut on the underside of corresponding grooves in the lid and gently twist the air the lid. bleed ¼ turn. « click » for next step DOSATRON INTERNATIONAL, INC. • 800-523-8499...
- Page 55 AIR BLEED MAINTENANCE AIR BLEED MAINTENANCE Air bleed disassembly Air bleed disassembly Remove the air bleed button by pushing it through the lid. « click » for next step DOSATRON INTERNATIONAL, INC. • 800-523-8499...
- Page 56 AIR BLEED MAINTENANCE AIR BLEED MAINTENANCE Air bleed reassembly Air bleed reassembly Replace the O-ring. The only serviceable part on the air bleed is the O-ring. « click » for next step DOSATRON INTERNATIONAL, INC. • 800-523-8499...
- Page 57 Position the air bleed Install the air bleed button button in the socket. from the inside of the cover. Turn the socket ¼ turn to lock the button in the lid. « click » for next step DOSATRON INTERNATIONAL, INC. • 800-523-8499...
- Page 58 AIR BLEED MAINTENANCE AIR BLEED MAINTENANCE Air bleed reassembly Air bleed reassembly Install the ribbed collar so that the slots align with the tabs on the air bleed button. « click » for next step DOSATRON INTERNATIONAL, INC. • 800-523-8499...
- Page 59 Air bleed reassembly Air bleed reassembly Re-install the rubber cap on the air bleed button. Using a small flat blade screwdriver, gently put back in place the rubber cap. « click » for next step DOSATRON INTERNATIONAL, INC. • 800-523-8499...
- Page 60 CHAPTER 6 CHAPTER 6 PASS MAINTENANCE PASS MAINTENANCE D25RE2 0.2 to 2% 1:500 to 1:50 Return to Main Menu « click » for next slide DOSATRON INTERNATIONAL, INC. • 800-523-8499...
- Page 61 PASS MAINTENANCE PASS MAINTENANCE pass disassembling pass disassembling Use needle nose pliers or awl to Set the by-pass button to “ON”. push pin out. « click » for next step DOSATRON INTERNATIONAL, INC. • 800-523-8499...
- Page 62 Remove the pin from the Remove the "ON-OFF" knob by "ON-OFF" knob and the firmly snapping it out of the stainless steel stem of the collar. by-pass. « click » for next step DOSATRON INTERNATIONAL, INC. • 800-523-8499...
- Page 63 PASS MAINTENANCE PASS MAINTENANCE pass disassembling pass disassembling Using a small flat blade screwdriver, gently pry loose the ribbed collar. Remove the ribbed collar by lifting it straight up. « click » for next step DOSATRON INTERNATIONAL, INC. • 800-523-8499...
- Page 64 Align a 7/8" socket with the plastic nut on the underside of the lid and gently twist the by-pass ¼ turn. Align the two tabs on the by-pass with the corresponding grooves in the lid. « click » for next step DOSATRON INTERNATIONAL, INC. • 800-523-8499...
- Page 65 PASS MAINTENANCE PASS MAINTENANCE pass disassembling pass disassembling Remove the by-pass by pushing it through the lid. The O-ring is the only serviceable part on the by-pass. « click » for next step DOSATRON INTERNATIONAL, INC. • 800-523-8499...
- Page 66 Slide the stainless steel Install the by-pass from the inside of the lid. With the socket, turn the by-pass ¼ turn to stem into the by-pass. lock it in the lid. « click » for next step DOSATRON INTERNATIONAL, INC. • 800-523-8499...
- Page 67 PASS MAINTENANCE PASS MAINTENANCE pass reassembling pass reassembling Install the ribbed collar so that the slots align with the tabs on the bypass. « click » for next step DOSATRON INTERNATIONAL, INC. • 800-523-8499...
- Page 68 PASS MAINTENANCE pass reassembling pass reassembling Carefully position by-pass Lightly tap on the top of the knob knob in the collar. with a mallet to snap it in place. « click » for next step DOSATRON INTERNATIONAL, INC. • 800-523-8499...
- Page 69 Install the pin. When completed, position, align the holes of the the pin should not protrude on lever and stainless rod of the either side of the lever. by-pass. « click » for next step DOSATRON INTERNATIONAL, INC. • 800-523-8499...
-
Page 70: Troubleshooting Guide
CHAPTER 7 CHAPTER 7 TROUBLESHOOTING GUIDE TROUBLESHOOTING GUIDE D25RE2 0.2 to 2% 1:500 to 1:50 Return to Main Menu « click » for next slide DOSATRON INTERNATIONAL, INC. • 800-523-8499... - Page 71 Make sure installation has a 200 mesh filter before the Dosatron. DOSING Check valve dirty, worn, Clean or replace the check valve assembly. Pages 24 & assembled incorrectly or missing Water flowing back into solution container « click » for next step DOSATRON INTERNATIONAL, INC. • 800-523-8499...
- Page 72 Worn piston shell and/or body Do piston “fit” test (page 31). If necessary replace piston shell and/or body. Make sure your installation has a 200 mesh filter before the Dosatron. « click » for next step DOSATRON INTERNATIONAL, INC. • 800-523-8499...
- Page 73 Worn or cracked injection stem Replace injection stem. (inside or outside). Check valve worn, improperly Clean or replace check valve assembly. Pages 24 assembled, dirty or damaged & 25. « click » for next step DOSATRON INTERNATIONAL, INC. • 800-523-8499...
- Page 74 Leaks between body and lid. Lid O-ring damaged, Position O-ring correctly, clean the seating improperly positioned or surface of the O-ring or replace the lid O-ring. missing « click » for next step DOSATRON INTERNATIONAL, INC. • 800-523-8499...
- Page 75 Thank you for using Dosatron liquid dispensers. Please contact us at (800) 523-8499 for further assistance or visit our website at www.dosatronUSA.com 2090 Sunnydale Blvd., Clearwater, Florida 33765 « click » for next step DOSATRON INTERNATIONAL, INC. • 800-523-8499...
Need help?
Do you have a question about the D25RE2 and is the answer not in the manual?
Questions and answers
our d25re is sticking would you recommend a service kit
Yes, a service kit should be recommended for a Dosatron D25RE2 that is sticking. The service process involves replacing seals and other components, which are included in the seal kit. This helps restore proper function and prevent further issues.
This answer is automatically generated