Advertisement
Quick Links
维修手册
适用机型
NT15-13L/NTH15-17L
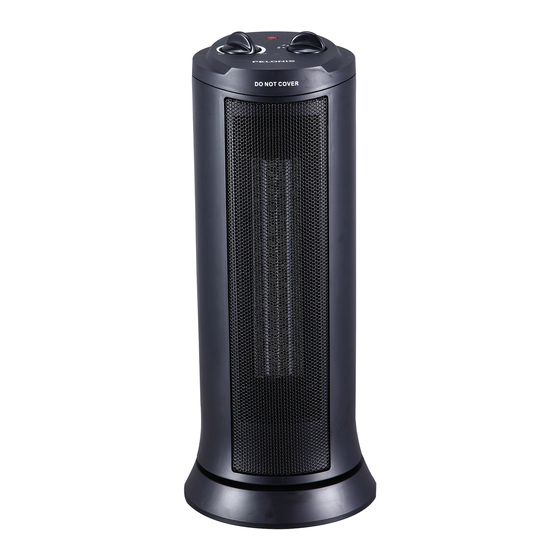
(本图片为参考示意图,具体外观和配置以实物为准)(The picture is only for reference, and
specific appearance and configuration are subject to the real product)
编制
审核
批准
Service Manual
Applicable Models
Prepared by
Reviewed by
Approved by
维修手册
Service Manual, 2017 v1.0
机型编码
Model No.
22057014000008
陈洋
肖荣、周高峰
苏颜存
1 / 25
Advertisement

Related Manuals for Midea NT15-13L


Summary of Contents for Midea NT15-13L
- Page 1 Service Manual, 2017 v1.0 维修手册 Service Manual 适用机型 机型编码 Applicable Models Model No. 22057014000008 NT15-13L/NTH15-17L (本图片为参考示意图,具体外观和配置以实物为准)(The picture is only for reference, and specific appearance and configuration are subject to the real product) 编制 陈洋 Prepared by 审核 肖荣、周高峰 Reviewed by 批准...
-
Page 2: Important Safety Notice
Midea Environment Appliance Technical Maintenance Manual Copyright @2016 All rights reserved. Replication of all or part of the Manual in any forms shall not be allowed without written approval by the Overseas Sales Corporation of Midea Environment Appliance. 2 / 25... -
Page 3: Safety Warning Code
维修手册 Service Manual, 2017 v1.0 安全警示规范 Safety Warning Code WARNING Read these instructions. Keep these instructions. Follow all instructions. Do not use this appliance near water. This appliance is intended to be used in household and similar environments. Clean only with a damp cloth. Install in accordance with the manufacturer’s instructions. - Page 4 维修手册 Service Manual, 2017 v1.0 整机拆卸 Dismantling of appliance 后壳拆卸 后壳螺钉拆卸 底盖拆卸 底盖拆卸、内部线束梳理 4 / 25...
- Page 5 维修手册 Service Manual, 2017 v1.0 2.3 卡簧、连杆拆卸 卡簧钳取下卡簧、连杆拆卸 线冒拆卸 用工具将线束上的线冒取下 5 / 25...
- Page 6 维修手册 Service Manual, 2017 v1.0 拆卸套管 2.5 顶盖、旋钮拆卸 将顶盖从前壳上拆卸下来 拆卸温控器连接线束端子 6 / 25...
- Page 7 维修手册 Service Manual, 2017 v1.0 旋钮从顶盖拆下 2.6 开关线束拆卸 将开关从顶盖拆卸 取出开关支架 7 / 25...
- Page 8 维修手册 Service Manual, 2017 v1.0 拔出开关插线端子 风机组件拆卸 1.拆卸风机组件固定螺钉 2.拆卸倾倒开关固定螺钉 8 / 25...
- Page 9 维修手册 Service Manual, 2017 v1.0 倾倒、温控开关拆卸 1.拆卸温控开关 2.温控支架拆卸 3.取出倾倒开关 2.9 同步电机拆卸 1.拆卸曲柄固定螺钉 2. 拆卸同步电机固定螺钉 9 / 25...
- Page 10 维修手册 Service Manual, 2017 v1.0 2.10 限温器、出风格栅拆卸 1.取出 PTC 支架内限温器 2. 拆开前网网角 3.取出出风格栅 10 / 25...
-
Page 11: Function And Operation
维修手册 Service Manual, 2017 v1.0 整机的安装 Function and operation 前网、格栅安装 安装出风格栅及前网到前壳上,网角按压入 前壳固定位置 11 / 25... - Page 12 维修手册 Service Manual, 2017 v1.0 限温器组件安装 拿取一限温器组件线束(限温器弹片朝外) 对应出风格栅孔位卡入安装到位;手不能摸 弹片中间,只能拿取限温器两端铜部位;拿 取一个 PTC 支架套入 PTC 发热体另一端后, 放置入前壳组件出风格栅内。 12 / 25...
- Page 13 维修手册 Service Manual, 2017 v1.0 同步电机安装 Display screen 将同步电机组件嵌入到前壳立轴孔,然后螺 钉固定立轴组件 将曲柄(白色 POM 件)螺钉固定到电机轴上 13 / 25...
- Page 14 维修手册 Service Manual, 2017 v1.0 倾倒开关/温控开关安装 左手拿取风机组件,右手拿取倾倒开关 安装在风机组件对应的位置上卡扣到 位 左手拿取一顶盖,右手拿温控支架安装在顶 盖对应的位置上卡扣到位,再拿取温控开关 安装在温控支架对应的卡槽内卡扣到位 14 / 25...
- Page 15 维修手册 Service Manual, 2017 v1.0 固定风机组件 1.螺钉紧固倾倒开关 2.检测风轮、 电机参数一致性及运转是否流畅 3.螺钉紧固风机组件到外壳, 确保没有滑牙现 象 指示灯、开关安装 1.按正确的线序对应插入旋转开关的端口中, 注意检查是否插到位 2. 左手拿取开关,右手拿取开关支架安装在 开关上双手按压卡扣到位 3. 左手拿取取顶盖,右手拿取一指示灯穿入 顶盖对应的孔上,按压到位 15 / 25...
- Page 16 维修手册 Service Manual, 2017 v1.0 温控旋钮安装 1. 左手拿取开关旋钮、温控旋钮;将旋钮安 装在顶盖开关,温控处;双手手将旋钮按压 到 2. 左手扶机身总成,右手拿取限温器一端的 护套插在倾倒开关对应的位置上, 再拿取 PTC 蓝线束插在温控开关对应的端口上(向内); 插-拔-插检查是否松脱现象。 16 / 25...
- Page 17 维修手册 Service Manual, 2017 v1.0 3.8 顶盖安装 1. 左手拿取顶盖,将其对准扣脚前壳顶部安 装在前壳上卡扣到位 2. 左手拿取 2 颗螺钉,右手拿取电批将顶盖 紧固到位无滑牙现象 3.拿取一蓝色线束插在温控开关对应的端口 上(向外) ;再拿取红线束插在倾倒开关对应 对应端口,插-拔-*插检查是否松脱现象 17 / 25...
- Page 18 维修手册 Service Manual, 2017 v1.0 3.9 顶盖安装 1.钳线冒 2.装套管 18 / 25...
- Page 19 维修手册 Service Manual, 2017 v1.0 3.10 安装连杆/轴承 1. 左手从物料盒拿取一颗螺钉套在电批上, 右手从前方的物料盒拿取一连杆安装在底座 对应的位置上, 左手从物料盒拿取一颗螺钉, 右手拿取电批将连杆紧固到位无滑牙现象 2. 左手从物料盒拿取一个轴承安装底座对应 的位置上卡扣到位 3. 左手扶机身总成,右手将底座套入前壳立 轴上,将连杆套入曲柄中,左手从物料盒拿 取一颗螺钉,右手拿取电批将连杆紧固到位 无滑牙现象 19 / 25...
- Page 20 维修手册 Service Manual, 2017 v1.0 3.11 安装卡簧/底板 1. 双手将连杆移到卡槽内卡扣好,再从物料 盒拿取一轴承安装底座对应的卡槽内卡扣到 位 2. 右手拿取卡簧钳,左手拿取卡簧;将卡簧 安装在立轴上,卡扣到位卡槽内 3. 将拿取电源线安装底座对应的卡槽内卡扣 到位,右手拿取底盖,左手扶住底座,底盖 扣脚对准底座卡槽,将底盖顺时针旋转安装 安装在底座上 20 / 25...
- Page 21 维修手册 Service Manual, 2017 v1.0 3.12 固定底盖/布线 1. 左手从物料盒拿取 3 颗螺钉,右手拿取电 批将底盖紧固到位无滑牙现象。并线束整理 好卡扣的卡槽内 21 / 25...
- Page 22 维修手册 Service Manual, 2017 v1.0 3.13 打铜带、固定后壳 1. 右手拿取穿好电源线的底盘组件, 左手拿 取套好套管线束组件; 将电源线长线 (带 字) 一根线与线束组件的红色线束用铜带 机铆接好;再将电源线线短线(无字)一 根线与线束组件蓝线用铜带机铆接在一 起, 双手拿起打好铜带的电源线, 将铆接 处放入松香水中再放入锡炉中侵锡 2. 左手产从物料盒拿取 6 颗螺钉, 右手拿取 电批将后壳紧固到位无滑牙现象 常见及解决方法 Fault code and solutions 故 障 代 代 码 可 故 障 内 容 原因...
- Page 23 维修手册 Service Manual, 2017 v1.0 附录 Appendix: 整机接线图 Electrical Schematic Diagram 暖风机维修常用工具、设备和材料 refrigerator maintenance tooling and equipment and material 工具 Tooling 名称 图片 主要用途 Name Photo Main Usage 十字螺丝刀 拆卸螺钉 Phillips screw assemble and screwdriver disassemble 平口螺丝刀/小铲刀 拆卸螺钉和铆钉 screw and slotted screwdriver/scraper rivet assemble and disassemble 23 / 25...
- Page 24 5/16″ and disassemble 尖嘴钳 辅助工具 Nipper pliers assistive tool 美的环境电器 如需获得厂家详细技术咨询,请联系: xxx@midea.com 环境电器事业部 海外营销公司 地址:中国安徽省合肥市经济技术开发区锦绣大道 176 号 Midea Environment Appliance If you need to get detailed technical information from the manufacturer, please contact: xxx@midea.com Refrigeration Division 24 / 25...
- Page 25 维修手册 Service Manual, 2017 v1.0 Overseas Sales Company Address: No. 176, Jinxiu Avenue, Economic-Technological Development Area, Hefei, Anhui, China 25 / 25...
Need help?
Do you have a question about the NT15-13L and is the answer not in the manual?
Questions and answers