Table of Contents
Advertisement
Quick Links
INSTALLATION
GUIDE
SLIDE-AWAY110
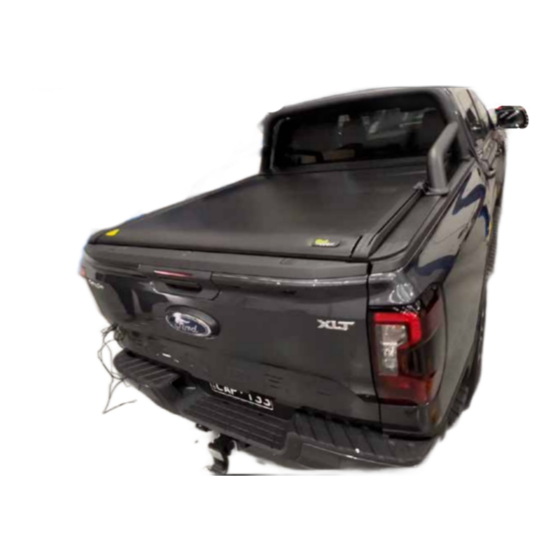
ROLL AWAY HARD TONNEAU to suit FORD RANGER 2022+
(non-Wildtrak models)
As per vehicle manufacturer's advice, Ironman 4x4
recommend the load box reinforcement brackets
(Ford part number AMN1WJ27726AA)
be installed prior to installation of Slide-Away.
NOTE: Although Ironman 4x4 take every possible
measure to prevent water and dust from entering
the cargo area, we cannot be held accountable for holes
and gaps in your factory tub
©Copyright 2022 Ironman 4x4 Pty Ltd. No part of this publication may be reproduced or replicated without the prior written consent of Ironman 4x4 Pty Ltd
Advertisement
Table of Contents

Subscribe to Our Youtube Channel
Related Manuals for Ironman4x4 SLIDE-AWAY110


Summary of Contents for Ironman4x4 SLIDE-AWAY110
- Page 1 INSTALLATION GUIDE SLIDE-AWAY110 ROLL AWAY HARD TONNEAU to suit FORD RANGER 2022+ (non-Wildtrak models) As per vehicle manufacturer’s advice, Ironman 4x4 recommend the load box reinforcement brackets (Ford part number AMN1WJ27726AA) be installed prior to installation of Slide-Away. NOTE: Although Ironman 4x4 take every possible...
-
Page 2: Parts List
Installation Guide SLIDEAWAY110 Parts List Main Drum Assemblies Side Tracks Top Cover Positioning Bar Drain Tubes Qty: 1 Qty: 2 Qty: 1 Qty: 1 Qty: 4 Adhesive Foam Tape Bolts with Screw Washer Rubber Cover for Front Drain Tube Rubber Hose Clamps End Track Washers... - Page 3 Installation Guide SLIDEAWAY110 Before installation check the product is compatible with your vehicle make, model and year. IMPORTANT: Ensure that the load box reinforcing brackets are also installed. Open the carton and unpack the contents It is recommended to lay out the contents to make it easier to find during installation Separate the packaging into...
- Page 4 Installation Guide SLIDEAWAY110 If required, remove the sports bar from the vehicle. This may requires removing the plastic trim on the tub’s top to unbolt the front sports bar mount. If the sports bar is to be reattached, retain fasteners and use ISLIDEAWAY110-SBA Take care to inspect any mounting holes left after removal of the...
- Page 5 Installation Guide SLIDEAWAY110 Install A8 rubber covers into the bottom channel at the front of each track. NOTE: Notch in the rubber cover matches the slot in the track. Pull track forward at least two slats. Using a 5mm hex key, remove the clutch protection plate.
- Page 6 Installation Guide SLIDEAWAY110 Attach side tracks to main drum. Align slot in bottom of side track with the locator on the end of the main drum. Start sliding track on, but do not pull all the way back. Check the end of the sliding cover. There is a plastic interface that slides into a cut out on the vertical inside face of the side track.
- Page 7 Installation Guide SLIDEAWAY110 Secure side tracks to main drum. For this step, it may be best to rest the main drum with loosely attached side tracks on its end. Insert 6x fasteners - 3 per side - from pack B2. NOTE - threadlock has been pre-applied to the fasteners.
- Page 8 Installation Guide SLIDEAWAY110 10. Install top cover to Drum using fastener pack B2. Separate tops and bottoms from plastic caps. Place top cover over drum. Align cover’s holes with threaded holes in the metal fingers on the drum. Place a plastic cap base in each hole.
- Page 9 Installation Guide SLIDEAWAY110 11. Attach Tub Brackets. FRONT BRACKETS Using the factory holes, secure small L-bracket with threaded holes to tub. This is attached behind the indentation in the plastic tub cover. Insert small screw from inside edge Now, attach large multi-bend bracket to tub.
- Page 10 Installation Guide SLIDEAWAY110 12. Attach Tub Brackets. MIDDLE BRACKETS Using the factory holes, place the two-hole spacer in the vertical indent in the plastic tub cover. Place the slotted L-bracket over this. Secure in place using screws, washers, and nuts. Page 10 of 18 ©Copyright 2022 Ironman 4x4 Pty Ltd.
- Page 11 Installation Guide SLIDEAWAY110 13. Attach Tub Brackets. REAR BRACKETS Remove the factory tie-down points from near the tailgate Place large bracket over the tie- down point’s holes Secure tie-down point back over bracket using factory-supplied screws. Page 11 of 18 ©Copyright 2022 Ironman 4x4 Pty Ltd.
- Page 12 Installation Guide SLIDEAWAY110 14. Lift drum and side track assembly onto vehicle. THIS IS A MINIMUM TWO PERSON JOB. CHECK THAT - the unit is sitting square on the vehicle’s tub. - the rubber lips on the side tracks are not caught up. - the rubber flap at the end of the drum is not caught between the drum and the front of the tub.
- Page 13 Installation Guide SLIDEAWAY110 15. Secure to brackets. Slide M6x25 mm T-Bolts (B8) into the underside of the side tracks. Position T-bolts through tops of tub brackets installed in Step 10. If needed, fine adjust tub brackets up or down so they touch the underside of the Slide-Away’s side rails With the supplied spreader bar...
- Page 14 Installation Guide SLIDEAWAY110 16. Install Drain Tubes NOTE - Consider positioning of drain tubes in relation to items that will be loaded into the tub, so as not to create snag points. Attach using hose clamps (A10) the small drain tubes (A5) to rear of the tracks, and the large tubes to the underside of the drum.
- Page 15 Installation Guide SLIDEAWAY110 Wiring Power Routing Notes: Red with positive Recommend wiring route path is engine Black with negative compartment » wheel trims » bed. Most vehicles already have holes in bed. If available, route cabling through exiting holes. For vehicles without access, a 20mm diameter hole is recommended.
-
Page 16: Battery Replacement
Installation Guide SLIDEAWAY110 Remote Controller Function Instructions ECO Button LED Indicator Light Close Tonneau Cover Open Tonneau Cover Turn On Tub Interior Light Turn Off Tub Interior Light Name Description ECO Button Opens the Slide-Away to halfway, at half speed. LED Indicator Light Illuminates when any button is pressed 1. -
Page 17: Clutch Operation
Installation Guide SLIDEAWAY110 Clutch Operation To disengage (manual operation) 1) Undo the two screws with a 5mm hex key, and remove the plate. 2) Using a flat-bladed screwdriver, rotate the screw counterclockwise 3-4 times. The cover can now be operated by hand, and is not locked. -
Page 18: Maintenance
Installation Guide SLIDEAWAY110 Maintenance 1. To ensure quiet and smooth operation of your Slide-Away, please regularly clean and lubricate the rail tracks and main drum assembly. This is recommended every 3 months or 6,000 km, or when you use it in muddy, sandy or dusty conditions.
Need help?
Do you have a question about the SLIDE-AWAY110 and is the answer not in the manual?
Questions and answers