Table of Contents
Advertisement
Quick Links
Advertisement
Table of Contents

Related Manuals for Shining 3D EinScan SE


Summary of Contents for Shining 3D EinScan SE
- Page 1 EinScan SE/SP User Manual V3.1.1 Shining 3D EinScan SE/SP_User Manual_3.1.1...
-
Page 2: Table Of Contents
7.4. Sharpen ..............................37 7.5. Smooth ..............................37 7.6. Simplify ..............................38 7.7. Remap Texture ............................38 Export Data ..........................40 8.1. Data Formats ............................40 8.2. Scale Data ............................... 41 8.3. Measurement ............................41 Shining 3D EinScan SE/SP_User Manual_3.1.1... - Page 3 Third-party Software ......................49 Preview Model ........................50 Others ..........................51 12.1. FAQ ................................. 51 12.2. Safety Precautions ..........................51 Support and Contact ......................52 13.1. Submit a Ticket ............................52 13.2. Contact Us .............................. 53 Shining 3D EinScan SE/SP_User Manual_3.1.1...
-
Page 4: Specification And System Requirements
Asus ZenBook Flip, Core i7, Nvidia MX250 with 2Gb memory, solid state hard drive, 16gb ram Lenovo Y520 15IKBM i7-7700hq, 16GB, gtx1060 Acer Predator PH317 i7, GTX1060, 16G RAM MSI – GS63VR 7RF stealth pro RAM 32G Alien ALW15M-R2726R ASUS ROG STRIX Shining 3D EinScan SE/SP_User Manual_3.1.1... -
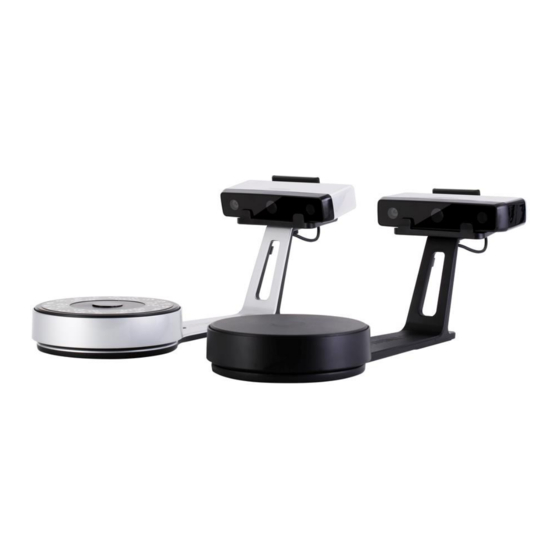
Page 5: Hardware Installation
Step 2. Insert calibration board onto the board holder. NOTE: Rotate the calibration board only while calibration. Step 3-1. Turntable and Scanner installation. Place the turntable onto scanner stand ) Screw the scanner into the socket on the stand. Shining 3D EinScan SE/SP_User Manual_3.1.1... - Page 6 2)Plug power cord into outlet and the back of scanner; Plug USB cable into back of scanner and computer USB port; Plug USB cable into back of scanner, and turntable. 1.2.2. Turn on/off the Scanner Hold on the touch switch for about one second to turn the scanner on. Shining 3D EinScan SE/SP_User Manual_3.1.1...
- Page 7 Double-click on the touch switch and stay for one second each time to turn the scanner off. If the device with mechanical ON/OFF switch, Press the power button to turn scanner on; press again, then turn scanner off. Shining 3D EinScan SE/SP_User Manual_3.1.1...
-
Page 8: Set Software
2.3. Update the Software When a new version is available, a pop-up will show when you start the software to remind you update your software to the latest version. Click Yes to update. Update Reminder Shining 3D EinScan SE/SP_User Manual_3.1.1... -
Page 9: Activate The Scanner
Online Activation Click this button to reveal the Local Activation Local activation When install Discovery Pack, you need to download the pack license, or import the file with .encode suffix in the USB disk. Shining 3D EinScan SE/SP_User Manual_3.1.1... -
Page 10: Interface And Parameters
Interface navigation Left mouse: rotate Middle mouse: move the data Scroll up and down: zoom in or out Navigate between different menu by click on the circle. Choose different scan modes if Discovery Pack is connected. Shining 3D EinScan SE/SP_User Manual_3.1.1... - Page 11 Click the settings logo from the upper right to open the drop down menu. 3.5.3.1 User Experience To help us improve the quality and user experience of EinScan SE&SP, we hope to be allowed to collect usage experience information. This information will not contain your personal information or scanned data, and will not be accessible to any third party.
- Page 12 Open Help Mode Click the question mark in the upper right bar, and open the help mode from the drop-down menu. Drop down menu Display the help tool related to the current interface. Help window Shining 3D EinScan SE/SP_User Manual_3.1.1...
- Page 13 For activation failure, make sure the scanner is well connected. Redo the activation. Device fails to activate Incorrect configuration try another USB port and update your graphics card drivers and restart the software. Graphics card incompatible Shining 3D EinScan SE/SP_User Manual_3.1.1...
- Page 14 In Manage 3D Settings > Program Settings, Add EXScan S software. Then change the preferred graphic processor for this program. Select NVIDIA processor. Click Apply to save the settings. Multiple graphic card detected Change graphic card preferences for EXScan S Shining 3D EinScan SE/SP_User Manual_3.1.1...
-
Page 15: Calibrate The Scanner
You can also choose Calibration on the navigation bar to enter If there is no calibration data, click “quit”, the software will prompt “No calibration process later. calibration data, please calibrate”. Shining 3D EinScan SE/SP_User Manual_3.1.1... - Page 16 Step 3: Turn calibration panel 90° counterclockwise as guided in software. Move bracket with panel to the turntable right side (until the calibration board white edge is aligned with the yellow line shown on the image). Shining 3D EinScan SE/SP_User Manual_3.1.1...
- Page 17 Calibration will take longer or fail if you did not follow all instructions properly. When calibration succeeds, click “Next” to move on to the White Balance as the software indicates. Camera calibration result If calibration fails, click “Redo calibration” to start the same calibration again from the beginning. Shining 3D EinScan SE/SP_User Manual_3.1.1...
- Page 18 You will see the result as below. Click “Next” to new a scan project. White Balance result Place a white paper at a proper distance(290mm - 480mm), adjust the brightness according to the camera view, click “white balance test” to start. Shining 3D EinScan SE/SP_User Manual_3.1.1...
- Page 19 After white balance, check the color of object in the camera view is the same as the real object. If not, adjust the brightness again and re-calibrate; If yes, click “Quit” to exit calibration interface. Note: Only devices with Discovery module have light box. Shining 3D EinScan SE/SP_User Manual_3.1.1...
-
Page 20: Before Scanning
Markers should be stuck on the flat surface area and keep the marker surface flat. Use the markers provided with the device only. Other markers can result bad accuracy or not to be seen. Shining 3D EinScan SE/SP_User Manual_3.1.1... - Page 21 Object with markers Before scanning transparent, highly reflective and black objects, you should spray white powder on the surface (see example above). Shining 3D EinScan SE/SP_User Manual_3.1.1...
-
Page 22: Scan
Note: When using the global markers file, new markers cannot be scanned. Global markers points can be deleted. Click the work button to create or load a new work When a project is open, click the work button to create or load a new work. Shining 3D EinScan SE/SP_User Manual_3.1.1... - Page 23 Drag to adjust the brightness setting To scan an object with high contrasting texture, such as something white and black, use HDR. Each single scan will take longer to capture. Turn HDR ON to scan contrasting textures Shining 3D EinScan SE/SP_User Manual_3.1.1...
-
Page 24: Turntable
5.2.3. More Turntable Settings More settings Click More Settings to set turntable speed and turns. 5.2.4. Turntable Speed Turntable speed Set to adjust turntable speed. "6" is set by default. Higher value is with higher speed. Shining 3D EinScan SE/SP_User Manual_3.1.1... - Page 25 Note: For EinScan SP, other than alignment mode features displayed above, global markers alignment feature is also available: Open New Project interface, import a global markers file. Then global marker feature is displayed (shown below). Shining 3D EinScan SE/SP_User Manual_3.1.1...
- Page 26 Note: Objects in regular shapes such as sphere and square are not suitable for this mode. With feature align, need to make sure the object will not move when turntable rotates. And the objects needs to have enough features for the software to recognize. Shining 3D EinScan SE/SP_User Manual_3.1.1...
-
Page 27: Scan
When the scan is completed the data is automatically saved in the project file. Make sure the relative position does not change during the scan. When auto scan mode is scanning, you can click the button to stop the current scan. The current data will be deleted directly. Shining 3D EinScan SE/SP_User Manual_3.1.1... - Page 28 5.3.2. Edit Scan After the single scan is completed you can edit the data. SHIFT + Left mouse: Select unwanted points, the selected points will turn red, as shown below. Ctrl + Left mouse: Deselect selected data. Shining 3D EinScan SE/SP_User Manual_3.1.1...
- Page 29 Click to confirm and apply global optimization. After scanning objects, use the feature to optimize global data and align model. For undesired optimization result, you can exit first, and then rescan or edit data. Before global optimization After global optimization Shining 3D EinScan SE/SP_User Manual_3.1.1...
-
Page 30: Project Group
Reopen a previous project to make it as the current project. 6.3. Rename a Project Right click on the project on the tree to rename it. The new name will be updated in the work folder. Shining 3D EinScan SE/SP_User Manual_3.1.1... -
Page 31: Remove/Delete
If you remove or delete the current project the last project will reload and become the new current project. Note: Delete only affects the data in the work. If the project is imported from other work, only the created copy is deleted. Shining 3D EinScan SE/SP_User Manual_3.1.1... -
Page 32: Create/Split A Group
Modifications will not affect the rest of the data. Shift + left mouse: select data on the 3d view, and enter the edition mode. the edition are applied on the visible data only. Shining 3D EinScan SE/SP_User Manual_3.1.1... -
Page 33: Alignment
Texture visible or invisible (color pack only) Manual Align SHIFT + click left mouse button to select at least 3 non-collinear corresponding points in the 3D preview windows for Manual Alignment, as shown below. Ctrl+Z: cancel last point picked Shining 3D EinScan SE/SP_User Manual_3.1.1... - Page 34 Alignment reference Click Complete to validate and leave the Alignment interface Click Reset to cancel all alignments done in this session Click Next to validate the alignment and continue to use the Alignment interface Shining 3D EinScan SE/SP_User Manual_3.1.1...
-
Page 35: Mesh
The texture capture is separate from the 3d data capture. If the texture has been captured, it will still be displayed on areas where holes are filled in the mesh processing. If the texture is missing, the corresponding mesh data will be in black. Shining 3D EinScan SE/SP_User Manual_3.1.1... -
Page 36: Edit Mesh
Select Visible to select data on the front view only Select Through to select data all though Click End button to return to the post-processing menu. Click Revoke, to cancel and return to the post-processing menu. Shining 3D EinScan SE/SP_User Manual_3.1.1... -
Page 37: Fill Holes
TANGENT calculates the solution considering the point position and the normal of the last row of triangles forming the boundary. CURVATURE calculates the solution considering the point position and the normal of the 2 last rows of triangles forming the boundary. Effect of Curvature, Tangent or Flat Shining 3D EinScan SE/SP_User Manual_3.1.1... -
Page 38: Sharpen
It might remove some small details or smooth some sharp edges at the same time. The example of before and after smoothing is shown below. Run 2 times, data will be smoothed twice. smooth menu Shining 3D EinScan SE/SP_User Manual_3.1.1... -
Page 39: Simplify
Texture Remapping to display the Texture menu Mesh edition of simplification, hole filling on texture scanned data will affect the texture render. By doing the texture remapping, the texture information will be reapplied on the mesh. Shining 3D EinScan SE/SP_User Manual_3.1.1... - Page 40 This option has no effect on the texture itself. Texture Layout Optimization No Texture layout optimization Texture layout optimization Notes: TLO requires a longer time to compute TLO is used only with OBJ output TLO result is more convenient for texture manual editing Shining 3D EinScan SE/SP_User Manual_3.1.1...
-
Page 41: Export Data
◆ Low storage ◆ Easy texture editing ◆ Mesh scan.3mf Low storage ◆ Compatibility with Microsoft paint3d Marker scan.p3 Global Marker File ◆ position ◆ EXScan S software ◆ Measurement of the marker position Shining 3D EinScan SE/SP_User Manual_3.1.1... -
Page 42: Scale Data
Open file. Click Open file, a STL or OBJ file can be imported to edit. 8.3.1. Create Feature Enter/Exit the Feature menu. Click the Feature button to display the menu, click again to close the menu. Shining 3D EinScan SE/SP_User Manual_3.1.1... - Page 43 The plane is generated by 3 points not co-linear. Plane 3 Points Fit Click on the data to select one point or click on a previous created feature point; In the Choice list select one of the point to Shining 3D EinScan SE/SP_User Manual_3.1.1...
- Page 44 Exact movement Exact Movement Menu Enter the value in mm and degrees, click Apply to match the data origin to the input coordinate and orientation The arrows represent the global coordinate system, Red=X+, Green=Y+, Blue=Z+ Shining 3D EinScan SE/SP_User Manual_3.1.1...
- Page 45 Click OK to confirm the transformation Tips: Start from data reposition (offset to 0,0,0) Edit rotations prior to transformation Change the view normal to a reference plane to change the corresponding angle Shining 3D EinScan SE/SP_User Manual_3.1.1...
- Page 46 Select a Point in the drop-down menu. The data will be translated to match the point with the origin point (coordinate 0,0,0) Click Align to perform the transformation Data after 3-2-1 movement Click Reset to cancel Click Apply to confirm the transformation. Shining 3D EinScan SE/SP_User Manual_3.1.1...
- Page 47 Surface Area menu VOLUME This tool calculates the volume contains in a mesh. watertight It returns the volume in mm^3 and the coordinates of the smallest box, parallel to the global coordinates, containing all the data. Shining 3D EinScan SE/SP_User Manual_3.1.1...
- Page 48 Volume menu Prior to the calculation make sure the file is (no holes). watertight File not watertight alert Shining 3D EinScan SE/SP_User Manual_3.1.1...
-
Page 49: Share Data
Sketchfab, it will show the dialog as below. A model title, username and user password are required. Register and view the shared model at http://sketchfab.com. Notes: Data is saved as .STL does NOT contain texture Shining 3D EinScan SE/SP_User Manual_3.1.1... -
Page 50: Third-Party Software
Solid Edge is a design tool from SIEMENS PLM Software. Partnered with SIEMENS PLM Software, EinScan users is able to use Solid Edge SHINING 3D Edition, which includes reverse engineering, generative design (optional modular), and simulation (optional modular) with CAD functions in one platform. -
Page 51: Preview Model
Meshlab, a free mesh software editor, or upload to sketchfab. Notes: To load a OBJ textured file make sure to have the MTL and JPG files with the same name and in the same folder than the OBJ Shining 3D EinScan SE/SP_User Manual_3.1.1... -
Page 52: Others
The device shall be repaired by professional technicians or under their instruction. You should send the device to facilities with qualification for recycling it instead of dropping into the household garbage when it is scrapped. Shining 3D EinScan SE/SP_User Manual_3.1.1... -
Page 53: Support And Contact
Support and Contact 13.1. Submit a Ticket Sign up in Shining 3D Support Platform support.shining3d.com Or send email directly to einscan_support@shining3d.com Log in with your account. Click New Ticket on the tab bar to submit a ticket and check the status... -
Page 54: Contact Us
Phone: +49 711 28444089 Add: Breitwiesenstraße 28, 70565, Stuttgart, Germany Americas Region SHINING 3D Technology Inc. San Francisco, United States Phone: +1 415 259 4787 Add: 1740 Cesar Chavez St. Unit D. San Francisco, CA 94124 Shining 3D EinScan SE/SP_User Manual_3.1.1...
Need help?
Do you have a question about the EinScan SE and is the answer not in the manual?
Questions and answers