Table of Contents
Advertisement
Advertisement
Table of Contents

Related Manuals for Shining 3D AccuFab-D1s


Summary of Contents for Shining 3D AccuFab-D1s
- Page 1 AccuFab-D1s User Manual V3.3.20...
- Page 2 Foreword General The user manual (hereinafter referred to as "the manual") introduces the functions, installation, operation and maintenance of the AccuFab-D1s printer (hereinafter referred to as "the printer"). AccuWare is the data preparation software for AccuFab printers. Fab Cure is the curing unit for AccuFab printers FabWare is the operating software for AccuFab printers.
- Page 3 The Manual is related to your safety, lawful rights and responsibilities. Please read it carefully before installing and using the product. Shining 3D Tech Co., Ltd. (hereinafter referred to as "the Company") owns complete intellectual property rights of the Manual. No part of the Manual may be reproduced, transmitted, distributed, adapted, compiled or translated in any form or by any means without the prior written consent of the Company.
-
Page 4: Table Of Contents
CONTENT Safety Material Contact Ultraviolet Light Ethanol Sharp Tools Electromagnetic Interference Operation Environment Site Requirements Material Storage Others Product Overview AccuFab-D1s Accessories Printer Setup Unpacking Install the Printer Add Material FabWare Connecting to Network 5.1.1 LAN Network 5.1.2 Wireless Network... -
Page 5: Safety
The printing material of AccuFab printer is photo-polymerized resin material independently developed by SHINING 3D. The resin is stable, safe, and no substances harmful to the human body found in the test, but direct contact with skin may cause adverse irritating reactions. -
Page 6: Operation Environment
The bottle shall be kept closed at all times to avoid contact with Note: fire sources. Others Ensure that the AccuFab-D1s 3D printer only uses the original consumables and accessories. Any change to the printer without the manufacturer's permission will result in device failure, which will invalidate your warranty. -
Page 7: Others
Operation Environment Others Ensure that the AccuFab-D1s 3D printer works in the recommended printing environment, and the incongruent printing environment will affect the printing accuracy and printing success rate. To guarantee the printing quality of the model, keep the hood closed during operation or just finished operation, and do not touch the model, resin... -
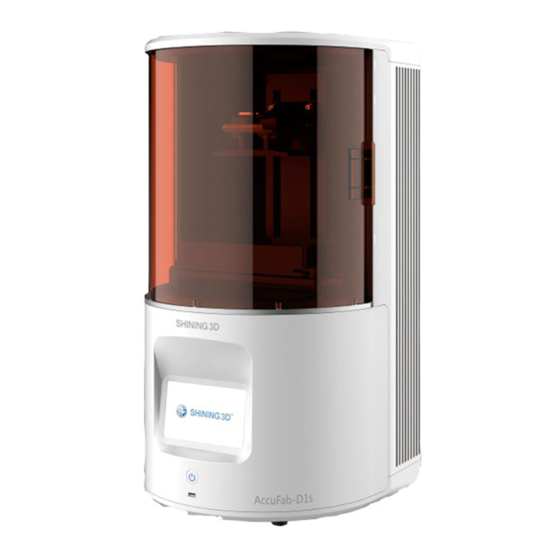
Page 8: Product Overview
Product Overview AccuFab-D1s Handle Printing platform bracket Chamber hood Printing platform Resin tank Touch screen Power button (Front) USB port Network Port Power Port B Type USB Port Power Button (back)... -
Page 9: Accessories
Product Overview Accessories Quality Certification Resin tank x 2 Build Platform Installation Guide Power Adaptor Cleaning box Power Cable USB flash drive Disposable Gloves Scraper USB cable Network cable Angular Knife Putty knife Brush Cloth PET Card Note: Detailed information please refer to Quick Start Guide... -
Page 10: Printer Setup
Printer Setup Precaution: Do not plug in the printer before the unpacking process iscomplete. Or the initialization action may cause stuck of the filling materials inside printer Unpacking Open the cover, take out accessory box, resin tank x 2, power adaptor and power cable from fixing foam. -
Page 11: Install The Printer
Printer Setup Install the Printer Plug in the power adaptor and connectit with power cable. Press the power button in the back, then press the power button in the front. The build platform bracket will move up automatically after booting the printer. Remove the protective film on the protection glass. -
Page 12: Add Material
Printer Setup Add Material The resin material is a mixture, and it is likely to form a small amount of sediment after placing for long time. Please shake the bottle well before adding to the resin tank. Shake The Bottle Use scraper to stir resin in the tank to avoid sediment. -
Page 13: Fabware
FabWare FabWare is the operating software for the printer, which controls the printer operation and some manual settings can be done by user. The home page shows the printer status Home . Idle, printing or printer finished. Also the build environment info is displayedfor reference. -
Page 14: Connecting To Network
FabWare Connecting to Network If you want to send the print file after slicing through network. Then you need to connect the printer to the network first, to LAN network or wireless network. 5.1.1 LAN Network Connect the Network cable to the network port Go to the FabWare. -
Page 15: Fabware Update
FabWare FabWare Update There are two ways of updating FabWare. Online and Offline. 5.2.1 Online Update Open About Printer. Update Software. Click Update to update the software Select Network Update. or material profile. Reboot When new FabWare versions is available, a prompted window will indicate user to update. -
Page 16: Product Activation(Optional)
FabWare Product Activation(Optional) Product Activation(Optional) If the notification window shows that the license expires or can not print, please activate the license. Delete Print , “Advanced Settings” - “Activate License” to enter activation interface . Insert the Flash Drive with Activation file(.ac) . (Flash Drive Activation File). -
Page 17: Print
Print Workflow IMPORT PRINT FILE AccuWare SETUP PRINTING POST PROCESSING AccuWare Detailed information please refer to AccuWare User Manual Resin Tank Setting The FabWare displays the current material setting for the resin tank and the layers have been printed with the current resin tank. You can click on the setting to change the setting. -
Page 18: Platform Level (Optional)
Print Platform level (Optional) Platform level is crucial to successful print. Before that, please make sure the resin tank and build platform are clean and locked in place. In the control panel, find “Settings--- Hardware Settings---Motor Settings ---move to Zero Position” and tap. Platform will go down, wait until it stops. -
Page 19: Clean Resin Tank(Optional)
Print Clean Resin Tank (Optional) Clean Resin tank is a function that can be used after a print failure. To clean some residue the failed print left in the resin tank. On the FabWare main interface, tap resin tank area to enter the Resin Tank Information. -
Page 20: Choose Printing File
Print Choose printing file Files can be sent to the printer with flash drive or through network. To ensure the model printing quality, keep the chamber door closed when the Printer is printing or just finished printing. Do not touch the model, resin tank, build platform or any other Printer parts. -
Page 21: Flash Drive Printing
Print 6.5.1 Local Printing to start printing process. Next After finishing printing,tap to finish. 6.5.2 Flash Drive Printing Insert the USB flash drive with sliced files into the Printer. On FabWare main interface, tap to enter the printing interface. to enter the USB flash drive. Select files to be printed. -
Page 22: Printing Status
Print Printing Status In the printing page, you can check the printing progress as well as pausing and cancelling the current printing. Name Description Print detail Tap to return to the previous step. Print layer Printed layers/Total layers. Time Time elapsed/Total time Percentage bar Printing progress Pause... -
Page 23: Post Processing
Post Processing Remove Model A few tools in the accessory box are for the cleaning of platform. Please avoid protrusion of the platform surface. As it would press the resin tank film during printing process. And may damage the film or even the screen. After the model printing is finished, lift and suspend the printing platform for 5 minutes. -
Page 24: Cleaning
Post Processing Cleaning 7.2.1 Clean Model Put the printed parts into the bath of alcohol (concentration of 75% or above). And clean manually for about 30 seconds. You can use cleaning machine as well. Alcohol 75% Optional: Dry the model with high-pressure air. 7.2.2 Clean Build Platform A few tools in the accessory box are for the cleaning of platform. -
Page 25: Model Post Cure
Post Processing Post Cure It is necessary to place the green part for a post cure process. To enhance the performance and also to cure the uncured surface of the model. Models after post cure can be handled without gloves. Place the model into the curing box. - Page 26 Support Center: Aftersales service: Technical resource:...
Need help?
Do you have a question about the AccuFab-D1s and is the answer not in the manual?
Questions and answers