Table of Contents
Advertisement
Quick Links
Advertisement
Table of Contents

Related Manuals for Ballard Designs Miles Redd MR Shell MS050


Summary of Contents for Ballard Designs Miles Redd MR Shell MS050
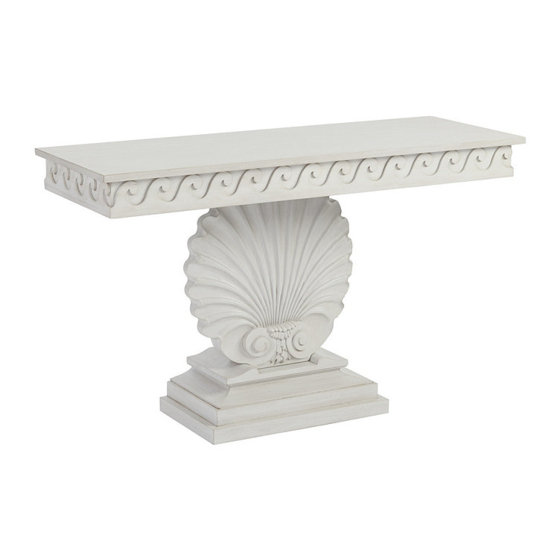
- Page 1 Customer Service: 800-367-2810 Online: www.ballarddesigns.com PRODUCT NAME: MR Shell Console ITEM NUMBER: MS050 DIMENSIONS OF ITEM ASSEMBLED: 33.5” H x 54” W x 20” D PRODUCTS ARE NOT INTENDED MADE IN INDONESIA FOR COMMERCIAL USE. UPDATED: 6/5/2017 Page 1 of 5...
- Page 2 Part A: Console Assembly Ltr. Qty. Hardware Included Small Allen Bolts TOOLS NEEDED: Large Allen Bolts - Assembly may require Lock Washers 2 people - Requires a screwdriver Flat Washers NOTE: When unpacking, lay the parts on a padded Allen Wrench surface such as the packaging provided Anti-Tip Kits...
- Page 3 STEP 1: Turn the Table Top (G) onto a smooth surface such as a carpeted floor or the packaging provided. STEP 2: Insert the top of the Post (H) into the slot in the Table Top (G). Insert a Lock Washer (C) and a Flat Washer (D) onto the Large Allen Bolts (B) and two of the Small Allen Bolts (A).
- Page 4 STEP 3: Align the pre-drilled holes in the Base (I) with the holes in the bottom of the Post (H). Insert a Lock Washer (C) and a Flat Washer (D) onto the remaining Small Allen Bolts (A) and attach them into the Base. Tighten with the Allen Wrench (E). STEP 4: If the floor is uneven adjust the Levelers located on the underside of the Base (I).
- Page 5 Part F: Anti-Tip Installation Ltr. Qty. Hardware Included Small Screws Large Screws Brackets Retention Belt STEP 1: Attach two Brackets (L) horizontally to the back of the top of the Console using the Small Screws (J). Attach the remaining Brackets vertically into a wall stud 1 inch below the Brackets attached to the Console using the Large Screws (K).
Need help?
Do you have a question about the Miles Redd MR Shell MS050 and is the answer not in the manual?
Questions and answers