Uponor Smatrix Pulse Installation And Operation Manual
Hide thumbs
Also See for Smatrix Pulse:
- Installation and operation manual (120 pages) ,
- Quick manual (13 pages) ,
- Installation and operation manual (96 pages)
Table of Contents
Advertisement
Advertisement
Table of Contents

Related Manuals for Uponor Smatrix Pulse


Summary of Contents for Uponor Smatrix Pulse
- Page 1 Smatrix Pulse Installation and Operation Manual...
- Page 2 Uponor Smatrix Pulse Installation and Operation Manual is published by Uponor Inc. 5925 148th Street West Apple Valley, MN 55124 USA T 800.321.4739 F 952.891.2008 Uponor Ltd. 6510 Kennedy Road Mississauga, ON L5T 2X4 CANADA T 888.594.7726 F 800.638.9517 uponor.com ©...
-
Page 3: Table Of Contents
Chapter 7: Connecting Wireless Devices ......27 Chapter 8: Clearing Setup Information or Resetting Devices ..................31 Chapter 9: System Operation ..........33 Chapter 10: Maintenance .............39 Chapter 11: System Connectivity ........41 Chapter 12: Troubleshooting ..........43 Chapter 13: Technical Data ..........51 uponor.com l 1... -
Page 4: Foreword
Uponor recommendations to ensure the product performs as expected and remains covered under warranty. For warranty information, visit uponor.com and search "warranty". 2 l Smatrix Pulse | Installation and Operation Manual... -
Page 5: Chapter 1: Copyright And Disclaimer
Uponor has been advised of the the limits printed on the products or stated in any possibility of such damages. Uponor’s total cumulative instructions supplied by Uponor. -
Page 6: Compliance
• Connect the equipment into an outlet on a circuit different from that to which the receiver is connected. • Consult the dealer or an experienced radio/TV technician for help. 4 l Smatrix Pulse | Installation and Operation Manual... -
Page 7: Chapter 2: Safety Instructions
Uponor Warning! Smatrix Pulse system. The Uponor system uses 115V 60 Hz AC power. In Refer to the following important safety instructions before, case of emergency, immediately disconnect the during, and after installation of the Smatrix Pulse system. - Page 8 6 l Smatrix Pulse | Installation and Operation Manual...
-
Page 9: Chapter 3: System Description
Designed for maximum comfort, the thermostats communicate with the controller by radio Antenna, replacement A3801265 part link. It is possible to mix the different types of Smatrix Pulse thermostats in the same installation. Transformer, A3850050 replacement part Wireless relays provide installation flexibility when needing... -
Page 10: Hardware Descriptions
Main Features Main Features • Operative sensor for increased comfort • Power saving e-paper display (updates every 10 • Adjust setpoint temperature via the Smatrix Pulse App minutes) (requires Communication Module) • Displays Fahrenheit or Celsius • Setpoint range is 41 – 95°F (5 – 35°C); maximum and minimum setting may be limited by system settings •... - Page 11 • Connects up to eight (8) actuators • Two-way communication with up to six (6) thermostats • Heating/cooling outputs, and/or Comfort/ECO mode switched by dry contact or Smatrix Pulse App (requires Communication Module) • Separate relays for control of pump and boiler (other...
- Page 12 (except the antenna; must be mounted Figure 3-6: A380265A Controller vertical) (X-265) with Antenna (A-265) • Heating/cooling outputs, and/or Comfort/ECO mode switched by dry contact or Smatrix Pulse App (requires Communication Module) Warning! Included Components Per Table 3-1, use Uponor 24V actuators to ensure compatibility with the Controller.
-
Page 13: Chapter 4: System Functionality
Chapter 4: System Functionality The Smatrix Pulse system provides a wide variety of Autobalancing is a function where the system calculates functionality and options to enhance the comfort and the actual energy need of single rooms or zones and operation for residential radiant heating and cooling adapts the output power of each loop to its length. - Page 14 Cooling Options Caution! When connecting a Relay Module to control air Use the Smatrix Pulse App to set up the following two heating or cooling, make sure an actuator is not cooling methods. connected to the first channel the thermostat is assigned to.
-
Page 15: Heating/Cooling Offset
Cooling is shut off on a per-room or zone basis when the When switching back to heating, the value is used to RH limit is reached (set in the Smatrix Pulse App, default reduce the setpoint. 75%). If a dehumidifier is installed, one per controller, it will be activated when the dehumidifier start limit is reached. - Page 16 14 l Smatrix Pulse | Installation and Operation Manual...
-
Page 17: Chapter 5: Hardware Installation
Uponor recommends the following steps to provide the (unless the manifold is a single zone). best possible installation results: • Ensure all Smatrix Pulse components are protected from • Prepare for Installation (see page 15) exposure to water. • Install Controller(s) (see page 16) Required Tools •... -
Page 18: A380265C/A380265A Controllers
Transformer (part number A3850050), can be mounted • Assemble or connect all components prior to installing separately. on to the DIN rail. • Snap the assembled hardware onto the DIN rail. 16 l Smatrix Pulse | Installation and Operation Manual... -
Page 19: A3801263 Expansion Module (M-262)
The Communication Module contains both an antenna for picture of the Controller. internal connections to thermostats and sub-controller • Install the Communication Module into and a local network (LAN) module for Wi-Fi or Ethernet the back mount. communication. Figure 5-4: Route Ethernet cable uponor.com l 17... -
Page 20: Antenna (A-265)
Install the Antenna outside a manifold cabinet. Caution! Install the Antenna vertically to ensure the best communication. Mounting the Antenna • Attach the Antenna to the wall using the adhesive strips included in the packaging. 18 l Smatrix Pulse | Installation and Operation Manual... -
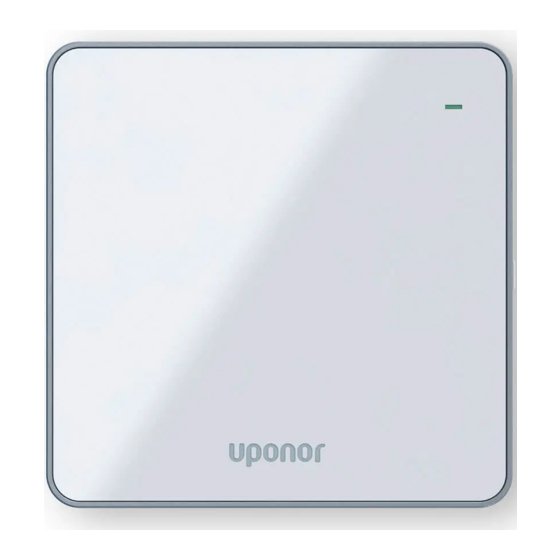
Page 21: Thermostats
Thermostats Attaching the Thermostat to a Wall Smatrix Pulse thermostats provide information that is The thermostat transmitted via wireless signal to Controllers and/or Relay packaging includes Modules. This information is used to determine whether hardware for the heating or cooling is needed for the individual zones and following three operate the appropriate devices. - Page 22 20 l Smatrix Pulse | Installation and Operation Manual...
-
Page 23: Chapter 6: Wiring
General Purpose Input (GPI) Switch This section explains how to wire various hardware components in the Smatrix Pulse system. Before beginning The controller includes a set of terminals that can be the wiring process, ensure all hardware is mounted and used to change system operation. -
Page 24: Output Relays
Function only available when Pump management is set to Individual, various options for these outputs if a Communication otherwise "Not used" is shown in the Smatrix Pulse App. Module is installed in the system. This table applies to Function only available when cooling is activated. -
Page 25: Relay Module
Modules can be used per Controller. The function for the Relay Module is set in Installer Settings during setup (requires a Communication Module). The tables below show the available functionality depending on the device it is linked to. uponor.com l 23... - Page 26 The relay LED will turn red when there is an Module and must be set in Installer Settings during active call for heating and blue for cooling. initial configuration, or in the System Settings Menu. Figure 6-5: Relay Module wiring 24 l Smatrix Pulse | Installation and Operation Manual...
-
Page 27: Thermostats
Minimum and maximum values that the battery is correctly inserted in the thermostat. can be set or modified through the Smatrix Pulse App or The A3800169 Digital Thermostat (T-169) will perform a on the Digital Thermostat if no Communication Module is self-test for 10 seconds when the transportation strip or installed in the system. - Page 28 26 l Smatrix Pulse | Installation and Operation Manual...
-
Page 29: Chapter 7: Connecting Wireless Devices
• The Controller is in registration mode when the LED for With the Smatrix Pulse system, the true wireless features Channel 1 flashes red. If a thermostat has already been make the hardware more flexible and easier to install. This linked, the first channel available will flash red. - Page 30 See the previous step for Linking a Thermostat to a Controller. Before proceeding to linking the devices, familiarize yourself with the various items on the Relay Module and their status/operation: Figure 7-4: Relay Module status items 28 l Smatrix Pulse | Installation and Operation Manual...
- Page 31 LED will start flashing in a pattern (long flash, short unlit flash, long flash, etc.). • Press the > button to move the flashing red LED to Channel 2. Figure 7-9: Enter pairing mode uponor.com l 29...
- Page 32 For thermostat information to appear on the • Channel 1 LED on both the sub-Controllers turns solid Smatrix Pulse App or for Over The Air (OTA) green and the registration is complete. Channel 1 LED on updates to be installed and updated, all sub-...
-
Page 33: Chapter 8: Clearing Setup Information Or Resetting Devices
LED will start flashing in a pattern mode. (long flash, short flash, long flash, etc.). • If unpairing a thermostat, Uponor recommends resetting • Press the > button to move to Channel 2 and this LED will this device as well. - Page 34 • The screen will go blank temporarily and restart showing the software version. • Once this is complete, the screen will show Figure 8-3: Resetting the the current room Digital Thermostat (T-169) temperature. 32 l Smatrix Pulse | Installation and Operation Manual...
-
Page 35: Chapter 9: System Operation
Scheduling programs provide an option to switch temperatures via thermostats located in each room, or selected rooms between Comfort and ECO mode using if installed with the Smatrix Pulse App (which requires a a 7-day program. This optimizes the installation and Communication Module). - Page 36 The Access Point is open, connected, and communication available connecting phone/tablet Orange via Wi-Fi. Solid Red No connection to the router has been established Dark (unlit) Power is off Table 9-2: Communication Module LED mode of operation 34 l Smatrix Pulse | Installation and Operation Manual...
- Page 37 Reference Icons Description Indicates changing the setpoint temperature Room set temperature Heating demand Cooling demand Figure 9-6: Changing temperature settings Comfort mode ECO (setback) mode uponor.com l 35 Table 9-6: Changing temperature settings...
- Page 38 High temperature floor limit Table 9-9: Control Mode menu Low temperature floor limit Cooling allowed Display units Relay Module integration Room temperature calibration Invert screen Table 9-8: Digital Thermostat (T-169) menu descriptions 36 l Smatrix Pulse | Installation and Operation Manual...
- Page 39 Table 9-10: Relative humidity displays mode RFT is activated in Menu 04. For systems with a Communication Module, this menu only shows the set value. Changes are done in the Smatrix Pulse App. Menu 06: Low Floor Temperature Limitation Default: 68°F (20°C) Setting range: 50 - 86°F (10 –...
- Page 40 38 l Smatrix Pulse | Installation and Operation Manual...
-
Page 41: Chapter 10: Maintenance
Open the wireless communication. These batteries will need to be Smatrix Pulse App and click the menu icon (three horizontal lines). Then, select System Settings, and replaced throughout the life of the Smatrix Pulse system. - Page 42 40 l Smatrix Pulse | Installation and Operation Manual...
-
Page 43: Chapter 11: System Connectivity
Pulse system to the Uponor Cloud. Smatrix Pulse Mobile App Available for download from the App Store or Google Play, the Smatrix Pulse App extends the flexibility and comfort of an Uponor radiant system by adding remote access to its range of possibilities. - Page 44 Setting up a system with a Communication Module requires a mobile device (smartphone/ tablet). Set up and connect the Controller (C) using the Uponor Smatrix Pulse App (A) and Communication Module (B) via multiple connection methods. Direct Connection (no Wi-Fi)
-
Page 45: Chapter 12: Troubleshooting
Troubleshooting This section covers general issues and alarms that can occur with the Smatrix Pulse system, along with the cause and solutions. A common cause of a problem may be due to improperly installed loops or mixed up or incorrectly installed thermostats. - Page 46 No power to the router • Restore power to the router. the Smatrix Pulse App to restore the connection No power to the Smatrix Pulse hardware • Restore power to the Smatrix Pulse hardware. 44 l Smatrix Pulse | Installation and Operation Manual...
- Page 47 Controller software versions are incompatible. • Contact the installer. • Check the software versions of the controllers using the Smatrix Pulse App. The antenna is installed inside a metal cabinet • Change the Antenna location. or too close to other materials that will shield •...
- Page 48 Controller from the wall socket). to the customer account in Uponor Cloud services. • Request help in the Smatrix Pulse App and follow the wizard to determine the root cause. Software update failed The Controller software update has failed.
- Page 49 • If the problem persists, contact the installer. Power LED and channel LED The antenna is out of position, or a wire is • Install the Antenna in a correct position with on the Controller flashes disconnected. the cable correctly connected. uponor.com l 47...
- Page 50 • Check thermostat(s) connections. not match setpoint on communication with the thermostat. • Check batteries in the thermostat. thermostat and actuators • Check the Smatrix Pulse App for a thermostat shut on/off on a fixed communication error. interval • Reconnect the lost thermostat.
- Page 51 • Contact the installer if the problem persists. The average temperature limit is too low. • Increase the average temperature limit. A window or door is open. • Close any windows or doors that might affect the measured temperature. uponor.com l 49...
- Page 52 Relative humidity sensor The relative humidity limit is reached. • Lower the humidity level by starting a limit dehumidifier or increasing the supply temperature setpoint. 50 l Smatrix Pulse | Installation and Operation Manual...
-
Page 53: Chapter 13: Technical Data
0.33 kV, OVC I Pollution degree Software class Operating temperature 32°F to 113°F (0°C to 45°C) Storage temperature 14°F to 149°F (-10°C to 65°C) Radio frequency 912.0 MHz Transmitter duty cycle <1% Connection terminals 18 - 24 AWG uponor.com l 51... - Page 54 IP20, Class III (IP: degree of inaccessibility to active parts of the product and degree of water) Maximum ambient RH (relative humidity) 85% at 68°F (20°C) Power supply From Controller Radio frequency 912.0 MHz Transmitter duty cycle <1% Receiver class 52 l Smatrix Pulse | Installation and Operation Manual...
- Page 55 85% at 68°F (20°C) Low voltage tests EN 60730-1* and EN 60730-2-9*** EMC (electromagnetic compatibility requirements) tests EN 60730-1 and EN 301-489-3 ERM (electromagnetic compatibility and radio spectrum EN 300 220-3 matters) tests Power supply From Controller uponor.com l 53...
- Page 56 ** EN 60730-2-1 Automatic electrical controls for household and similar use -- Part 2-1: Particular requirements for electrical controls for electrical household appliances *** EN 60730-2-9 Automatic electrical controls for household and similar use -- Part 2-9: Particular requirements for temperature sensing controls 54 l Smatrix Pulse | Installation and Operation Manual...
- Page 57 18 - 24 AWG, twisted pair Cable from relay switch to Controller GPI 65' (20 m) 18 - 24 AWG input Product Dimensions Controller (X-265) Figure 13-1: Controller (X-265) Communication Module (R-208) Figure 13-2: Communication Module (R-208) uponor.com l 55...
- Page 58 Digital Thermostat (T-169) Figure 13-3: Digital Thermostat (T-169) Mini Sensor (T-161) Figure 13-4: Mini Sensor (T-161) 56 l Smatrix Pulse | Installation and Operation Manual...
- Page 59 4,184 165,180 3,760 139,402 3,383 118,018 3,050 100,221 2,754 85,362 2,490 72,918 2,255 62,465 2,045 53,658 1,857 46,218 1,689 39,913 1,538 34,558 1,403 29,996 1,281 26,099 1,172 22,763 1,073 19,900 17,436 15,311 13,474 11,883 10,501 9,299 8,250 uponor.com l 57...
- Page 60 Notes 58 l Smatrix Pulse | Installation and Operation Manual...
- Page 61 Notes uponor.com l 59...
- Page 62 Uponor Inc. Uponor Ltd. 5925 148th Street West 6510 Kennedy Road Apple Valley, MN 55124 Mississauga, ON L5T 2X4 CANADA T 800.321.4739 T 888.594.7726 F 952.891.2008 F 800.638.9517 uponor.com SmatrixPulse_manual_1022, Copyright © 2022 Uponor. Printed in the United States.
Need help?
Do you have a question about the Smatrix Pulse and is the answer not in the manual?
Questions and answers