Cosmo F965NF User Manual
Dual fuel range, 36-in freestanding range
Hide thumbs
Also See for F965NF:
- Installation manual (50 pages) ,
- Installation manual (50 pages) ,
- Use & installation manual (51 pages)
Table of Contents
Advertisement
Advertisement
Table of Contents

Subscribe to Our Youtube Channel
Related Manuals for Cosmo F965NF


Summary of Contents for Cosmo F965NF
- Page 1 DUAL FUEL RANGE F965 F965NF 36-IN FREESTANDING RANGE USER MANUAL IMPORTANT: READ AND SAVE THESE INSTRUCTIONS. FOR RESIDENTIAL USE ONLY. INSTALLER: PLEASE LEAVE THIS GUIDE WITH THE HOMEOWNER. HOMEOWNER: PLEASE KEEP THIS GUIDE FOR FUTURE REFERENCE. Rev. 22.10...
- Page 3 COSMO Appliances are designed according to the strictest safety and performance standard for the North American market. We follow the most advanced manufacturing philosophy.
-
Page 4: Table Of Contents
TABLE OF CONTENTS RANGE SAFETY....................3 Anti-tip Device ......................4 Important Safety Instructions ................. 6 OVERVIEW ......................10 Control Panel ......................12 Clock & Timer ......................12 Timed Cooking ......................14 COOKTOP USE ....................16 Power Failure ......................16 Cookware ........................17 OVEN USE ...................... -
Page 5: Range Safety
RANGE SAFETY WARNING Fire Hazard If the information in this manual is not followed exactly, a fire or explosion may result causing property damage, personal injury or death. - Do not store or use gasoline or other flammable vapors and liquids in the vicinity of this or any other appliance. -
Page 6: Anti-Tip Device
WARNING Tip Over Hazard • A child or adult can tip the range and be killed. • Install anti-tip bracket to floor or wall per installation instructions. • Slide range back so rear range foot is engaged in the slow of the anti-tip bracket. - Page 7 Your safety and the safety of others are very important. We have provided many important safety messages in this manual and on your appliance. Always read and obey all safety messages. This is the safety alert symbol. This symbol alerts you to potential hazards that can kill or hurt you and others.
-
Page 8: Important Safety Instructions
IMPORTANT SAFETY INSTRUCTIONS WARNING: To reduce the risk of fire, electrical shock, injury to persons, or damage when using the range, follow basic precautions, including the following: • WARNING: TO REDUCE THE RISK • CAUTION: Do not store items of OF TIPPING OF THE RANGE, THE interest to children in cabinets RANGE MUST BE SECURED BY... - Page 9 IMPORTANT SAFETY INSTRUCTIONS • Do Not Use Water on Grease • Disconnect power before Fires – Smother fire or flame or servicing. use dry chemical or foam-type • Proper Installation – The extinguisher. appliance, when installed, must • Use Only Dry Potholders – Moist be electrically grounded in or damp potholders on hot accordance with local codes, or...
- Page 10 IMPORTANT SAFETY INSTRUCTIONS • Do not use replacement parts • Care must be taken to prevent that have not been aluminum foil and meat probes recommended by the from contacting heating manufacturer (e.g. parts made at elements. home using a 3D printer). •...
- Page 11 IMPORTANT SAFETY INSTRUCTIONS • Proper Disposal of Your For self-cleaning ranges – Appliance – Dispose of or recycle • Do Not Clean Door Gasket – The your appliance in accordance door gasket is essential for a with Federal and Local good seal.
-
Page 12: Overview
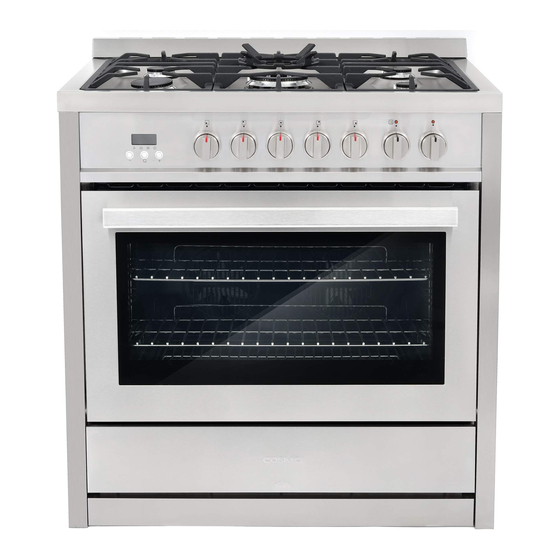
OVERVIEW RANGE LAYOUT This illustration covers several different models. The range you have purchased may have some or all of the items listed. The locations and appearances of the features shown here may not match those of your model. Backsplash Oven rack positions Semi-rapid burner Oven door window... - Page 13 WHAT'S INCLUDED Surface burner grates (3) Surface burners and caps (5) Wok grate Oven racks (2) BURNER LAYOUT Burner cap Electrode Burner head Flame failure safety device (on older models)
-
Page 14: Control Panel
CONTROL PANEL LED Indicators Defrost Light Conv Bake Bake Pizza Conv Broil High Broil Broil Clock/Timer Surface Burner Oven Controls Controls Controls CLOCK & TIMER SETTING THE CLOCK AND TIMER IMPORTANT: Clock must be set in order for the timed oven functions to work. - Page 15 1. If the clock was previously set, press the function button repeatedly until the indicator bar blinks above "Set Clock". 2. Press or hold the + or - button to adjust the clock. The clock will be confirmed automatically if you leave the correct time there for 5 seconds without pressing any buttons, and the indicator bar will become solid.
-
Page 16: Timed Cooking
TIMED COOKINGS WARNING Food Poisoning Hazard Do not let food sit in oven more than one hour before or after cooking. Doing so can result in food poisoning or sickness. Foods that can easily spoil such as milk, eggs, fish, meat or poultry, should be chilled in the refrigerator first. - Page 17 TO SET THE END TIME Press the function button until the bar flashes above "End Time". Then use the + or – button to set the shut off time of day, and press the function button or wait for 5 seconds to confirm. SETTING THE COOKING METHODS Light Defrost...
-
Page 18: Cooktop Use
COOKTOP USE Read the instructions before installing or using this appliance. 1. This appliance shall be installed in accordance with the regulations in force and only used in a well-ventilated space. 2. The use of a gas-cooking appliance results in the production of heat and moisture in the room in which it is installed. -
Page 19: Cookware
For lower gas consumption and a better result, use saucepans with a diameter matching the diameter of the burner, to avoid the flame coming up around the sides of the saucepan. See the Container Table. Use only flat- bottomed pans. As soon as liquid starts to boil, turn the flame down to a level sufficient to maintain boiling. -
Page 20: Oven Use
OVEN USE WARNING NEVER cover any slots, holes or passages in the oven bottom or cover an entire rack with materials such as aluminum foil. Doing so blocks airflow through the oven and may cause carbon monoxide poisoning. Aluminum foil linings may also trap heat, causing a fire hazard. Reset all controls to the OFF position after using a programmable timing operation. -
Page 21: Oven Modes
THERMOSTAT KNOB Select the cooking temperature by turning the knob to the required temperature. The indicator light will come on when the oven is preheating. Once the oven reaches desired temperature, the heating process will pause and the indicator light will go out temporarily to maintain the current temperature. - Page 22 Low Broil THERMOSTAT RANGE: 150°F (65.6°C) TO MAX 450°F (232°C) The Low Broil mode uses less intense heat from the upper inner and outer elements to cook food while also browning the surface. It is also used to brown selected dishes at the end of cooking. Food should be place near the upper racks, and preheating is not necessary when using this mode.
-
Page 23: Tips And Techniques
TIPS AND TECHNIQUES BAKE Baking is cooking with heated air. Both upper and lower elements in the oven are used to heat the air but no fan is used to circulate the heat. Follow the recipe or convenience food directions for baking temperature, time and rack position. - Page 24 Bake Chart RACK TEMP. °F (°C) FOOD ITEM TIME (MIN) POSITION (PREHEATED OVEN) Cake Cupcakes 350 (175) 19-22 Bundt Cake 350 (175) 40-45 Angel Food 350 (175) 35-39 2 crust, fresh, 9" 375-400 (190-205) 45-50 2 crust, frozen fruit, 9" 375 (190) 68-78 Cookies...
- Page 25 • Dark metal pans may be used. Note that food may brown faster when using dark metal bake ware. • The number of racks used is determined by the height of the food to be cooked. • Baked items, for the most part, cook extremely well in convection. Don’t try to convert recipes such as custards, quiches, pumpkin pie, or cheesecakes, which do not benefit from the convection-heating process.
- Page 26 Convection Bake Chart Reduce standard recipe temperature by 25 ºF (15 °C) for Convection Bake. Temperatures have been reduced in this chart. FOOD ITEM RACK TEMP. °F (°C) TIME (MIN) POSITION (PREHEATED OVEN) Cake Cupcakes 325 (160) 20-22 Bundt Cake 325 (160) 43-50 Angel Food...
-
Page 27: Cooking With The Convection Oven
• Turn meats once halfway through the cooking time (see convection broil chart). • Thicker cuts and unevenly shaped pieces of meat, fish and poultry may cook better at lower broiling temperatures. Convection Broil Chart FOOD ITEM RACK BROIL INTERNAL TIME TIME POSITION... - Page 28 This European Convection system provides state-of-the-art engineering and advanced design to create the finest convection oven. In standard convection ovens, a fan simply circulates the hot air around the food. The system is characterized by the combination of an additional heating element located around the convection fan and the venting panel that distributes heated air in three dimensions: along the sides, the top and the full depth of the oven cavity.
-
Page 29: Range Care
RANGE CARE CLEANING IMPORTANT: Before cleaning, make sure all controls are off and the oven and cooktop are cool. Always follow label instructions on cleaning products. Soap, water and a soft cloth or sponge are suggested first unless otherwise noted. Do not use abrasive cleaning products. - Page 30 PORCELAIN-COATED GRATES AND CAPS • Clean as soon as cooktop, grates and caps are cool. • Food spills containing acids, such as vinegar and tomato, should be cleaned as soon as the cooktop grates and caps are cool. These spills may affect the finish.
- Page 31 OVEN CAVITY • Food spills should be cleaned when oven cools. At high temperatures, foods react with porcelain, so staining, etching, pitting or faint white spots can result. Cleaning Method: • Mild detergent and warm water. NOTE: Do not use oven cleaners. OVEN RACKS AND ROASTING RACKS Cleaning Method: •...
-
Page 32: Troubleshooting
TROUBLESHOOTING First try the solutions suggested here to possibly avoid the cost of a service call. BAKING PROBLEMS With any oven setting poor results can occur for many reasons other than a malfunction of the oven. Check the chart below for causes of the most common problems. -
Page 33: Cooktop Problems
PROBLEM CAUSE Pie crusts do not brown • Baking time not long enough on bottom or crust is • Using shiny steel pans soggy • Incorrect rack position • Oven temperature is too low Cakes pale, flat and may • Oven temperature too low not be done inside •... - Page 34 PROBLEM POSSIBLE CAUSE SOLUTION Burner Burner port(s) are Clean burner port opening using a stiff, Flames clogged. nylon toothbrush or a straightened paper clip. uneven, Burner caps are not Place burner caps so that the alignment yellow positioned properly. pins are properly aligned with the slots. and/ or noisy Propane gas is...
-
Page 35: Oven Problems
OVEN PROBLEMS PROBLEM POSSIBLE CAUSE SOLUTION Oven is not No power to the Check the circuit breaker or fuse box heating range. to your house. Make sure there is proper electrical power to the oven. Oven control not Make sure the oven temperature has turned on. - Page 36 PROBLEM POSSIBLE CAUSE SOLUTION Excessive When using bake mode, preheat the Moisture oven first. Convection Bake and Convection Roast will eliminate any moisture in the oven. Porcelain Porcelain interior When removing and replacing oven Chips is chipped by racks, always tilt racks upward and do oven racks not force them to avoid chipping the porcelain.
-
Page 37: Limited Warranty
LIMITED WARRANTY WARRANTY AND SERVICE TO RECEIVE WARRANTY SERVICE, YOUR PRODUCT MUST BE REGISTERED. TO REGISTER AND REVIEW FULL WARRANTY DETAILS, VISIT: WWW.COSMOAPPLIANCES.COM/WARRANTY SCAN TO REGISTER CUSTOMER SUPPORT TO CHAT WITH US LIVE FOR ASSISTANCE, VISIT: WWW.COSMOAPPLIANCES.COM/CHAT SCAN TO CHAT... - Page 38 IMPORTANT Do Not Return This Product To The Store If you have a problem with this product, please contact COSMO Customer Support at +1 (888) 784-3108 DATED PROOF OF PURCHASE, MODEL #, AND SERIAL # REQUIRED FOR WARRANTY SERVICE. IMPORTANT Ne pas Réexpédier ce Produit au Magasin...
- Page 39 MEMO...
- Page 40 MEMO...
- Page 42 APPLIANCES Cosmo is constantly making efforts to improve the quality and performance of our products, so we may make changes to our appliances without updating this manual. Electronic version of this manual is available at: www.cosmoappliances.com...
Need help?
Do you have a question about the F965NF and is the answer not in the manual?
Questions and answers