Table of Contents
Troubleshooting

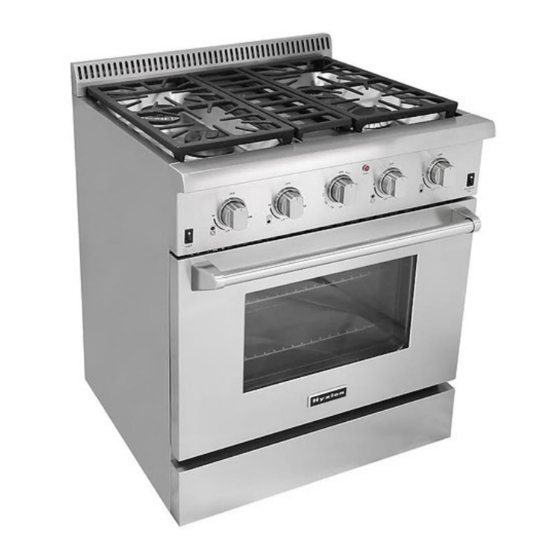
Related Manuals for Cosmo HYXION 36


Summary of Contents for Cosmo HYXION 36
- Page 1 USER MANUAL & INSTALLATION INSTRUCTIONS HYXION 36” PROFESSIONAL STYLE GAS RANGE IMPORTANT SAFETY INSTRUCTIONS Carefully read the following important information regarding installation safety and maintenance. Keep these instructions for future reference.
-
Page 2: Table Of Contents
Contents Safety Instructions ……………………………………………………………. 1 Installation Instructions ………………………………………………………. 2~8 Cooktop Operation …………………………………………………………… 9~11 Oven Operation ………………………………………………………………. 12 Broiler Operation ……………………………………………………………... 13 Griddle Operation …………………………………………………………….. 14 Care & Cleaning ……………………………………………………………… 15~16 Troubleshooting ………………………………………………………………. 17 Warranty & Product Registration …………………………………………….. 18~19 WARNING If the information in this manual is not followed exactly, a fire or an explosion may result causing property damage, personal injury or even death. -
Page 3: Installation Instructions
Installation WARNING All ranges can tip and cause injuries. Install anti-tip device packaged with range. Follow all Installation Instructions. Make sure the anti-tip bracket is installed: Slide range forward. Make sure the anti-tip bracket is securely attached to the wall behind the range. Safely tilt the front of the range upward slightly and move back against wall, Making sure the pin slides under bracket. - Page 4 Installation To ensure proper and safe operation, read all instructions before using the product. Install or locate the product only in accordance with the provided Installation Instructions. • Do not attempt to adjust, repair, service, or replace any part of your appliance unless it is specifically recommended in this guide.
-
Page 5: Gas Supply Requirements
Installation Gas Supply Requirements I t ll ti Installation of this range must conform with local codes, or in the absence of local codes, than f thi ith l i th national Fuel Gas Code, ANSIZ223.1 / NFPA 54. In Canada, installation must conform to the current natural Gas Installation /code, CAN 1-1.1-M81 and with local codes where applicable. -
Page 6: Dimensions And Clearances
Installation Dimensions and Clearances The range may be installed flush to the rear wall. You may install a non-combustible material on the rear wall above the range and up to the vent hood. It is not necessary to install non-combustible materials behind the range below the counter top height. The minimum distance from the side of the range above the counter top to combustible sidewalls must be at least 10 inches. - Page 7 Installation Dimensions and Clearances Dimensions and Clearances...
- Page 8 Installation Electric Power Supply Requirements pp y Your range must be electrically grounded in accordance with local codes or, in the absence of local codes, in accordance with the National Electrical Code (ANSI/NFPA 70, latest edition). In Canada, electrical grounding must be in accordance with the current CSA C22.1 Canadian Electrical Code Part 1 and/or local codes.
- Page 9 Installation 5. When all connections have been made, make sure all range controls are in the “off” position and turn on main gas supply valve and turn on main gas supply valve. 6. Use a leak detector at all joints and connections to check for leaks in the system. Do not use a flame to check for gas leaks.
-
Page 10: Cooktop Operation
Cooktop Operation Surface Burner Ignition Push to release gas. Turn to ‘Hi’ position. Adjust to appropriate flame height. To light the surface burners, push and turn the appropriate control knob counter clockwise to a “Hi” position. You will hear a clicking noise – the sound of the electric spark igniting the burner. Once burner ignition has been achieved, turn the burner control knob to adjust the flame size. - Page 11 Cooktop Operation Simmer and Boil • A smaller flame will give the best simmer results Small flames offer precise A smaller flame will give the best simmer results. Small flames offer precise cooking performance for delicate foods, keeping food warm, melting chocolate or butter, and for cooking that need to cook over low heat for a long time.
-
Page 12: Cooktop Operation
Cooktop Operation Oven Vent • Do not block the ducts at the rear of the range when cooking in the oven. It is important that the flow of hot air from the oven and fresh air into the oven burner never be interrupted. -
Page 13: Oven Operation
Oven Operation Oven Function Natural Airflow Bake occurs when heat is transferred into the oven from the bake burners in Natural Airflow Bake occurs when heat is transferred into the oven from the bake burners in the bottom of the oven cavity. Heat is then circulated by natural airflow. This is a traditional bake setting. -
Page 14: Broiler Operation
Broiler Operation Note: Door must be closed during broiling operation. Broiling is a method of cooking tender cuts of meat directly under the infrared broiler in the oven . Broiling in the oven is accomplished with the oven door closed. It is normal and necessary for some smoke to be present to give the food a broiled flavor. -
Page 15: Griddle Operation
Griddle Operation Before Using the Griddle Clean the griddle thoroughly with warm, soapy water to remove dust or any protective coating. Rinse with clean water and wipe off to dry with soft, clean, lint-free towel/cloth. A stainless steel cover that is sized to fit on top of the surface when the griddle is not being used is provided. -
Page 16: Care And Cleaning
Care and Cleaning Cooktop • To avoid electrical shock or burns, turn off all controls and ensure the cooktop is cool before cleaning. • Before cleaning the cooktop, ensure that all burners are turned off and that all components are cool enough to safely touch. •... -
Page 17: Care & Cleaning
Care and Cleaning Metal Finishes • Wash with soap and water, glass cleaner, or mild liquid sprays. Plastic Finishes • When control panel trim and end caps are cool, clean with soap and water, rinse and dry. • Use a glass cleaner and soft cloth. Oven Racks •... -
Page 18: Troubleshooting
Troubleshooting Before you call for service, please review the potential problem / possible causes and remedies shown in the table below. Have oven connected to a properly sized electrical power supply by a Oven is not connected to the electrical qualified electrician. -
Page 19: Warranty & Product Registration
The warranty does not apply to damage resulting from abuse, accident, natural disaster, loss of electrical power to the product for any reason, alteration, outdoor use, improper installation, improper operation, or repair or service of the product by anyone other than an authorized Cosmo Products service agency or representative. - Page 20 Cosmo is not responsible for incidental or consequential damages. Under no circumstances will Cosmo’s liability exceed the cost that you paid for the product. Some provinces/states do not allow the exclusion or limitation of incidental or consequential damages so the above limitation or the exclusion or limitation of incidental or consequential damages, so the above limitation or exclusion may not apply to you.
Need help?
Do you have a question about the HYXION 36 and is the answer not in the manual?
Questions and answers