
Subscribe to Our Youtube Channel
Related Manuals for Cosmo COS-DFR366


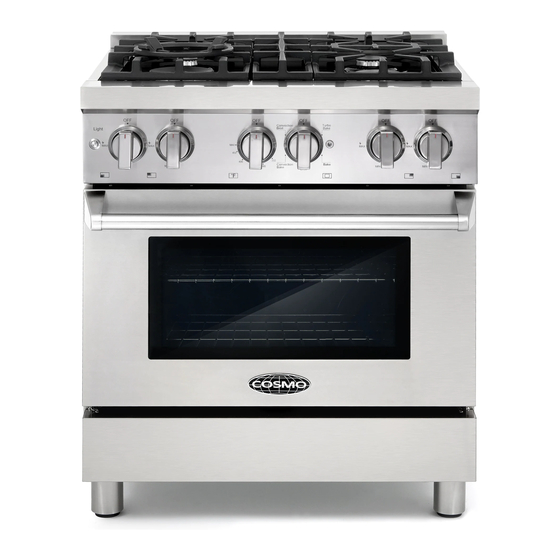
Summary of Contents for Cosmo COS-DFR366
- Page 1 PROFESSIONAL STYLE DUAL FUEL RANGE Installation Guide & User's Manual This manual is made with 100 % recycled paper. Electronic version of this manual is available at: www.cosmoappliances.com...
- Page 2 Thank You Thank you for your purchase. We know that you have many brands and products to choose from and we are honored to know that you have decided to take one of our products into your home and hope that you enjoy it.
-
Page 3: Important Safety Information
IMPORTANT SAFETY INFORMATION WARNING Read this instruction booklet before installing and PLEASE READ AND FOLLOW THESE IMPORTANT using the appliance, INSTRUCTIONS FOR THE SAFETY OF YOUR HOME The manufacturer will not be responsible for any AND OF THE PEOPLE LIVING IN IT. damage to property or to persons caused by incorrect installation or improper use of the appliance. - Page 4 TABLE OF CONTENTS...
-
Page 5: Warranty And Service
The ma imum liability of the warranty for product replacement or repair shall not e ceed the original purchase price of the product. c Cosmo reser es the right to repair or replace the co ered product with a comparable feature model of like kind. - Page 6 RODUCT SPECIFICATIONS Dimensions (insert drawings front, side and back)
-
Page 7: Before Installation
BEFORE INSTALLATION WARNING! Do not use aerosol sprays in the vicinity of This appliance shall only be installed by an authorized professional. this appliance while it is in operation This appliance shall be installed in accordance with the manufacturer's installation instructions. ROOM VENTILATION: An exhaust fan may be used with the appliance;... -
Page 8: Installing The Legs
INSTALLING THE LEGS The ranges must only be used with the legs properly installed. Before installing the legs, position the appliance near its final location as the legs are not suitable for moving the appliance over long distances. Four height-adjustable legs are shipped with the range in the polystyrene container situated over the appliance. - Page 9 WARNING: A child or adult can tip the range and be killed; Re-engage the anti-tip device if the range is moved. Failure to do so can result in death or serious burns to children or adults. INSTALLING THE ANTI-TIP STABILITY DEVICE The anti-tip device shipped with the range must be properly secured to the rear wall as shown in the picture below.
-
Page 10: Installation Requirements
IN T LL TION ENT TO INSTALLATION REQUIREMENTS IT HEN INET A properly grounded and horizontally-mounted This range may be installed directly electrical receptacle Type NEMA 14-50R should adjacent to existing countertop high be installed no higher than 3" (7.6 cm) above cabinets (36"... -
Page 11: Exhaust Hood Installation
EXHAUST HOOD INSTALLATION To eliminate the risk of burns or fire by reaching over heated surface units, cabinet storage space located above the surface units should be avoided. If cabinet storage is to be provided, the risk can be reduced by installing a range hood. These hoods have been designed to work in conjunction with the range and have the same finish for a perfect look. -
Page 12: Electrical Connection
ELECTRICAL CONNECTION The appliance shall be connected to a single phase electric line rated at 120/208Vac or 120/240Vac and 60Hz frequency. Electric power rating: 120/208Vac: 10 A max 120/240Vac: 12 A max Heating elements power rating: Oven bake element = 1500 Watt Oven circular element = 3200 Watt Oven broil element = 2850 Watt Install a suitable electric power supply receptacle... - Page 13 DO NOT USE EXTENSION CORDS WITH 4) Loose strain relief by unscrewing the two THIS APPLIANCE AS IT MAY RESULT IN strain relief's screws as in diagram. FIRE, ELECTRIC SHOCK OTHER type PERSONAL INJURY. The appliance is equipped at the factory with an electric supply cord set 4 wires type with ring terminals ...
-
Page 14: Electrical Grounding
ELECTRICAL GROUNDING This appliance is equipped with a four-prong plug for your protection against shock hazard and should be plugged directly into a properly grounded receptacle. Do not cut or remove the prong from this plug WARNING! ELECTRICAL SHOCK HAZARD Disconnect electrical power at the circuit breaker box or fuse box before installing the appliance. -
Page 15: Rating Plate
LOCATION OF APPLIANCE PLATES The data rating plate shows the model and A= Rating plate(s) located under front edge serial number of your range. It is located of cooktop under the front edge of the range cooktop, B= Wiring / schematic diagram placed on and is visible when the oven door is open backside panel and on installation (see illustration) -
Page 16: Gas Connection
GAS CONNECTION All gas connections must comply with national THIS VALVE IS NOT SHIPPED WITH and local codes. The gas supply line (service) THE APPLIANCE AND MUST BE must be the same size or greater than the inlet SUPPLIED BY THE INSTALLER. line of the appliance. -
Page 17: Pressure Regulator
PRESSURE REGULATOR GAS CONVERSION WARNING! Since service pressure may fluctuate with local demand, every gas cooking appliance Before carrying out this operation, must be equipped with a pressure regulator disconnect the appliance from gas on the incoming service line for safe and and electricity. - Page 18 STEP 1: PRESSURE REGULATOR The pressure regulator supplied with the To replace the nozzles of the appliance is a convertible type pressure surface burners, lift up the burners and regulator for use with Natural Gas at a unscrew the nozzles shipped with the nominal outlet pressure of 4"...
-
Page 19: Surface Burners
STEP 3: MINIMUM FLAME ADJUSTMENT WARNING! These adjustments should be made only for use of the appliance with natural gas. For use with liquid propane gas, the choke screw must be fully turned in a clockwise direction. SURFACE BURNERS 1. Light one burner at a time and set the to the MINIMUM position(small flame). -
Page 20: Installation Checklist
INSTALLATION Checklist FINAL PREPARATION All stainless steel body parts should be 1. Is the range mounted on its legs? wiped with hot, soapy water and with a liquid stainless steel cleanser. 2. Is the back guard securely connected? If build-up occurs, do not use steel wool, abrasive cloths, cleaners, or powders! If it is 3. - Page 21 USER MANUAL hot air or steam escape before removing or replacing food Take care of resettin all coo top / oven/broiler burners controls in OFF Do not heat unopened food containers. position after use of the appliance. Build-up of pressure may cause container to burst and result in injury.
- Page 22 are ( for example, oven vent openings and surfaces near these openings, oven doors, and windows of oven doors). Do not use an extension cord to connect this appliance. If the power supply cord is too short, have a qualified electrician or serviceman install an outlet near the appliance WARNING...
-
Page 23: Surface Burner Layout
SURFACE COOKING SURFACE BURNER LAYOUT IMPORTANT Small Burner Medium burn er Take care of reset all worktop/oven/ Rapid burner broiler burners controls in OFF position Dual burner (Power burner) after use of the appliance. Burner position (in this case front right burner). -
Page 24: Surface Burner Operation
SURFACE BURNER OPERATION To activate the electric ignition, simply turn the control knob counter-clockwise to maximum power(*position).Press the knob to start the flow of gas and the ignition spark. The spark will released at the metal tip of the white ceramic pin located on the side of the burner. -
Page 25: Tips For Using Burners Correctly
TIPS FOR USING BURNERS CORRECTLY TIPS FOR USING PANS CORRECTLY EN ION! Always ensure that bottom and handles of pans do not protrude from the worktop. When cooking with flammable fat such as oil, do not leave the range unattended. Use pots of the appropriate size on each IMPORTANT burner following the indication of the... - Page 26 enough to cause burns, for example, oven vent openings and surfaces near these openings, oven doors, oven glass window. Use Care When Opening Door. Let hot air or steam escape before removing or replacing food. Do Not Heat Unopened Food Containers. Buildup of pressure may cause container to burst and result in injury.
-
Page 27: Oven Racks
OVEN RACKS The ranges are equipped with commercial BROILER (Broiler heating element) to grade shelves and an enamel cooking tray. be used with temperature selector at Shelves are mounted on the appropriate guides 500°F for broiling situated on the sides of the oven compartment. Insert the shelf between top and bottom guide in any of the 5 positions available. -
Page 28: Using The Oven
USING THE OVEN BAKE PREHEATING THE OVEN OVEN LIGHT The appliance is equipped with two oven lamps Preheat the oven before baking. The oven does that light up when the oven door is opened or each not need to be preheated for large pieces of time the oven is in operation. -
Page 29: Cooking With Convection
CONVECTION throughout the oven cavity for all uses. Multiple COOKING WITH CONVECTION rack use is possible for baking large amounts of There are many advantages to cooking with food. When roasting, cool air is quickly replaced - convection. In the convection system, a fan in the searing meats on the outside and retaining more back of the oven moves heated air evenly around juices and natural flavour on the inside with less... -
Page 30: Baking Recommendations
BAKING RECOMMENDATIONS This may be used for cakes, cookies, biscuits and FOOD CONTROL TOTAL other foods for which two rack baking is desirable. SIZE TEMPERATURE SUGGESTED When several casseroles, frozen pies or cakes are to SETTING COOKING be baked, use racks 4 and 2. TIME Cookies 375*... - Page 31 OO SA E The United States Department of Agriculture recommends to NOT keep food at temperatures between 40°F to 140°F for longer than 2 hours. Cooking raw foods below 275°F is not recommended. FOOD OVEN TEMPERATURE Beef 150°F (70*C) Bacon 200°...
- Page 32 DEHYDRATE To activate DEHYDRATE mode: set In this oven function the function selector on and set temperature pre-heating light/sound indicators are selector at 100°F (corresponding to an deactivated; only the heating indicator light is internal oven setup fixed temperature of active.
-
Page 33: Broil / Convection Broil
BROIL / CONVECTION BROIL 100°F. Turn and cook the second side to desired internal temperature. Broiling requires constant exposure to high, intense heat. Only the upper element heats in the BROILER mode. It is recommended that you preheat the broil element before starting to cook. -
Page 34: Broiling And Roasting Recommendations
BROILING AND ROASTING RECOMMENDATIONS CONTROL OVEN MODE SPECIAL RACK APPROXIMATE TEMPERATURE FOOD ITEM FUNCTION INSTRUCTIONS AND SETTING SELECTOR TIPS SELECTOR BEEF 500° Broil until no pink in Broiler or convection 15 to 20 minutes Ground Beef center Broiler Patties, Vt thick 500°... - Page 35 AIN AINING O R RANGE Cleaning the worktop: periodically clean the burner heads, the cast iron pan supports and the burner WARNING! caps using warm water. Remove burned food and fat Disconnect power before servicing unit. residues with a rubber spatula . If food residue prevent the smooth operation of the control knobs, To replace the oven light bulb, unscrew the call the customer service hotline to schedule service...
-
Page 36: Troubleshooting Guide
TROUBLESHOOTING GUIDE OVEN PROBLEM POSSIBLE CAUSES AND/OR REMEDY Range is not connected to electrical power. Ask a professional to check power Range does not function circuit breaker, wiring and fuses. Temperature control knob is rotated too far past broil position (500° F); PRE Broil does not work HEATING indicator will light intermittently Oven is still in self-clean mode. - Page 37 OCA ION O A IANCE AGS The rating tag shows the model and serial number of your range. It is located under the front edge of the range cooktop, and is visible when the oven door is open (see illustration) A= Rating tag(s) located under front edge of cooktop B= Wiring / schematic diagram placed behind backside panel and on installation booklet...
- Page 38 MODEL DATE INSTALLED DEALER INSTALLER You can contact our customer support by emailing staff@cosmokitchenproducts.com, calling 1(888)784-3108, or submitting a support ticket online at cosmoappliances.com/support...
Need help?
Do you have a question about the COS-DFR366 and is the answer not in the manual?
Questions and answers