Cosmo COS-965AGC Installation Manual
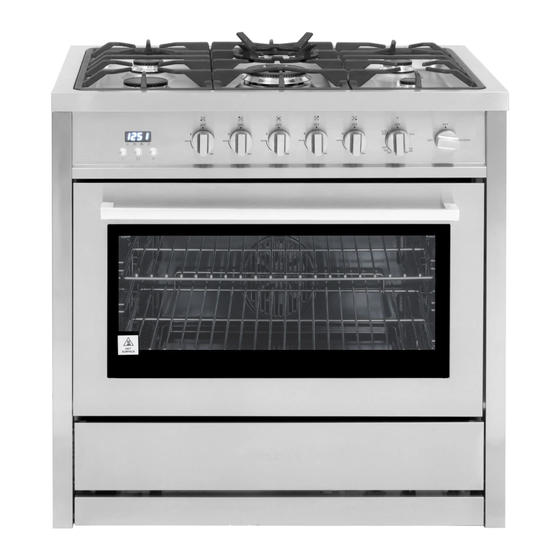
36-in freestanding range
Hide thumbs
Also See for COS-965AGC:
- User manual ,
- Installation manual (40 pages) ,
- Installation instructions manual (90 pages)
Table of Contents
Advertisement
Quick Links
Advertisement
Table of Contents

Related Manuals for Cosmo COS-965AGC


Summary of Contents for Cosmo COS-965AGC
- Page 1 GAS RANGE COS-965AGC COS-965AGFC 36-IN FREESTANDING RANGE INSTALLATION MANUAL IMPORTANT: READ AND SAVE THESE INSTRUCTIONS. FOR RESIDENTIAL USE ONLY. INSTALLER: PLEASE LEAVE THIS GUIDE WITH THE HOMEOWNER. HOMEOWNER: PLEASE KEEP THIS GUIDE FOR FUTURE REFERENCE. Rev.22.06...
- Page 3 COSMO Appliances are designed according to the strictest safety and performance standard for the North American market. We follow the most advanced manufacturing philosophy.
-
Page 4: Table Of Contents
TABLE OF CONTENTS RANGE SAFETY ....................3 Anti-tip Device ......................4 INSTALLATION REQUIREMENTS ..............6 Tools and Parts ......................6 Location Requirements .................... 8 Product Dimensions ....................10 Clearances ........................11 Venting Requirements ..................... 12 Electrical Requirements ................... 13 Gas Supply Requirements ..................16 INSTALLATION INSTRUCTIONS .............. -
Page 5: Range Safety
RANGE SAFETY WARNING Fire Hazard If the information in this manual is not followed exactly, a fire or explosion may result causing property damage, personal injury or death. - Do not store or use gasoline or other flammable vapors and liquids in the vicinity of this or any other appliance. -
Page 6: Anti-Tip Device
WARNING Tip Over Hazard • A child or adult can tip the range and be killed. • Install anti-tip bracket to floor or wall per installation instructions. • Slide range back so rear range foot is engaged in the slot of the anti-tip bracket. - Page 7 Your safety and the safety of others are very important. We have provided many important safety messages in this manual and on your appliance. Always read and obey all safety messages. This is the safety alert symbol. This symbol alerts you to potential hazards that can kill or hurt you and others.
-
Page 8: Installation Requirements
• Pipe-joint compound resistant to Propane gas Parts Supplied Backsplash with screws Anti-tip bracket with screws Anti-tip wall anchor hooks with (COS-965AGC only) screws (COS-965AGFC only) Gas pressure regulator Gas pipe adapter with washers Power cord with strain relief (Pre-installed for COS-965AGC) - Page 9 Parts Needed Gas supply line kit (supply line and 2 adapters) Optional Parts To purchase these or any other accessories, please visit www.cosmoappliances.com or reference the contact information at the end of this manual. • LP conversion kits Scan to find available LP kits...
-
Page 10: Location Requirements
LOCATION REQUIREMENTS IMPORTANT: Observe all governing codes and ordinances. Do not obstruct flow of combustion and ventilation air. • It is the installer's responsibility to comply with installation clearances specified on the model/serial rating plate. The model/serial rating plate is located behind the oven door on the oven frame. - Page 11 Mobile Home - Additional Installation Requirements • The installation of this range must conform to the Manufactured Home Construction and Safety Standard, Title 24 CFR, Part 3280 (formerly the Federal Standard for Mobile Home Construction and Safety, Title 24, HUD Part 280).
-
Page 12: Product Dimensions
PRODUCT DIMENSIONS This manual covers several models. Your model may appear different from the models depicted. Dimensions given are maximum dimensions across all models. COS-965AGC 35.4 in (900 mm) 1.77 in (45 mm) Vent height 35.4 in (900 mm) To cooktop 25.0 in... -
Page 13: Clearances
CLEARANCES IMPORTANT: Some cabinet and building materials are not designed to withstand the heat produced by the oven for baking and self-cleaning. Check with your builder or cabinet supplier to make sure that the materials used will not discolor, delaminate or sustain other damage. GIVEN DIMENSIONS ARE MINIMUM CLEARANCES. -
Page 14: Venting Requirements
Power Supply Location IMPORTANT: An electrical outlet in the floor, may be either recessed or surface mounted, but an electrical outlet in the wall must be recessed to make the connection. For Direct Wiring, the electrical box should be mounted to the wall. -
Page 15: Electrical Requirements
Makeup Air Local building codes may require the use of makeup air systems when using ventilation systems greater than specified CFM of air movement. The specified CFM varies from locale to locale. Consult your HVAC professional for specific requirements in your area. ELECTRICAL REQUIREMENTS WARNING Electrical Shock Hazard... - Page 16 ELECTRICAL REQUIREMENTS - U.S.A. ONLY Be sure that the electrical connection and wire size are adequate and in conformance with the National Electrical Code, ANSI/ NFPA No. 70-latest edition and all local codes and ordinances. A copy of the above code standards can be obtained from: National Fire Protection Association 1 Batterymarch Park Quincy, MA 02169...
- Page 17 ELECTRICAL REQUIREMENTS - CANADA ONLY Be sure that the electrical connection and wire size are adequate and in conformance with the CSA Standard C22.1, Canadian Electrical Code, Part 1 - latest edition and all local codes and ordinances. A copy of the above code standards can be obtained from: Canadian Standards Association 178 Rexdale Blvd.
-
Page 18: Gas Supply Requirements
GAS SUPPLY REQUIREMENTS WARNING Explosion Hazard Use a new CSA International approved gas supply line. Install a shut-off valve. Securely tighten all gas connections. If connected to LP, have a qualified person make sure gas pressure does not exceed 14" (36 cm) water column. Examples of a qualified person include: •... - Page 19 LP Gas Conversion: Conversion must be performed by a qualified service technician. The qualified agency performing this work assumes the gas conversion responsibility. No attempt shall be made to convert the appliance from the gas specified on the model/serial rating plate for use with a different gas without consulting the serving gas supplier.
- Page 20 Gas shutoff valve: A manual gas line shut-off valve must be installed in an easily accessible location. Do not block access to shut-off valve. The valve is for turning on or shutting off gas to the range. Gas Supply Line Shutoff Valve "Open"...
-
Page 21: Installation Instructions
INSTALLATION INSTRUCTIONS IMPORTANT: This appliance shall be installed only by authorized persons and in accordance with the manufacturer's installation instructions, local gas fitting regulations, municipal building codes, electrical wiring regulations, local water supply regulations. UNPACK RANGE WARNING Excessive Weight Hazard Use two or more people to move and install range. -
Page 22: Install Anti-Tip Device
• Do not operate the range without anti-tip bracket installed and engaged. • Failure to follow these instructions can result in death or serious burns to children and adults. INSTALL ANTI-TIP BRACKET (COS-965AGC ONLY) IMPORTANT: • An anti-tip bracket is provided with the range. The anti-tip bracket uses a rear range foot to secure the range to the floor or wall. - Page 23 2. Place the bracket so that the back of the bracket is against the rear wall and the side edge of the bracket is 3/8" to 1/2" from the adjacent cabinet. NOTE: If there is no adjacent cabinet, place the bracket so that the edge of the bracket is 3/8"...
- Page 24 5. Install the anti-tip bracket. Wood • Using the two screws (provided) fasten the anti-tip bracket to the floor or wall. NOTE: The screw must enter wood or metal. Concrete • Insert the sleeve anchor into the drilled holes and then insert the lag bolts through the anti-tip bracket and into the floor or wall.
-
Page 25: Install Backsplash
INSTALL BACKSPLASH • Install the backsplash to rear of range with the screws provided. GAS CONNECTION WARNING Explosion Hazard Use a new CSA International approved gas supply line. Install a shut-off valve. Securely tighten all gas connections. If connected to LP, have a qualified person make sure gas pressure does not exceed 14"... - Page 26 This appliance shall be installed only by authorized persons and in accordance with the manufacturer's installation instructions, local gas fitting regulations, municipal building codes, electrical wiring regulations, local water supply regulations. This range is factory-set for use with Natural gas. To use this range with Propane gas, see the "GAS CONVERSION section before connecting this range to the gas supply.
- Page 27 1. Apply pipe-joint compound made for use with LP gas to all pipe thread connections. 2. Using a pipe wrench to tighten, connect the gas supply to the range. Gas Line from Range Washer (provided) Adapter (provided) Gas Pressure Regulator (provided) CONVERT TO LP GAS (OPTIONAL) This range is shipped from the factory set up to use natural gas.
-
Page 28: Complete Connection
COMPLETE CONNECTION WARNING Electrical Shock Hazard Disconnect power before servicing. Plug into a grounded 3-prong outlet. Do not use an adapter or an extension cord. Failure to do so can result in death, fire, or electrical shock 1. Open the manual shutoff valve in the gas supply line. The valve is open when the handle is parallel to the gas pipe. -
Page 29: Adjust Flame Height
Note: Align notches in burner caps with pins in burner base. Burner caps should be level when properly positioned. If burner caps are not properly positioned, surface burners will not light. Incorrectly Positioned Base Correctly Positioned Auxiliary Burner Triple Ring Burner Semi Rapid Burner Rapid Burner 4. - Page 30 The flame can be adjusted using the adjustment screw in the center of the valve stem. The valve stem is located directly behind the control knob. 1. Light the burner and turn the knob to the lowest setting (MIN). 2. Pull and remove the control knob. 3.
-
Page 31: Level Range
LEVEL RANGE IMPORTANT: Do not operate the range if its rear foot is not completely engaged in the anti-tip bracket. Never completely remove the leveling legs or the range will not be secured to the anti-tip device properly. 1. Slide range into final location, making sure rear leveling leg slides into the anti- tip bracket. - Page 32 2. Slowly attempt to tilt the range forward. • If you encounter immediate resistance, the range foot is engaged in the anti-tip bracket. Range installation is completed. • If the rear of the range lifts more than 1/2" (1.3 cm) off the floor without resistance, stop tilting the range and lower it gently back to the floor.
-
Page 33: Gas Conversion
GAS CONVERSION WARNING Explosion Hazard Use a new CSA International approved gas supply line. Install a shut-off valve. Securely tighten all gas connections. If connected to LP, have a qualified person make sure gas pressure does not exceed 14" (36 cm) water column. Examples of a qualified person include: •... -
Page 34: Convert Gas Pressure Regulator
LP/PROPANE GAS CONVERSION IMPORTANT: Gas conversions must be done by a qualified service technician in accordance with the manufacturer's instructions and all codes and requirements of the authority having jurisdiction. The qualified agency performing this work assumes the gas conversion responsibility. Convert Gas Pressure Regulator 1. -
Page 35: Convert Surface Burners
7. Screw and tighten the regulator cap back into the gas pressure regulator with the wrench. Regulator Convert Surface Burners 1. If installed, remove the burner grates. 2. Remove the burner grates, burner caps, and the burner base. 3. Remove the natural gas orifices with a 9/32" (7 mm) nut driver. Orifice 4. - Page 36 Orifice Chart for Surface and Oven Burners: COS-965AGC / COS-965AGFC Orifice Orifice Burner Burner Placement Type Size (mm) Rating 1.45 Rapid Front Left 8,800 BTU 0.91 1.05 Auxiliary Front Right 5,000 BTU 0.70 2.10 18,000 BTU Triple Center Ring 1.22 17,000 BTU 1.29...
-
Page 37: Convert Oven Bake Burner
Convert Oven Bake Burner 1. Remove Bake Burner Cover Open your oven door and unscrew the back two screws of bake burner cover. Remove the bake burner cover. 2. Remove Flame Spread Plate Unscrew the four screws of the flame spread plate. Remove the flame spread plate. -
Page 38: Convert Oven Broil Burner
Convert Oven Broil Burner 1. Unscrew Front Bracket Locate the bracket at the front of the broiler. Remove the screw. 2. Remove the Burner Carefully slide the burner forward and out of the socket, without severing or damaging the wire attached. - Page 39 IMPORTANT Do Not Return This Product To The Store If you have a problem with this product, please contact COSMO Customer Support at +1 (888) 784-3108 DATED PROOF OF PURCHASE, MODEL #, AND SERIAL # REQUIRED FOR WARRANTY SERVICE. IMPORTANT Ne pas Réexpédier ce Produit au Magasin...
- Page 40 MEMO...
- Page 42 APPLIANCES Cosmo is constantly making efforts to improve the quality and performance of our products, so we may make changes to our appliances without updating this manual. Electronic version of this manual is available at: www.cosmoappliances.com...
Need help?
Do you have a question about the COS-965AGC and is the answer not in the manual?
Questions and answers