Advertisement
Quick Links
Advertisement

Related Manuals for fantastic furniture Oasis


Summary of Contents for fantastic furniture Oasis
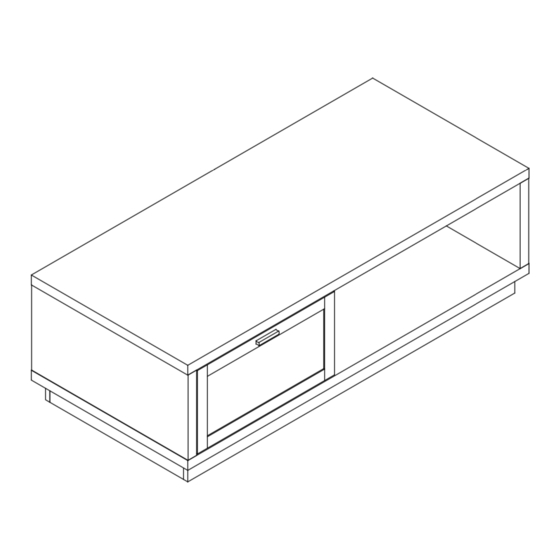
- Page 1 Version 1.0 Oasis Coffee Table White Rattan fantasticfurniture.com.au...
- Page 2 We’re thrilled you’ve chosen Fantastic Furniture to help create a home you’ll love! Love it? Share it! Fantastic buy! Share how it looks at home on Instagram for your chance to win a $250 Fantastic Furniture Gift Card! @fantasticfurniture fantasticfurniture.com.au Page 2...
-
Page 3: Assembly Checklist
Assembly Checklist Read through the instructions carefully Make sure you have all the required tools. before you begin. Never use power tools unless instructed. Unless instructed, do not fully tighten Identify and lay out all of the screws until the item is fully assembled. components before you begin assembly. -
Page 4: What You Need
What you need to assemble the product Top Panel (P1) Right Side Panel (P4) Divider (P5) DO NOT USE Divider Other tools you need: (P6) Phillips head screwdriver; Hammer Rail Bottom Panel Left Side (P7) (P2) Panel (P3) Rail (P8) Parts list Top Panel (P1);... - Page 5 Step 1 You will need 6 x Small 1 x CL Runner Screws (H5) Track (H6) (P5) 1 x CR Runner Phillips Head Track (H7) Screwdriver (P3) Attach 1 x CL Runner Track (H6) to Left Side Panel (P3) with 3 x Small Screws (H5). Attach 1 x CR Runner Track (H7) to Divider (P5) with 3 x Small Screws (H5).
- Page 6 Step 3 (P3) You will need 4 x Dowels (H1) (P6) (P5) Attach Left Side Panel (P3) and Divider (P5) to Divider (P6) with 4 x Dowels (H1) as shown. Step 4 (P3) You will need 6 x Cam Nuts 6 x Dowels (P5) (H4)
- Page 7 Step 5 You will need 8 x Cam Bolts Phillips Head (H3) Screwdriver (P2) Attach 8 x Cam Bolts (H3) to Bottom Panel (P2) as shown by tightening with the Phillips Head Screwdriver. Step 6 You will need 6 x Dowels 6 x Long (H1) Screws (H2)
- Page 8 Step 7 You will need 4 x Cam Bolts Phillips Head (H3) Screwdriver (P8) Attach 4 x Cam Bolts (H3) to Rails (P8 x 2) as shown by tightening with the Phillips Head Screwdriver. Step 8 You will need (P7) (P8) 4 x Dowels 4 x Cam Nuts...
- Page 9 (P7) Step 9 (P8) You will need (P8) (P3) (P2) 8 x Cam Nuts Phillips Head (H4) Screwdriver (P7) (P4) Insert 8 x Cam Nuts (H4) into Rails (P7 x 2, P8 x 2). Rotate the nuts so the arrows point towards the incoming bolts.
- Page 10 Step 11 You will need 4 x Cam Bolts Phillips Head (H3) Screwdriver (P9) Attach 4 x Cam Bolts (H3) to Drawer Front (P9) as shown by tightening with the Phillips Head Screwdriver. Step 12 You will need 4 x Long Phillips Head (P11) Screws (H2)
- Page 11 Step 13 (P12) (P11) (P10) Slide Drawer Base (P12) into the grooves of Left & Right Drawer Sides (P10 & P11). Step 14 You will need (P9) 4 x Cam Nuts Phillips Head (H4) Screwdriver (P11) (P10) Insert 4 x Cam Nuts (H4) into Left & Right Drawer Sides (P10 &...
- Page 12 Step 15 (P11) You will need 1 x DL Runner 4 x Small (P10) (H8) Screws (H5) 1 x DR Runner Phillips Head (H9) Screwdriver Attach 1 x DL Runner (H8) to the bottom of Left Drawer Side (P10) and 1 x DR Runner (H9) to the bottom of Right Drawer Side (P11) with 4 x Small Screws (H5) by tightening with the Phillips Head Screwdriver.
-
Page 13: Job Complete
Step 17 Gently insert the assembled drawer into the unit by carefully lining up the drawer runners with the drawer runner tracks. Job Complete! In the interest of our environment please dispose of all packaging thoughtfully. fantasticfurniture.com.au Page 13...
Need help?
Do you have a question about the Oasis and is the answer not in the manual?
Questions and answers