Table of Contents
Advertisement
Quick Links
! IMPORTANT SAFETY GUIDE
•
Your safety and the safety of others is very important.
•
In order to help you make informed decisions about safety, we have provided the
following warnings, safety precautions, installation instructions, and other important
information to alert you to potential hazards that could hurt you or others.
•
Please do a job safety analysis before each task to identify potential hazards for your
situation and remove/protect against them.
•
Use own good judgment and take your time.
•
Check packaged materials immediately upon arrival to ensure that all listed parts are
included and undamaged.
Read and understand all warnings, safety precautions, and instructions before installing
this product.
SENSORS' FIELD OF VIEW WILL BE ALTERED WITH USE OF THE
REPLACEMENT BUMPER.
•
FAILURE TO OBSERVE THE FOLLOWING WARNINGS AND
INSTRUCTIONS PROVIDED IN THIS MANUAL COULD LEAD TO
SEVERE INJURY AND/OR DEATH.
•
FOR PROFFESIONAL INSTALLATION ONLY. CARELESS
INSTALLATION AND/OR OPERATION CAN RESULT IN SERIOUS
INJURY, DEATH, AND/OR EQUIPMENT DAMAGE. ALL LIABILITY FOR
INSTALLATION AND USE RESTS WITH THE USER OR CONSUMER.
•
FAB FOURS, INC. ONLY APPROVES INSTALLING THIS PRODUCT
ACCORDING TO THESE WRITTEN INSTRUCTIONS WITH THE
HARDWARE PROVIDED. FAILURE TO INSTALL ACCORDING TO
THESE INSTRUCTIONS WILL INVALIDATE THE WARRANTY. THIS
INCLUDES, BUT IS NOT LIMITED TO, USING ALTERNATIVE
INSTALLATION METHODS, HARDWARE, OR MATERIALS.
•
THIS PRODUCT IS FOR OFFROAD USE ONLY.
Copyright 2009 Fab Fours, Inc
Installation Instructions
WARNINGS
. Page 1 of 19
VI-COWL
Product Number: VC2900
2010 - 2018 DODGE 2500
VC2900_Installation_Manual_REV_A
Advertisement
Table of Contents

Related Manuals for Fab Fours VI-COWL


Summary of Contents for Fab Fours VI-COWL
- Page 1 INJURY, DEATH, AND/OR EQUIPMENT DAMAGE. ALL LIABILITY FOR INSTALLATION AND USE RESTS WITH THE USER OR CONSUMER. • FAB FOURS, INC. ONLY APPROVES INSTALLING THIS PRODUCT ACCORDING TO THESE WRITTEN INSTRUCTIONS WITH THE HARDWARE PROVIDED. FAILURE TO INSTALL ACCORDING TO THESE INSTRUCTIONS WILL INVALIDATE THE WARRANTY.
- Page 2 Always insulate and protect all exposed wiring and electrical terminals. o Perform regular inspections and maintenance on mounts and hardware. o Tire may rub at max turn or articulation. . Page 2 of 19 Copyright 2009 Fab Fours, Inc VC2900_Installation_Manual_REV_A...
-
Page 3: Table Of Contents
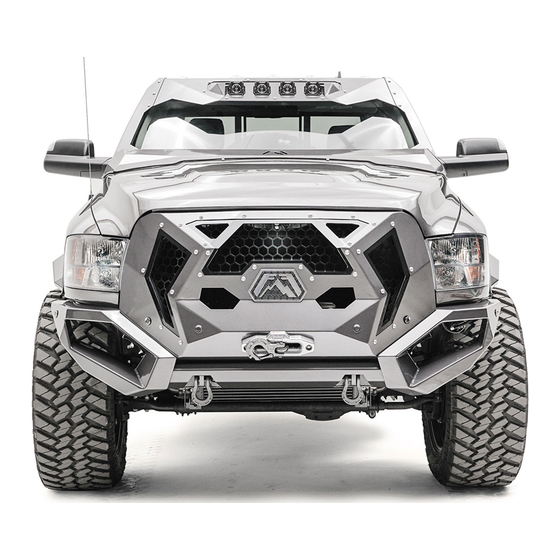
Congratulations on your new purchase of the Fab Fours Vi-Cowl Accessory. Your Vi-Cowl was designed in 3-D from digitized data, CNC laser cut, fabricated, and powder coated… all in the U.S.A. Enjoy the fit and finish of a Vi-Cowl from Fab Fours, Inc. -
Page 4: Tools Required
• Product number: 21337 • Product number: 21338 • Product number: 21332 • Product number: 21333 • Product number: 21330 • Product number: 21331 • Product number: 50113-Hardware kit . Page 4 of 19 Copyright 2009 Fab Fours, Inc VC2900_Installation_Manual_REV_A... - Page 5 5/16”-18 x .75”, yellow zinc, hex cap screw, grade 8 50113- HW 50113- HW 5/16", yellow zinc, lock washer, grade 8 50113- HW 5/16", yellow zinc, flat washer, grade 8 . Page 5 of 19 Copyright 2009 Fab Fours, Inc VC2900_Installation_Manual_REV_A...
-
Page 6: Factory Vehicle Prep
Disconnect any electrical connections and washer fluid lines if your vehicle is equipped. d. With a friend on the other side, support the hood and fully remove the hood bolts and remove the hood. . Page 6 of 19 Copyright 2009 Fab Fours, Inc VC2900_Installation_Manual_REV_A... - Page 7 Rotate forward out of the way. Fig 3 f. Remove the wheelhouse splash shield by removing the plastic push pins from inside the wheel well as shown in Fig 3 labeled (2,3,4). . Page 7 of 19 Copyright 2009 Fab Fours, Inc VC2900_Installation_Manual_REV_A...
- Page 8 Remove the screws from the upper middle of splash shield as shown in Fig 4 and labeled (2,3,4). h. Unclip the splash shield from the fender and remove from vehicle. . Page 8 of 19 Copyright 2009 Fab Fours, Inc VC2900_Installation_Manual_REV_A...
- Page 9 Remove and save the two bolts labeled (4) from Fig 1. Its easier to access the two bolts from up through the wheel well and behind the fender. o. Set the OEM hood hinge bracket aside, it won’t be used again. . Page 9 of 19 Copyright 2009 Fab Fours, Inc VC2900_Installation_Manual_REV_A...
-
Page 10: Wiper Cowl Modification
Trim off the areas shown above in Fig 6 & 7 on both sides of the cowl. Note: some minor additional trimming may be needed in areas marked to cut. V.Fab Fours hood hinge installation . Page 10 of 19 Copyright 2009 Fab Fours, Inc... - Page 11 Fully tighten down the 5/16”-18 bolt. e. Repeat the same procedure for the passenger side bracket. Caution: The Fab Fours VC2900 brackets contain the same adjustability as the OEM counterparts. This may lead to wiper interferences with the ViCowl arms if the brackets are set too low or rotated to far to the windshield.
-
Page 12: Hood Installment
This will get you close as the Fab Four brackets have identical profile. c. Lower the hood slowly and check for uniform hood gap. d. Adjust as needed. . Page 12 of 19 Copyright 2009 Fab Fours, Inc VC2900_Installation_Manual_REV_A... -
Page 13: Vicowl Pre-Assembly
Note: It’s highly recommended that all projection weld nuts are chased with the appropriate taps to clean out any powder coat or foreign debris prior to assembly. Tap sizes needed to do this are ½”-13, and ⅜"-16 Fig 10 . Page 13 of 19 Copyright 2009 Fab Fours, Inc VC2900_Installation_Manual_REV_A... - Page 14 Install the 1” neoprene rubber strip to the inside of both arms as shown in Fig 11. Note: leave about a ⅛" reveal on the edge of the arms. This will ensure the rubber strip doesn’t shift or show after installation. Fig 12 . Page 14 of 19 Copyright 2009 Fab Fours, Inc VC2900_Installation_Manual_REV_A...
-
Page 15: Vicowl Installation
Note: don’t stretch the seal as you apply it to the Cowl. This will ensure it doesn’t pull away from the sheet metal later. g. Trim the edge seal for fit and finish h. The ViCowl is now prepped for install. VIII.ViCowl Installation Fig 14 . Page 15 of 19 Copyright 2009 Fab Fours, Inc VC2900_Installation_Manual_REV_A... - Page 16 Rivnuts are misplaced. e. Remove the upper ViCowl assembly in preparation to drill and install four Rivnuts in the fenders. . Page 16 of 19 Copyright 2009 Fab Fours, Inc VC2900_Installation_Manual_REV_A...
- Page 17 Tighten the bolt into the nutsert until it becomes snug in the rocker panel. DO NOT OVERTIGHTEN CAUSING THE INSERT TO SPIN! l. Repeat steps “f-k” on the remaining holes. m. Reinstall the upper ViCowl using steps “a-b” . Page 17 of 19 Copyright 2009 Fab Fours, Inc VC2900_Installation_Manual_REV_A...
- Page 18 Raise the hood slowly and hand tighten the four ⅜"-16 hex head bolts, zinc lock washers, and zinc flat washers securing the Cowl to the hood hinge brackets as shown in Fig 16. . Page 18 of 19 Copyright 2009 Fab Fours, Inc VC2900_Installation_Manual_REV_A...
-
Page 19: Maintenance/Care
Stripped, fractured, or bent bolts or nuts need to be replaced. X.Contact Information Fab Fours Inc. Phone (866)-385-1905 1312 Camp Creek Rd. (970)-385-1914 Lancaster, SC 29720 Email Support@fabfours.com More than expected… Better than expected. . Page 19 of 19 Copyright 2009 Fab Fours, Inc VC2900_Installation_Manual_REV_A...
Need help?
Do you have a question about the VI-COWL and is the answer not in the manual?
Questions and answers